Last night, I was staring at my screen thinking how best to solve this problem.
My NextJS localization project needed to support five languages, and I was drowning in a bunch of inconsistent localization approaches. That’s when I decided to move over to XLIFF, the XML Localization Interchange File Format.
If you've ever struggled with managing app localization across different tools and platforms, you'll understand why XLIFF matters so much.
In this guide, we’ll go over everything about XLIFF translation, from understanding the file structure to creating and processing them, step by step.
What is an XLIFF file?
XLIFF (XML Localization Interchange File Format) is a standardized file format designed for exchanging localization information between different tools, platforms, and programming languages. It was developed by OASIS to solve the lack of a standardized format in the localization industry and has now become a de facto standard for many localization projects.
An XLIFF file offers simplicity and structure that’s difficult to achieve with other file formats—except localizing with JSON which is still my go-to file format.
It pairs source text with its translations, organizing them into translation units. This creates a clear, consistent format that both humans and machines can easily process.
XLIFF offers a couple of special features:
- Can separate translatable content from formatting and layout-related code
- Retains contextual information that helps translators
- Works across virtually any content type or platform
The current standard version is XLIFF 1.2, though version 2.0 (defined by ISO 21720:2017) and version 2.1 are also available. Many modern localization platforms automatically generate and process XLIFF files, making them the de facto standard for translation exchange.
Here’s what a simple XLIF file looks like:
<xliff version="1.2" xmlns="urn:oasis:names:tc:xliff:document:1.2">
  <file source-language="en" target-language="fr" datatype="plaintext" original="file.ext">
    <body>
      <trans-unit id="1">
        <source>Hello World!</source>
        <target>Bonjour le monde!</target>
      </trans-unit>
    </body>
  </file>
</xliff>
Don’t get overwhelmed by file contents. We just need to look at what’s inside the tags. Everything else remains pretty standard.
Each translation unit (trans-unit) contains a source element with the original text and a target element with the translated text.
This simple structure makes it easy to track what needs translation and what's already translated.
XLIFF 2.0 vs XLIFF 2.1 at a glance
While XLIFF 1.2 has been widely used, the newer XLIFF 2.0 (ISO 21720:2017) and XLIFF 2.1 standards introduce significant improvements in modularity, extensibility, and interoperability. Let's examine the differences between these newer versions.
XLIFF 2.0 represented a major overhaul of the format, introducing a modular architecture with a core schema and optional modules. XLIFF 2.1 builds upon this foundation with additional refinements and capabilities.
| Feature | XLIFF 2.0 | XLIFF 2.1 |
|---|---|---|
| Release Date | October 2014 | February 2018 |
| Core Structure | Modular architecture with core schema | Same modular architecture with a refined core |
| Extensibility | Eight official modules | Nine official modules (adds Advanced Validation) |
| Metadata Handling | Basic metadata support | Enhanced metadata support with additional attributes |
| Validation | Basic validation | Advanced validation module for complex content rules |
| Segmentation | Enhanced segmentation | Further improved segmentation with more controls |
| Inline Markup | Simplified inline markup | Same simplified inline markup with better consistency |
| Fragment Identification | Basic fragment identification | Enhanced fragment identification |
| Backward Compatibility | Not backward compatible with 1.2 | Not backward compatible with 1.2, minor updates from 2.0 |
Here's what a simple XLIFF 2.0 file looks like:
<?xml version="1.0" encoding="UTF-8"?>
<xliff xmlns="urn:oasis:names:tc:xliff:document:2.0" version="2.0"
 srcLang="en" trgLang="fr">
 <file id="f1">
  <unit id="greeting">
   <segment>
    <source>Hello World!</source>
    <target>Bonjour le monde!</target>
   </segment>
  </unit>
 </file>
</xliff>
Here's the same content in XLIFF 2.1 format:
<?xml version="1.0" encoding="UTF-8"?>
<xliff xmlns="urn:oasis:names:tc:xliff:document:2.1" version="2.1"
 srcLang="en" trgLang="fr">
 <file id="f1">
  <unit id="greeting">
   <segment>
    <source>Hello World!</source>
    <target>Bonjour le monde!</target>
   </segment>
  </unit>
  <unit id="welcome" type="paragraph">
   <notes>
    <note category="context">Displayed on the homepage</note>
   </notes>
   <segment id="s1">
    <source>Welcome to our application.</source>
    <target>Bienvenue dans notre application.</target>
   </segment>
  </unit>
 </file>
</xliff>
The most important differences in the structure include:
- The namespace definition changes from 2.0 to 2.1
- XLIFF 2.x uses
and elements instead of in 1.2 - Both versions support notes but with different structures
- XLIFF 2.1 allows for more detailed typing and metadata
These newer versions provide better separation of concerns, improved content reusability, and greater extensibility through their modular approach.
How to localize XLIFF files step by step
Now that we understand what XLIFF files are and why they're useful, let's work with them for localization.
I'll walk you through the entire process, from creating a sample XLIFF file to testing your localized content.
Step 0: Create a sample XLIFF file
Before jumping into localization, let's create a sample XLIFF file to work with. You can create one manually using any text editor, but I find it easier to use specialized tools.
Here's a basic XLIFF 2.1 file structure you can use as a starting point:
<?xml version="1.0" encoding="UTF-8"?>
<xliff xmlns="urn:oasis:names:tc:xliff:document:2.1" version="2.1"
 srcLang="en" trgLang="fr">
 <file id="messages">
  <notes>
   <note category="description">UI messages for the application</note>
   <note category="tool" priority="1">Sample Tool v1.0</note>
  </notes>
  <unit id="greeting">
   <notes>
    <note category="context">This is the welcome message displayed on the home page</note>
   </notes>
   <segment>
    <source>Hello, welcome to our application!</source>
    <target></target>
   </segment>
  </unit>
  <unit id="button.login">
   <segment>
    <source>Log In</source>
    <target></target>
   </segment>
  </unit>
  <unit id="button.signup">
   <segment>
    <source>Sign Up</source>
    <target></target>
   </segment>
  </unit>
 </file>
</xliff>
Save this as sample.xlf. Notice the empty
Step 1: Extract content for translation
For real-world projects, you typically won't create XLIFF files manually.
Instead, you'll extract content from your source files into the XLIFF format. Various tools can help with this extraction process:
- For web applications: Tools like i18next, react-intl, or angular-i18n can extract strings into XLIFF
- For mobile apps: Xcode for iOS and Android Studio both support XLIFF export
- For general content: Specialized localization platforms like Centus
Let me show you how to extract content using a simple Node.js script with the i18next-parser package, configured for XLIFF 2.1:
// install with: npm install i18next-parser
const Parser = require('i18next-parser').Parser;

new Parser({
  locales: ['en', 'fr', 'de'],
  output: 'locales/$LOCALE/$NAMESPACE.xlf',
  defaultNamespace: 'translation',
  defaultValue: '',
  keepRemoved: true,
  keySeparator: false,
  skipDefaultValues: false,
  indentation: 2,
  xliffVersion: '2.1'  // Updated to use XLIFF 2.1
})
  .parseSources(['src/**/*.{js,jsx}'])
  .save();
This script scans your JavaScript/React files for translation keys and generates XLIFF files for English, French, and German languages.
Step 2: Prepare XLIFF files for translation
Before sending files to translators, you want to make sure the files are perfectly ready for translators. This means:
- Adding context: Include notes and references to help translators understand the text
- Setting metadata: Add information about the project, contact details, etc.
- Pre-translating: Fill in any translations that already exist or can be automatically generated
Here's how I’ve updated our sample XLIFF file with better context:
<unit id="greeting">
  <notes>
    <note category="context">This is the welcome message displayed on the home page</note>
    <note category="developer">Please keep the translation friendly and inviting</note>
    <note category="location">src/components/HomePage.js:24</note>
  </notes>
  <segment>
    <source>Hello, welcome to our application!</source>
    <target></target>
  </segment>
</unit>
Adding this context makes a huge difference to translators. While I was working on my localization project for a complex app, providing screenshots alongside the string placement (location) information reduced translator questions quite significantly.
Step 3: Translate the XLIFF file
You can’t just insert an XLIFF file into Google Translate. Because Google Translate will completely ruin the formatting and even translate tags. It’s a mess you don’t want to deal with.
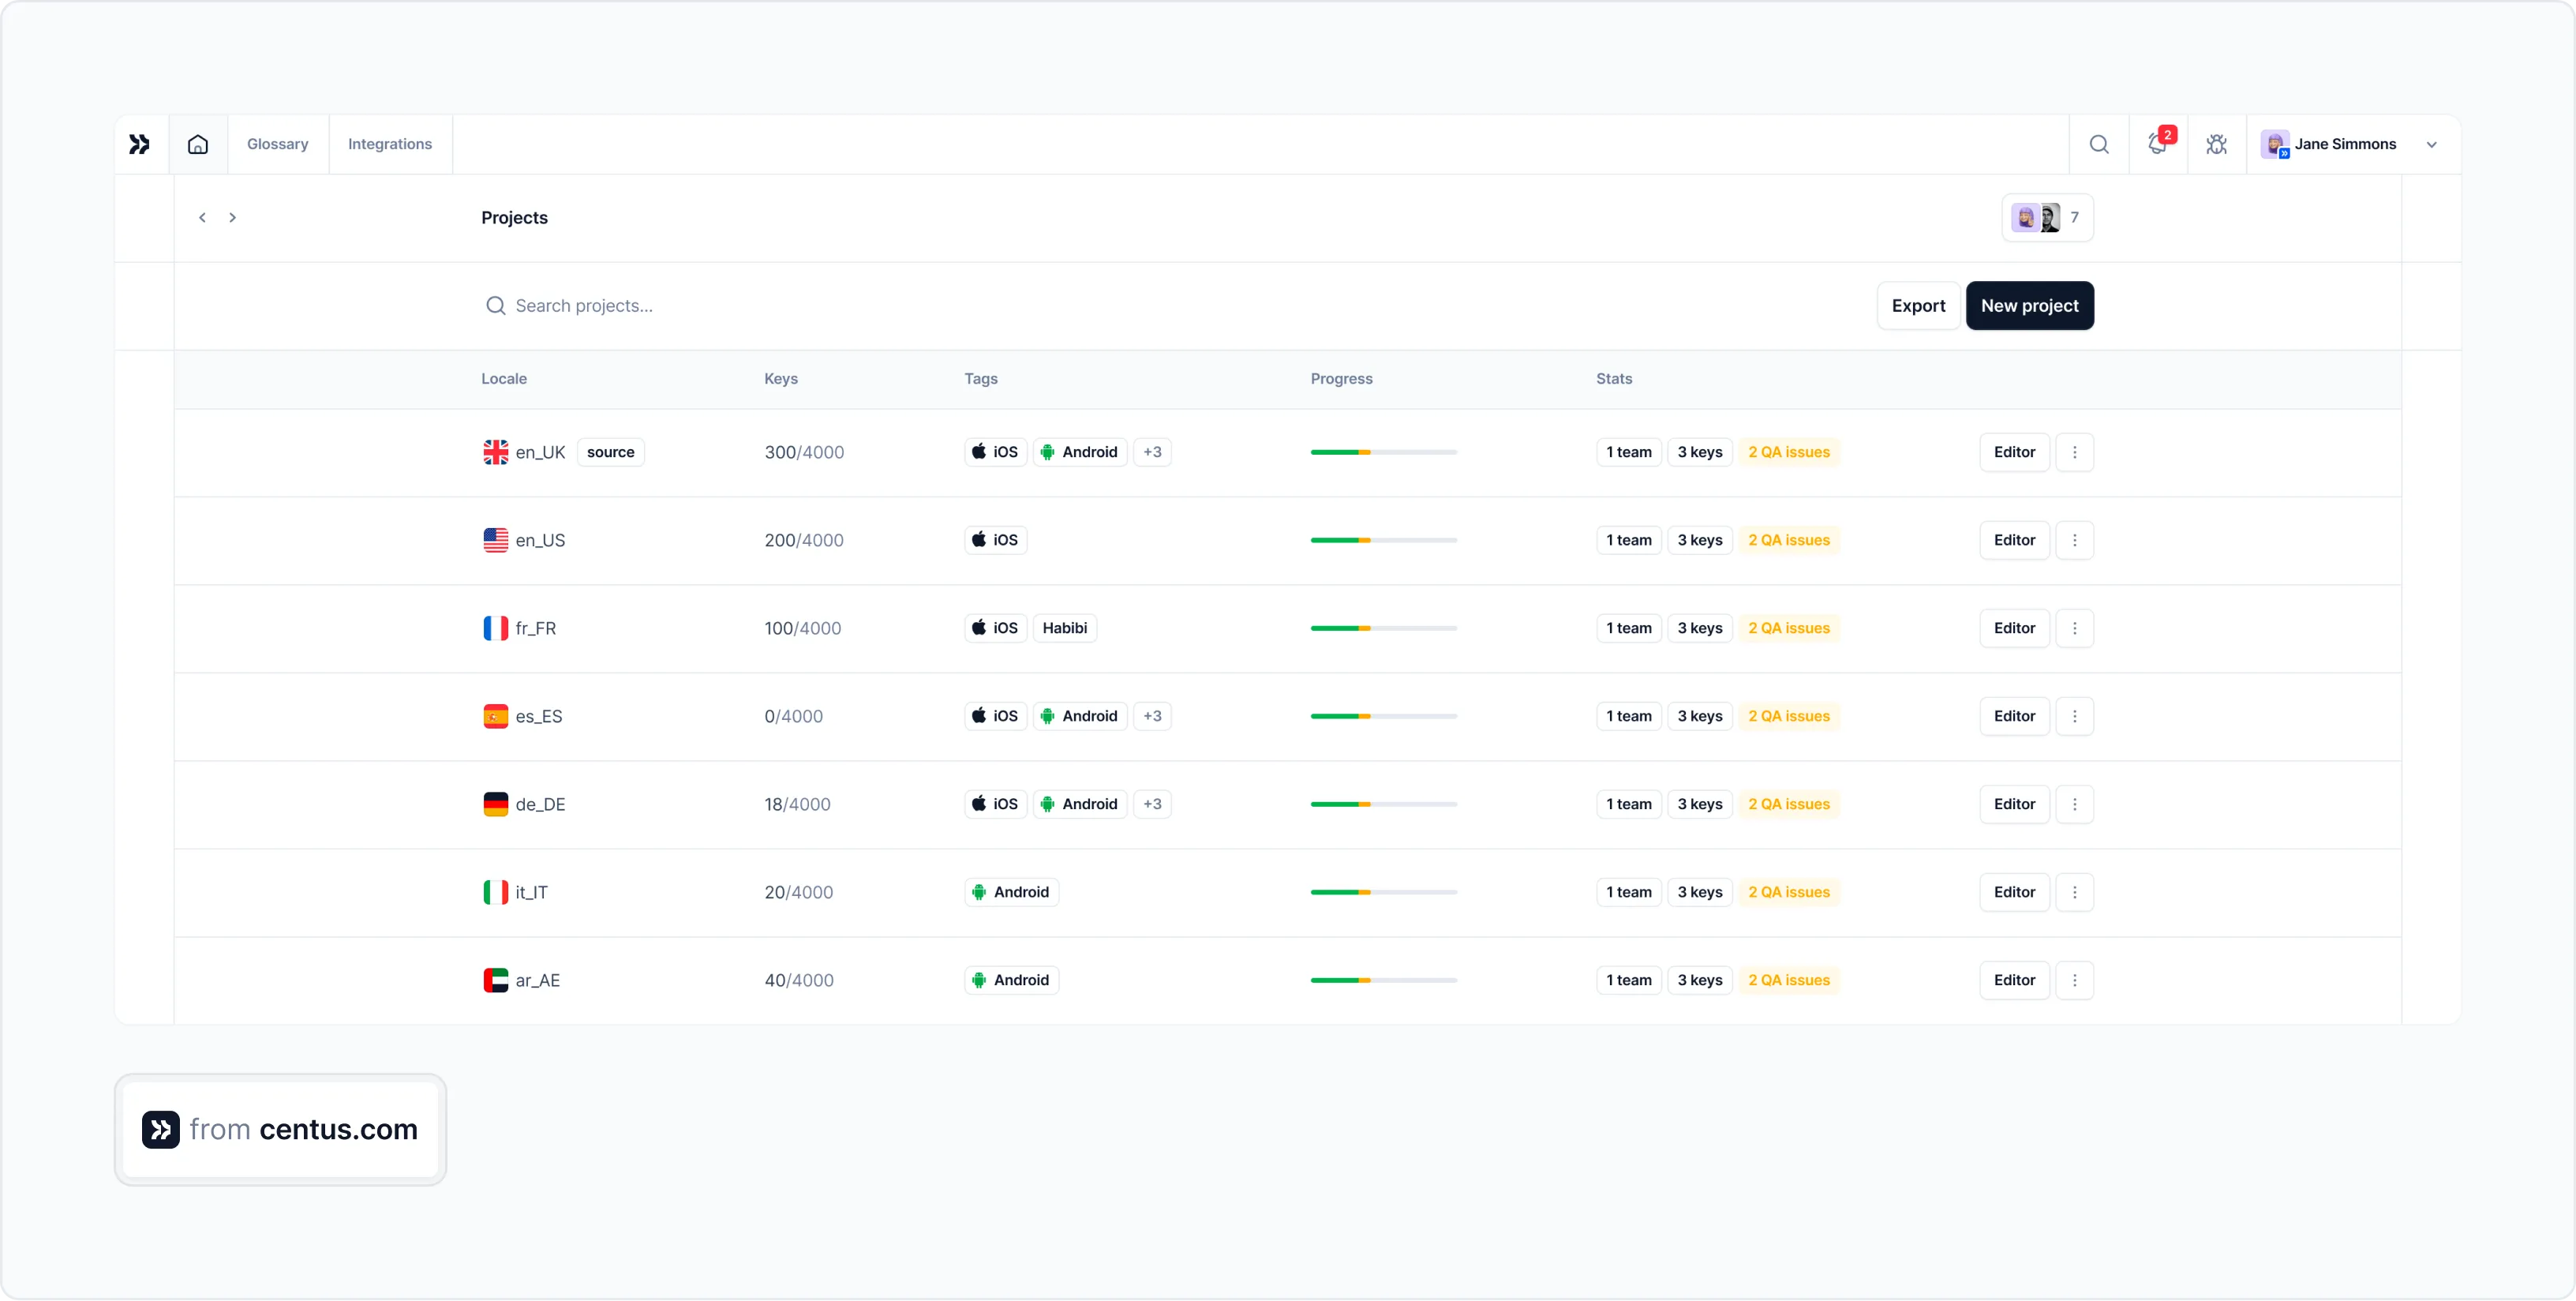
Using a professional translation tool, like Centus, you don’t have to worry about file formatting. Centus preserves both XLIFF elements and their hierarchy.
Just import your file to Centus and enable automatic translation. Then, arrange a manual review by your team’s translators and editors. It goes like this:
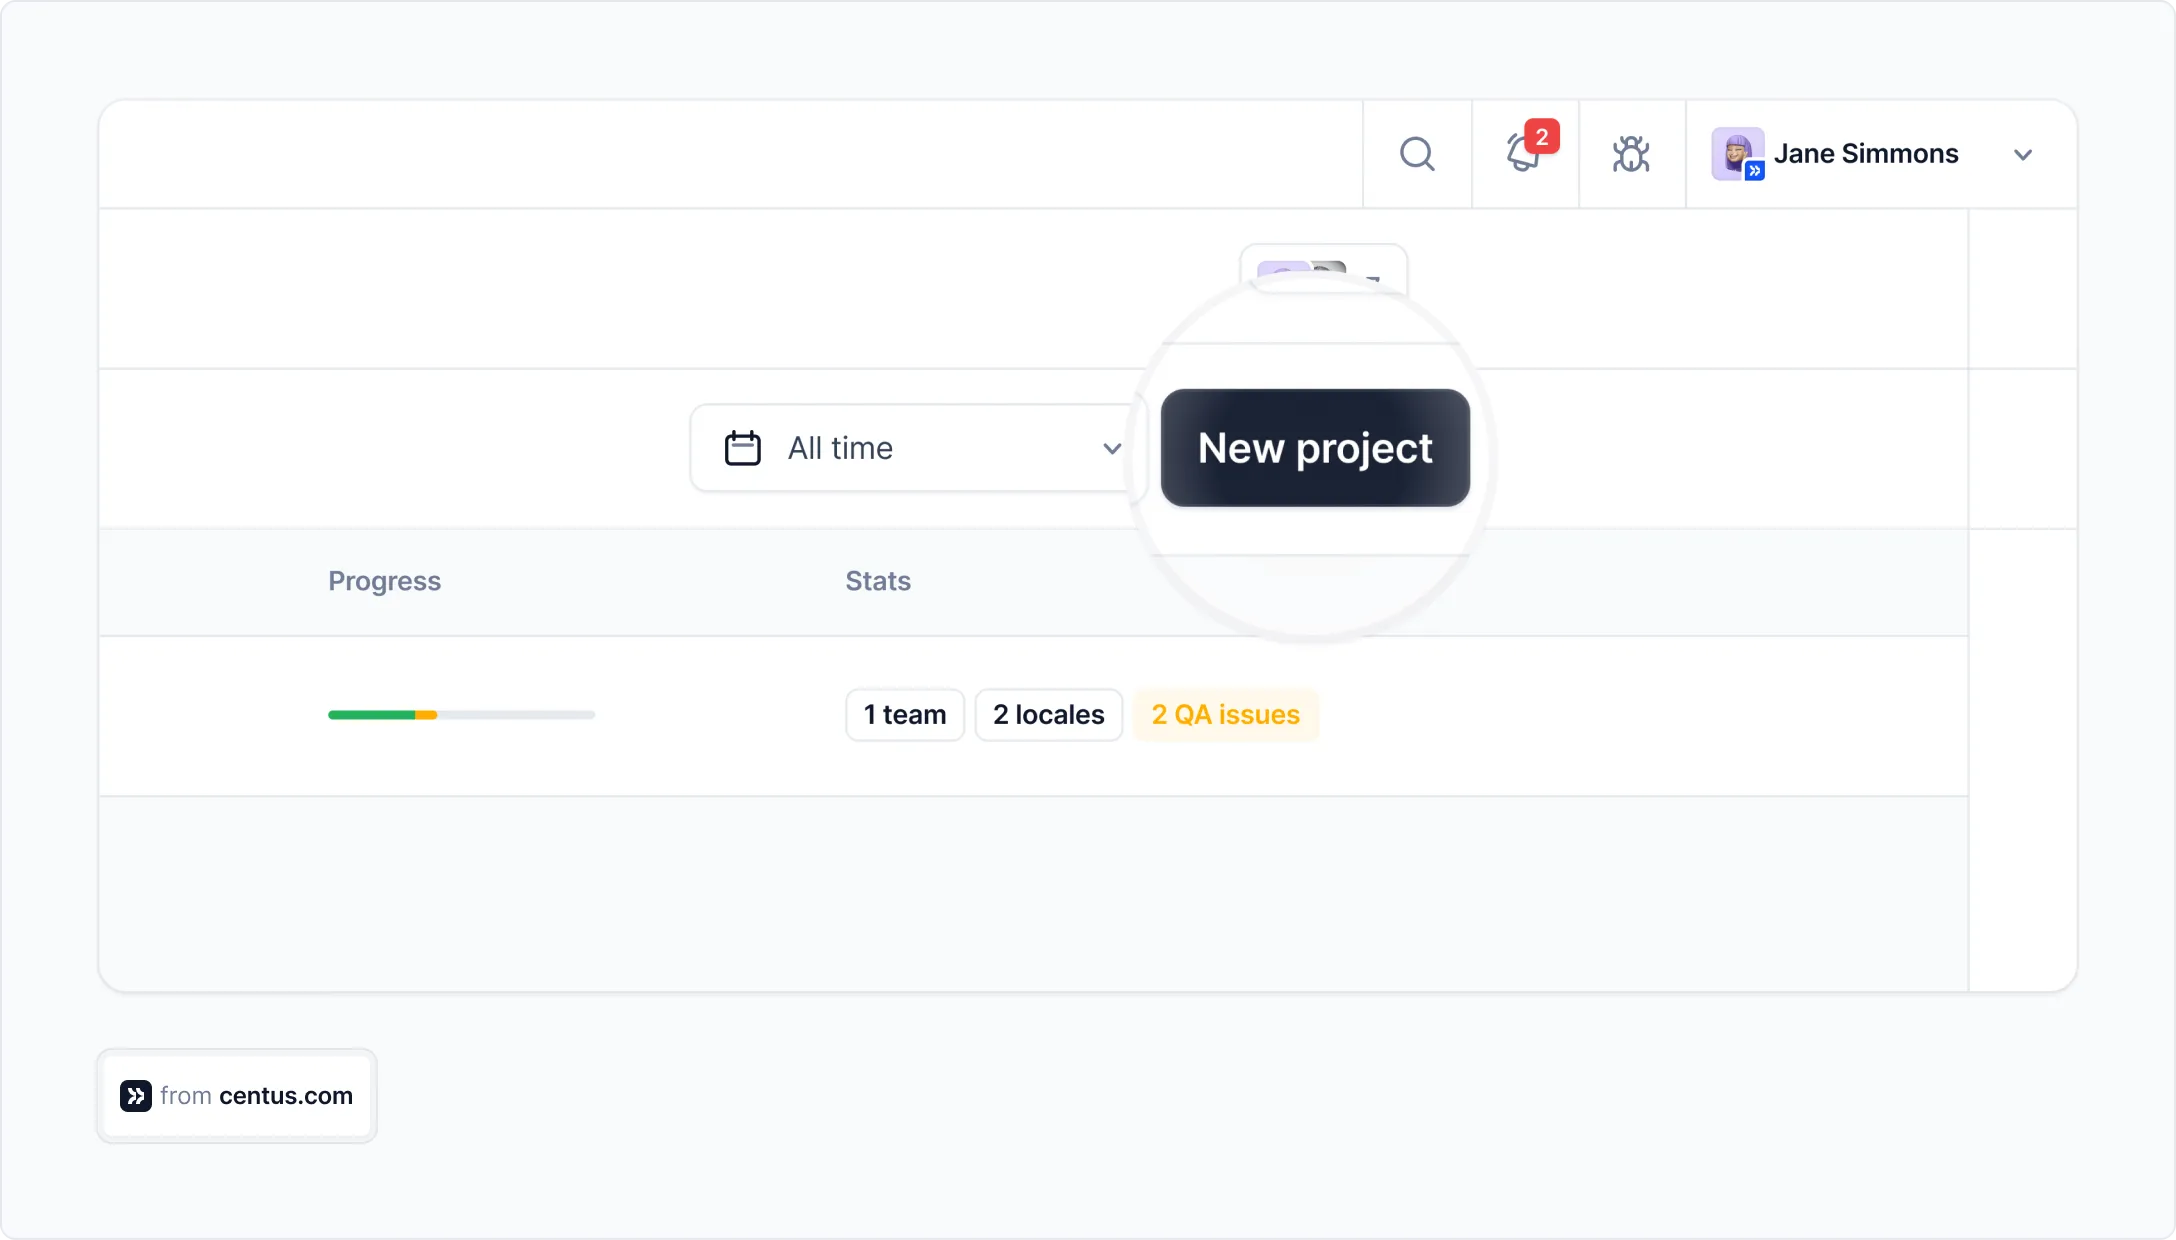
- Sign up to Centus and click New project
- Navigate to the Imports section and click Select a file
- Upload one or multiple XLIFF files
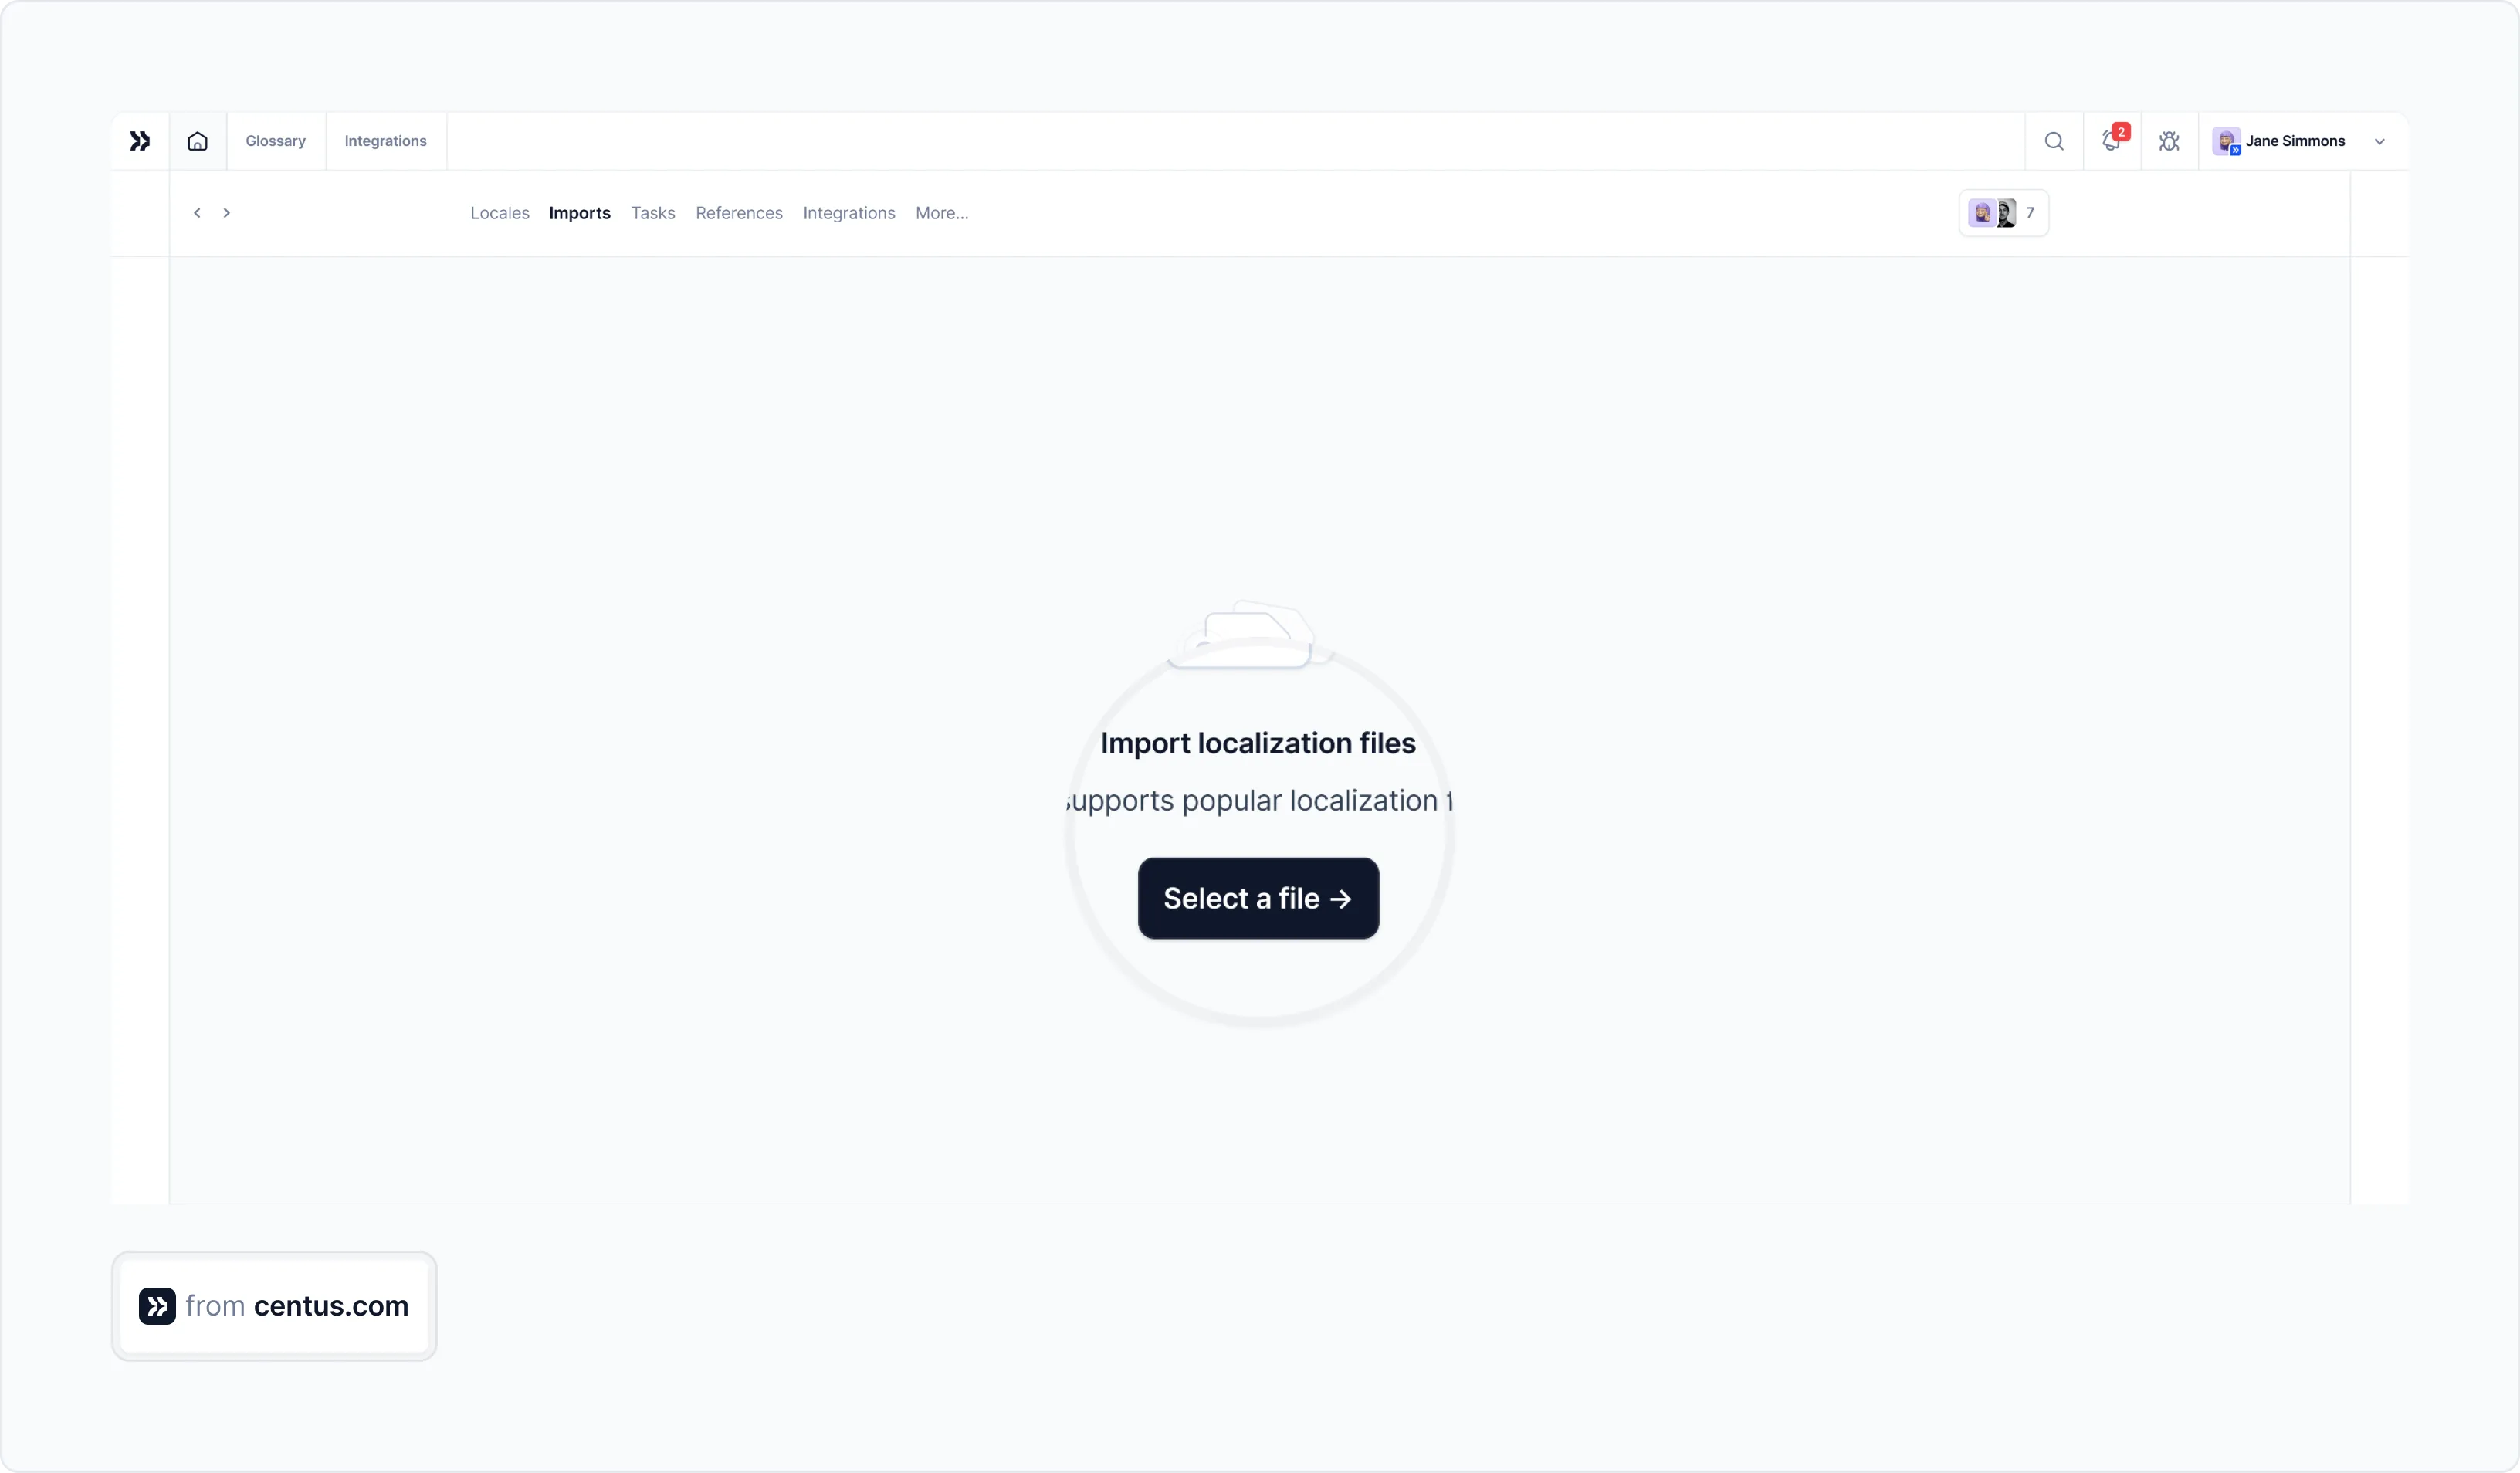
Note: Centus also handles other localization file formats like XML, YAML, JSON, PHP, and many more.
One of the main advantages of using Centus for XLIFF translation is the convenient Editor where your linguists can translate files without worrying about disrupting tags or file hierarchy.
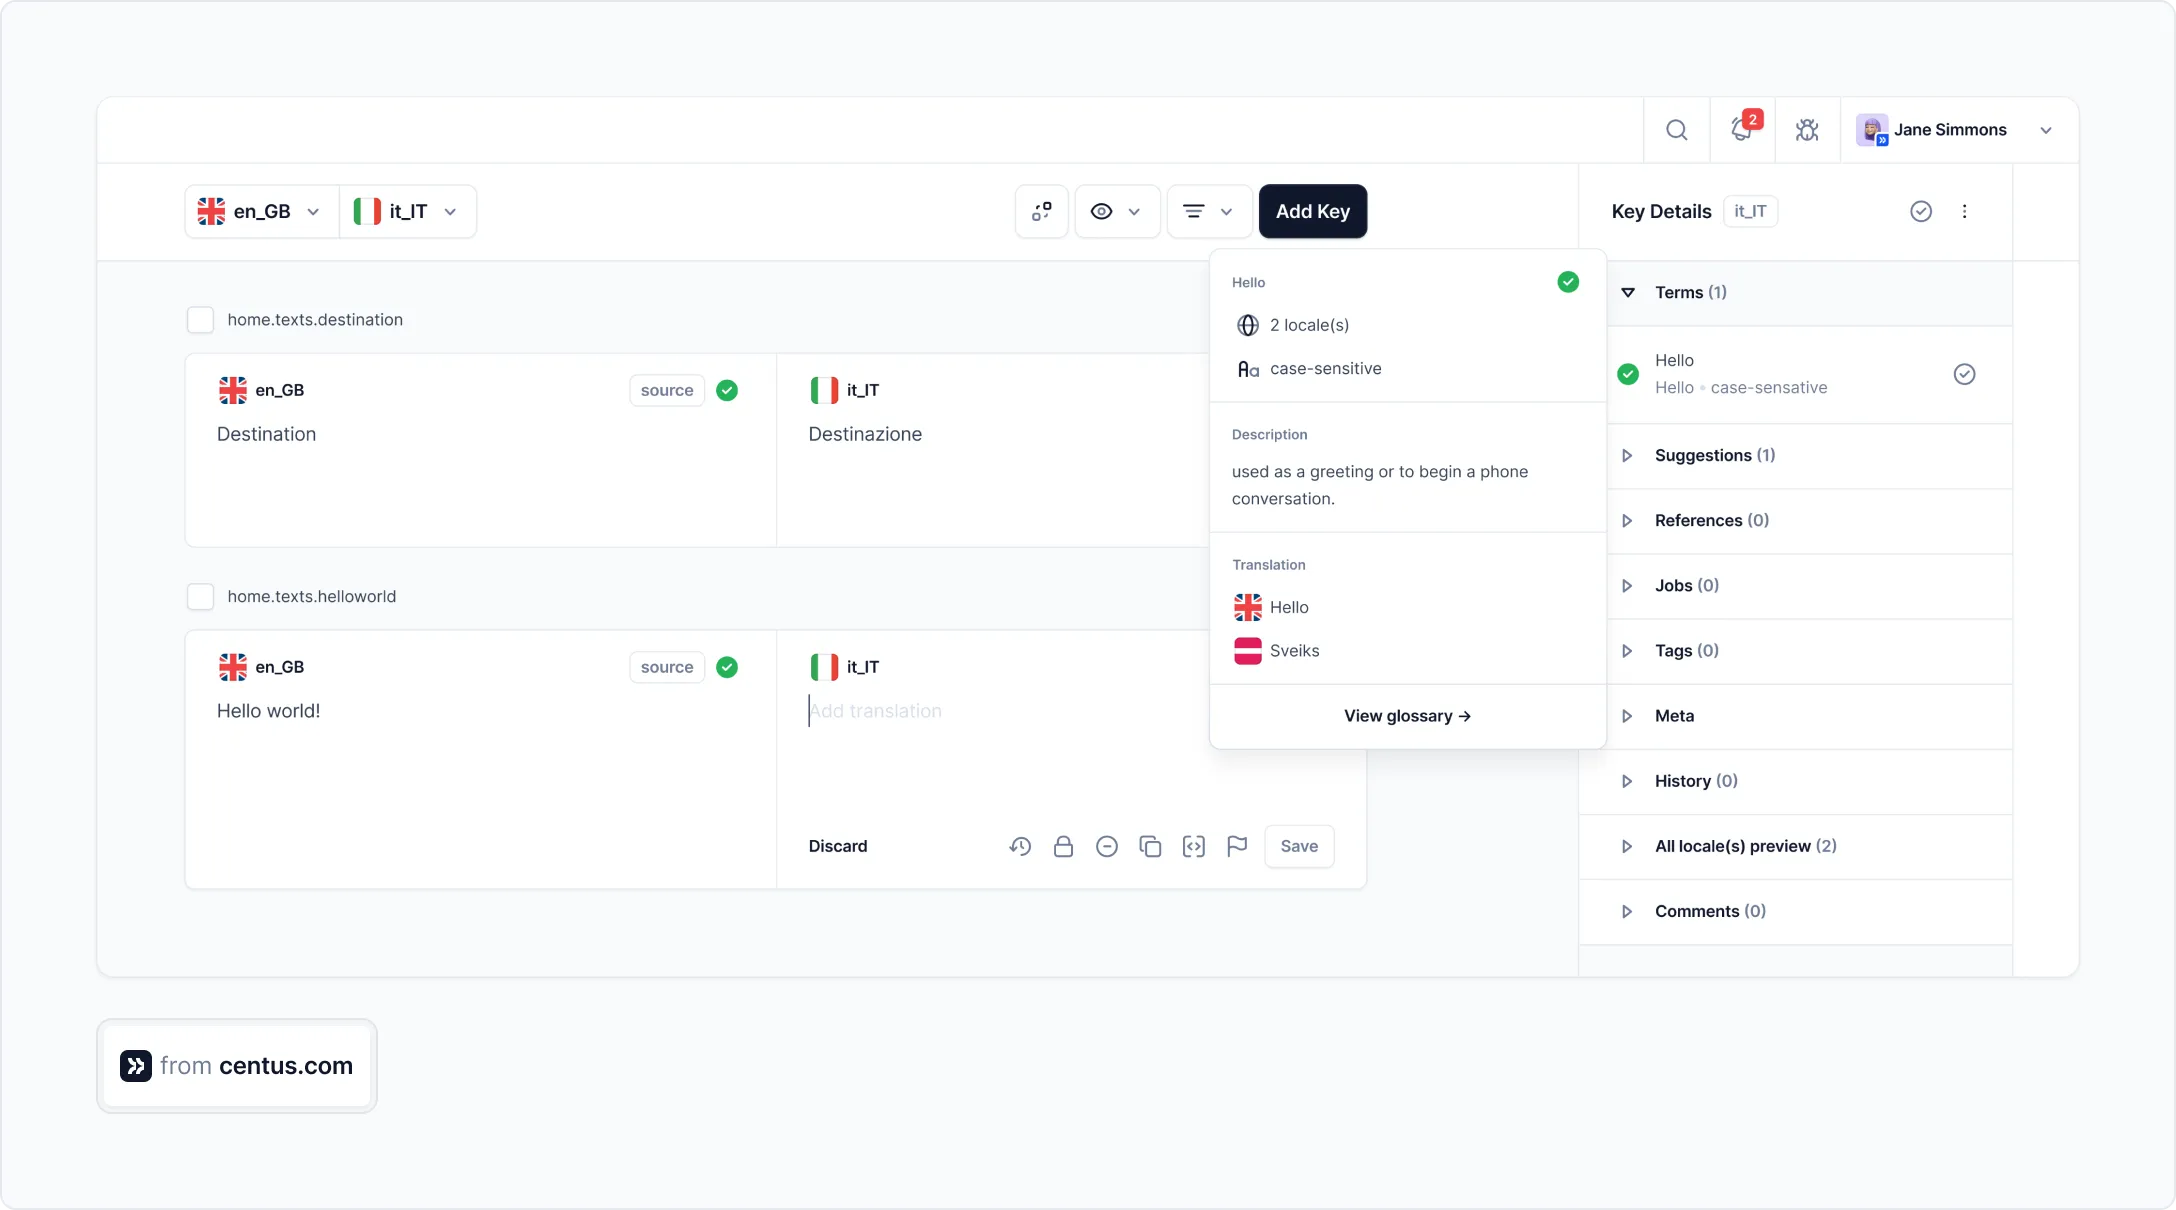
In the Editor, your team can automatically translate XLIFF files using Google Translate, DeepL, or Microsoft Translate. Once the translations are ready, your linguists can refine them manually.
This combined approach to translation cuts app translation time and costs by up to 90%, helping you ship projects faster.
It gets better! Given that Centus is a cloud-based platform, multiple translators can work on your XLIFF files simultaneously, meaning you can prepare your app for dozens of markets at once. Conventional translation methods can’t compete.
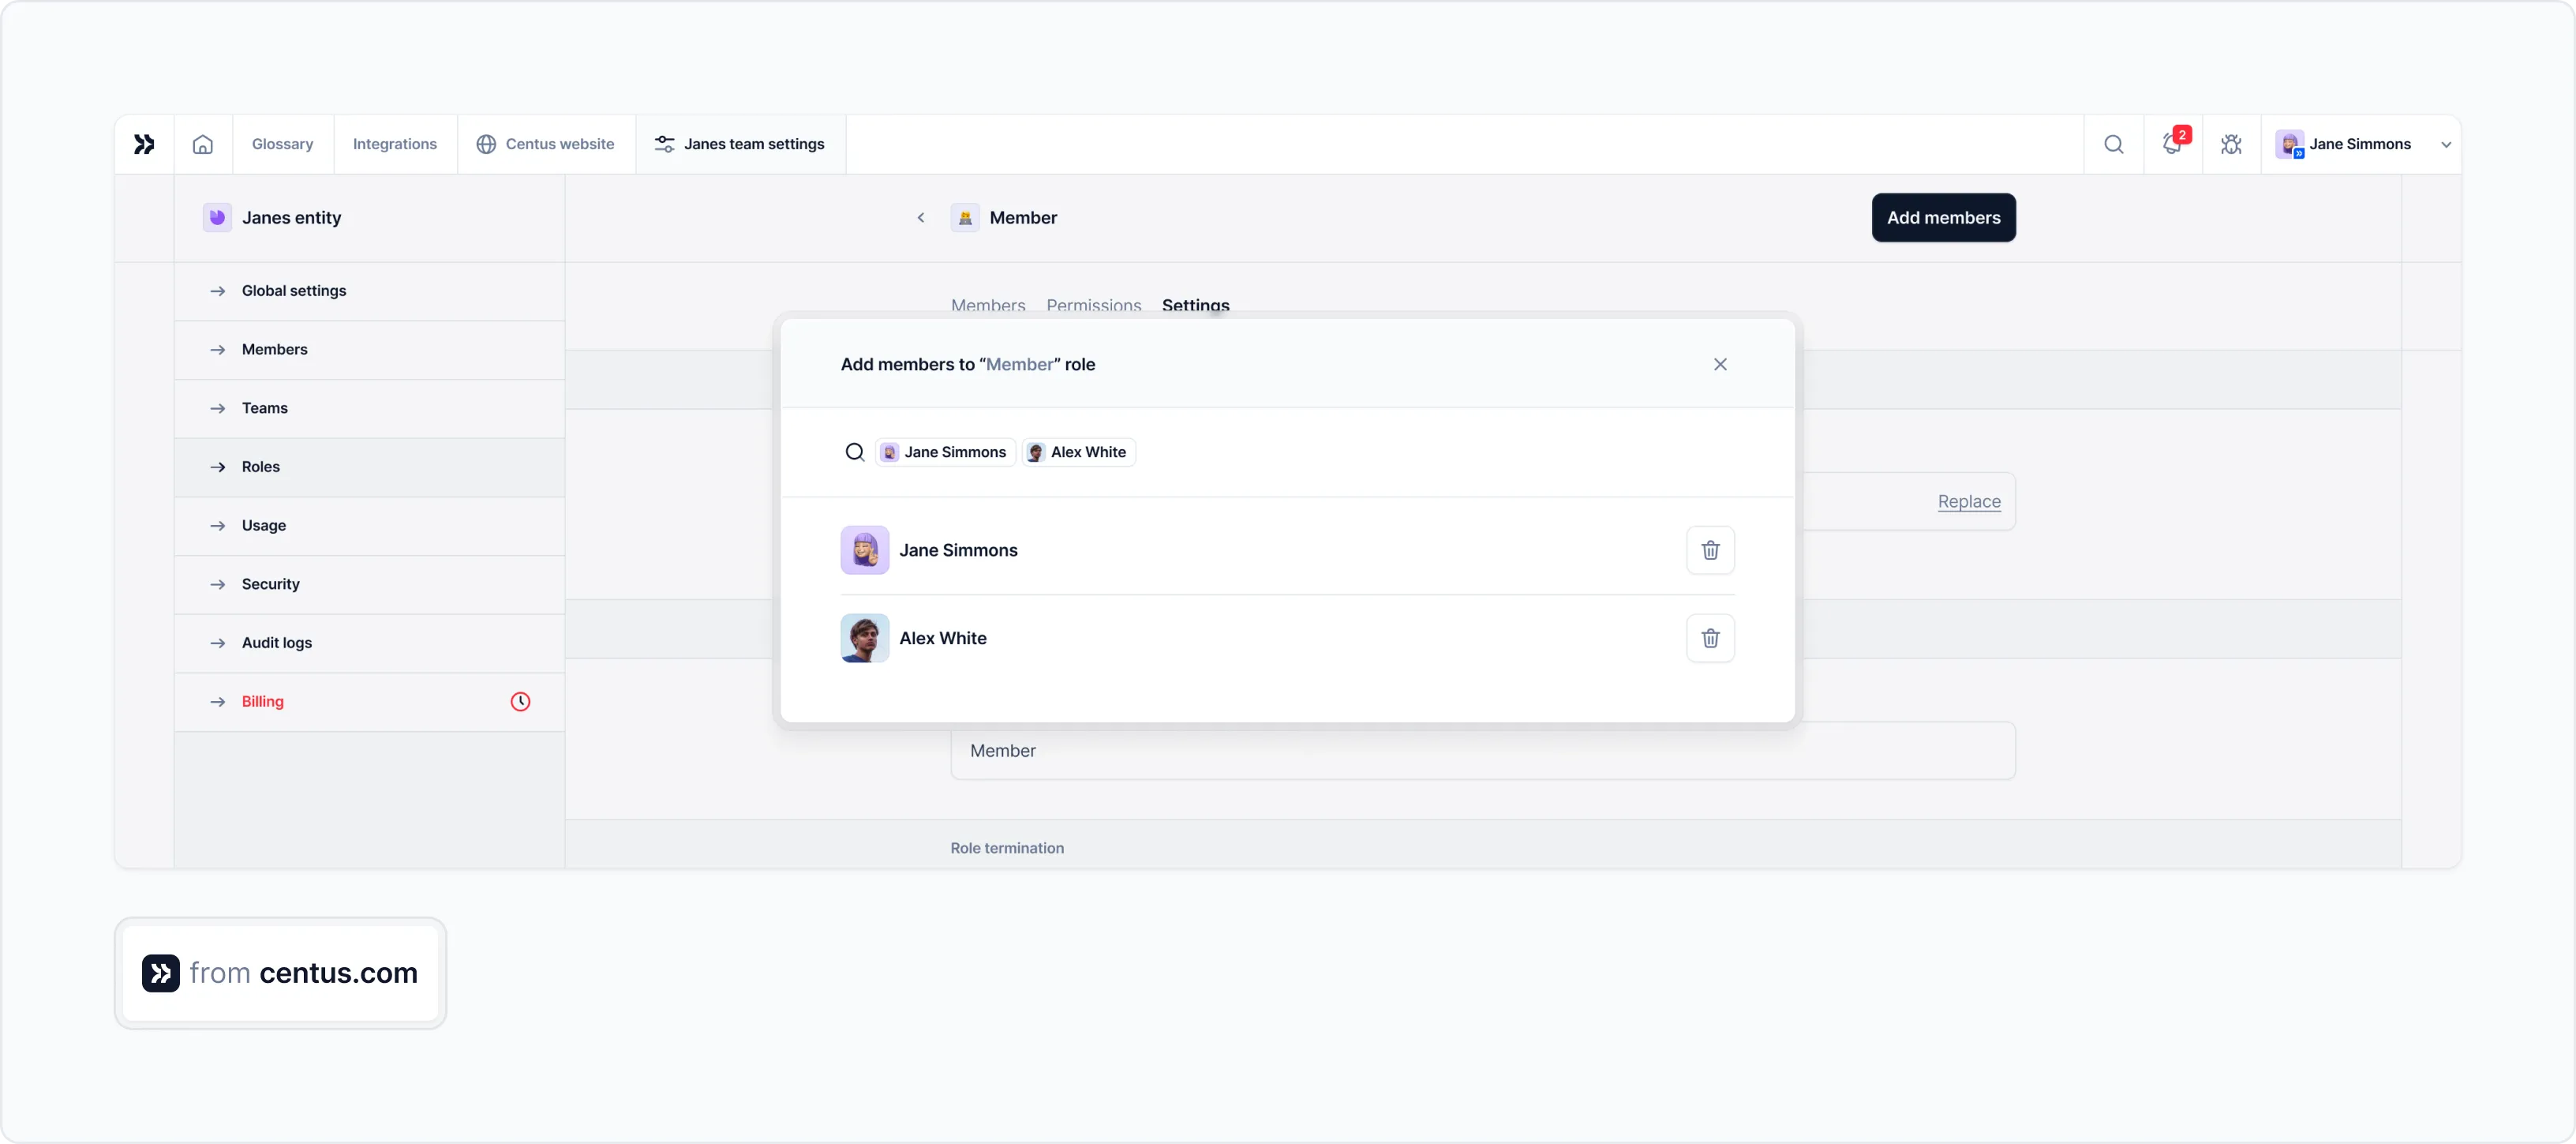
Here’s how to add team members to your project:
- In the Collaborators section, click Invite collaborators
- Enter the team member’s details
- Choose the team member’s role from the dropdown menu
- Click Add collaborator
Congratulations! Now your team has everything it needs to deliver accurate XLIFF translations. You can monitor their progress in the dashboard.
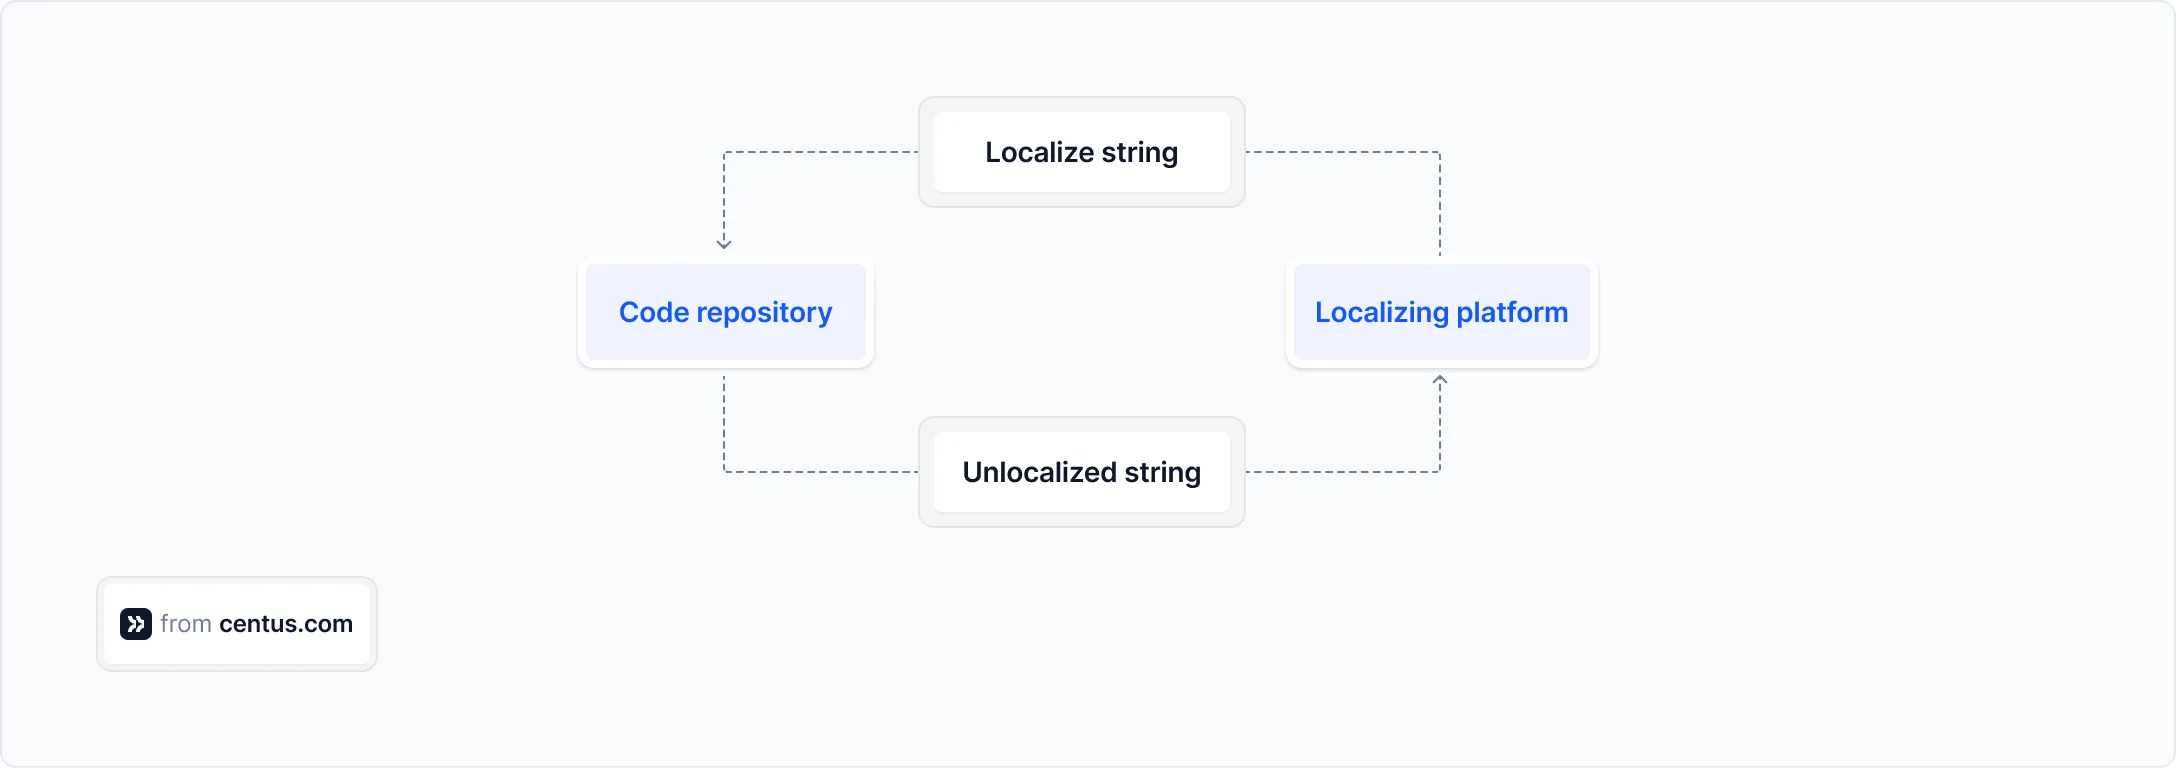
When translations are ready, push them to your code repository using Centus-GitHub integration.
To download files manually, go to the Export section and click Export files.
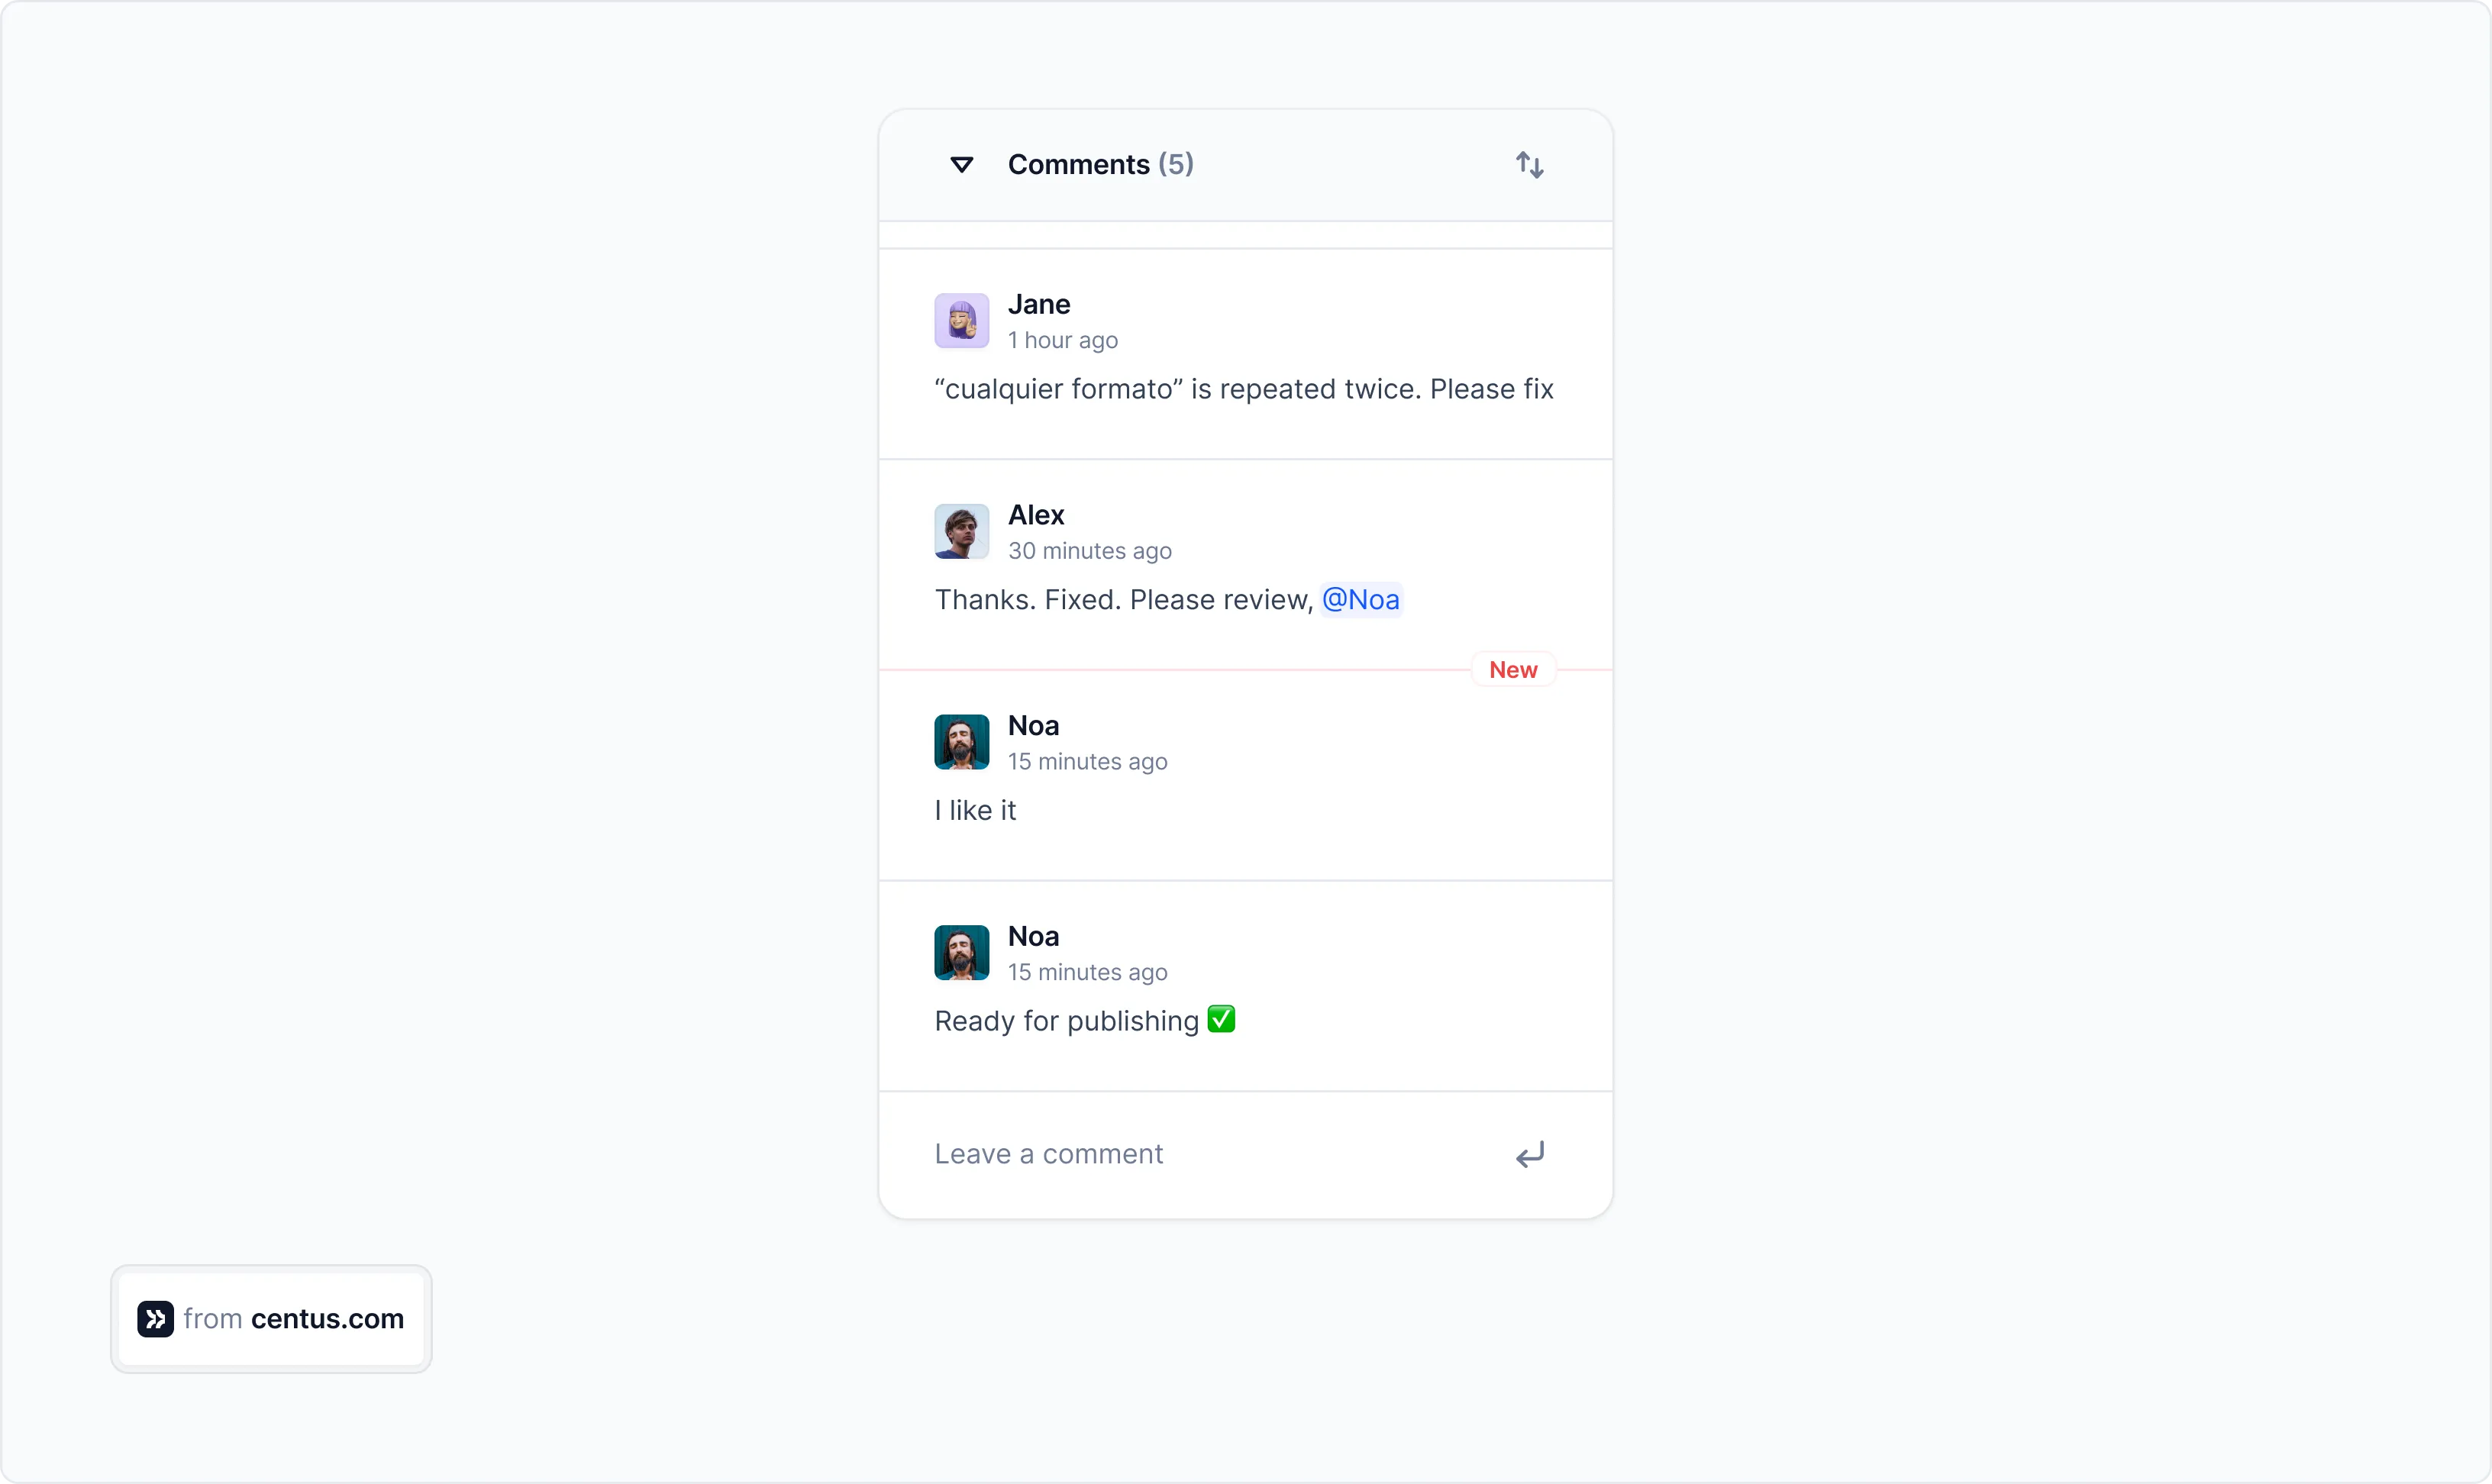
Step 4: Review and validate translations
After translation, it's important that you have an in-house review process to validate the XLIFF files and ensure quality. You’d generally have the following steps:
- Linguistic review: Native speakers check for accuracy and natural phrasing
- Technical validation: Checking for completeness and formatting issues
- Specialized checks: Looking for length issues, variable handling, etc.
To make things simpler, you can use state information in XLIFF 2.1 files to track this process:
<unit id="greeting">
  <notes>
    <note category="context">This is the welcome message displayed on the home page</note>
  </notes>
  <segment state="translated">
    <source>Hello, welcome to our application!</source>
    <target>Bonjour, bienvenue dans notre application !</target>
  </segment>
</unit>
The state attribute can have values like:
- initial: Newly added, not yet translated
- needs-translation: Ready for translation
- translated: Translation provided but not reviewed
- needs-review: Translation needs linguistic review
- final: Translation approved and finalized
And since XLIFF is technically just an XML file, you can run it through XML validators after a translation session to ensure that it still follows the XLIFF 2.1 schema.
Step 5: Testing the translated XLIFF file
Once your XLIFF files are translated and validated, it's time to test them in your application. Here are the key steps that I generally follow :
- Converting XLIFF back to application format: Transform XLIFF into JSON, properties files, or whatever your application uses
- Integrating translations: Load the translations into your application
- Testing in context: Verify that translations display correctly in the application UI
Now, XLIFF files don’t do much by themselves. You’re likely going to use these translated files in software localization projects. For instance, the project I was working on required JSON files, and the project was too big to switch the file format.
Luckily, a simple JS script like this can convert XLIFF files to JSON files:
const fs = require('fs');
const xml2js = require('xml2js');

// Read the XLIFF 2.1 file
fs.readFile('locales/fr/translation.xlf', 'utf8', (err, data) => {
  if (err) {
    console.error('Error reading file:', err);
    return;
  }

  // Parse XML to JS object
  xml2js.parseString(data, (err, result) => {
    if (err) {
      console.error('Error parsing XML:', err);
      return;
    }

    const translations = {};

    // Extract translations from XLIFF 2.1
    try {
      const file = result.xliff.file[0];
      const units = file.unit || [];

      units.forEach(unit => {
        const id = unit.$.id;
        const segments = unit.segment || [];

        if (segments.length > 0) {
          const segment = segments[0];
          const target = segment.target && segment.target[0] ? segment.target[0] : segment.source[0];
          translations[id] = target;
        }
      });

      // Write to JSON file
      fs.writeFile('locales/fr/translation.json', JSON.stringify(translations, null, 2), 'utf8', err => {
        if (err) {
          console.error('Error writing JSON file:', err);
          return;
        }
        console.log('Successfully converted XLIFF 2.1 to JSON');
      });
    } catch (error) {
      console.error('Error processing XLIFF structure:', error);
    }
  });
});
After conversion, you need to re-check if all the translation strings work as expected, paying special attention to things like:
- Text strings that might overflow its container
- Date and time formats
- Number formats
- Right-to-left languages if applicable
- Special characters rendering correctly
When testing my application translations, we discovered that German translations were about 30% longer than English ones, causing layout issues in several UI components. Early testing allowed us to fix these issues before release.
XLIFF localization tips
Localization isn't just about translating words—it’s about adapting content to different languages, cultures, and technical constraints.
Advanced localization techniques ensure that your translations remain natural, functional, and user-friendly, regardless of language complexity.
Handling plurals in XLIFF
Different languages have unique pluralization rules. While English has simple singular/plural forms (e.g., “1 apple” vs. “2 apples”), other languages, like Arabic or Russian, have multiple plural forms.
XLIFF supports pluralization through <unit> elements with multiple <segment> variations. Here’s an example:
<unit id="items">
  <notes>
    <note category="context">Message shown when listing items in the cart</note>
  </notes>
  <segment id="one">
    <source>You have 1 item in your cart.</source>
    <target>Vous avez 1 article dans votre panier.</target>
  </segment>
  <segment id="other">
    <source>You have {count} items in your cart.</source>
    <target>Vous avez {count} articles dans votre panier.</target>
  </segment>
</unit>
- The
element groups all variations of the same text. - The
element defines different translations for singular (one) and plural (other) cases. - {count} is a variable placeholder that will be dynamically replaced in the application.
For applications using i18next or Fluent, XLIFF exports can support pluralization keys (one, few, many, other) to correctly match target language rules.
Supporting right-to-left (RTL) languages
Languages like Arabic, Hebrew, and Urdu read from right to left (RTL). This not only affects text direction but also UI layouts, typography, and punctuation placement.
XLIFF Best Practices for RTL Support:
- Use dir="rtl" attributes where applicable.
- Provide context in
elements for translators to adjust text accordingly. - Ensure UI mirroring tools are in place (CSS direction: rtl; or React’s dir prop).
- Be mindful of numbers, dates, and punctuation, which may differ from LTR languages.
Here’s a snippet for an Arabic translation:
<xliff version="2.1" xmlns="urn:oasis:names:tc:xliff:document:2.1" srcLang="en" trgLang="ar">
  <file id="messages" xml:lang="ar">
    <unit id="welcome">
      <notes>
        <note category="context">Displayed on the homepage</note>
      </notes>
      <segment>
        <source>Welcome to our application!</source>
        <target dir="rtl">مرحبًا بك في تطبيقنا!</target>
      </segment>
    </unit>
  </file>
</xliff>
Here’s what we’ve done in the snippet above:
- The xml:lang="ar" attribute sets Arabic as the target language.
- The
text is written in Arabic and marked with dir="rtl" for proper right-to-left rendering.
📘 Relevant reading: RTL localization guide.
Handling variables and interpolation in translations
Variables like names, dates, and numbers often appear in translations. Incorrect handling can result in unnatural or broken text.
For instance, an English string:
"Hello {name}, you have {count} new messages."
Might be structured differently in French or Arabic, requiring flexible placeholders.
XLIFF allows variable placeholders inside
<unit id="messages_count">
  <segment>
    <source>Hello {name}, you have {count} new messages.</source>
    <target dir="rtl">مرحبًا {name}، لديك {count} رسالة جديدة.</target>
  </segment>
</unit>
In the above code:
- {name} and {count} variable placeholders will be dynamically replaced.
- Arabic text maintains correct punctuation and word order while keeping placeholders intact.
Translation tools like i18next, Angular i18n, and Fluent support dynamic placeholders. Make sure your application framework properly renders localized strings with variables.
Handling date, time, and number formats
Date and number formats differ across regions:
- US: MM/DD/YYYY → 03/05/2025
- Europe: DD/MM/YYYY → 05/03/2025
- Japan: YYYY/MM/DD → 2025/03/05
- Arabic locales: Use different numerals (١٢٣٤٥)
Rather than hardcoding date formats, use ICU Message Format or a library like Intl.DateTimeFormat:
<unit id="date_format">
  <segment>
    <source>The event is on {date}.</source>
    <target>الحدث في {date}.</target>
  </segment>
</unit>
In the above code:
-
{date} is a placeholder that will be replaced dynamically.
-
The format of {date} should be handled by localization libraries like Intl.DateTimeFormat or Moment.js.
-
Arabic text keeps the placeholder in the correct order.
Wrapping up
Here’s why XLIFF should be a key part of your software localization strategy:
- Separation of content and presentation: Making translations cleaner and easier to manage.
- Context preservation: Ensuring accurate and high-quality translations.
- Integration with translation memory: Reducing costs and improving consistency.
- Built-in workflow tracking: Helping you manage complex localization projects.
- Automation capabilities: Streamlining the entire process from extraction to deployment.
However, managing XLIFF files manually is a time waste—one you can avoid with Centus.
Simply import XLIFF files to Centus where everyone from translators and managers to developers can work together to ship your project faster.
Whether you're handling a web app, mobile app, or enterprise-level software, Centus helps you save time, improve accuracy, and scale your localization efforts effortlessly.
Get the week's best content!
By subscribing, you are agreeing to have your personal information managed in accordance with the terms of Centus Privacy Policy ->
Keep learning

23 min. read
Angular Localization and Internationalization (i18n) Guide
22 min. read
Angular with ngx-translate: Practical Guide

18 min. read
JavaScript Localization Guide for Web Apps
16 min. read
How to Perform Localization in Java
3 min. read
How to Perform TXT File Translation Fast
18 min. read