You may have many reasons for making your Angular app multilingual. Perhaps your team wants a quick translation. Or maybe users across the globe demand a thoroughly-localized app with UI tailored to their expectations.
For me, it was a client call that led me to localize our Angular app.
Whatever your motivation, creating an application that can connect with diverse audiences is undoubtedly worth your while.
Let me show you how I localized an English-only app and why I picked ngx-translate instead of sticking with the default Angular i18n library like I did before.
ngx-translate vs i18n: Which is better for Angular localization?
The built-in i18n approach from Angular is workable, but I find it too "static.”
The built-in method relies on compile-time translation. There’s no easy dynamic switching out of the box. Also, it can struggle to store language data outside of the main build assets.
On top of that, the default i18n can handle translations, but it does not offer a comfortable route for runtime switching or loading languages from external sources after deployment.
This is where ngx-translate excels. This library offers:
-
Dynamic runtime switching without rebuilding.
-
JSON-based translation files are easy to manage and update.
-
The ability to fetch translations from external sources.
-
Integration with services for on-the-fly translation handling.
-
Support for advanced features like interpolation, pluralization, and missing key handlers.
It integrates seamlessly with Angular as an external dependency, simplifying tasks such as adding or removing languages, loading them as JSON files, and dynamically overriding translations.
Each file corresponds to a language, making it easy to keep separate translation files.
The approach allows loading translations dynamically at runtime, switching languages without page reloads, and introducing new languages after deploying the app.
My code can request translation strings anywhere I want. I can inject the “service” into components and call a method to retrieve the desired text. That helps me avoid rigid placeholders or complicated build setups.
These points combine into a strong justification for picking ngx-translate over Angular’s built-in approach. I wanted to mention those from personal experience. The upcoming sections will detail how to get up and running.
Step-by-step guide to Angular localization with ngx translate
Let’s now get right into the steps. Install Node.js if not installed. You can confirm if you already have it installed by running the below commands.
node -v
npm -v
If not installed, head to the official Node website and install the LTS version.
npm install -g @angular/cli
After the command is complete, Angular will be globally installed. If you get an error, you may need to run the command as an administrator.
Once you have it installed, create a new Angular project named centus-angular-ngx-localization:
ng new centus-angular-ngx-localization
Choose Yes for routing and CSS as the stylesheet format when prompted. After the setup is complete, navigate into the project directory:
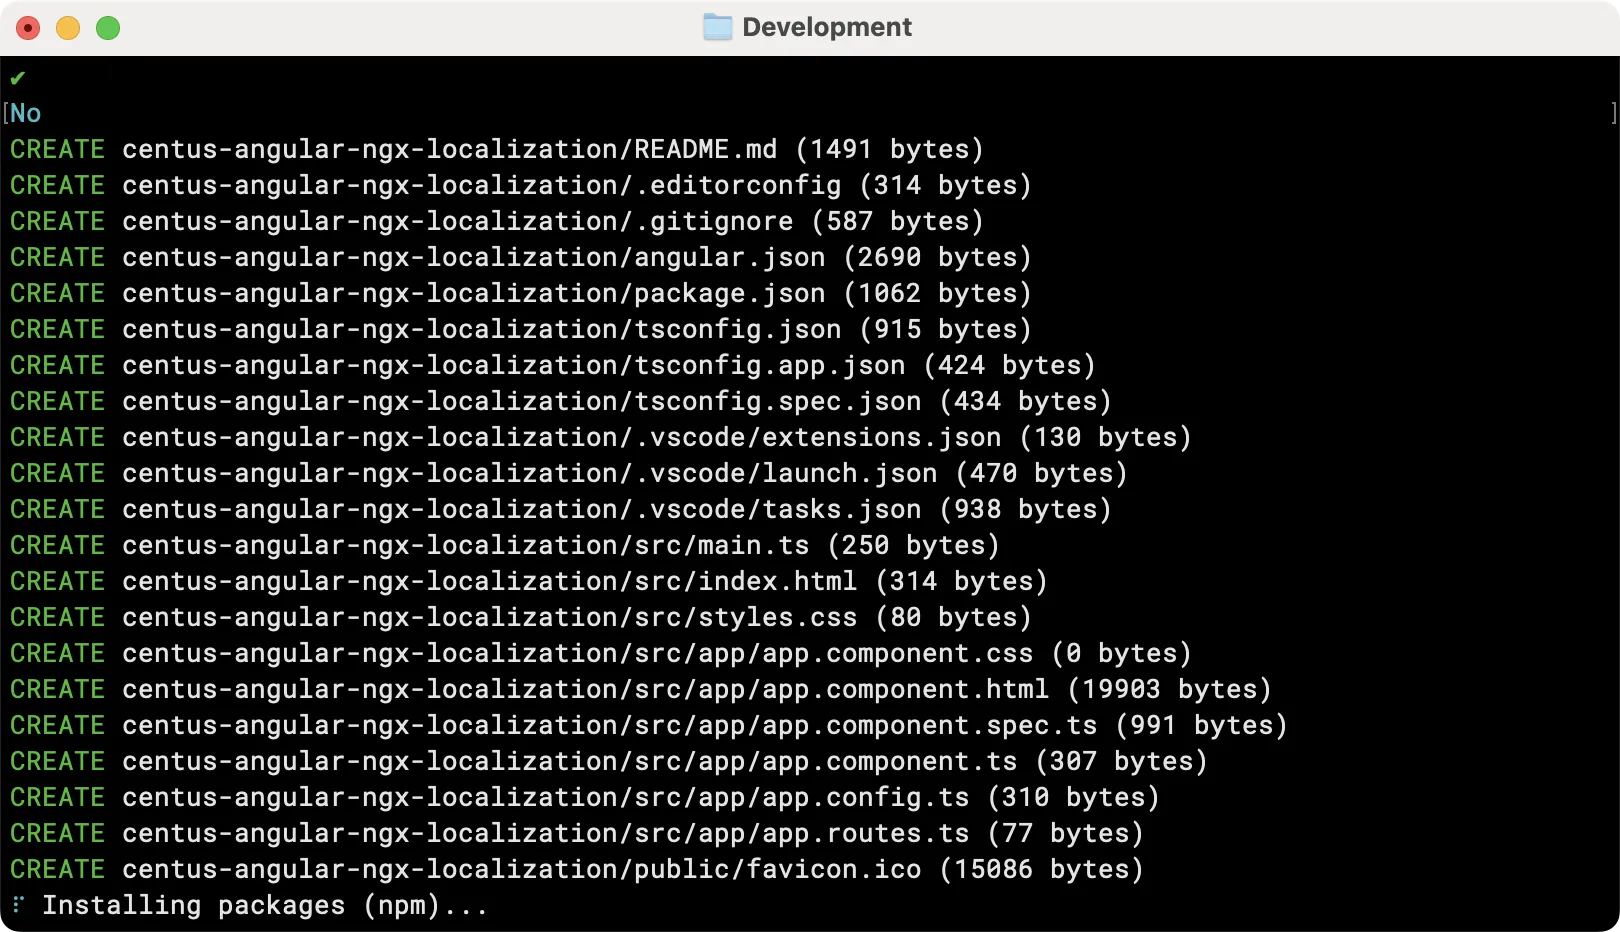
Now, cd into the new project directory:
cd centus-angular-ngx-localization
Run the development server to verify everything is working well:
ng serve
Go to //localhost:4200 in your browser to see the default Angular welcome page and to make sure that everything is set up correctly.
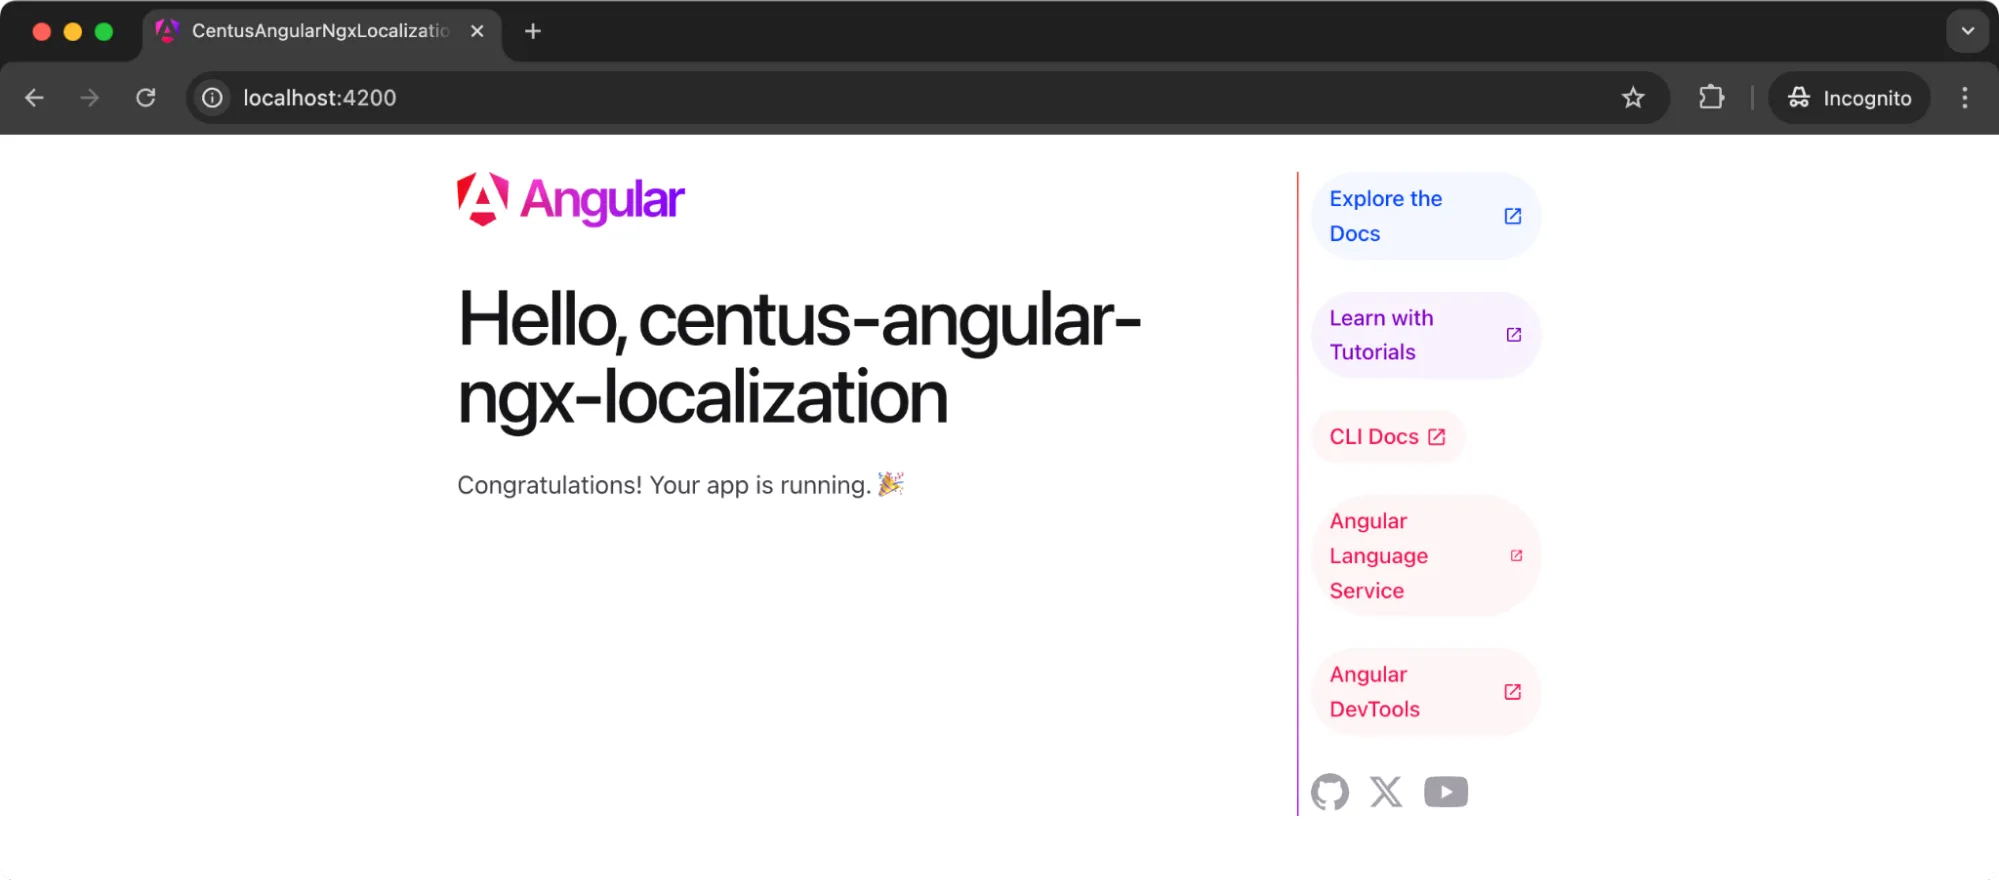
At this point, we have a working Angular application. It runs locally and shows the standard starter template in English only. Now, let’s move to localizing the Angular app.
Step 1: Setting Up a basic html component
We now need something to translate. Let’s replace the default template with a simple landing page for a web app. I am adding a little bit of CSS for aesthetic reasons.
However, you can choose to just use plain HTML for learning how to translate pages.
Add the following code to your app.component.html page
<link href="https://cdnjs.cloudflare.com/ajax/libs/font-awesome/5.15.4/css/all.min.css" rel="stylesheet">

<div class="container">
  <h1>Centus: Your all-in-one localization platform</h1>
  <p>
    Automate and manage your entire translation workflow in one place. Shorten time to market and optimize your content localization budget.
  </p>
  <div class="button-group">
    <button class="cta-button">
      <i class="fa fa-rocket"></i> Try for free
    </button>
    <button class="cta-button">
      <i class="fa fa-calendar"></i> Book a demo
    </button>
  </div>
</div>
And here’s the app.component.css:
/* General container styling */
.container {
  display: flex;
  flex-direction: column;
  justify-content: flex-start; /* Moves content closer to the top */
  align-items: center;
  min-height: 100vh;
  text-align: center;
  padding: 20px;
  background-color: #f9f9f9;
  box-sizing: border-box;
  position: relative; /* For absolute positioning of language selector */
  font-family: Arial, Helvetica, sans-serif; /* Updated to built-in sans-serif fonts */
}

/* Typography styling */
h1 {
  font-size: 2.5rem;
  font-weight: 700;
  color: #333;
  margin-bottom: 10px; /* Reduced margin for tighter spacing */
}

p {
  font-size: 1.2rem;
  line-height: 1.6;
  color: #555;
  max-width: 600px;
  margin-bottom: 20px; /* Reduced margin for tighter layout */
}

/* Button group styling */
.button-group {
  display: flex;
  gap: 15px;
  margin-top: 15px; /* Slightly reduced margin */
}

/* Button styling */
.cta-button {
  display: flex;
  align-items: center;
  justify-content: center;
  gap: 10px;
  background-color: #007bff;
  color: #fff;
  border: none;
  border-radius: 5px;
  padding: 10px 20px;
  font-size: 1rem;
  font-weight: 600;
  cursor: pointer;
  box-shadow: 0 4px 6px rgba(0, 0, 0, 0.1);
  transition: background-color 0.3s, transform 0.2s;
}

.cta-button:hover {
  background-color: #0056b3;
  transform: translateY(-2px);
}

.cta-button i {
  font-size: 1.2rem;
}

/* Adding responsiveness */
@media (max-width: 768px) {
  h1 {
    font-size: 2rem;
  }

  p {
    font-size: 1rem;
  }

  .cta-button {
    padding: 8px 15px;
    font-size: 0.9rem;
  }
}
Now if you go back to your hosted app page, you should see a page that looks like this:
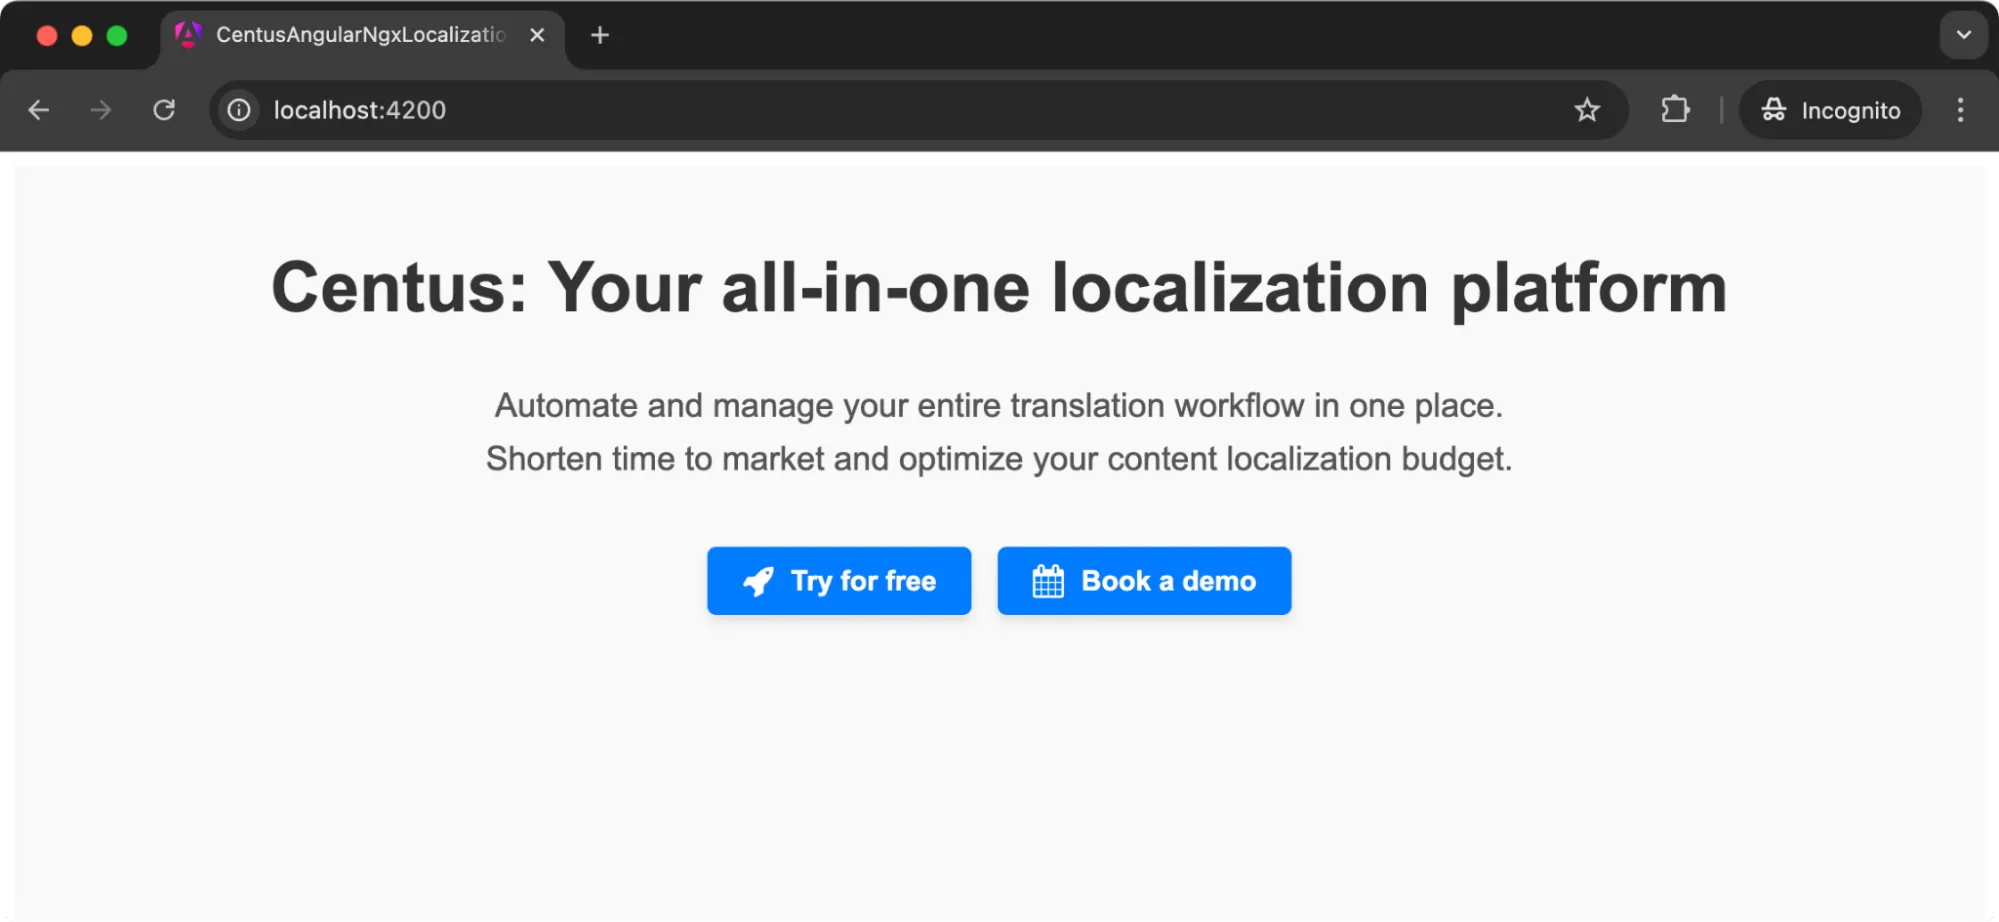
Let’s get started with translating and localizing this with ngx-translate.
Step 2: Install ngx-translate
ngx-translate has two main packages:
- @ngx-translate/core
- @ngx-translate/http-loader
The core package provides the main translation service, Angular translate pipe, and directive. The http-loader package helps load translations from JSON files.
Let’s install both the packages with the following command:
npm install @ngx-translate/core @ngx-translate/http-loader
These two packages handle the core translation functionality and allow loading translations from external JSON files.
Step 3: Creating translation files
The previous step gave ngx-translate the instructions on where to find translations. Now let’s provide actual translation files.
Create a folder named i18n inside the assets directory:
public/assets/i18n/
Create en.json inside i18n with the following content:
{
    "CENTUS": {
      "TITLE": "Centus: Your all-in-one localization platform",
      "DESCRIPTION": "Automate and manage your entire translation workflow in one place. Shorten time to market and optimize your content localization budget.",
      "BUTTONS": {
        "TRY_FREE": "Try for free",
        "BOOK_DEMO": "Book a demo"
      }
    }
  }
Those keys represent text chunks from the page. Each key maps to a string in the target language. This file represents English translations.
Create another language file. Suppose we want French, so create fr.json:
{
    "CENTUS": {
      "TITLE": "Centus: Tu plataforma de localización todo en uno",
      "DESCRIPTION": "Automatiza y gestiona todo tu flujo de trabajo de traducción en un solo lugar. Reduce el tiempo de comercialización y optimiza tu presupuesto de localización de contenido.",
      "BUTTONS": {
        "TRY_FREE": "Prueba gratis",
        "BOOK_DEMO": "Reservar una demo"
      }
    }
  }
You can add other languages in a similar fashion and still get the expected output without making any other changes to your code.
The point is the same: define each language file with identical keys and their respective translations.
Using Centus to simplify Angular l8n
There’s a major problem with the above step.
As your app grows, so do your files, and so does the probability of erroneous translations. While manually handling these JSON files works great for basic applications, you need a more specialized platform to manage Angluar language translation as your app grows.
That’s where a localization management platform, like Centus, helps.
Centus brings together your translators, developers, designers, and managers to complete your localization and internationalization projects faster. It goes like this:
First, you import your JSON strings to Centus:

Then, you translate Angular strings using Google Translate, DeepL, or Microsoft Translator.
“But automatic translations are imperfect,” I hear you object. You’re right, they are up to 90% cheaper and faster than regular translations, but they’re not entirely accurate. That’s why, your team can use Centus Editor to refine them:

In the Editor, your team can also get automatic glossary suggestions to keep translations consistent:
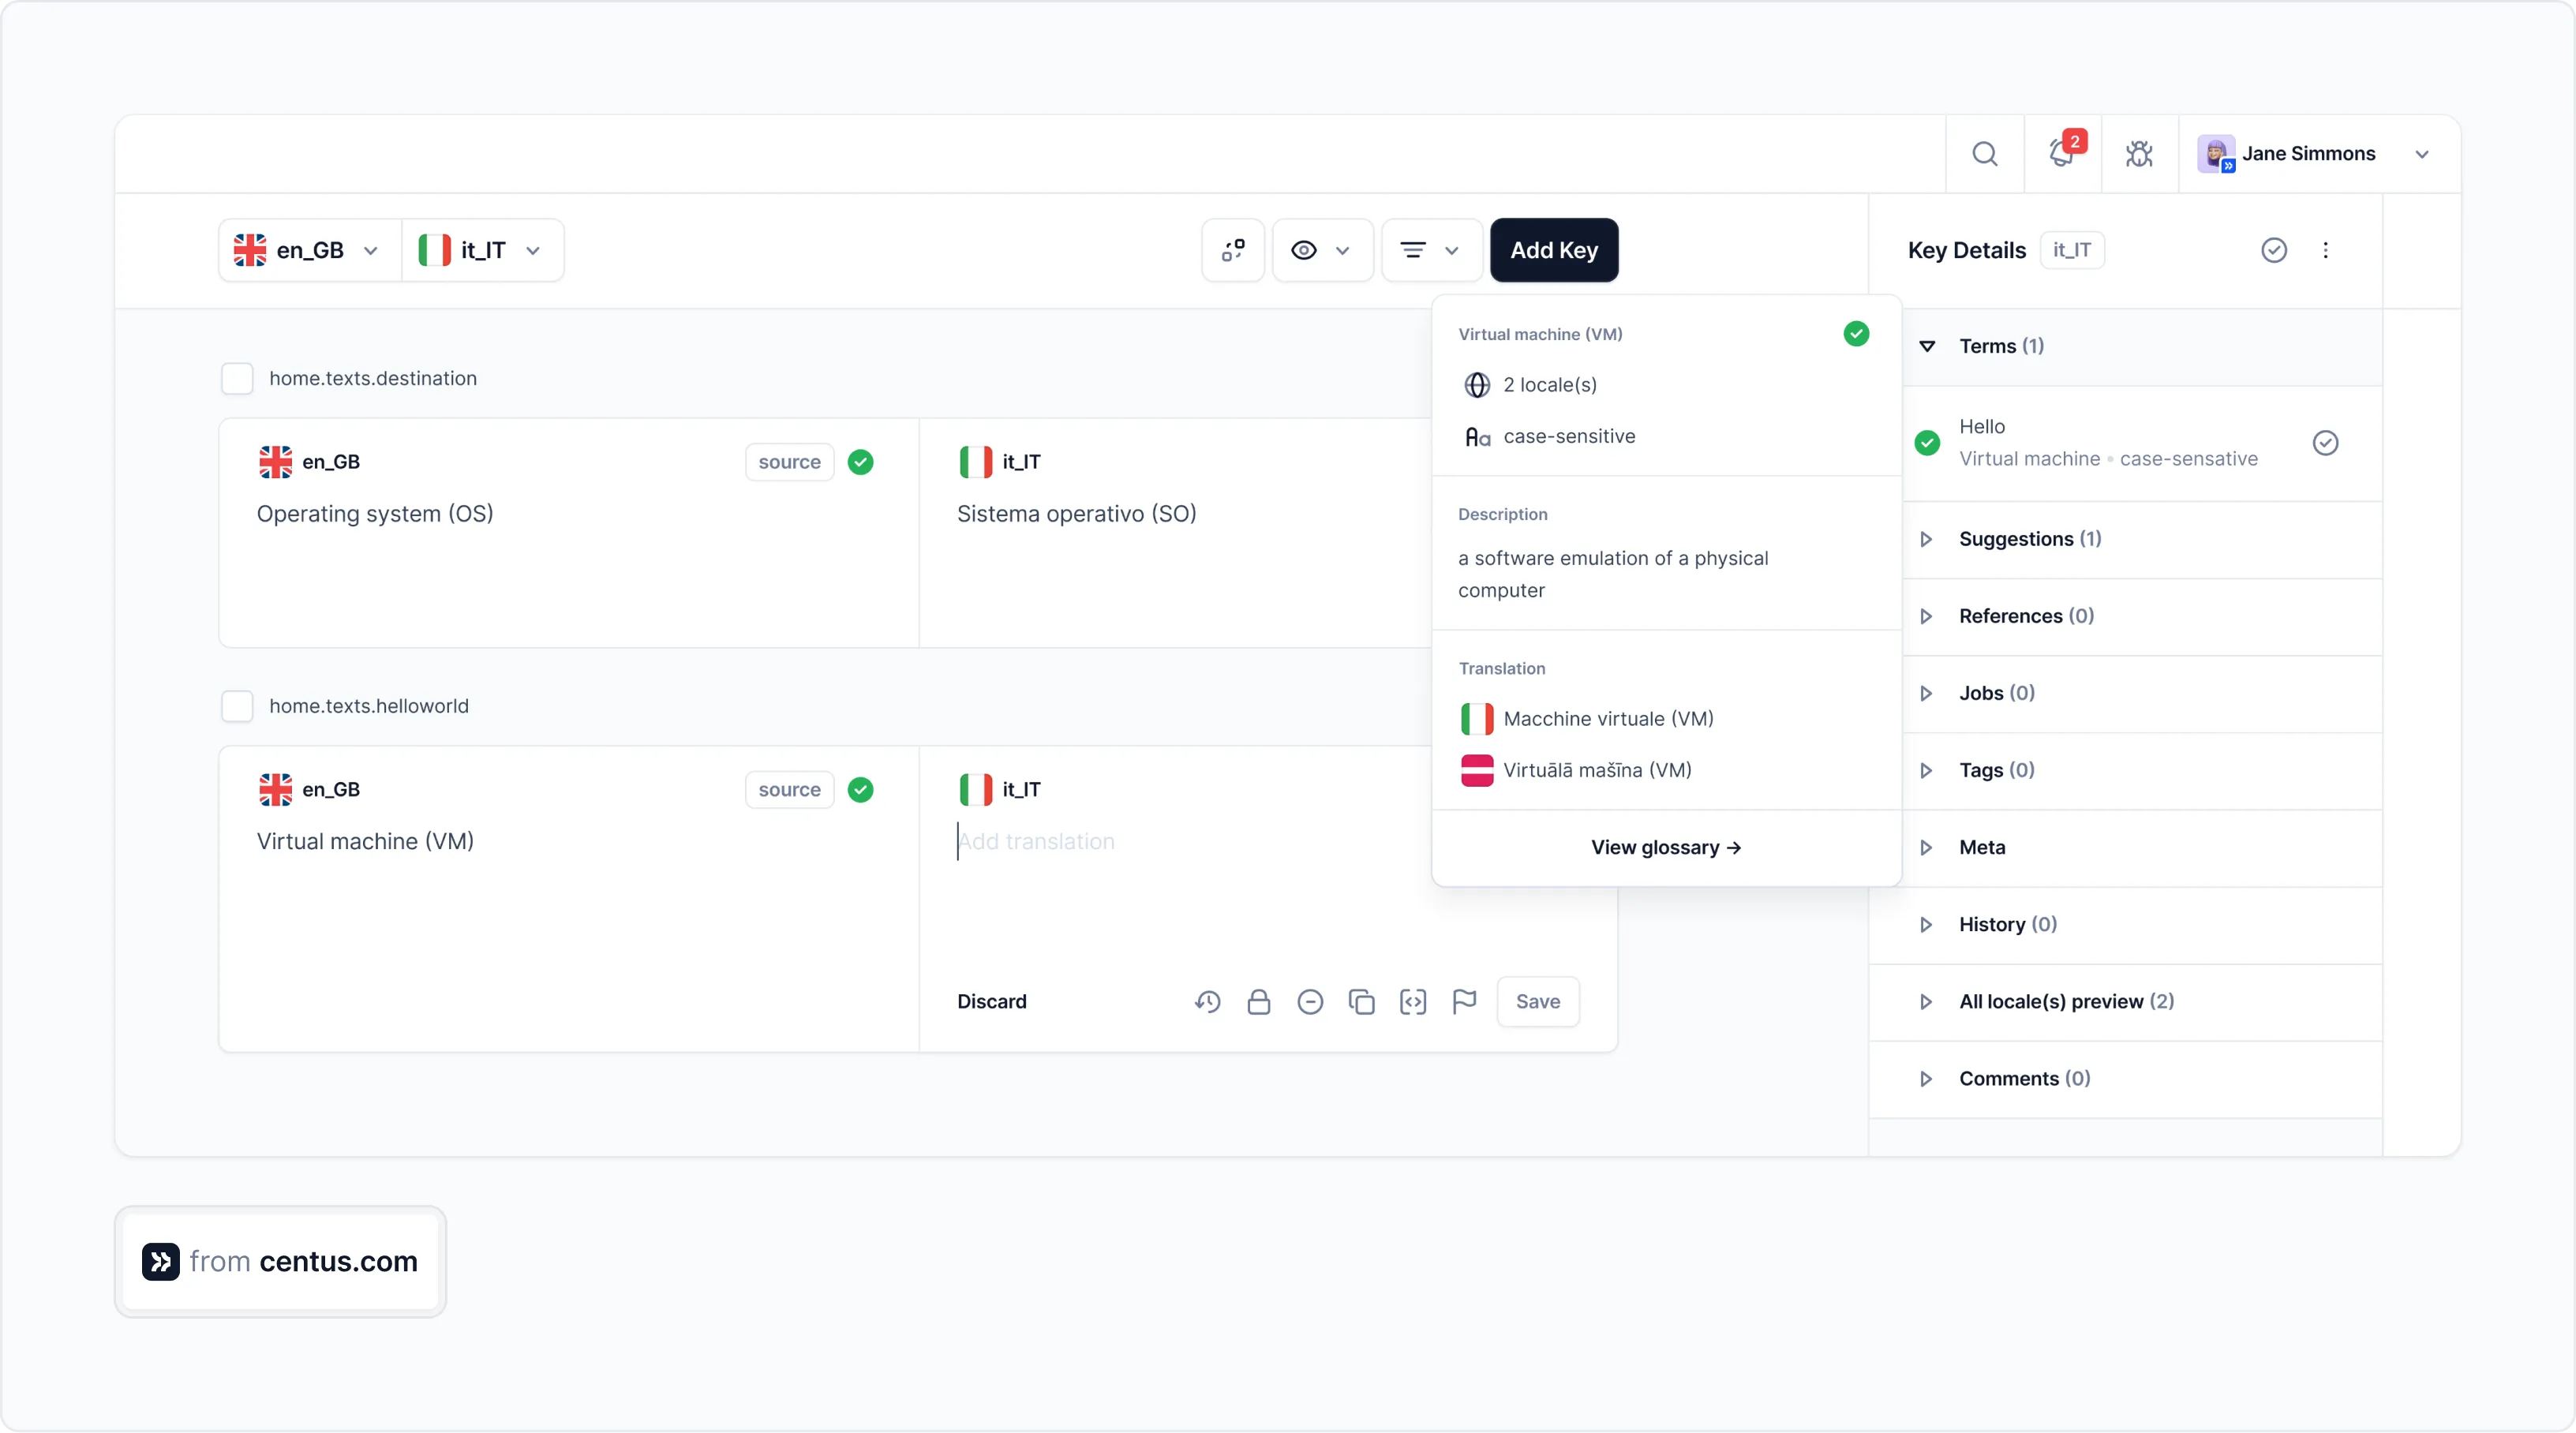
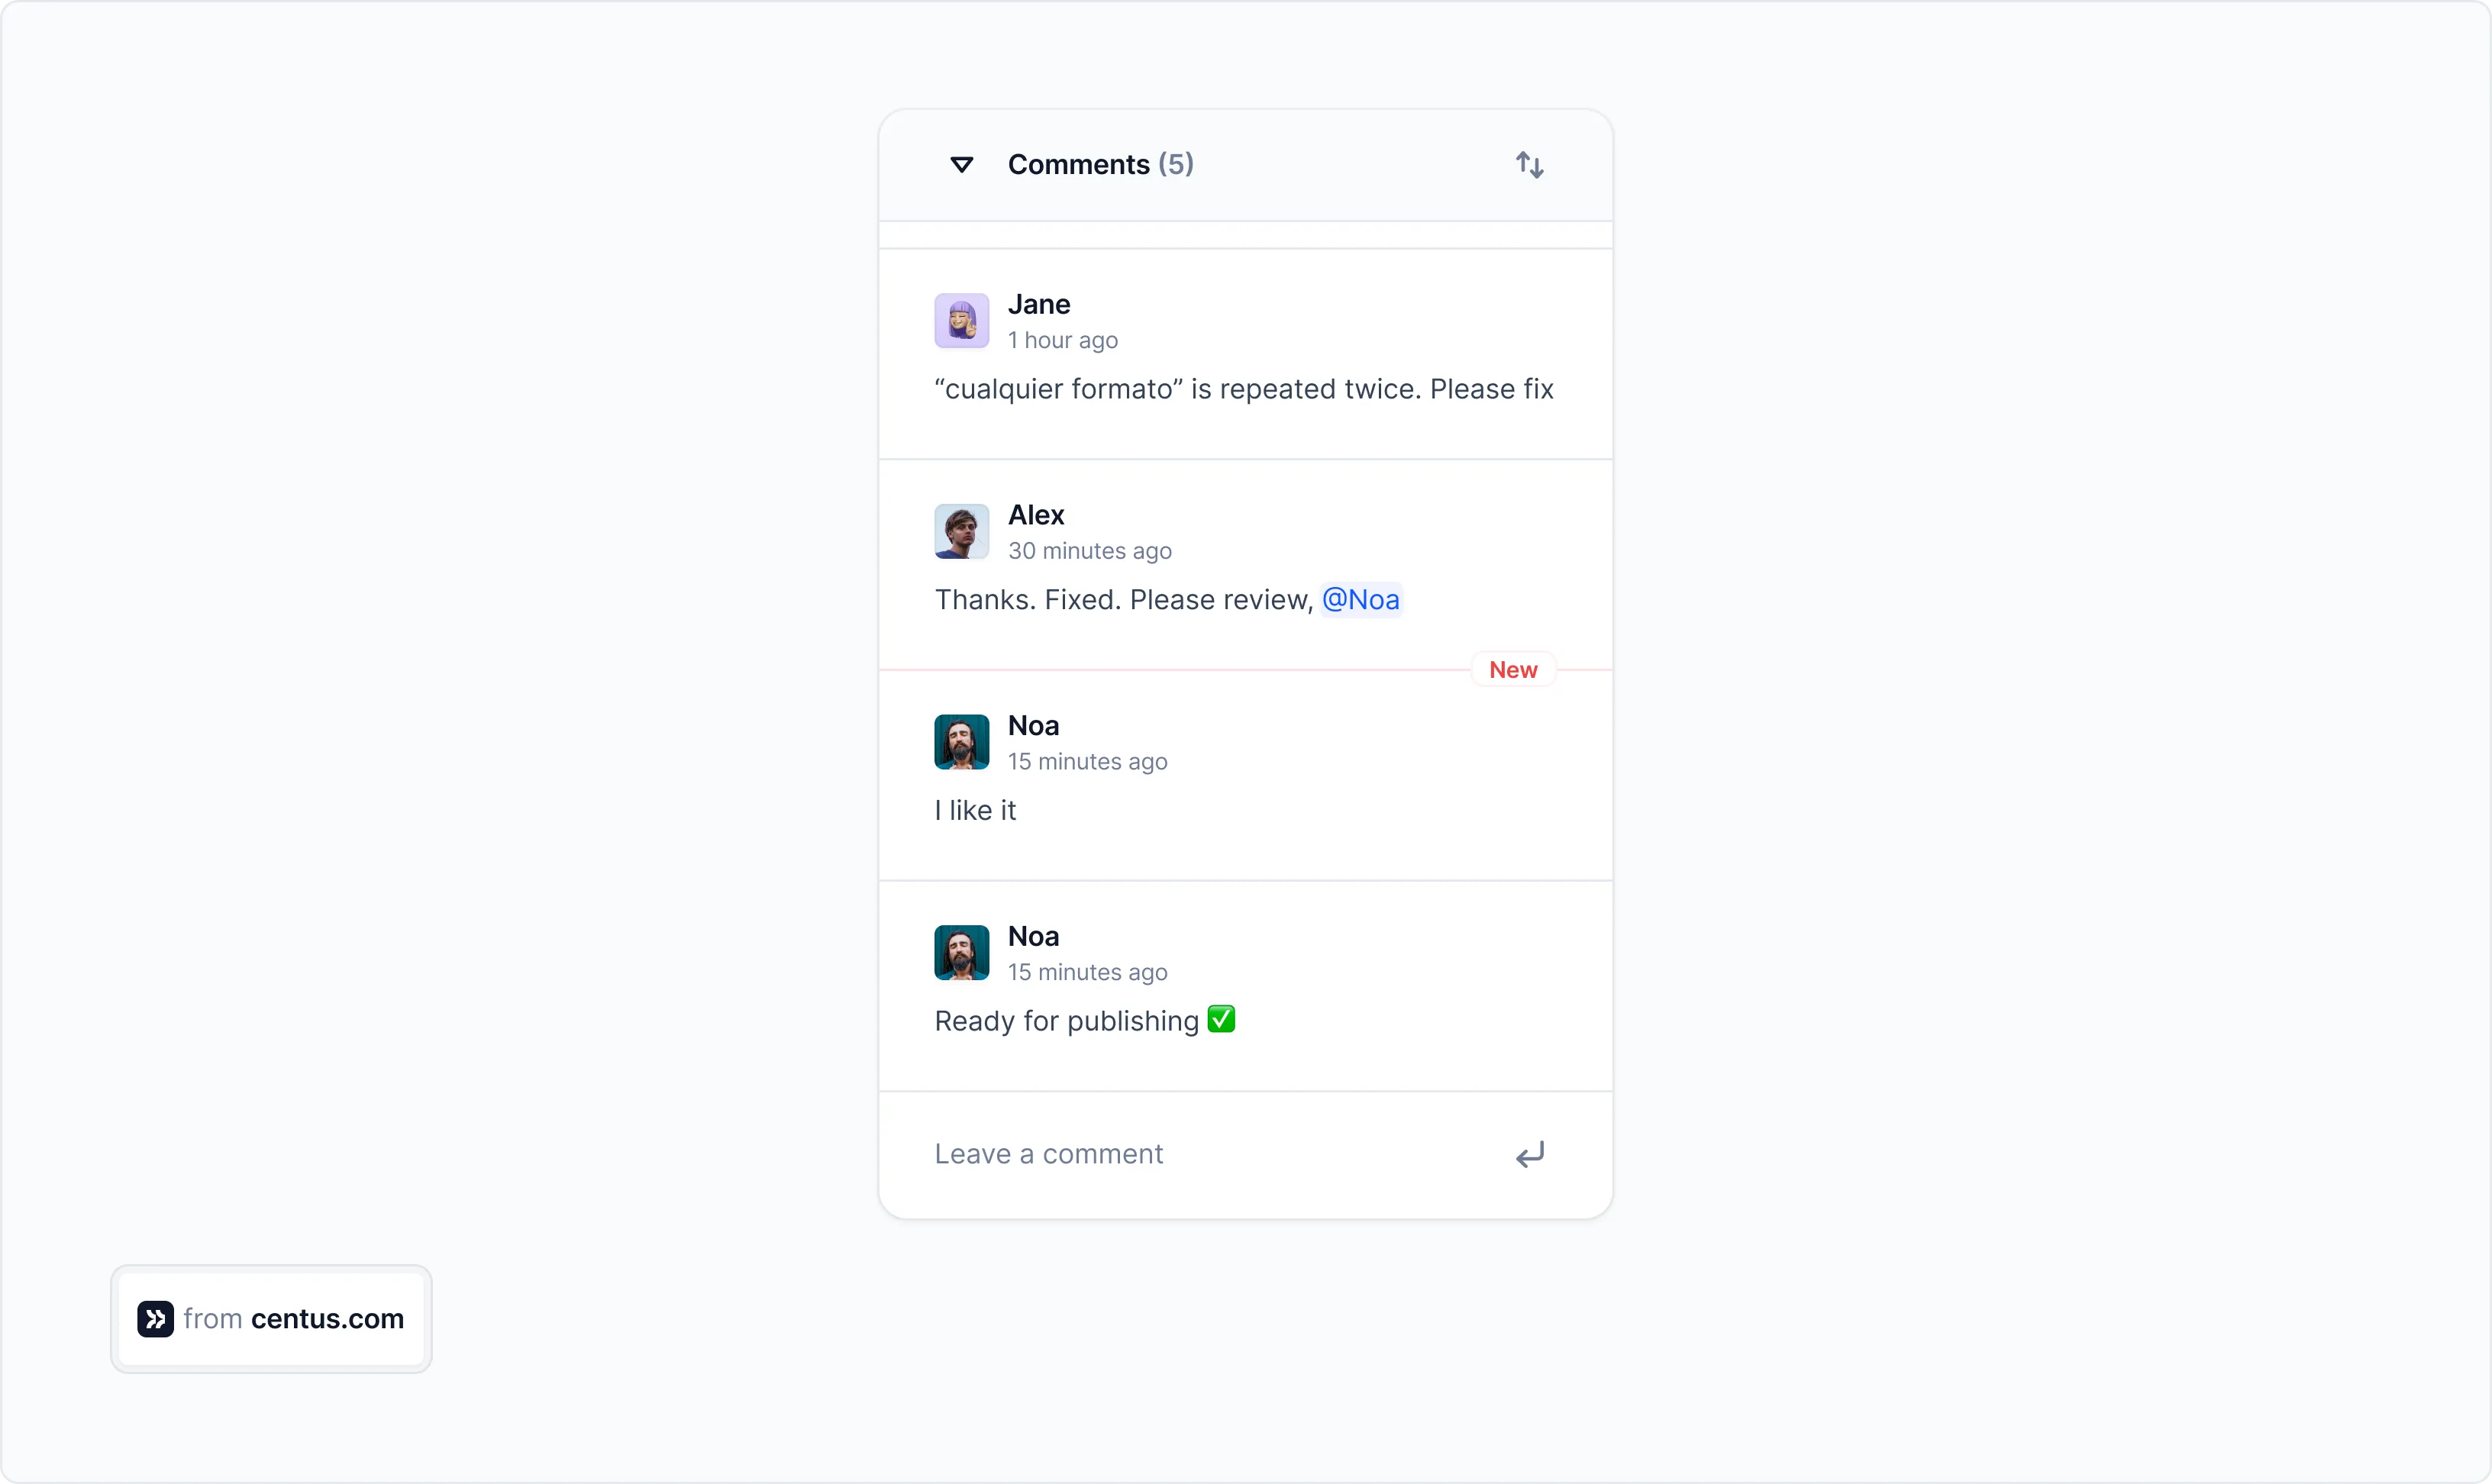
They can also share screenshots and feedback:
Your team will appreciate other translation features Centus has to offer, but since I can’t cover them all here, let me focus on one that could further streamline your app development process.
With Centus, localization issue resolution takes minutes instead of days.
Here’s the regular bug fix workflow:
First, you notice the truncated text in the app. Next, you email your freelance translators, requesting a revision. After waiting for shortened translations, you run regression tests. But what if translations still don’t fit? Back to square one.
This back-and-forth wastes your time, delaying the app's release.
But with Centus, bug-fixing looks like this:
- You notice truncated text in the app.
- You leave a comment for translators directly in Centus.
- Translators make adjustments, and strings are automatically updated via Centus API.
This streamlined bug-fix workflow takes mere minutes.
Sign up for Centus and try it yourself!
Back already?
Your JSON files should be now translated and ready for use. Now, let’s see how to integrate ngx-translate into your application.
Step 4: Integrate ngx-translate into the application setup
This part can get a little messy if you come from an older Angular version. I struggled with fixing this for some time before figuring it all out.
So here’s my attempt at saving your time:
Note: In Angular 18, the HttpClientModule has been deprecated, and it’s now replaced with provideHttpClient().
Specifically, it has been replaced with:
provideHttpClient(withInterceptorsFromDi())
If you’re used to the older versions of Angular, this may be where your localized Angular app breaks. So let’s add this correctly.
In your app.config.ts replace your existing code with the following imports and configuration.
// app.config.ts
import { ApplicationConfig } from '@angular/core';
import { provideHttpClient, withInterceptorsFromDi } from '@angular/common/http';
import { provideTranslateService, TranslateLoader } from '@ngx-translate/core';
import { TranslateHttpLoader } from '@ngx-translate/http-loader';
import { HttpClient } from '@angular/common/http';

export function httpLoaderFactory(http: HttpClient) {
  return new TranslateHttpLoader(http, './assets/i18n/', '.json');
}

export const appConfig: ApplicationConfig = {
  providers: [
    provideHttpClient(withInterceptorsFromDi()),
    provideTranslateService({
      loader: {
        provide: TranslateLoader,
        useFactory: httpLoaderFactory,
        deps: [HttpClient],
      },
      defaultLanguage: 'en'
    })
  ]
};
And in your app.component.ts, import the ngx-translate library and the TranslateModule.
// app.component.ts
import { Component } from '@angular/core';
import { TranslateModule } from '@ngx-translate/core';
import { LanguageSelectorComponent } from './components/language-selector/language-selector.component';

@Component({
  selector: 'app-root',
  standalone: true,
  imports: [TranslateModule, LanguageSelectorComponent],
  templateUrl: './app.component.html',
  styleUrls: ['./app.component.css']
})
export class AppComponent {
  appTitle = 'centus-angular-ngx-localization';  // Added this property
}
You’ll notice I’ve also imported a language-selector component. Let’s create that component now and then finally, we’ll replace all the hard-coded text with the appropriate variables in our HTML file.
Step 5: Creating the language selector
We’ll make a nice-looking language selector now, with the country flags and some CSS styling.
Inside the src/app directory, create a components folder and add the language-selector-component.ts. You could split the file further into an HTML and CSS file, but for the simplicity of this demonstration, I’m keeping it all clubbed together.
// app/components/language-selector/language-selector.component.ts
import { Component } from '@angular/core';
import { CommonModule } from '@angular/common';
import { TranslateService } from '@ngx-translate/core';

@Component({
  selector: 'app-language-selector',
  standalone: true,
  imports: [CommonModule],
  template: `
    <div class="language-selector">
      <button class="selector-button" (click)="toggleDropdown()">
        <span class="flag">{{ getCurrentLanguage().flag }}</span>
        <span class="language-name">{{ getCurrentLanguage().name }}</span>
        <i class="fa fa-chevron-down"></i>
      </button>

      <div class="dropdown-menu" [class.show]="isOpen">
        <button
          *ngFor="let lang of languages"
          class="language-option"
          (click)="switchLanguage(lang.code)"
          [class.active]="isCurrentLanguage(lang.code)"
        >
          <span class="flag">{{ lang.flag }}</span>
          <span class="language-name">{{ lang.name }}</span>
        </button>
      </div>
    </div>
  `,
  styles: [`
    .language-selector {
      position: relative;
      display: inline-block;
    }

    .selector-button {
      display: flex;
      align-items: center;
      gap: 8px;
      padding: 8px 16px;
      background: white;
      border: 1px solid #ddd;
      border-radius: 6px;
      cursor: pointer;
      transition: all 0.2s ease;
    }

    .selector-button:hover {
      background: #f5f5f5;
    }

    .flag {
      font-size: 1.2em;
    }

    .language-name {
      font-weight: 500;
    }

    .dropdown-menu {
      position: absolute;
      top: 100%;
      right: 0;
      margin-top: 4px;
      background: white;
      border: 1px solid #ddd;
      border-radius: 6px;
      box-shadow: 0 2px 8px rgba(0,0,0,0.1);
      display: none;
      z-index: 1000;
    }

    .dropdown-menu.show {
      display: block;
    }

    .language-option {
      display: flex;
      align-items: center;
      gap: 8px;
      width: 100%;
      padding: 8px 16px;
      border: none;
      background: none;
      cursor: pointer;
      text-align: left;
    }

    .language-option:hover {
      background: #f5f5f5;
    }

    .language-option.active {
      background: #e6f3ff;
    }
  `]
})
export class LanguageSelectorComponent {
  languages = [
    { code: 'en', name: 'English', flag: '🇬🇧' },
    { code: 'es', name: 'Español', flag: '🇪🇸' }
 ];

  isOpen = false;

  constructor(private translate: TranslateService) {
    const browserLang = translate.getBrowserLang();
    this.translate.setDefaultLang('en');
    this.translate.use(browserLang?.match(/en|es/) ? browserLang : 'en');
  }

  getCurrentLanguage() {
    return this.languages.find(lang => lang.code === this.translate.currentLang) || this.languages[0];
  }

  isCurrentLanguage(code: string): boolean {
    return code === this.translate.currentLang;
  }

  toggleDropdown(): void {
    this.isOpen = !this.isOpen;
  }

  switchLanguage(langCode: string): void {
    this.translate.use(langCode);
    this.isOpen = false;
  }
}
Awesome! Now we’re on to the final step for modifying our HTML file.
Step 6: Adding dynamic translation keys to the HTML
I’ve already created the required translation key-value pairs for all of our translateable texts. Now we need to use those keys in the HTML.
Here’s what my modified HTML looks like:
<link rel="stylesheet" href="https://cdnjs.cloudflare.com/ajax/libs/font-awesome/4.7.0/css/font-awesome.min.css">

<div class="container">
  <app-language-selector class="language-selector-position"></app-language-selector>

  <h1>{{ 'CENTUS.TITLE' | translate }}</h1>
  <p>{{ 'CENTUS.DESCRIPTION' | translate }}</p>

  <div class="button-group">
    <button class="cta-button">
      <i class="fa fa-rocket"></i>
      {{ 'CENTUS.BUTTONS.TRY_FREE' | translate }}
    </button>
    <button class="cta-button">
      <i class="fa fa-calendar"></i>
      {{ 'CENTUS.BUTTONS.BOOK_DEMO' | translate }}
    </button>
  </div>
</div>
You’ll notice I’ve also added the language selector module with this line:
<app-language-selector class="language-selector-position"></app-language-selector>
With this, our component is ready to be used now!
Since we’ve already added the logic to switch languages based on the selected language, if you refresh the page, you should see the language selected at the top.
And switching the language should work now, as in the below gif:

Now we’re all set to move to the advanced localization for our Angular 18 app.
Advanced Angular localization techniques
While the basics are all set, and you can keep adding as many text snippets, languages, and translation strings to our app, there’s a lot more left.
We now need to narrow down on the localization aspect of our Angular app translation.
That means formatting dates and times, numbers and currencies, gendered words, and plurals.
But first, I want to add a feature to improve user experience.
Adding language persistence
You’ll notice that our Angular app defaults to the language set in the browser when we refresh the page, even if another language is selected.
That’s a bad user experience since they’ve already picked a language and the Angular app should remember it. .
To achieve that, store the selected language in local storage. Then, on app initialization, we’ll load that stored language.
Edit the language selector component and update the constructor with the following code:
constructor(private translate: TranslateService) {
    this.translate.setDefaultLang('en');

    const storedLang = localStorage.getItem('lang');
    if (storedLang && (storedLang === 'en' || storedLang === 'es')) {
      this.translate.use(storedLang);
    } else {
      const browserLang = this.translate.getBrowserLang();
      this.translate.use(browserLang?.match(/en|es/) ? browserLang : 'en');
    }
  }

  getCurrentLanguage() {
    return this.languages.find(lang => lang.code === this.translate.currentLang) || this.languages[0];
  }

  isCurrentLanguage(code: string): boolean {
    return code === this.translate.currentLang;
  }

  toggleDropdown(): void {
    this.isOpen = !this.isOpen;
  }

  switchLanguage(langCode: string): void {
    this.translate.use(langCode);
    localStorage.setItem('lang', langCode);
    this.isOpen = false;
  }
What I’ve done is added an if…else block to check if we have a stored language first, and if not, then default to the browser language, and if that’s not available, our app falls back to English.
That’s it. You can select a different language now and refresh the page to see that the language persists.
Handling genders and plurals in Angular
Pluralization and gender-based translations use ICU Message Syntax, natively supported by ngx-translate.
This gives you clarity and flexibility for localized text. First, let’s add some greetings and pluralized sentences to our JSON files.
// en.json

"MESSAGES": {
      "GREETINGS": {
        "male": "Hello Mr. {username}!",
        "female": "Hello Ms. {username}!",
        "nonbinary": "Hello Mx. {username}!",
        "agender": "Hello Mx. {username}!",
        "other": "Hello  {username}!"
      },
      "NOTIFICATIONS": {
        "zero": "You have no notifications",
        "one": "You have 1 notification",
        "two": "You have a pair of notifications",
        "few": "You have {count} notifications",
        "many": "You have {count} notifications",
        "other": "You have {count} notifications"
      }
    }
Now, let’s update our app.component.ts to use these key-value pairs appropriately.
import { Component } from '@angular/core';
import { FormsModule } from '@angular/forms';
import { TranslateModule } from '@ngx-translate/core';
import { TranslateService } from '@ngx-translate/core';
import { LanguageSelectorComponent } from './components/language-selector/language-selector.component';

@Component({
  selector: 'app-root',
  standalone: true,
  imports: [TranslateModule, LanguageSelectorComponent, FormsModule],
  templateUrl: './app.component.html',
  styleUrls: ['./app.component.css']
})
export class AppComponent {
  gender = 'male'; // Default gender
  notificationCount = 0; // Default notification count
  username = 'John';

  constructor(private translate: TranslateService) {}

  getGreeting(username: string): string {
    const genderKey = this.gender;
    const greetings = this.translate.instant('CENTUS.MESSAGES.GREETINGS');
    const template = greetings[genderKey] || greetings['other'];
    return template.replace('{username}', username);
  }

  getNotificationMessage(): string {
    const count = this.notificationCount;
    const notifications = this.translate.instant('CENTUS.MESSAGES.NOTIFICATIONS');

    if (count === 0) {
      return notifications['zero'];
    } else if (count === 1) {
      return notifications['one'];
    } else if (count === 2) {
      return notifications['two'];
    } else if (count >= 3 && count <= 5) {
      return notifications['few'].replace('{count}', count.toString());
    } else if (count > 5) {
      return notifications['many'].replace('{count}', count.toString());
    } else {
      return notifications['other'].replace('{count}', count.toString());
    }
  }
}
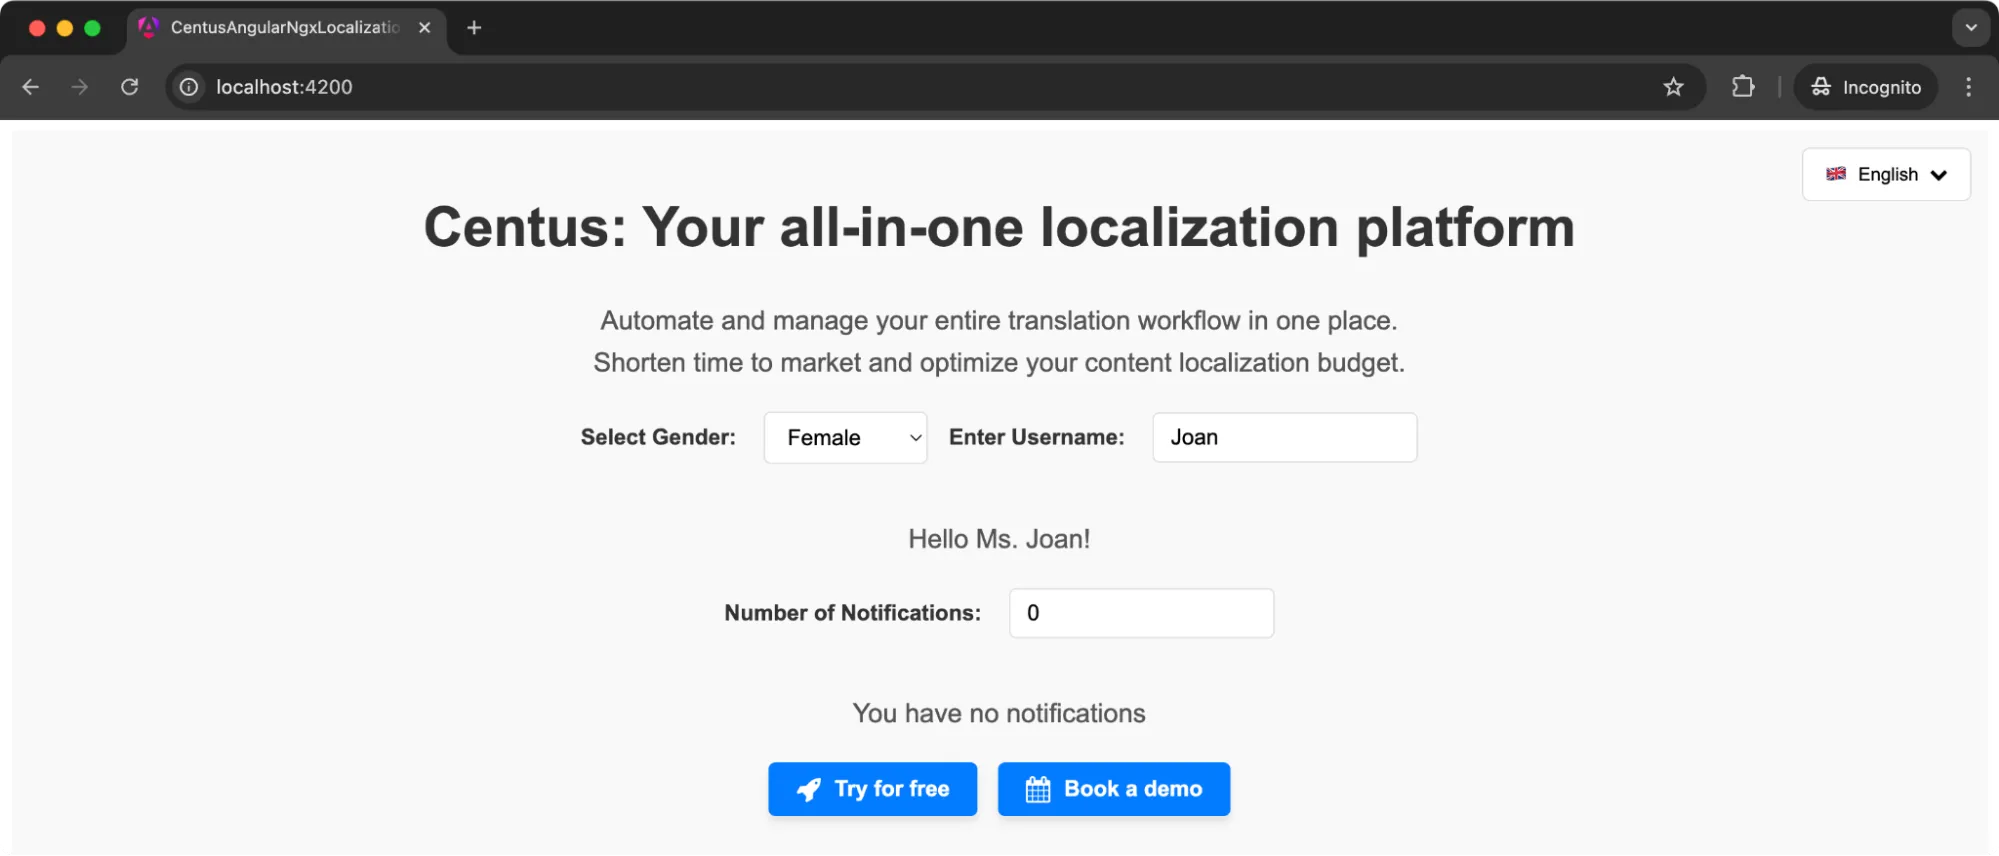
To add this to our HTML page, you can create a dropdown like this one with an option to select the gender and add a username to see the updated pluralized sentence.
<!-- Form Section -->
<div class="label-group">
  <label for="gender">Select Gender:</label>
  <select id="gender" [(ngModel)]="gender">
    <option value="male">Male</option>
    <option value="female">Female</option>
    <option value="nonbinary">Nonbinary</option>
    <option value="agender">Agender</option>
    <option value="other">Other</option>
  </select>

  <label for="username">Enter Username:</label>
  <input
    id="username"
    type="text"
    [(ngModel)]="username"
    placeholder="Your name"
  />
</div>

<!-- Translated Greeting -->
<p>{{ getGreeting(username) }}</p>

<!-- Notification Section -->
<div class="label-group">
  <label for="notifications">Number of Notifications:</label>
  <input
    id="notifications"
    type="number"
    [(ngModel)]="notificationCount"
    min="0"
  />
</div>
<p>{{ getNotificationMessage() }}</p>
And here’s some styling to make it all look pretty:
/* Form container for gender and username */
.label-group {
  display: flex;
  flex-wrap: wrap;
  justify-content: center;
  gap: 15px;
  align-items: center;
  margin-bottom: 20px;
}

.label-group label {
  font-size: 1rem;
  font-weight: 600;
  color: #333;
  margin-right: 5px;
}

.label-group select,
.label-group input {
  padding: 8px 12px;
  font-size: 1rem;
  border: 1px solid #ddd;
  border-radius: 5px;
  outline: none;
  transition: box-shadow 0.3s;
}

.label-group select:hover,
.label-group input:hover {
  box-shadow: 0 0 5px rgba(0, 0, 0, 0.2);
}
Once you refresh your page, it should look something like this:
For formatting dates, numbers, and currencies, you can easily use the Intl.DateTimeFormat and Intl.NumberFormat methods and display the required values on the front-end.
You can’t just add a lot of translations to your file and expect the app to work flawlessly.
The added load can negatively affect your performance and you need to carefully optimize the app to handle translations.
Caching translation files for better app performance
If you keep fetching the same JSON files repeatedly, it wastes bandwidth and time. Caching saves this added effort for your app.
Most browsers cache static assets by default, but ngx-translate offers ways to integrate with custom caching strategies or use service workers for advanced caching.
Here’s a simple approach:
- Make sure the server sets proper cache headers for JSON files.
- Service workers can store translation files so that the next time the application runs offline or on a slow connection, translations load instantly.
For more control, create a custom loader. The loader can store fetched translations in memory or in IndexedDB. Subsequent requests for translations check the cache first before hitting the server.
Example of a custom loader:
import { TranslateLoader } from '@ngx-translate/core';
import { HttpClient } from '@angular/common/http';
import { Observable, of } from 'rxjs';

export class CustomCacheLoader implements TranslateLoader {
  private cache: { [lang: string]: any } = {};

  constructor(private http: HttpClient) {}

  getTranslation(lang: string): Observable<any> {
    if (this.cache[lang]) {
      return of(this.cache[lang]);
    } else {
      return new Observable(observer => {
        this.http.get(`assets/i18n/${lang}.json`).subscribe((res: any) => {
          this.cache[lang] = res;
          observer.next(res);
          observer.complete();
        });
      });
    }
  }
}
This custom loader checks a local cache first. If absent, it fetches from the server, stores it, and then returns it. From here on, any future requests for the same language return instantly.
Lazy loading translations
Sometimes translation files can become quite large, or maybe you only want to load ngx-translate supports lazy loading, meaning that translation files load on demand.
For large applications, consider creating separate translation files per module and loading them as the module is accessed.
The TranslateHttpLoader can point to different endpoints, or custom logic can dynamically select a translation file. For example, if a user navigates to a feature module, load that module’s translation file at that moment. This can reduce initial load time.
A possible approach:
-
Create separate files, such as en-feature.json and es-feature.json.
-
When a module loads, call translateService.setTranslation(language, translationObject, merge=true) to merge those translations into the existing ones.
Here’s what you’d do:
// After fetching the module-specific translation file (e.g., via HttpClient)
this.http.get(`assets/i18n/${currentLang}-feature.json`).subscribe(translations => {
  this.translate.setTranslation(currentLang, translations, true);
});
The third parameter true, merges new translations with the existing ones. This strategy means only the main translations load at startup.
Additional translations load lazily, improving initial load performance.
Handling missing translations
Sometimes a translation key might be missing from a particular language file. The UI would show a blank or the key itself, which is not ideal.
ngx-translate provides a MissingTranslationHandler to deal with missing keys. Implementing a handler can log warnings or provide fallback text. For example:
import { MissingTranslationHandler, MissingTranslationHandlerParams } from '@ngx-translate/core';

export class MyMissingTranslationHandler implements MissingTranslationHandler {
  handle(params: MissingTranslationHandlerParams) {
    // Log a warning or provide a fallback
    console.warn(`Missing translation for key: ${params.key}`);
    return `**${params.key}**`;
  }
}
Include this handler in the providers:
provideTranslateService({
  loader: { /* ... */ },
  defaultLanguage: 'en',
  missingTranslationHandler: {
    provide: MissingTranslationHandler,
    useClass: MyMissingTranslationHandler
  }
})
When a key is not found, the handler logs a warning and returns a placeholder. This prevents the UI from silently failing.
Integrating ngx-translate with standalone components
Newer Angular versions favor standalone components, which do not rely on modules. ngx-translate works fine with standalone components. The TranslateModule can be imported directly into the component’s imports array in the @Component decorator.
Example:
import { Component } from '@angular/core';
import { TranslateModule } from '@ngx-translate/core';

@Component({
  standalone: true,
  selector: 'my-feature-component',
  imports: [TranslateModule],
  template: `<p>{{ 'FEATURE.INTRO' | translate }}</p>`
})
export class MyFeatureComponent {}
As long as the application is bootstrapped with the correct providers (from app.config.ts), translations remain accessible in all standalone components.
The TranslateService can also be injected directly into these components if needed. Nothing special is required besides making sure the configuration is applied globally.
Ready to localize your Angular apps?
With Angular and ngx-translate, you now have the tools to build apps that speak directly to your audience, no matter where they are. From dynamic translations to formatting dates and currencies, we’ve covered the steps to make your application truly global.
But let’s face it: internationalizing your app is far more exciting than managing Angular translations. Especially, as the app grows.
That’s where Centus can help. Centus simplifies the translation process, letting you focus on building while it handles the complexities of localization. Whether you’re working solo or with a team, Centus can make a huge difference.
So, why not give it a try? Sign up now and see how Centus can make localization the easiest part of your development workflow.
Happy localizing!
Get the week's best content!
By subscribing, you are agreeing to have your personal information managed in accordance with the terms of Centus Privacy Policy ->
Keep learning
23 min. read
Angular Localization and Internationalization (i18n) Guide
19 min. read
NextJS Internationalization: A Complete Walkthrough
21 min. read
Nuxt i18n and Localization: Make Your App Multilingual

21 min. read
React App Localization and i18n: Advanced Guide
18 min. read
JavaScript Localization Guide for Web Apps
19 min. read