You already know why React internationalization is important. So I’ll skip that part.
But the thing with React is that there are many libraries you can use for internationalization.
I’ve already covered React i18next and native localization, but it does become difficult to choose the right one, especially since it’s a long term commitment.
I was in search of something that was feature-rich and easy to implement without being a resource hog. And react-intl seems to fit the bill.
So today I’ll show you how to perform React internationalization with the react-intl library.
But first, the basics:
React-i18next vs react-intl for internationalization
react-i18next offers greater flexibility, dynamic translation management, and a plugin-driven architecture, making it ideal for interactive, modern React applications. It supports advanced features, excellent TypeScript integration, and minimal setup without relying on Babel plugins.
react-intl, on the other hand, follows a standards-based approach using ICU MessageFormat and the browser's built-in Intl API. It’s leaner, easier to integrate, and well-suited for enterprise teams prioritizing standardization, message extraction, and smaller bundle sizes.
Key Differences:
- Flexibility: react-i18next is highly customizable; react-intl adheres to standards.
- Formatting: react-i18next uses a custom interpolation API; react-intl uses ICU MessageFormat.
- Ecosystem: react-i18next offers more plugins and add-ons.
- Simplicity: react-intl provides simpler setup with standardized formatting.
When to Choose:
- Choose react-i18next for rich features, dynamic UIs, and flexibility.
- Choose react-intl for standardization, enterprise TMS workflows, and smaller bundle size.
Both libraries effectively support React internationalization—the right choice depends on your app’s complexity, team preferences, and i18n strategy.
Where the problem begins: A single-language app
Most React apps begin with perfectly functional code, but if you ever want to scale the app to multiple languages, it becomes a larger-scale project because you never built the app to be localization ready.
All the strings are hard-coded and now, you might as well create the app from scratch to localize it!
import React from 'react';
import './UserProfile.css';

function UserProfile() {
  const user = {
    name: 'John Doe',
    joinDate: new Date(2023, 3, 15),
    visitCount: 42,
    lastActive: new Date(Date.now() - 3600000 * 24 * 3) // 3 days ago
  };

  return (
    <div className="user-profile">
      <h1>User Profile</h1>
      <div className="profile-card">
        <h2>Welcome back, {user.name}!</h2>
        <p>You joined on April 15, 2023</p>
        <p>You have visited 42 times</p>
        <p>Last active 3 days ago</p>
        <button>Edit Profile</button>
        <button>Change Password</button>
      </div>
    </div>
  );
}

export default UserProfile;
This is what the app would look like if you run it with some CSS styling.
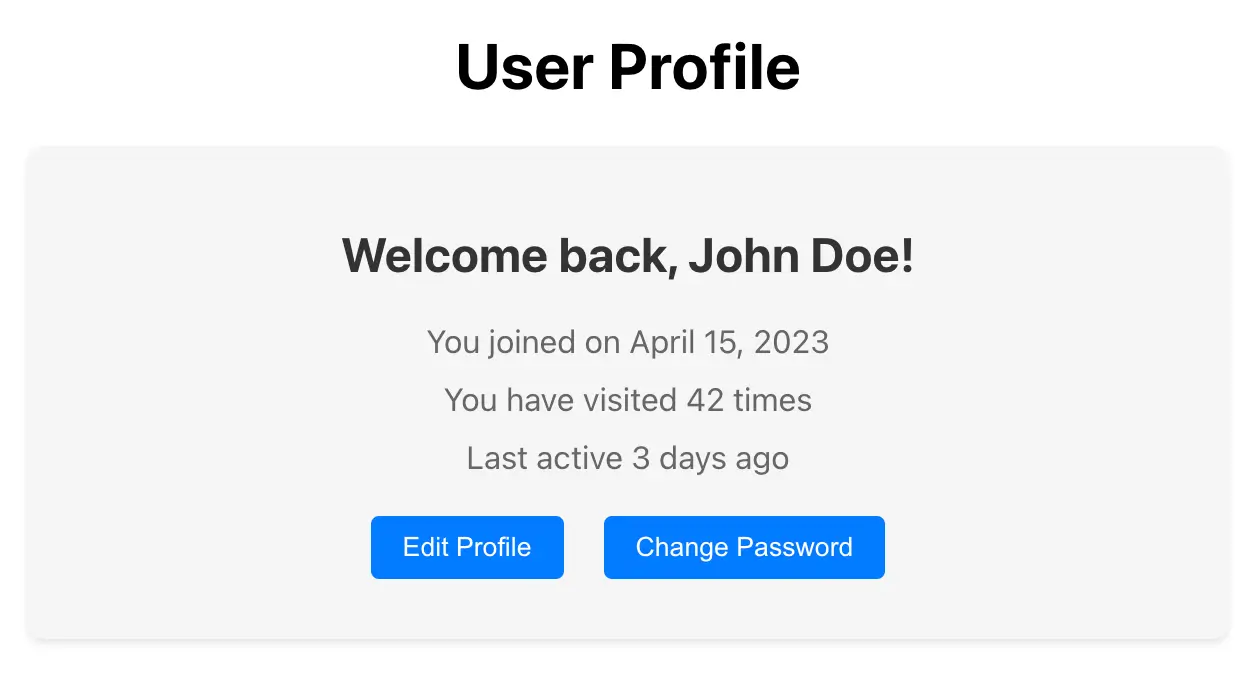
The app works. It shows the profile details. But imagine taking it global! That would require a complete overhaul and a lot of changes to the code.
And while most apps start here, yours doesn't have to.
This is my simple step-by-step process to help you set up your app for internationalization and localization.
App localization with React-intl
Step 1: Setting up react-intl (The foundation)
First things first, we need to get the react-intl packages installed. So, grab the package with the following command:
npm install react-intl
# or if you're on the yarn train
yarn add react-intl
Also to keep the project organized, I have created this simple folder structure:
src/
├── components/
│   └── UserProfile.js
├── locales/
│   ├── en.json
│   ├── es.json
│   └── fr.json
├── App.js
└── index.js
Make sure that you have your directory structure set up exactly as I have shown here. If you're starting from scratch. If not, try to match the structure with your existing application.
Step 2: Creating translation files
Next, I'm going to be creating some translation files.
I love the JSON format for handling translation files because it’s just something I’ve gotten used to over the years. But you could go ahead and use XML or PO files depending on your application requirements and how you prefer to handle translations.
Each language gets its own translation file. In the case of JSON, these translation files are just dictionaries mapping message IDs to translated strings.
Here are two translation files that I'll be using. Feel free to create more based on the requirements and make sure that you keep the translation keys exactly as they are across all the files.
src/locales/en.json:
{
  "app.title": "My React App",
  "profile.title": "User Profile",
  "profile.welcome": "Welcome back, {name}!",
  "profile.joinDate": "You joined on {date}",
  "profile.visitCount": "You have visited {count} {count, plural, one {time} other {times}}",
  "profile.lastActive": "Last active {relative}",
  "profile.editButton": "Edit Profile",
  "profile.passwordButton": "Change Password"
}
src/locales/es.json:
{
  "app.title": "Mi Aplicación React",
  "profile.title": "Perfil de Usuario",
  "profile.welcome": "¡Bienvenido de nuevo, {name}!",
  "profile.joinDate": "Te uniste el {date}",
  "profile.visitCount": "Has visitado {count} {count, plural, one {vez} other {veces}}",
  "profile.lastActive": "Última actividad hace {relative}",
  "profile.editButton": "Editar Perfil",
  "profile.passwordButton": "Cambiar Contraseña"
}
src/locales/fr.json:
{
    "app.title": "Mon Application React",
    "profile.title": "Profil Utilisateur",
    "profile.welcome": "Bon retour, {name} !",
    "profile.joinDate": "Vous avez rejoint le {date}",
    "profile.visitCount": "Vous avez visité {count} {count, plural, one {fois} other {fois}}",
    "profile.lastActive": "Dernière activité il y a {relative}",
    "profile.editButton": "Modifier le Profil",
    "profile.passwordButton": "Changer le Mot de Passe"
  }
Now you'll notice there is more to these translation files than just text.
They also support dynamic variables within the text. For example, the name, count, and date, are all variables that we can pass to these files while fetching the translation values.
And of course there is more to pluralization and genders that I’ll discuss in just a bit.
Step 3: The IntlProvider
Alright, now we need to change our app to use these translation files.
How do we do that? We’ll replace the hard-coded English strings with the translation keys and fetch the data from the translation files into the app front-end.
The IntlProvider is the component that makes this translation magic happen throughout your app.
src/index.js
import React from 'react';
import ReactDOM from 'react-dom/client';
import './index.css';
import App from './App';
import reportWebVitals from './reportWebVitals';
import { IntlProvider } from 'react-intl';

// Import locale data
import enMessages from './locales/en.json';
import esMessages from './locales/es.json';
import frMessages from './locales/fr.json';

const messages = {
  'en': enMessages,
  'es': esMessages,
  'fr': frMessages
};

// Get the user's browser language or fall back to English
const userLocale = navigator.language.split('-')[0] || 'en';

const root = ReactDOM.createRoot(document.getElementById('root'));
root.render(
  <React.StrictMode>
    <IntlProvider
      locale={userLocale}
      messages={messages[userLocale] || messages.en}
      defaultLocale="en"
    >
      <App />
    </IntlProvider>
  </React.StrictMode>
);

// If you want to start measuring performance in your app, pass a function
// to log results (for example: reportWebVitals(console.log))
// or send to an analytics endpoint. Learn more: https://bit.ly/CRA-vitals
reportWebVitals();
I’m simply telling index.js where to import the language translation values from first. This code snippet also wraps your entire app in a translation context.
Now any component can tap into the current language's messages.
Step 4: Refactoring components
Here comes the fun part. We have to replace all the hard-coded strings in the React web app frontend with the translatable components and the variables, the keys that we created in our translation files.
src/components/UserProfile.js
import React from 'react';
import {
  FormattedMessage,
  FormattedDate,
  FormattedNumber,
  FormattedRelativeTime,
  useIntl
} from 'react-intl';
import './UserProfile.css';

function UserProfile() {
  const intl = useIntl();
  const user = {
    name: 'John Doe',
    joinDate: new Date(2023, 3, 15),
    visitCount: 42,
    lastActive: new Date(Date.now() - 3600000 * 24 * 3) // 3 days ago
  };

  // Calculate relative time in days
  const daysDiff = Math.round(
    (user.lastActive.getTime() - Date.now()) / (1000 * 60 * 60 * 24)
  );

  return (
    <div className="user-profile">
      <h1>
        <FormattedMessage id="profile.title" defaultMessage="User Profile" />
      </h1>
      <div className="profile-card">
        <h2>
          <FormattedMessage
            id="profile.welcome"
            defaultMessage="Welcome back, {name}!"
            values={{ name: user.name }}
          />
        </h2>
        <p>
          <FormattedMessage
            id="profile.joinDate"
            defaultMessage="You joined on {date}"
            values={{
              date: intl.formatDate(user.joinDate, {
                year: 'numeric',
                month: 'long',
                day: 'numeric'
              })
            }}
          />
        </p>
        <p>
          <FormattedMessage
            id="profile.visitCount"
            defaultMessage="You have visited {count} {count, plural, one {time} other {times}}"
            values={{ count: user.visitCount }}
          />
        </p>
        <p>
          <FormattedMessage
            id="profile.lastActive"
            defaultMessage="Last active {relative}"
            values={{
              relative: (
                <FormattedRelativeTime
                  value={daysDiff}
                  unit="day"
                  numeric="auto"
                />
              )
            }}
          />
        </p>
        <button>
          <FormattedMessage id="profile.editButton" defaultMessage="Edit Profile" />
        </button>
        <button>
          <FormattedMessage id="profile.passwordButton" defaultMessage="Change Password" />
        </button>
      </div>
    </div>
  );
}

export default UserProfile;
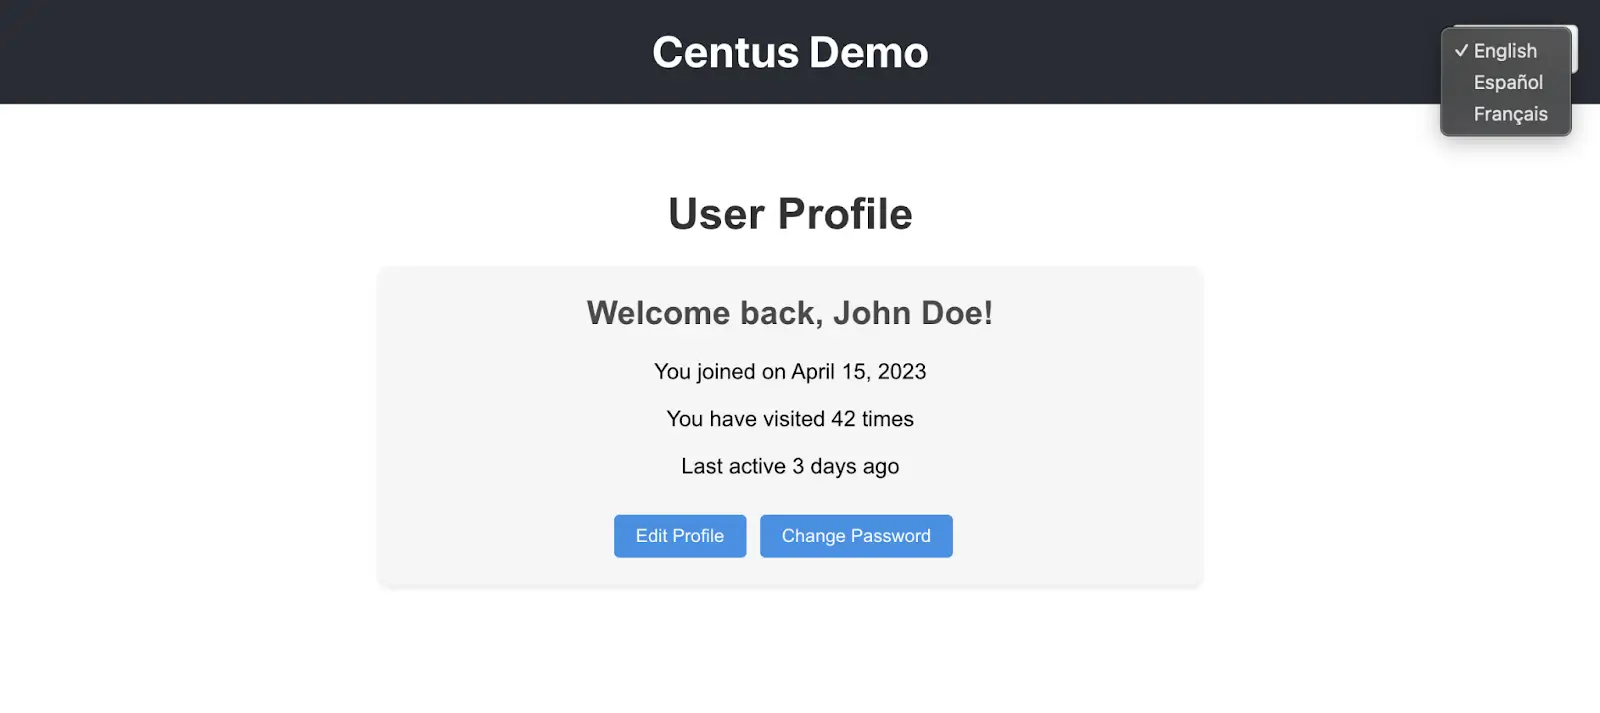
If you set this up right, you should have a completely translated application that also has a language switcher at the top. In my case, the language switcher only has English and Spanish. You can add as many options and drop down menus as your app requires.
At the moment, the app still looks the exact same. You would still get the English text as the output and you would not notice any change except the app is completely different behind the scenes. Let's add a language switcher so that we can see the change in real time.
Step 5: Adding a language switcher
For this demonstration, I'm going to add an extremely simple language switcher drop-down, which includes all the locales we support. Selecting any one of the locales will automatically switch the language of the app.
src/components/LanguageSwitcher.js
import React from 'react';
import './LanguageSwitcher.css';

function LanguageSwitcher({ currentLocale, onLocaleChange }) {
  const languages = [
    { code: 'en', name: 'English' },
    { code: 'es', name: 'Español' },
    { code: 'fr', name: 'Français' }
  ];

  return (
    <div className="language-switcher">
      <select
        value={currentLocale}
        onChange={(e) => onLocaleChange(e.target.value)}
        className="language-select"
      >
        {languages.map(lang => (
          <option key={lang.code} value={lang.code}>
            {lang.name}
          </option>
        ))}
      </select>
    </div>
  );
}

export default LanguageSwitcher;
src/components/LanguageSwitcher.css
.language-switcher {
    position: absolute;
    top: 20px;
    right: 20px;
  }

  .language-select {
    padding: 8px;
    border-radius: 4px;
    border: 1px solid #ccc;
    background-color: white;
    font-size: 14px;
    cursor: pointer;
  }
Your app.js also changes a little bit to accommodate the new languages which are here.
import React, { useState, useEffect } from 'react';
import './App.css';
import UserProfile from './components/UserProfile';
import LanguageSwitcher from './components/LanguageSwitcher';
import { FormattedMessage, IntlProvider } from 'react-intl';

// Import locale data
import enMessages from './locales/en.json';
import esMessages from './locales/es.json';
import frMessages from './locales/fr.json';

const messages = {
  'en': enMessages,
  'es': esMessages,
  'fr': frMessages
};

function App() {
  // Get saved language preference or default to browser language
  const getSavedLocale = () => {
    const savedLocale = localStorage.getItem('locale');
    return savedLocale || navigator.language.split('-')[0] || 'en';
  };

  const [locale, setLocale] = useState(getSavedLocale());

  // Save locale preference
  useEffect(() => {
    localStorage.setItem('locale', locale);
  }, [locale]);

  return (
    <IntlProvider
      locale={locale}
      messages={messages[locale] || messages.en}
      defaultLocale="en"
    >
      <div className="App">
        <header className="App-header">
          <h1><FormattedMessage id="app.title" defaultMessage="My React App" /></h1>
          <LanguageSwitcher
            currentLocale={locale}
            onLocaleChange={setLocale}
          />
        </header>
        <main>
          <UserProfile />
        </main>
      </div>
    </IntlProvider>
  );
}

export default App;
And finally we make a small change to the index.js file.
import React from 'react';
import ReactDOM from 'react-dom/client';
import './index.css';
import App from './App';
import reportWebVitals from './reportWebVitals';

const root = ReactDOM.createRoot(document.getElementById('root'));
root.render(
  <React.StrictMode>
    <App />
  </React.StrictMode>
);

reportWebVitals();
Let's run the app again:
Congratulations! If you have followed me through this step, you have a fully translated app with the language switcher ready.
Now we can proceed to some advanced localization techniques.
Advanced localization techniques for React applications
Once you have the basics working, react-intl has some seriously powerful features to handle complex language situations.
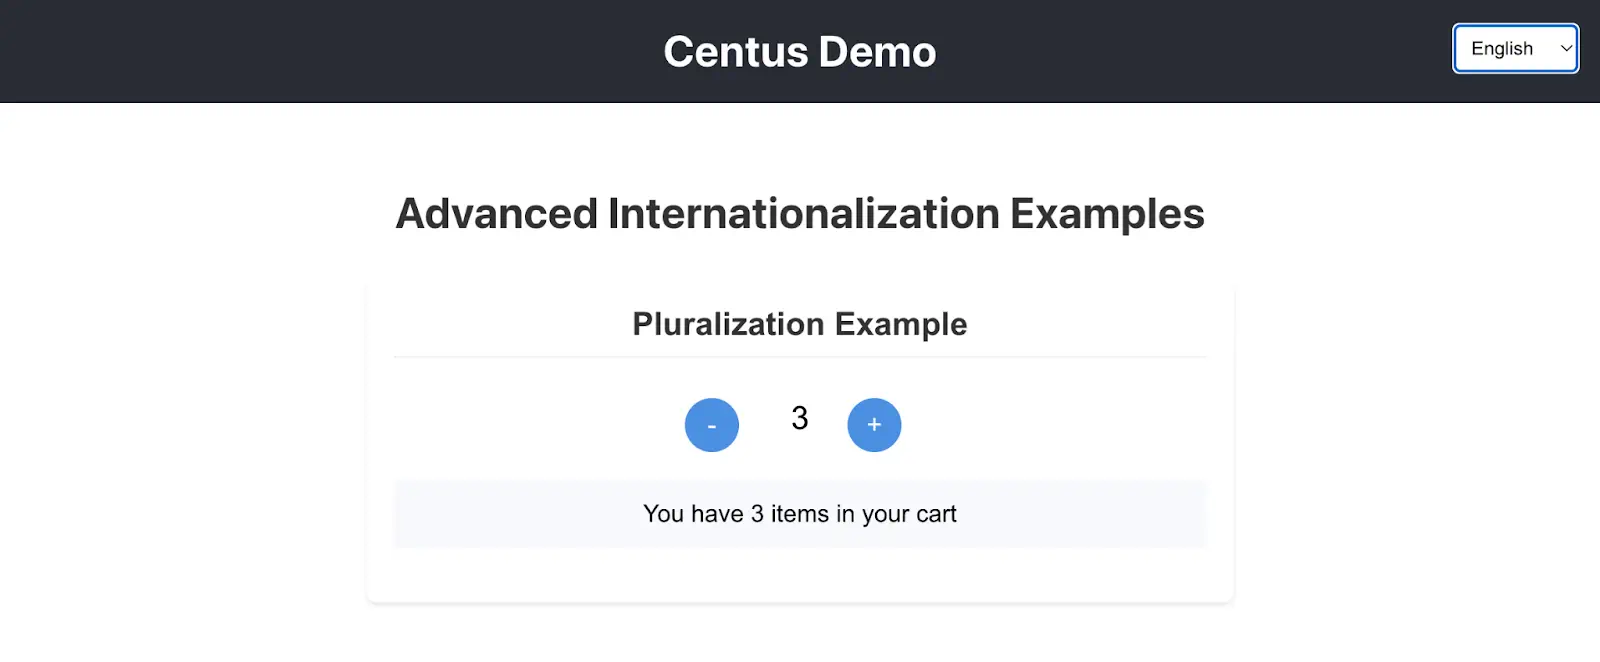
Pluralization
Different languages handle plurals very differently. English has two forms (singular and plural), but other languages can have multiple forms based on quantity. React-intl handles this complexity.
src/components/PluralExample.js
import React, { useState } from 'react';
import { FormattedMessage } from 'react-intl';
import './PluralExample.css';

function PluralExample() {
  const [itemCount, setItemCount] = useState(1);

  const decreaseCount = () => {
    if (itemCount > 0) {
      setItemCount(itemCount - 1);
    }
  };

  const increaseCount = () => {
    setItemCount(itemCount + 1);
  };

  return (
    <div className="plural-example">
      <h2>Pluralization Example</h2>

      <div className="counter-controls">
        <button className="counter-button" onClick={decreaseCount}>-</button>
        <span className="counter-value">{itemCount}</span>
        <button className="counter-button" onClick={increaseCount}>+</button>
      </div>

      <div className="message-box">
        <FormattedMessage
          id="examples.plural.items"
          defaultMessage="You have {count, plural,
            =0 {no items}
            one {# item}
            other {# items}
          } in your cart"
          values={{ count: itemCount }}
        />
      </div>
    </div>
  );
}

export default PluralExample;
I've also added a little bit of CSS to make these examples look great. You can choose to skip them
For extensibility, I'm also creating an AdvancedExamples.js file that I'll import, so it becomes easier for us to add more examples throughout this tutorial.
import React from 'react';
import PluralExample from './PluralExample';
import './AdvancedExamples.css';

function AdvancedExamples() {
  return (
    <div className="advanced-examples">
      <h1>Advanced Internationalization Examples</h1>
      <PluralExample />
      {/* We'll add more examples here later */}
    </div>
  );
}

export default AdvancedExamples;
You need to modify the app.js file to display the plurals.
... Rest of the code ...

<main>
  <AdvancedExamples />
</main>

... Rest of the code ...
Here's what the output looks like when you run the application again.
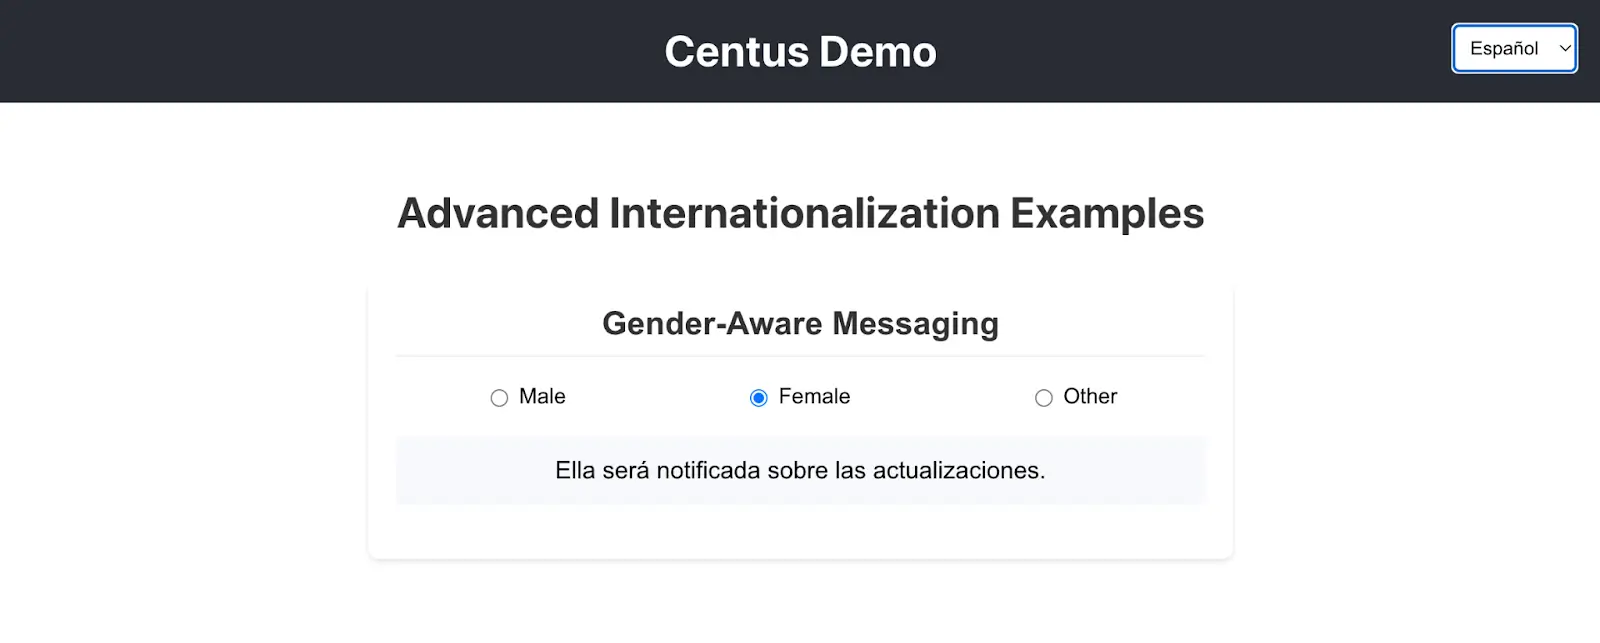
Gender-aware messaging
Unlike English, most languages have words that change according to the gender of the subject. Some languages like French even have genders for objects like a table or a pen.
So when you're localizing a nap, you need to ensure that these gendered sentences are taken care of.
<FormattedMessage
 id="examples.gender.notification"
 defaultMessage="{gender, select,
   male {He will be notified about updates.}
   female {She will be notified about updates.}
   other {They will be notified about updates.}
 }"
 values={{ gender: selectedGender }}
/>
Add this block to your advanced examples.js file that we created earlier and you should see an output like the one below.
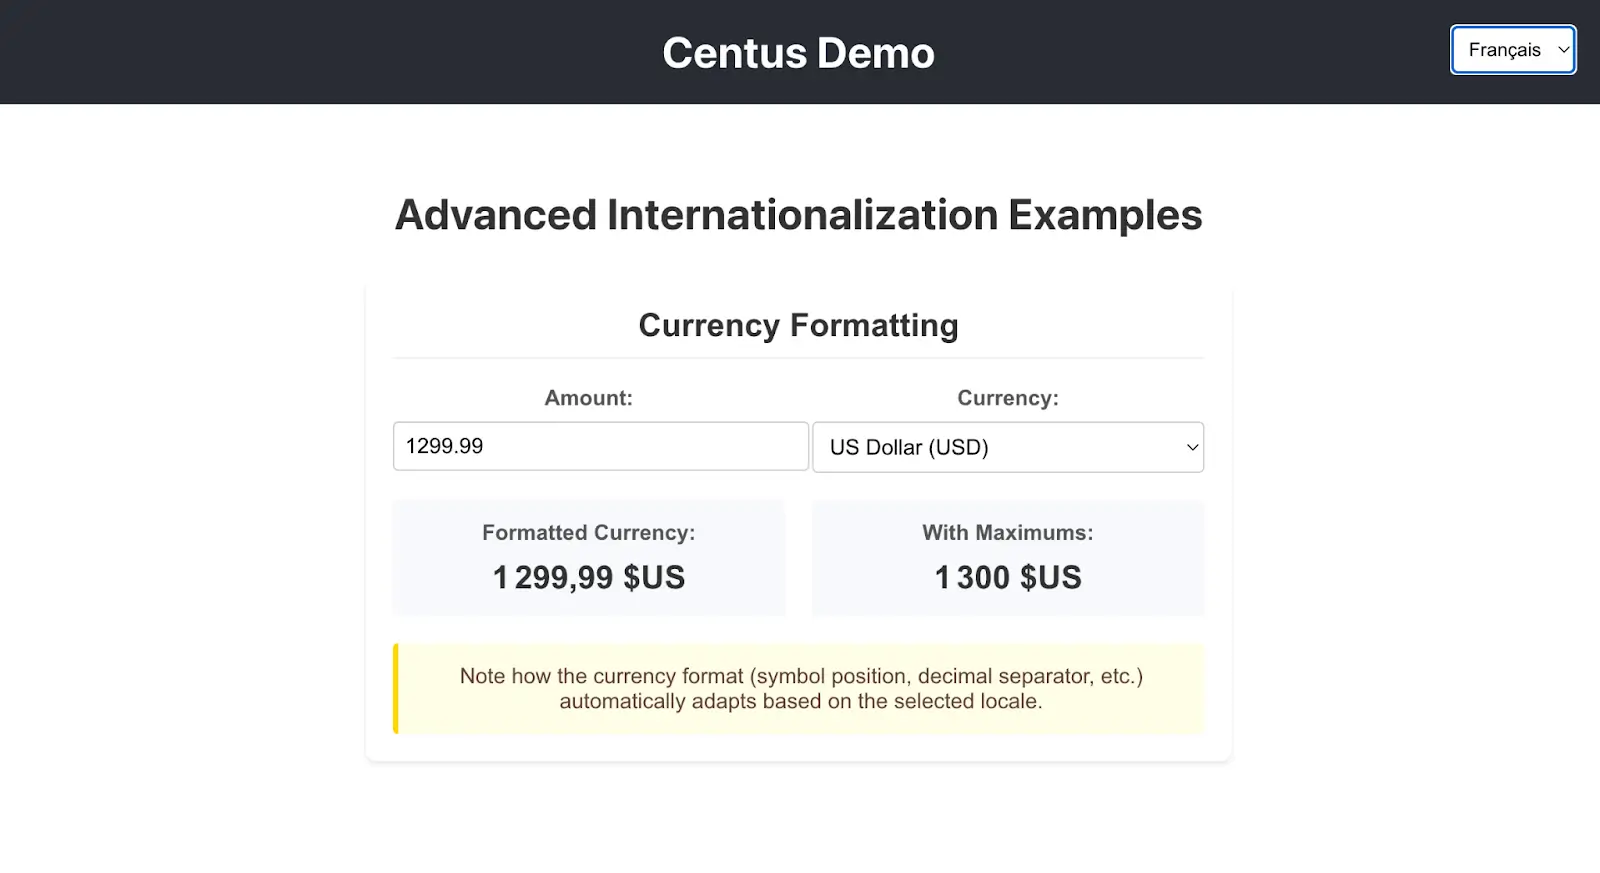
Currency formatting for each locale
Money displays differently around the world. In the US, it's $42.99, but in France, it's 42,99 €.
I've created a src/components/CurrencyExample.js file that handles the currency display in a single place.
You can of course pick up parts of it depending on your own app.
import React, { useState } from 'react';
import { FormattedNumber, useIntl } from 'react-intl';
import './CurrencyExample.css';

function CurrencyExample() {
  const intl = useIntl();
  const [amount, setAmount] = useState(1299.99);
  const [currency, setCurrency] = useState('USD');

  const handleAmountChange = (e) => {
    const value = parseFloat(e.target.value);
    if (!isNaN(value)) {
      setAmount(value);
    }
  };

  const handleCurrencyChange = (e) => {
    setCurrency(e.target.value);
  };

  return (
    <div className="currency-example">
      <h2>Currency Formatting</h2>

      <div className="controls">
        <div className="control-group">
          <label>Amount:</label>
          <input
            type="number"
            value={amount}
            onChange={handleAmountChange}
            step="0.01"
          />
        </div>

        <div className="control-group">
          <label>Currency:</label>
          <select value={currency} onChange={handleCurrencyChange}>
            <option value="USD">US Dollar (USD)</option>
            <option value="EUR">Euro (EUR)</option>
            <option value="GBP">British Pound (GBP)</option>
            <option value="JPY">Japanese Yen (JPY)</option>
            <option value="CNY">Chinese Yuan (CNY)</option>
          </select>
        </div>
      </div>

      <div className="results">
        <div className="result-item">
          <h3>Formatted Currency:</h3>
          <div className="formatted-value">
            <FormattedNumber
              value={amount}
              style="currency"
              currency={currency}
            />
          </div>
        </div>

        <div className="result-item">
          <h3>With Maximums:</h3>
          <div className="formatted-value">
            <FormattedNumber
              value={amount}
              style="currency"
              currency={currency}
              maximumFractionDigits={0}
            />
          </div>
        </div>
      </div>

      <div className="note">
        <p>Note how the currency format (symbol position, decimal separator, etc.) automatically adapts based on the selected locale.</p>
      </div>
    </div>
  );
}

export default CurrencyExample;
Notice that I'm not explicitly giving it formats because the react-intl library handles that by itself.
Now you may have figured out that as you add more languages, it is going to become difficult to manage the translations, keep track of what part of your application doesn't have a translated version and update the files as your number of languages and the number of app pages grow.
Is there a better way to handle translations?
Yes there is!
I always recommend using a localization management system to simplify translation workflows down the line.
When your application grows and you onboard more translators, managers, and designers, everybody can work on the translation files without accessing and potentially altering the code. Here’s how it works:
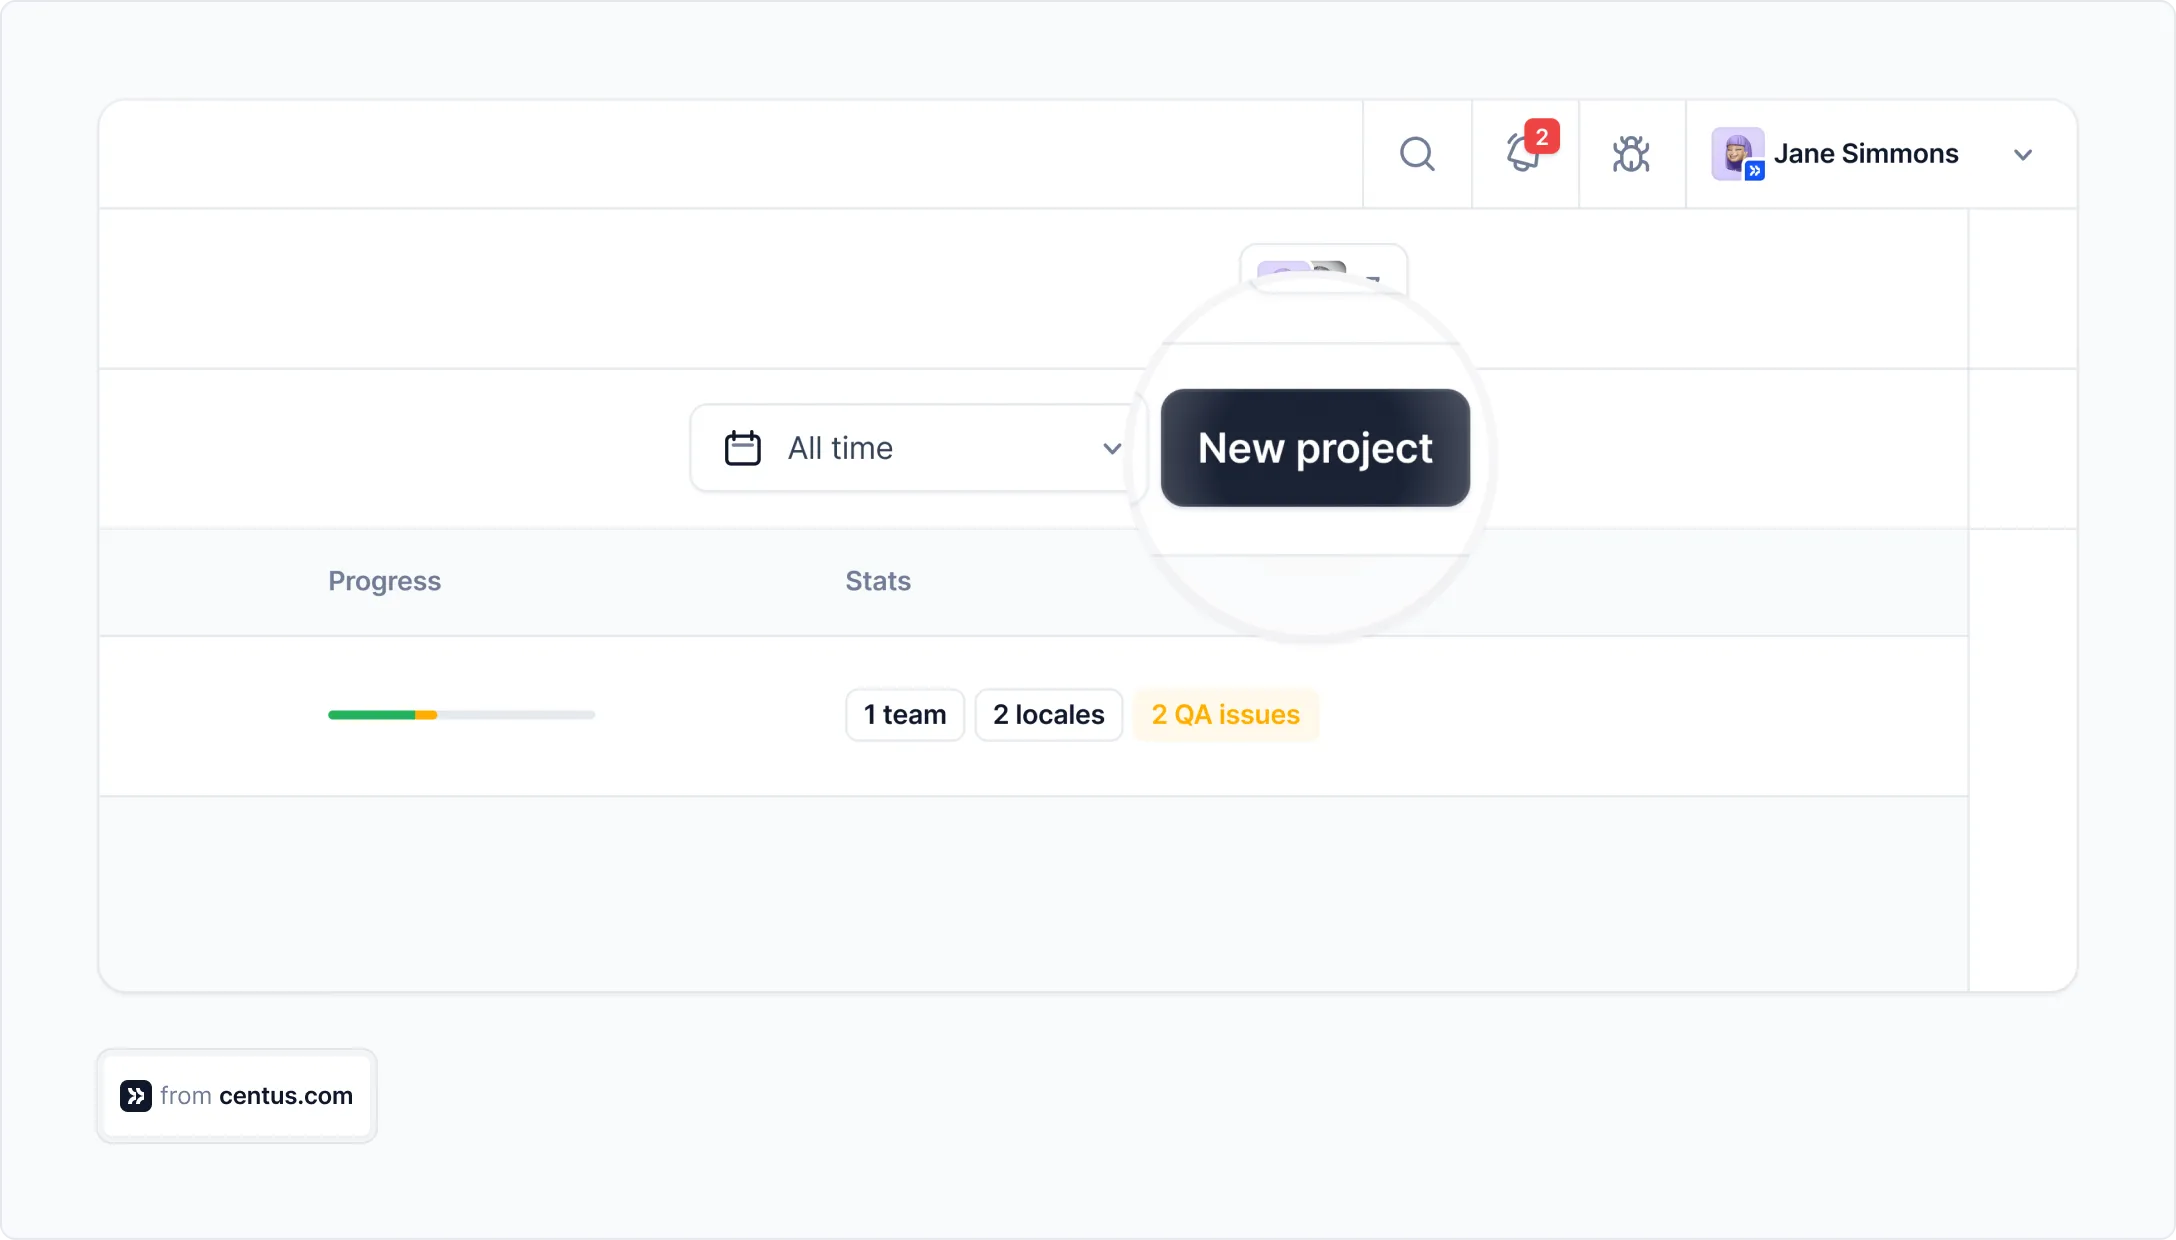
Sign up to Centus and click New project
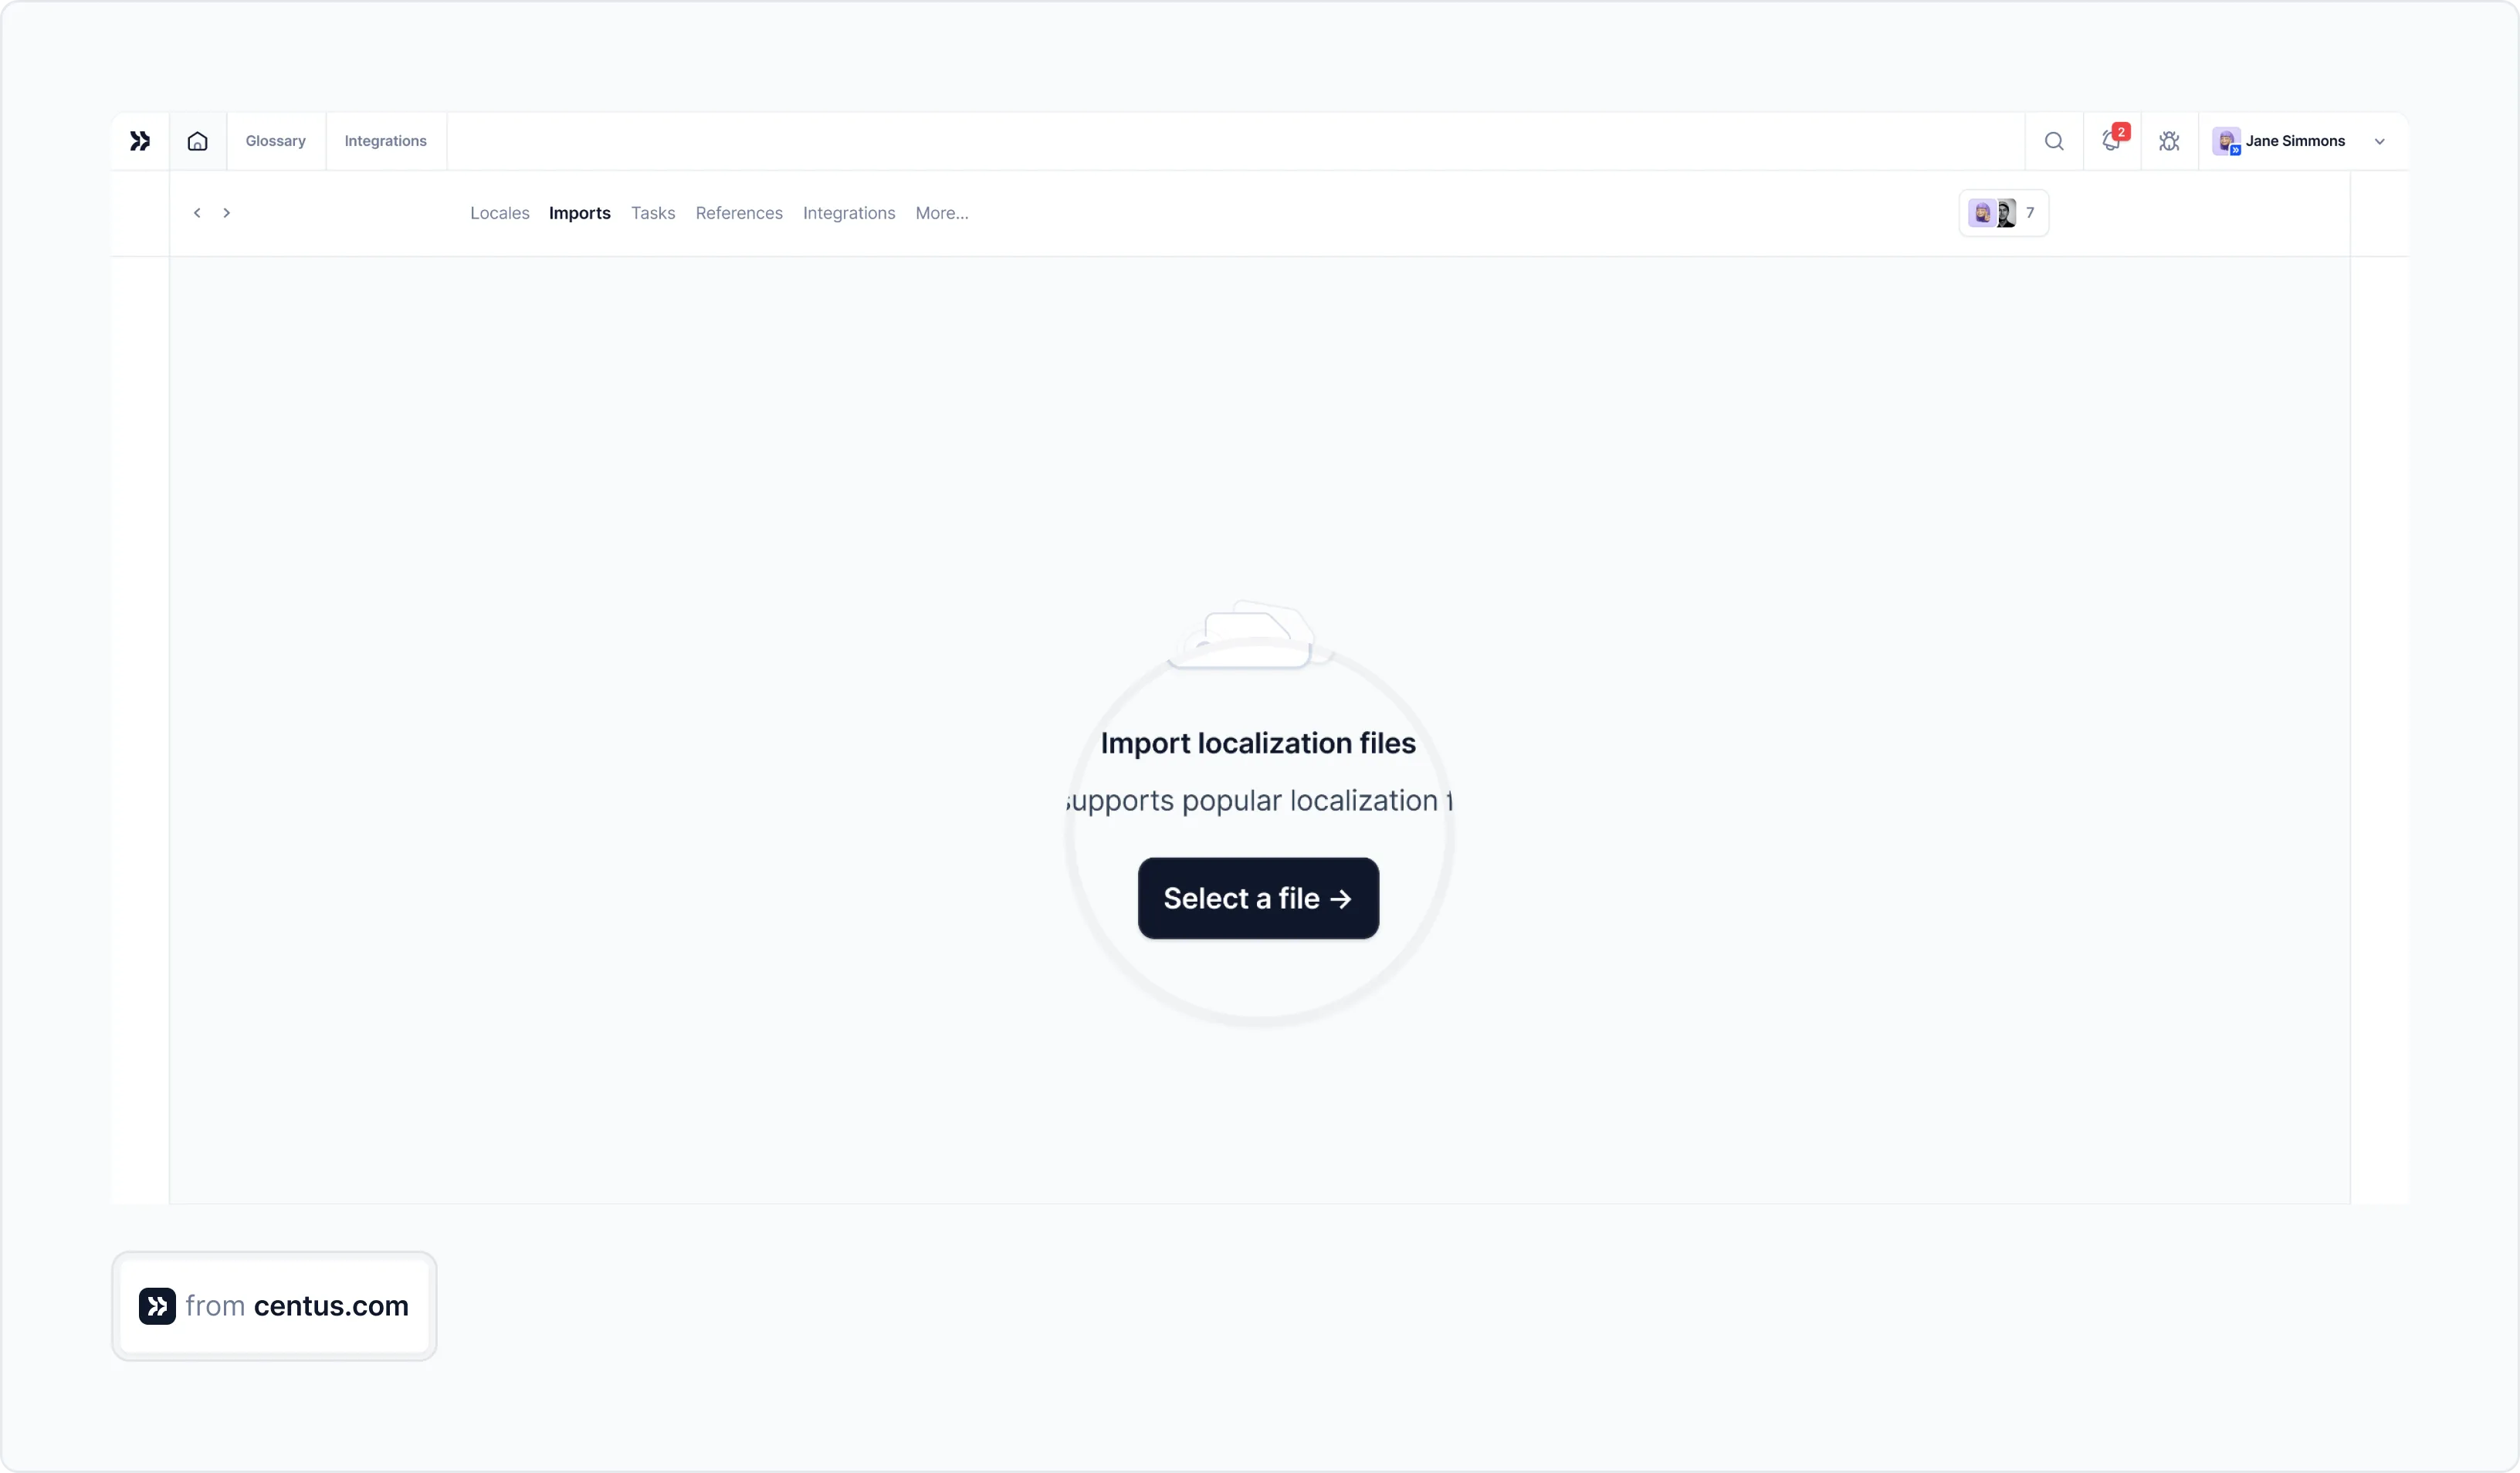
- In the Imports section, click Select a file
- Upload your JSON, XML, or PO files
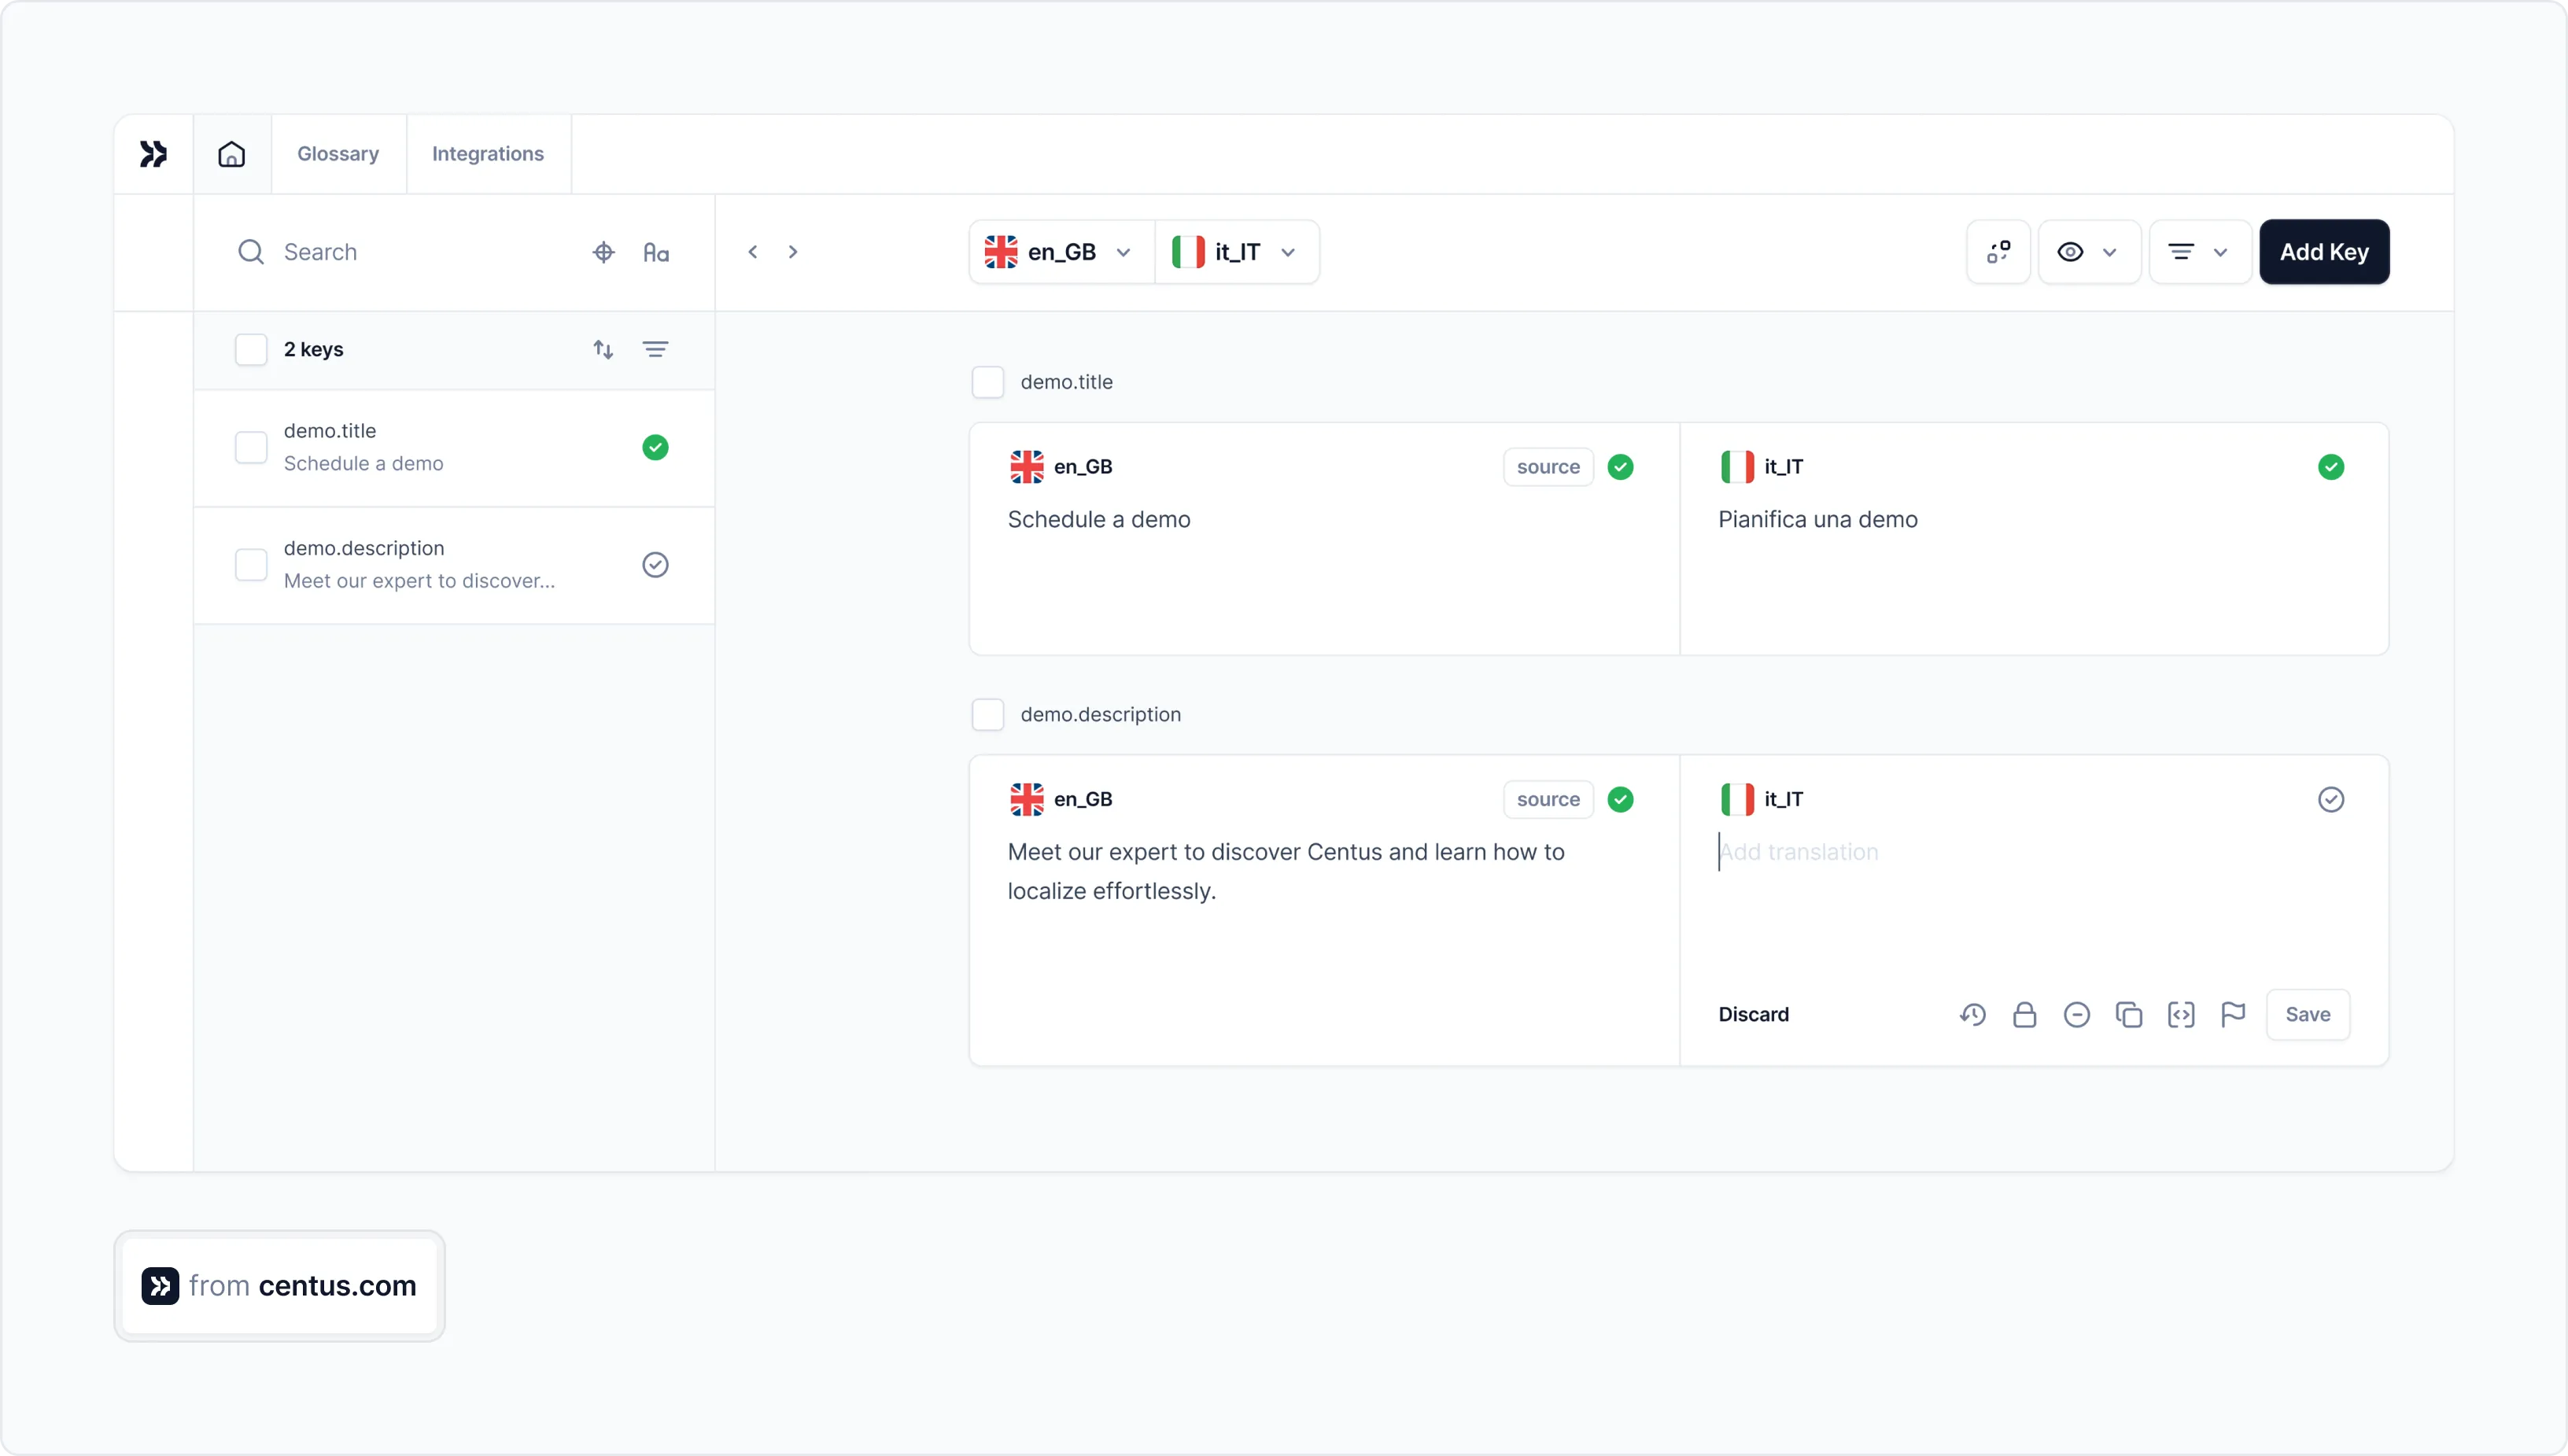
Now your files are ready for automatic translation with built-in DeepL, Google Translate, or Microsoft Translator integrations. Don’t worry, machine translation will not mess up your JSON placeholders, variables, and special characters. Centus preserves them all.
Automatic JSON translation process is incredibly simple:
- In Centus Editor, select manually or auto-select checkboxes next to the keys you want to translate
- In the modal that opens, click More options
- Click Machine translate
- Select a machine translation provider and locales
- Click Translate
That’s it! In mere clicks and seconds, you can save your days of work and up to 90% of your translation budget.
No matter how accurate, your team’s linguists might want to improve the automatic JSON translations further. Using Centus’ intuitive Editor, nothing can be easier :
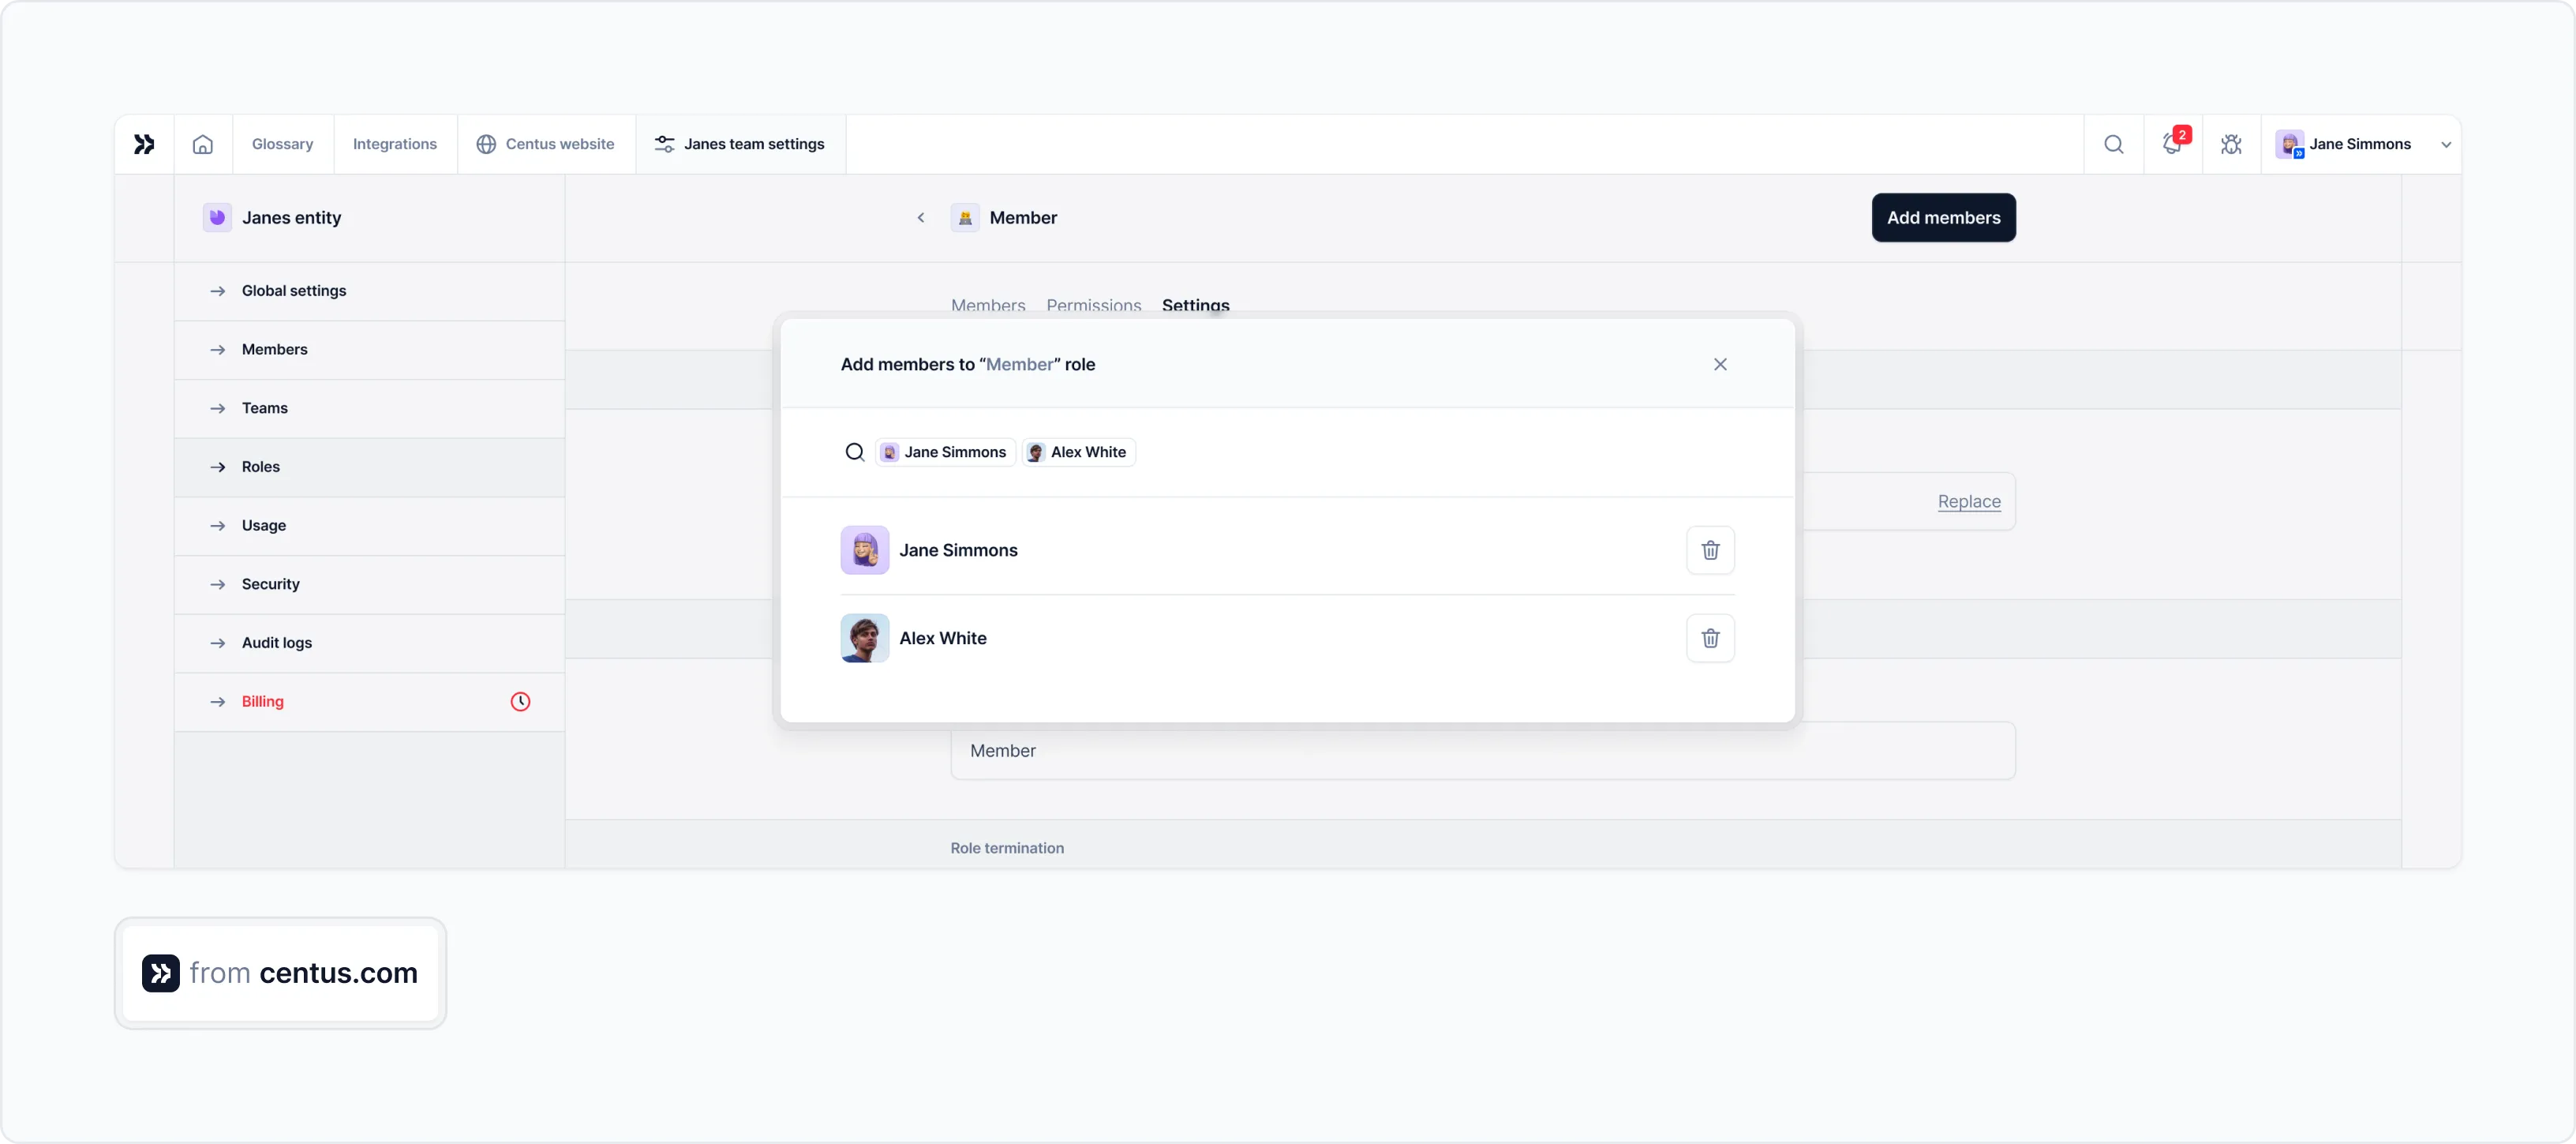
- In the Contributors section, click Invite contributors
- Enter the team member’s details
- Choose the team member’s role from the dropdown menu
- Click Add contributor
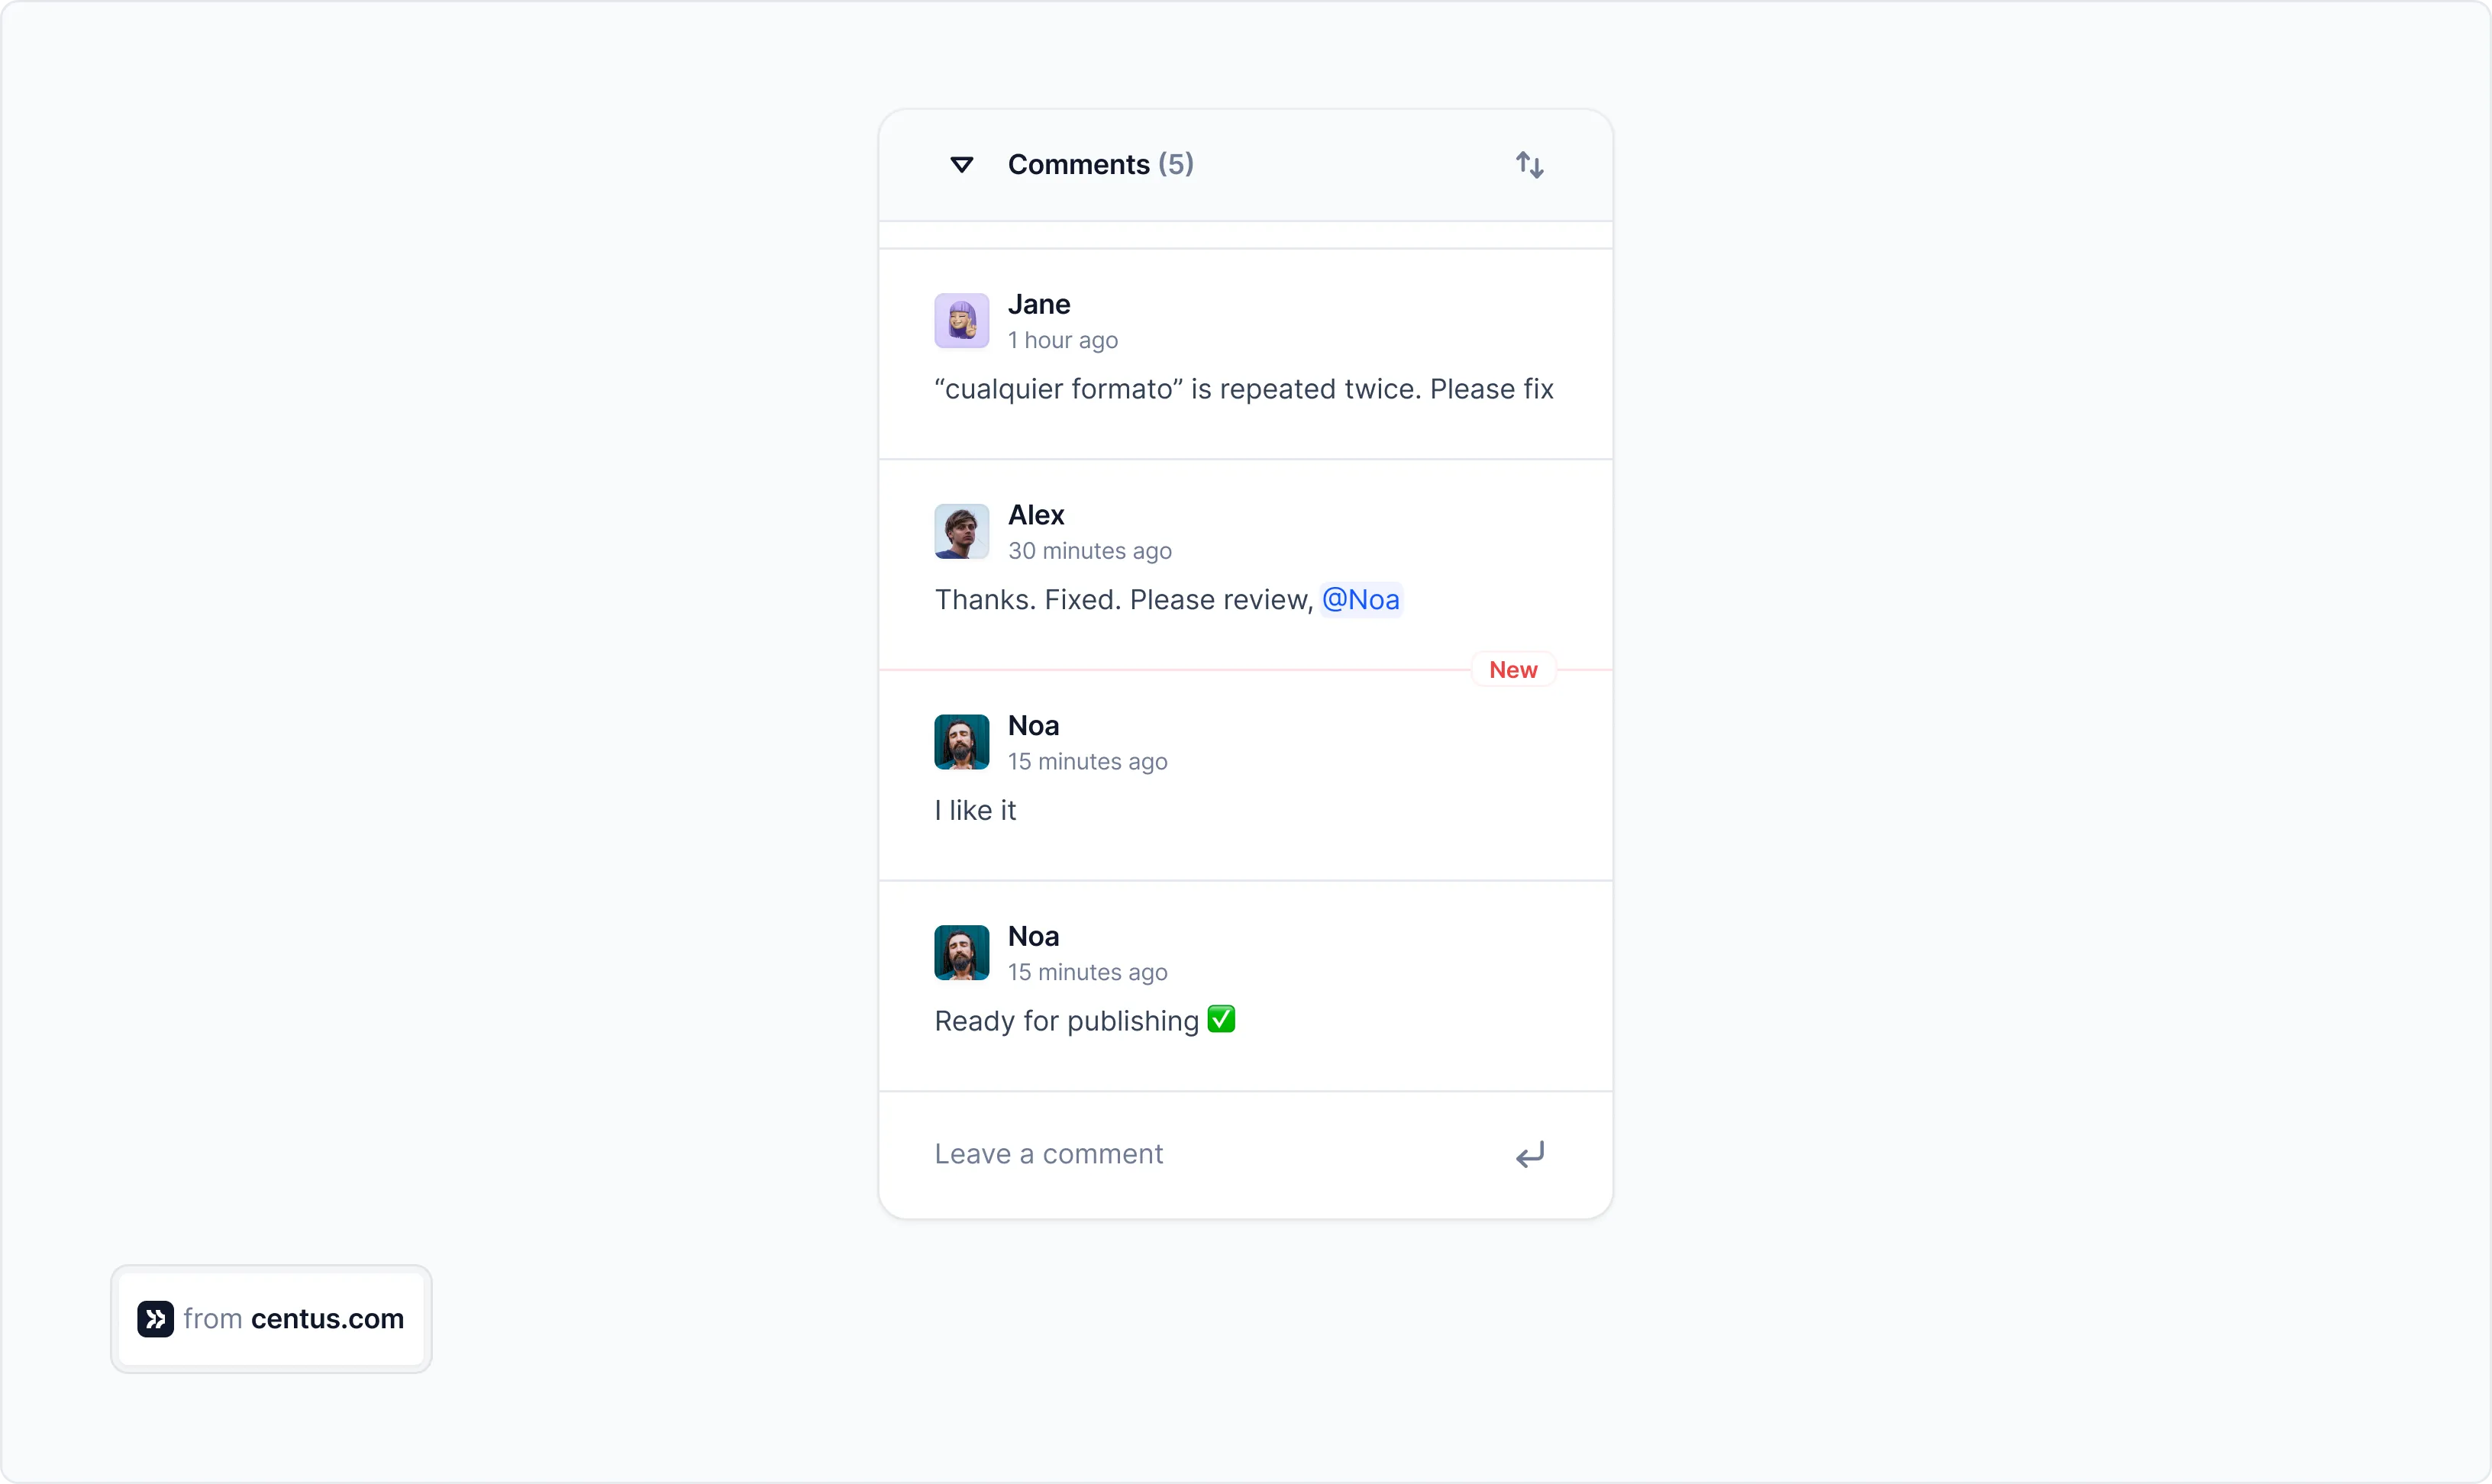
Now your team can edit translations while using professional CAT tools, like automatic glossaries or translation memory suggestions.
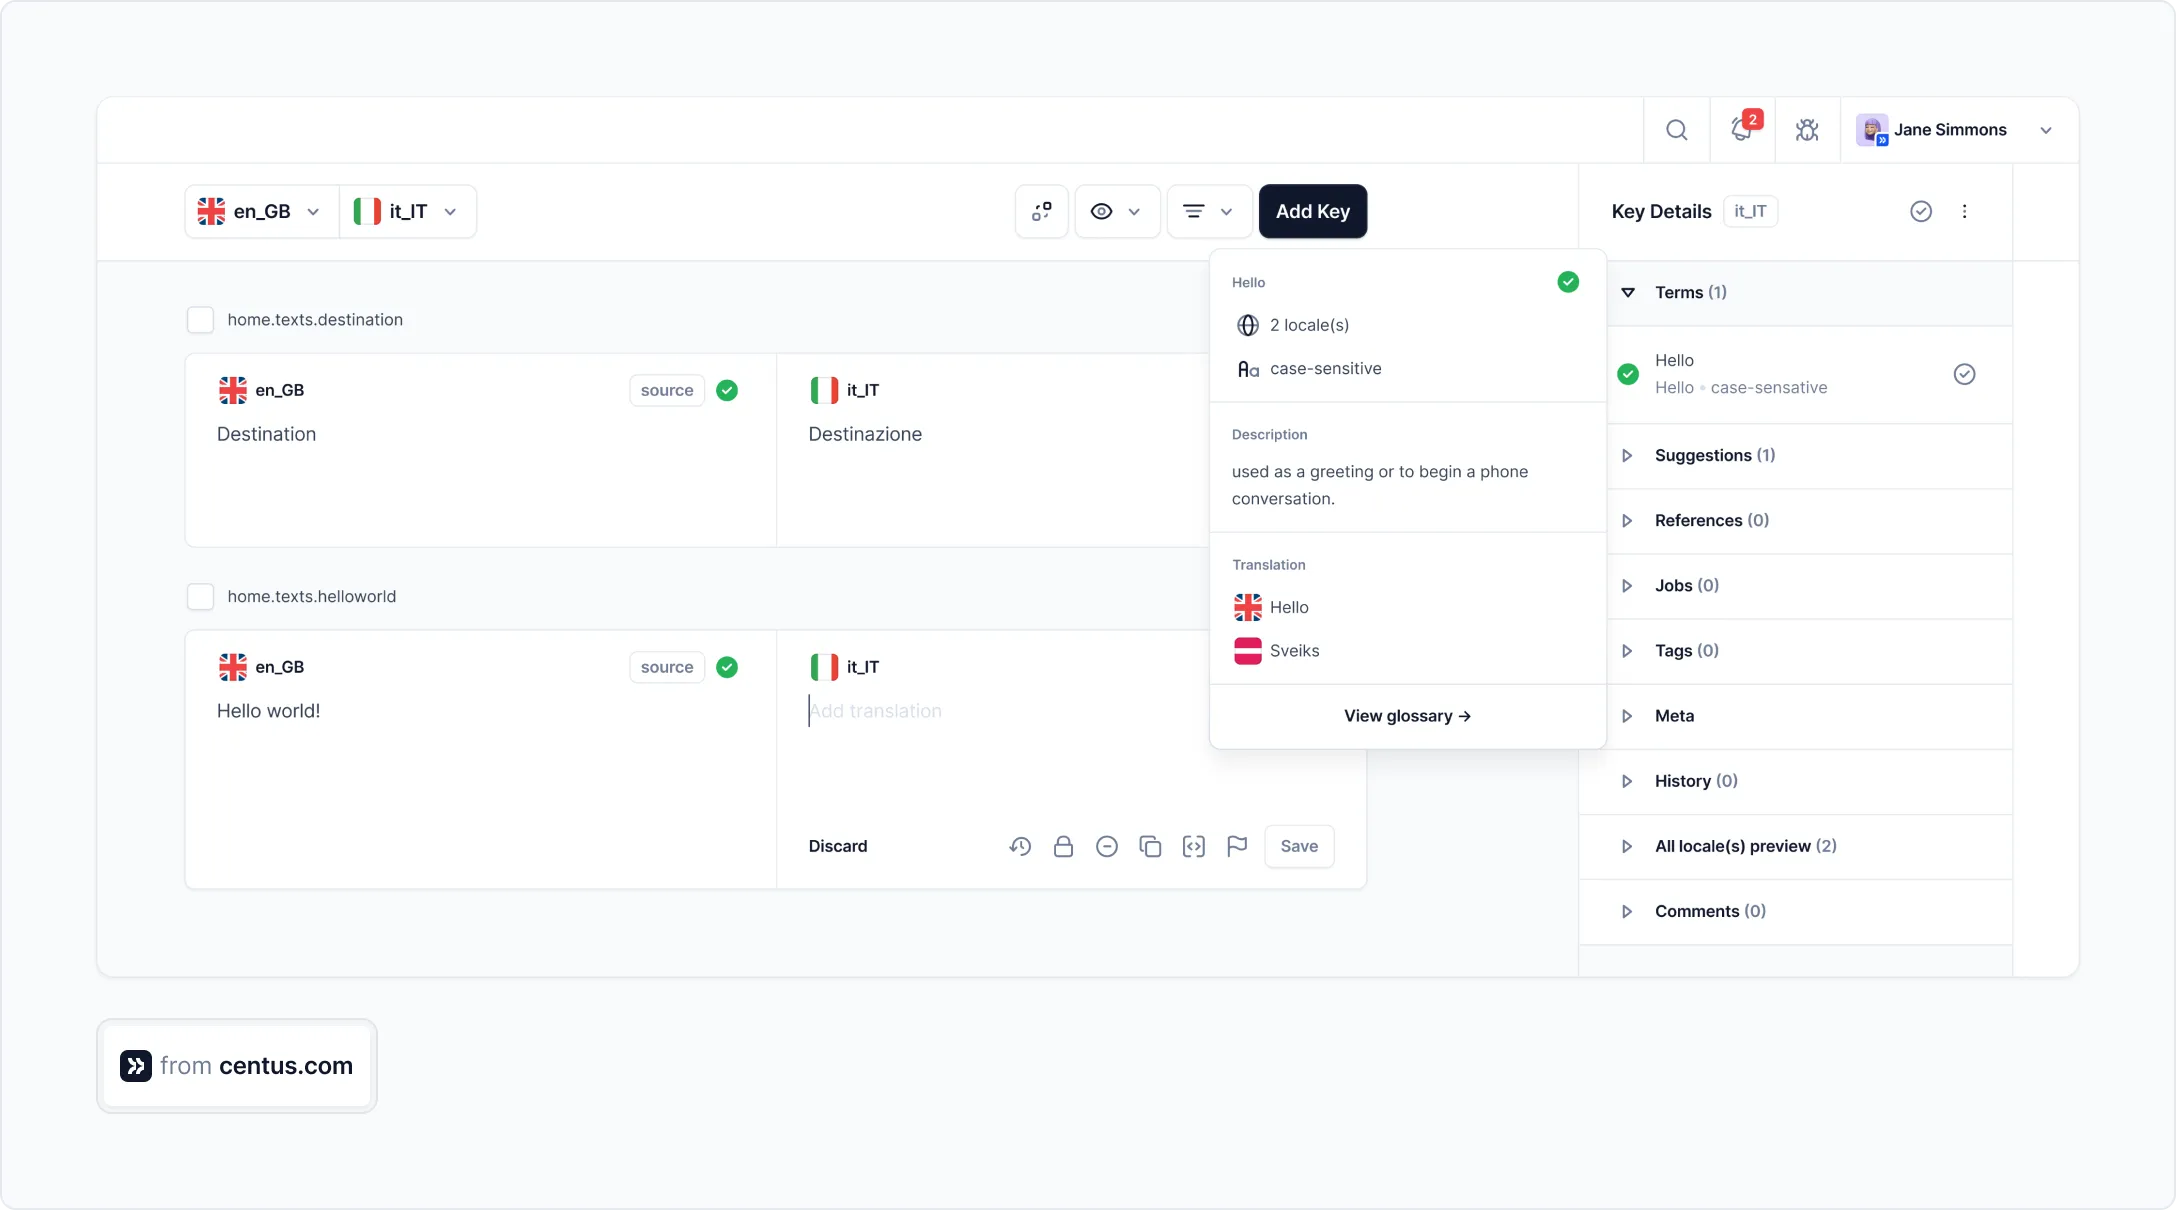
Your linguists can also communicate directly in Centus to review translations, approve changes, and keep the project on track.
To keep up the momentum and resolve bottlenecks, monitor the team’s progress in the dashboard.
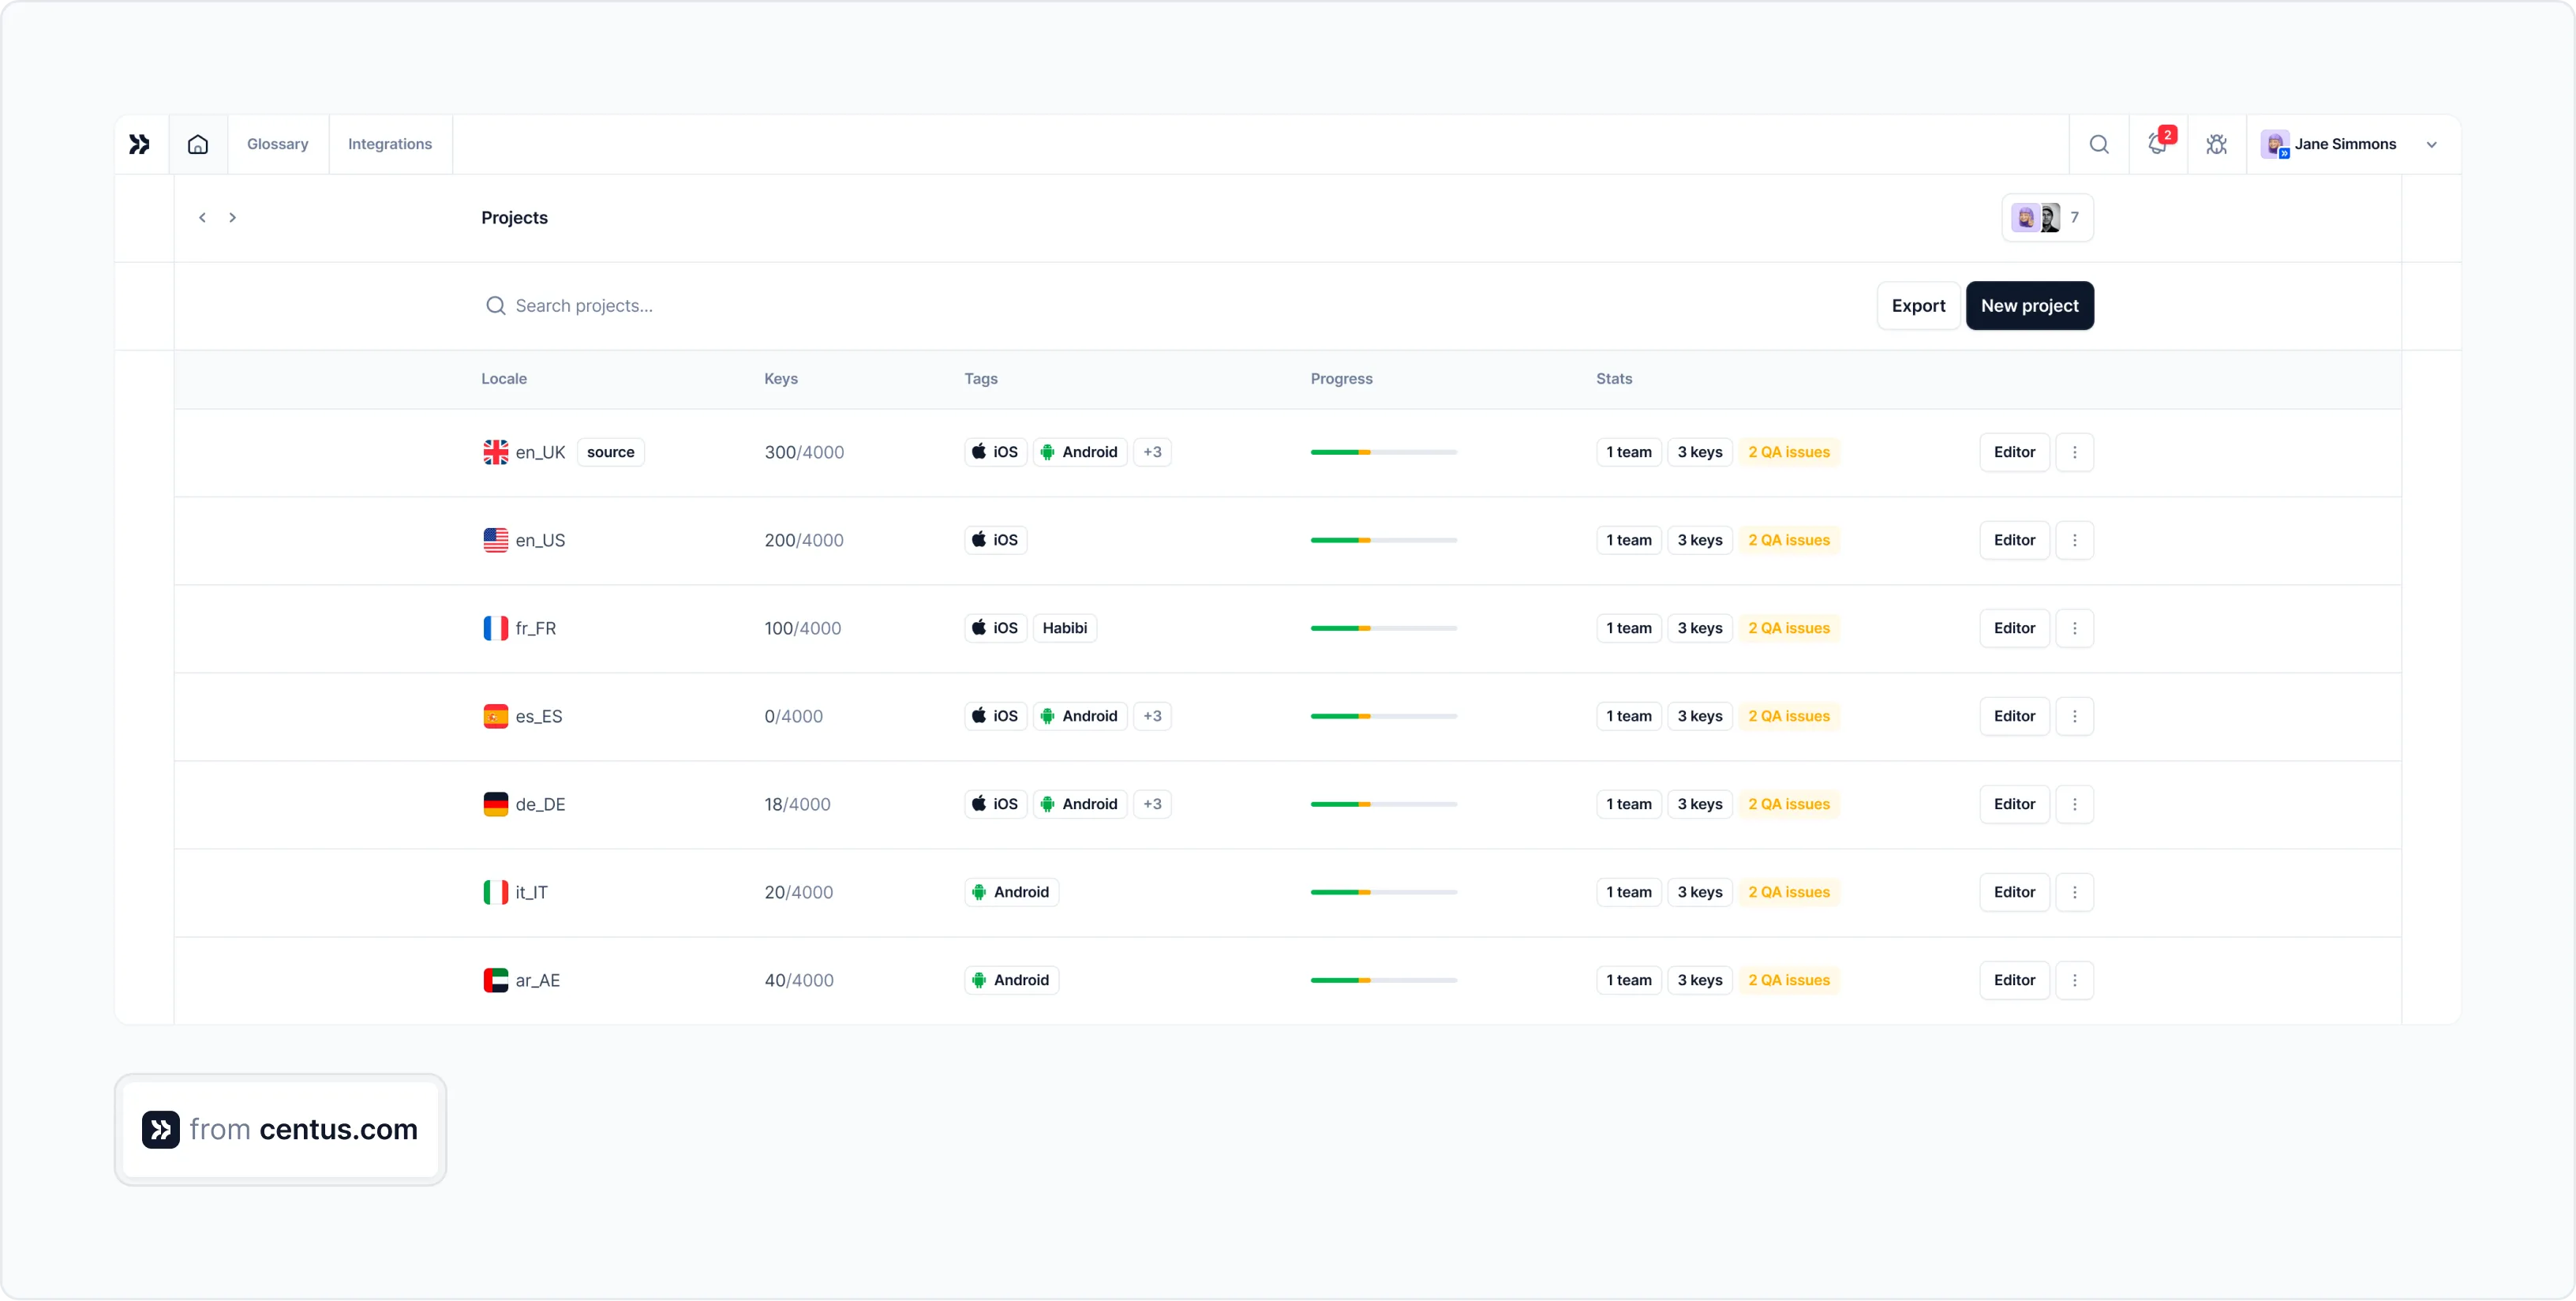
When your JSON translations are ready, push them to your code repository using Centus-GitHub integration.
With Centus, the stakeholders and management can keep track of the progress of all the translations, get a bird's eye view of what part of the application is being worked on, and who's working on it so there’s never a blind spot in your localization strategy.
Performance tips, because speed matters
As your app grows larger and there are more translation files, the package is going to take a little longer than normal to load.
But here are some practical optimization techniques with which you can retain the benefits of localization without losing on the performance.
1. Memoize your messages
Memoization is an optimization technique where the output of expensive function calls is cached. When the same function is called again, the app renders the cached output instead of re-running the entire function.
import React, { memo } from 'react';
import { FormattedMessage } from 'react-intl';

const MemoizedMessage = memo(({ id, values }) => (
  <FormattedMessage id={id} values={values} />
));
2. Load languages on demand
I only had three languages throughout the entire application, but larger apps are going to support a whole lot more.
You don't want to load all the languages for everyone. In fact, you want to organize the language files in such a way that only the files that are absolutely essential for the user are downloaded.
useEffect(() => {
  import(`./locales/${locale}.json`)
    .then(module => {
      setMessages(module.default);
      setLoading(false);
    })
    .catch(error => {
      console.error(`Failed to load ${locale}`, error);
      setLocale('en'); // Fall back to English
    });
}, [locale]);
You could even go beyond individual language files and start organizing them in separate modules. So the English language has 10 different modules and only the file that is required for a specific module is downloaded rather than the entire English file as well.
Mistakes to avoid (Learn from my pain!)
After many internationalization projects, I've seen these mistakes repeatedly:
1. String concatenation
// WRONG 🚫
<div>{intl.formatMessage({ id: 'greeting' })} {username}</div>

// RIGHT ✅
<FormattedMessage id="greeting.with.name" values={{ username }} />
Why? Because in some languages, the name might need to come first, or in the middle of a sentence.
2. Assuming all languages are structured like English
The grammatical rules and the sentence structure of all the languages is extremely different. In fact, English even feels funny to people who have it as a second language.
So assuming that all languages are going to be structured in the way that English is, is going to make it difficult for you to handle the different pluralization and localization rules that are built into the language nuance.
3. Not accounting for text expansion
German words can be about 30-40% longer than English, even if they mean the same thing. So you want to design the UI in a way that handles expansion without breaking and without letting the text out of the container
4. Hardcoding number, date, or currency formats
Don't hard core date formats or number formats or currency formats because the react-intl library handles that for you and every country has a different way of showing the same date.
For example, in the US we use month, date and year format while in the UK it's date, month and year.
// WRONG 🚫
const formattedDate = `${date.getMonth() + 1}/${date.getDate()}/${date.getFullYear()}`;

// RIGHT ✅
const formattedDate = intl.formatDate(date, {
  year: 'numeric',
  month: 'numeric',
  day: 'numeric'
});
Wrapping up
Alright, we have unpacked a whole lot of things about the react-intl library and how to perform localization for a React application from scratch.
Now here's the thing to remember: internationalization and localization aren’t just checkboxes that you want to check off and forget. They become a full-time job as the app grows. So you want to think about the architecture, the organizational structure, and the way you are maintaining localization files.
The best way to organize the localization process? Use the localization management system Centus, just like so many distributed teams already do. Try Centus for free and never look back!
Get the week's best content!
By subscribing, you are agreeing to have your personal information managed in accordance with the terms of Centus Privacy Policy ->
Keep learning
30 min. read
Your Complete Guide to Django i18n
29 min. read
Rails Internationalization Using i18n Gems
12 min. read
How to Translate JSON Files: A Simple Guide

19 min. read
NextJS Internationalization: A Complete Walkthrough

19 min. read
NodeJS Internationalization (i18n) and Localization
21 min. read