Imagine your Rails app supporting a dozen of languages and attacting users from all over the globe. Ambitious? It is. But with Rails’ robust i18n gems, internationalization is surprisingly achievable.
In this guide, I’ll show you how to set up and use i18n, R18n, FastGettext, and Mobility gems to help your Ruby app speak your customers’ languages.
Why do internationalization and localization matter?
English accounts for over 52% of web content, but it represents less than 26% of global internet users' native languages.
This means ~74% of internet users see content in languages they don't understand. In fact, this group accesses content in just ten languages, leaving many without information in their native tongue.
And we now have another growing market to tap into.
Southeast Asia experienced over 30% year-over-year growth in app usage, which indicates a rapidly expanding user base that prefers localized content.
How can you capitalize on global language preferences?
If you have a Rails app, localize it following this simple guide. For other languages and frameworks, browse our localization tutorials.
Installing and setting up a Rails app
Installation is different for different operating systems, so I'll keep this section simple. Here’s what you can expect while setting Rails up.
- Install Ruby: Rails is built on Ruby, so start by installing Ruby on your machine.
- Install Node.js and Yarn: These help manage JavaScript dependencies, which Rails uses.
- Install Rails: With Ruby in place, you can install Rails using the gem package manager.
- Set up a database: Rails ships with SQLite by default. But you can also use PostgreSQL and MySQL, so pick one that suits your app's needs.
To check if you have everything you need, run the below commands:
ruby -v
node -v
rails -v
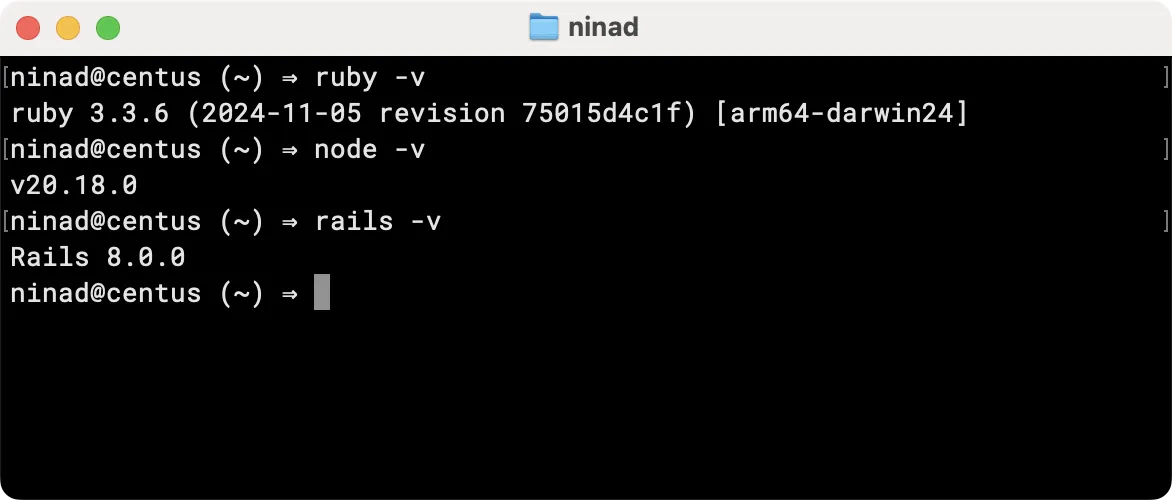
Once you’ve set up these basics, you’re ready to create a Rails app and start exploring i18n. For detailed steps tailored to your OS, check out the official Rails installation guide.
Now let’s create an app using the rails new command.
rails new centus-rails-localization
I’m sticking to the default—SQLite.
But if you prefer MySQL or Postgres, use one of the below commands for creating the new app.
#### For MySQL database
rails new centus-rails-localization -d mysql

#### For PostgreSQL database
rails new centus-rails-localization -d postgresql
This command adds all the required files, initializes a git repo, and sets you up to get coding.

Alright, now let’s cd into the directory and run the server.
# Move into the application directory
cd centus-rails-localization

rails server
The server should now listen on //127.0.0.1:3000 and you should see the default Rails page.
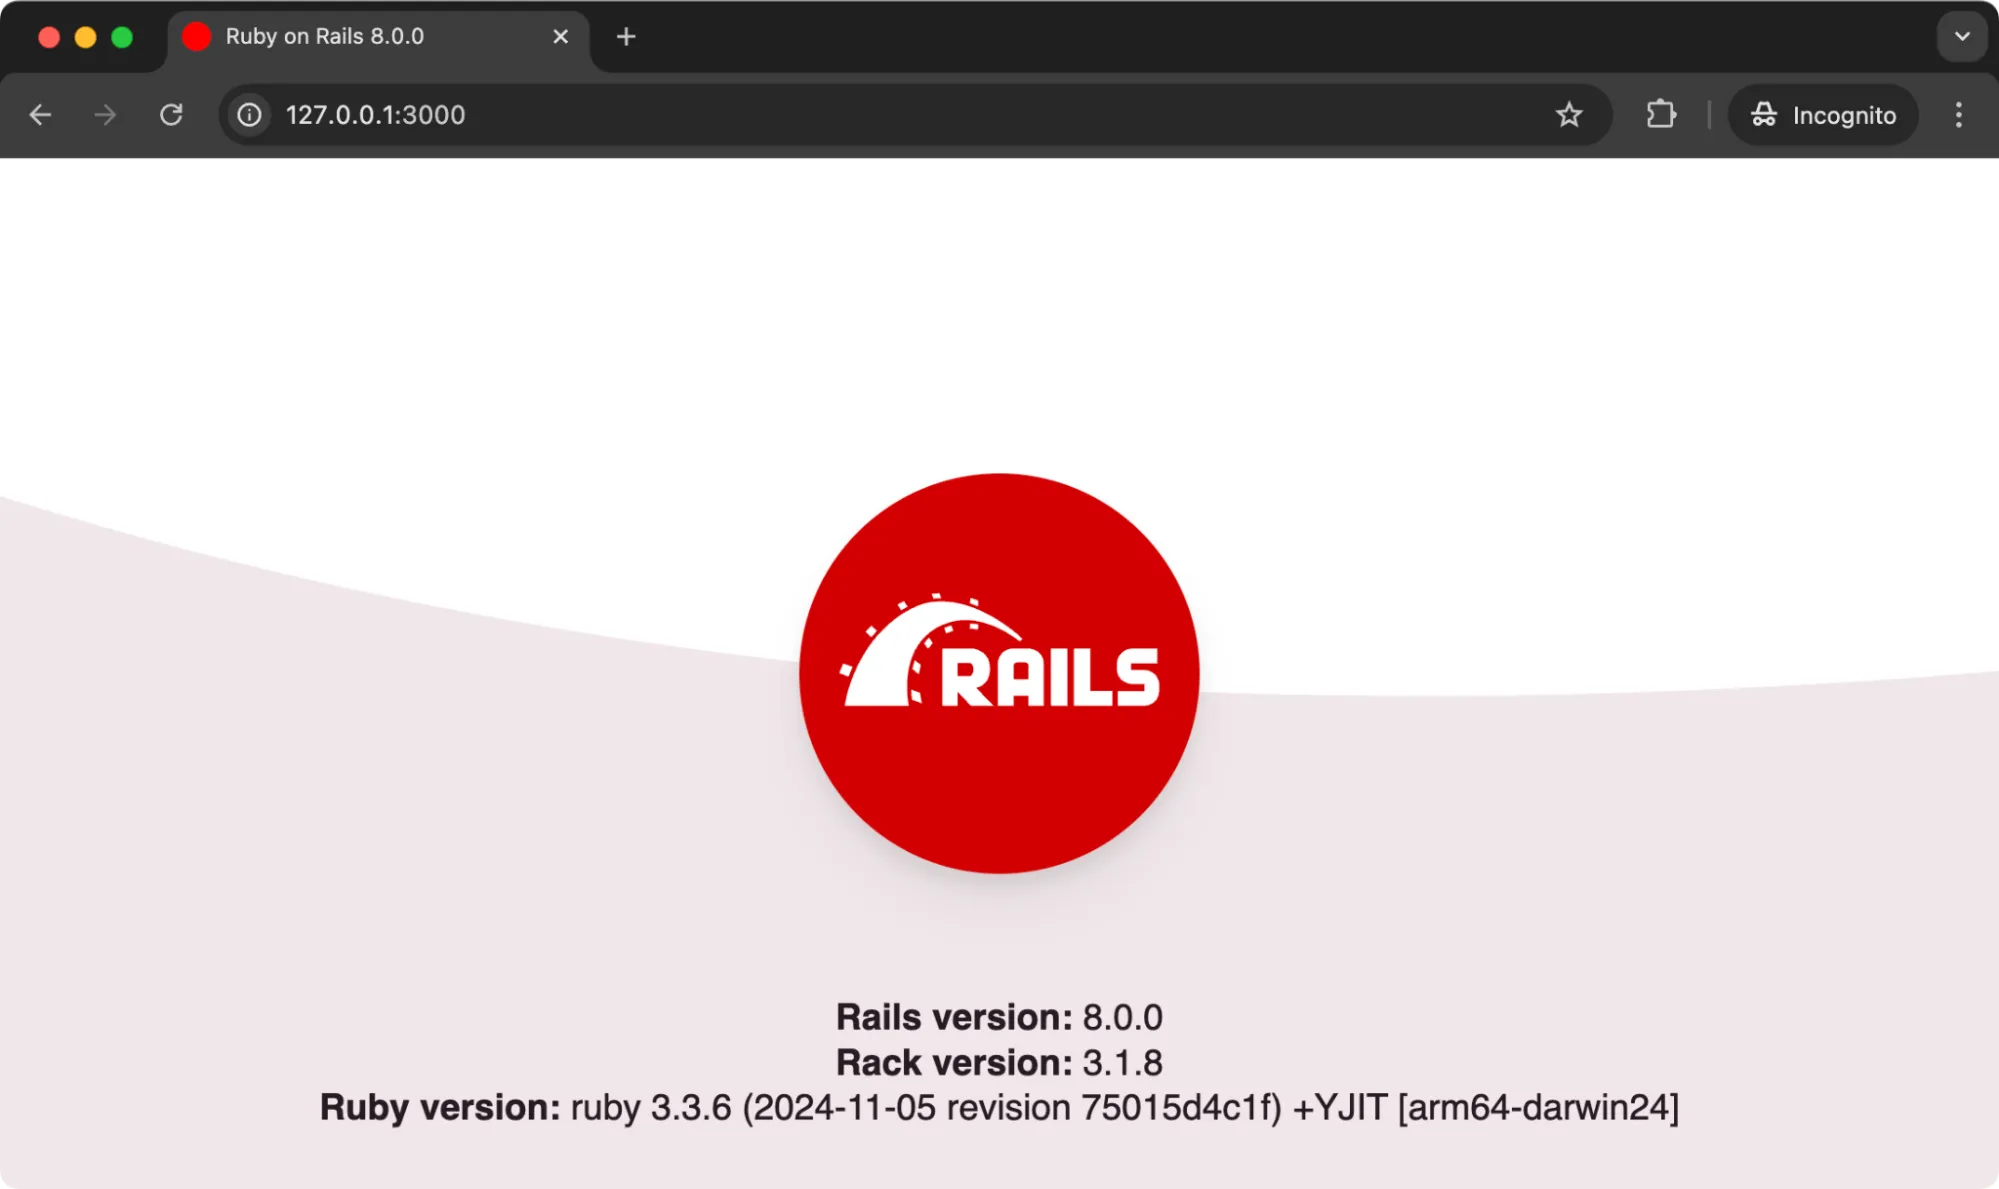
You’re now all set to move to the next step—installing the i18n gem.
Localizing Ruby on Rails with i18n gem
With Rails installed and ready, let’s talk about internationalization (i18n).
Rails apps use the i18n gem by default, making it the foundation for managing multiple languages, date formats, and localized content within your app. This gem helps you define translations and configure the app to deliver the right content for each user’s language.
The i18n gem works by storing translations in simple, organized YAML files. Rails loads these files automatically, so you don’t need extra code for setup, just configuration.
Here are some of the features of the i18n gem:
- Translation and localization
- Interpolation of values to translations
- Pluralization (CLDR compatible)
- Customizable transliteration to ASCII
- Flexible defaults
- Bulk lookup
- Lambdas as translation data
- Custom key/scope separator
- Custom exception handlers
- Extensible architecture with a swappable backend
Setting up i18n gem
Since Rails already includes the i18n gem, we only need to configure it to handle multiple languages.
Step 1: Setting up rails-i18n gem
Here’s the thing: you don’t really need rails-i18n gem. But the gem helps to simplify date and time formatting because it has locale data about most of the popular languages. And the installation is quite simple.
Add the following line to your Gemfile first:
gem "rails-i18n"
Then run the following command to install the bundle.
bundle install
Step 2: Create language files
Rails uses the config/locales folder to store language files. By default, you’ll find a single en.yml file here, which contains a single English translation for “hello.”
Let’s change it to welcome and create another file fr.yml that translates the word.
Assuming your en.yml contains:
# config/locales/en.yml
en:
  welcome: "Welcome"
And your fr.yml contains:
# config/locales/fr.yml
fr:
  welcome: "Bienvenue"
Now, we have two Rails locales that we can work with. You can add as many locale files as your app requires while following the rest of the process
Step 3: Set the default locale
To set a default Rails locale, update your config/application.rb with this setup. Remember, the module name is based on the name of your Rails app. So update that part accordingly.
# config/application.rb
require_relative "boot"

require "rails/all"

# Require the gems listed in Gemfile, including any gems
# you've limited to :test, :development, or :production.
Bundler.require(*Rails.groups)

module CentusRailsLocalization
 class Application < Rails::Application
   config.i18n.available_locales = [:en, :fr]
   config.i18n.default_locale = :en
 end
end
Step 4: Verify the setup
To ensure i18n does not have any errors, start the Rails server:
rails server
Then open the app in your browser. If everything’s set up correctly, the app should run smoothly with no errors related to locale files or configuration.
With our i18n setup complete, we’re ready to dive into translations! Let’s start with the basics of performing simple translations.
Performing simple translations
With the i18n gem configured and locale files in place, it's time to implement translations in your application. Rails provides the t helper method to access translations defined in your locale files.
Create a home controller
Run this command to generate the home controller with an index action:
rails generate controller Home index
Using the t helper in views
In your views, replace hardcoded text with the t method to fetch the appropriate translation based on the current locale.
Now, in your app/views/home/index.html.erb add this simple line of code to get started with our testing.
<!-- app/views/home/index.html.erb -->
<h1><%= t('welcome') %></h1>
Right now, these two locales will not do much since we haven’t configured the routes yet, nor do we dynamically set the text. So let’s do that.
Setting the locale dynamically
To allow users to switch between languages, you can set the locale dynamically based on parameters or user preferences. Define a set_locale method in your ApplicationController:
# app/controllers/application_controller.rb
class ApplicationController < ActionController::Base
  before_action :set_locale

  private

  def set_locale
    I18n.locale = params[:locale] || I18n.default_locale
  end

  # Add this to persist locale in URLs
  def default_url_options
    { locale: I18n.locale }
  end
end
This method sets the locale based on the locale parameter in the URL or defaults to the application's default locale. Ensure your routes include the locale parameter:
# config/routes.rb
Rails.application.routes.draw do
  scope "(:locale)", locale: /#{I18n.available_locales.join("|")}/ do
    root 'home#index'
    # Other routes...
  end
end
With this setup, your application can serve content in multiple languages now.
Let me run the server again and show you the simple page with a Welcome. Right now, we haven’t added a language switcher, but if you go to the server page, you can switch languages by add /en and /fr at the end of the URL like this:
- 127.0.0.1:3000/en
- 127.0.0.1:3000/fr
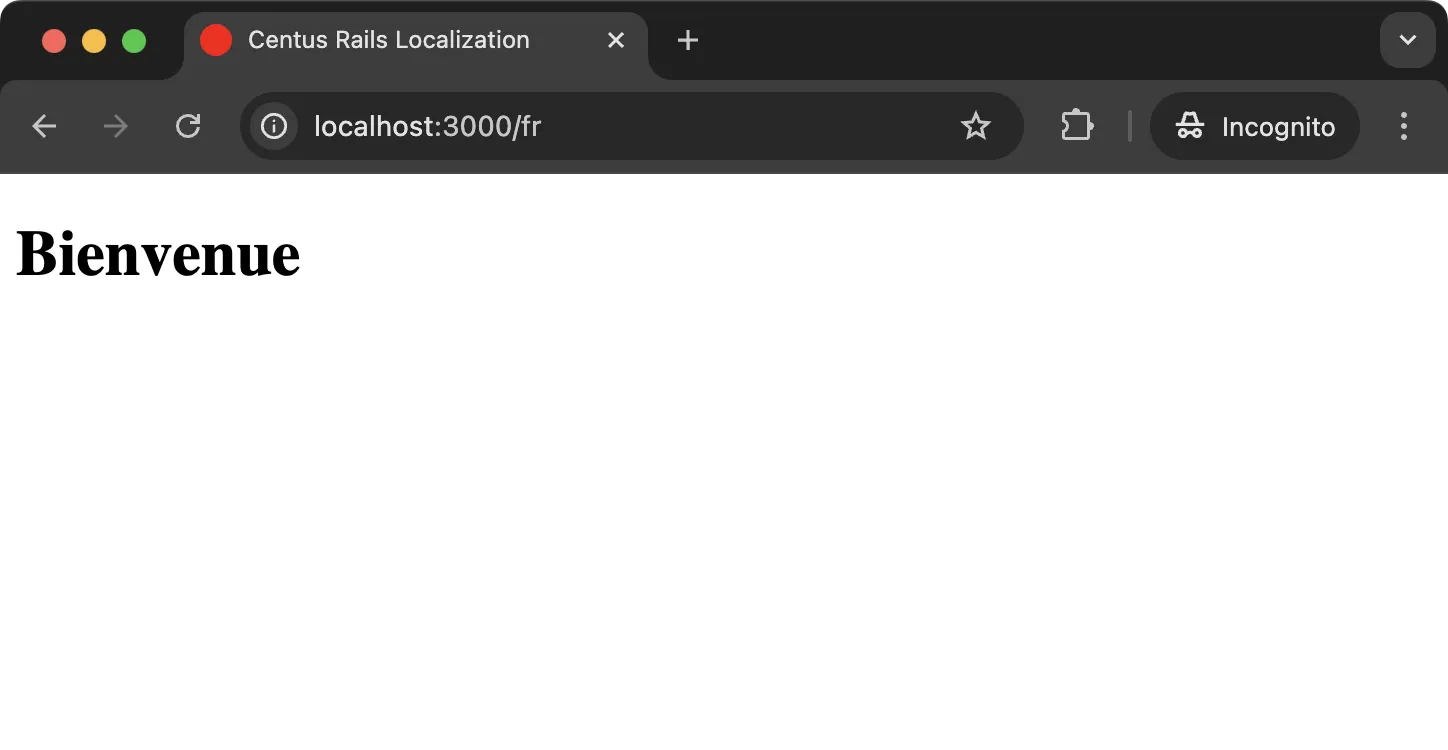
If you see both versions of the page, you’re all set to venture into the “real world” of internationalizing your Rails app.
Updating the HTML page and adding a language switcher
Now, instead of this simplistic page, which I’d created to demonstrate the basics, I’ll write a more “real” page to help you see how things work when there’s a lot of text on the page.
Replace the HTML inside of your index.html.erb page with the following:
<!DOCTYPE html>
<html lang="<%= I18n.locale %>">
<head>
  <meta charset="UTF-8">
  <title>Centus Translation Management Platform</title>
  <style>
    /* General Styles */
    body {
        display: flex;
        flex-direction: column;
        min-height: 100vh;
        font-family: Arial, sans-serif;
        margin: 0;
        padding: 0;
        background-color: #f4f4f4;
    }

    h1, h2, h3, p {
        margin: 0;
        padding: 0;
    }

    /* Navigation Bar */
    nav {
        background-color: #333;
        padding: 10px 0;
    }

    nav ul {
        list-style: none;
        margin: 0;
        padding: 0;
        text-align: center;
    }

    nav ul li {
        display: inline;
        margin: 0 15px;
    }

    nav ul li a {
        color: #fff;
        text-decoration: none;
        font-weight: bold;
    }

    nav ul li a:hover {
        color: #ddd;
    }

    /* Header Section */
    header {
        text-align: center;
        padding: 50px 20px;
        background-color: #fff;
        box-shadow: 0 2px 4px rgba(0, 0, 0, 0.1);
    }

    header h1 {
        font-size: 2.5em;
        margin-bottom: 10px;
    }

    header h2 {
        font-size: 1.5em;
        color: #666;
        margin-bottom: 20px;
    }

    header p {
        font-size: 1em;
        color: #333;
        max-width: 600px;
        margin: 0 auto 30px;
    }

    .buttons {
        margin-top: 20px;
    }

    .buttons .btn {
        display: inline-block;
        padding: 10px 20px;
        margin: 5px;
        background-color: #007bff;
        color: #fff;
        text-decoration: none;
        border-radius: 5px;
        transition: background-color 0.3s;
    }

    .buttons .btn:hover {
        background-color: #0056b3;
    }

    /* Main Section */
    section {
        padding: 40px 20px;
        text-align: center;
        background-color: #fff;
    }

    section h3 {
        font-size: 1.8em;
        margin-bottom: 20px;
    }

    section ul {
        list-style: none;
        padding: 0;
        max-width: 800px;
        margin: 0 auto;
        text-align: left;
    }

    section ul li {
        font-size: 1em;
        color: #333;
        margin-bottom: 10px;
        padding-left: 20px;
        position: relative;
    }

    section ul li:before {
        content: '•';
        color: #007bff;
        position: absolute;
        left: 0;
    }

    /* Footer with Language Switcher */
    footer {
        background-color: #333;
        color: #fff;
        text-align: center;
        padding: 10px;
        margin-top: auto;
    }

    .language-switcher {
        font-size: 0.9em;
    }

    .language-switcher span {
        margin-right: 5px;
    }

    .language-switcher a {
        color: #fff;
        text-decoration: none;
        margin: 0 5px;
    }

    .language-switcher a:hover {
        text-decoration: underline;
    }
  </style>
  </head>
  <body>
  <nav>
    <ul>
      <li><a href="#"><%= t('home') %></a></li>
      <li><a href="#"><%= t('features') %></a></li>
      <li><a href="#"><%= t('pricing') %></a></li>
      <li><a href="#"><%= t('contact') %></a></li>
    </ul>
  </nav>

  <header>
    <h1><%= t('welcome') %></h1>
    <h2><%= t('subheading') %></h2>
    <p><%= t('description') %></p>
    <div class="buttons">
      <a href="#" class="btn"><%= t('try_for_free') %></a>
      <a href="#" class="btn"><%= t('book_a_demo') %></a>
    </div>
  </header>

  <section>
    <h3><%= t('why_choose_centus') %></h3>
    <ul>
      <li><%= t('feature_1') %></li>
      <li><%= t('feature_2') %></li>
      <li><%= t('feature_3') %></li>
    </ul>
  </section>

  <!-- Footer with Language Switcher -->
  <footer>
    <div class="language-switcher">
      <span><%= t('language') %>:</span>
      <%= link_to "🇺🇸 English", url_for(locale: :en) %> |
      <%= link_to "🇫🇷 Français", url_for(locale: :fr) %>
    </div>
  </footer>

</body>
</html>
I’ve also added a language switcher in the footer of the page.
Now, change the translation files to include all the text. Here are the translations for both the English and French files.
# config/locales/en.yml
en:
  welcome: "Welcome to Centus Translation Management Platform"
  subheading: "Streamline Your Localization Process with Centus"
  description: "Centus is an all-in-one localization platform that automates and manages your entire translation workflow in one place. Shorten time to market and optimize your content localization budget."
  try_for_free: "Try for Free"
  book_a_demo: "Book a Demo"
  why_choose_centus: "Why Choose Centus?"
  feature_1: "Collaborate with translators, developers, designers, and QA engineers in one convenient place."
  feature_2: "Create professional translations with machine translation, glossaries, translation memory, and QA checks."
  feature_3: "Integrate with your favorite tools like Figma, Jira, Salesforce, WordPress, and GitHub."
  home: "Home"
  features: "Features"
  pricing: "Pricing"
  contact: "Contact"
  language: "Language"


# config/locales/fr.yml
fr:
  welcome: "Bienvenue sur la plateforme de gestion de traduction Centus"
  subheading: "Rationalisez votre processus de localisation avec Centus"
  description: "Centus est une plateforme de localisation tout-en-un qui automatise et gère l'ensemble de votre flux de travail de traduction en un seul endroit. Réduisez le temps de mise sur le marché et optimisez votre budget de localisation de contenu."
  try_for_free: "Essayer gratuitement"
  book_a_demo: "Réserver une démonstration"
  why_choose_centus: "Pourquoi choisir Centus ?"
  feature_1: "Collaborez avec les traducteurs, les développeurs, les designers et les ingénieurs qualité en un seul endroit pratique."
  feature_2: "Créez des traductions professionnelles avec traduction automatique, glossaires, mémoire de traduction et contrôles de qualité."
  feature_3: "Intégrez vos outils préférés comme Figma, Jira, Salesforce, WordPress et GitHub."
  home: "Accueil"
  features: "Caractéristiques"
  pricing: "Tarification"
  contact: "Contact"
  language: "Langue"
Refresh the page to ensure everything works as expected.
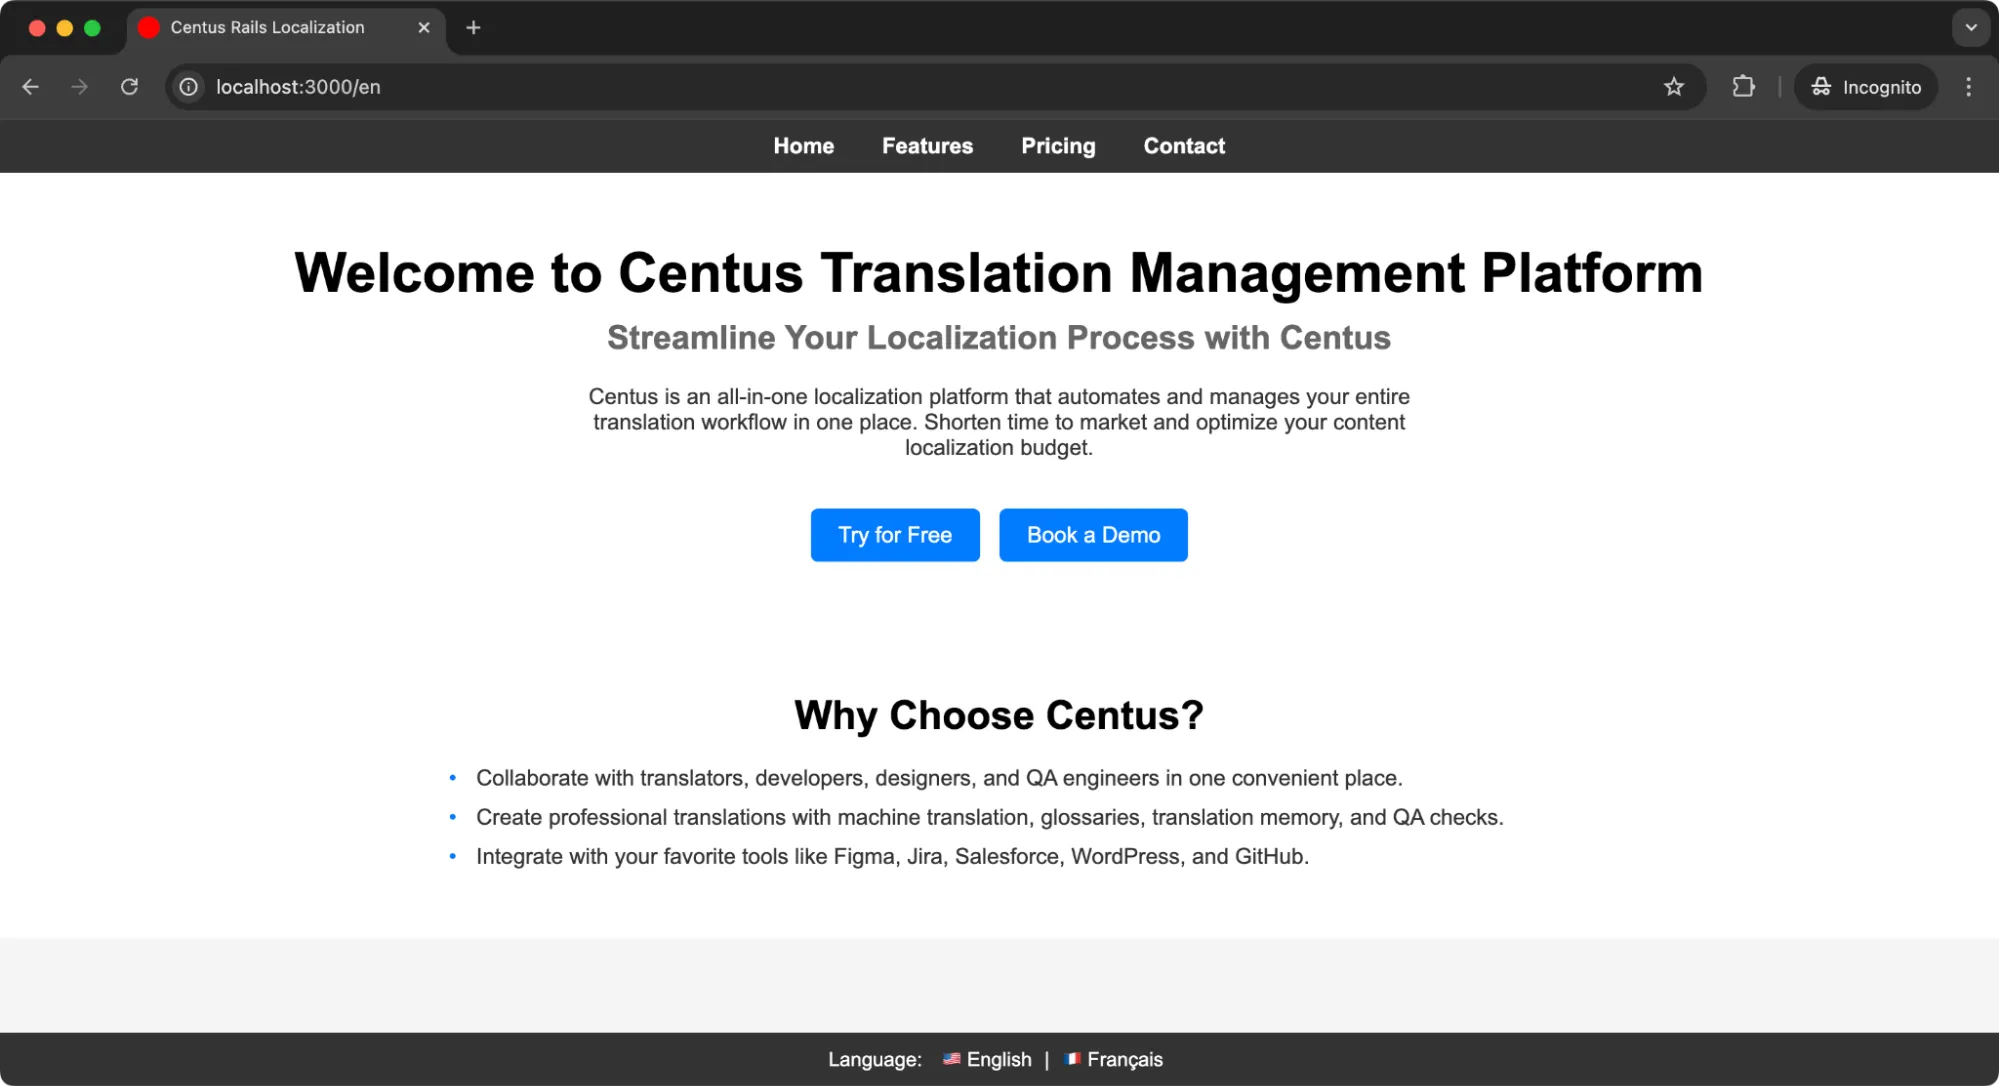
Click on the language choices at the bottom, and you should see the entire page gets translated as per the text setup in our file.
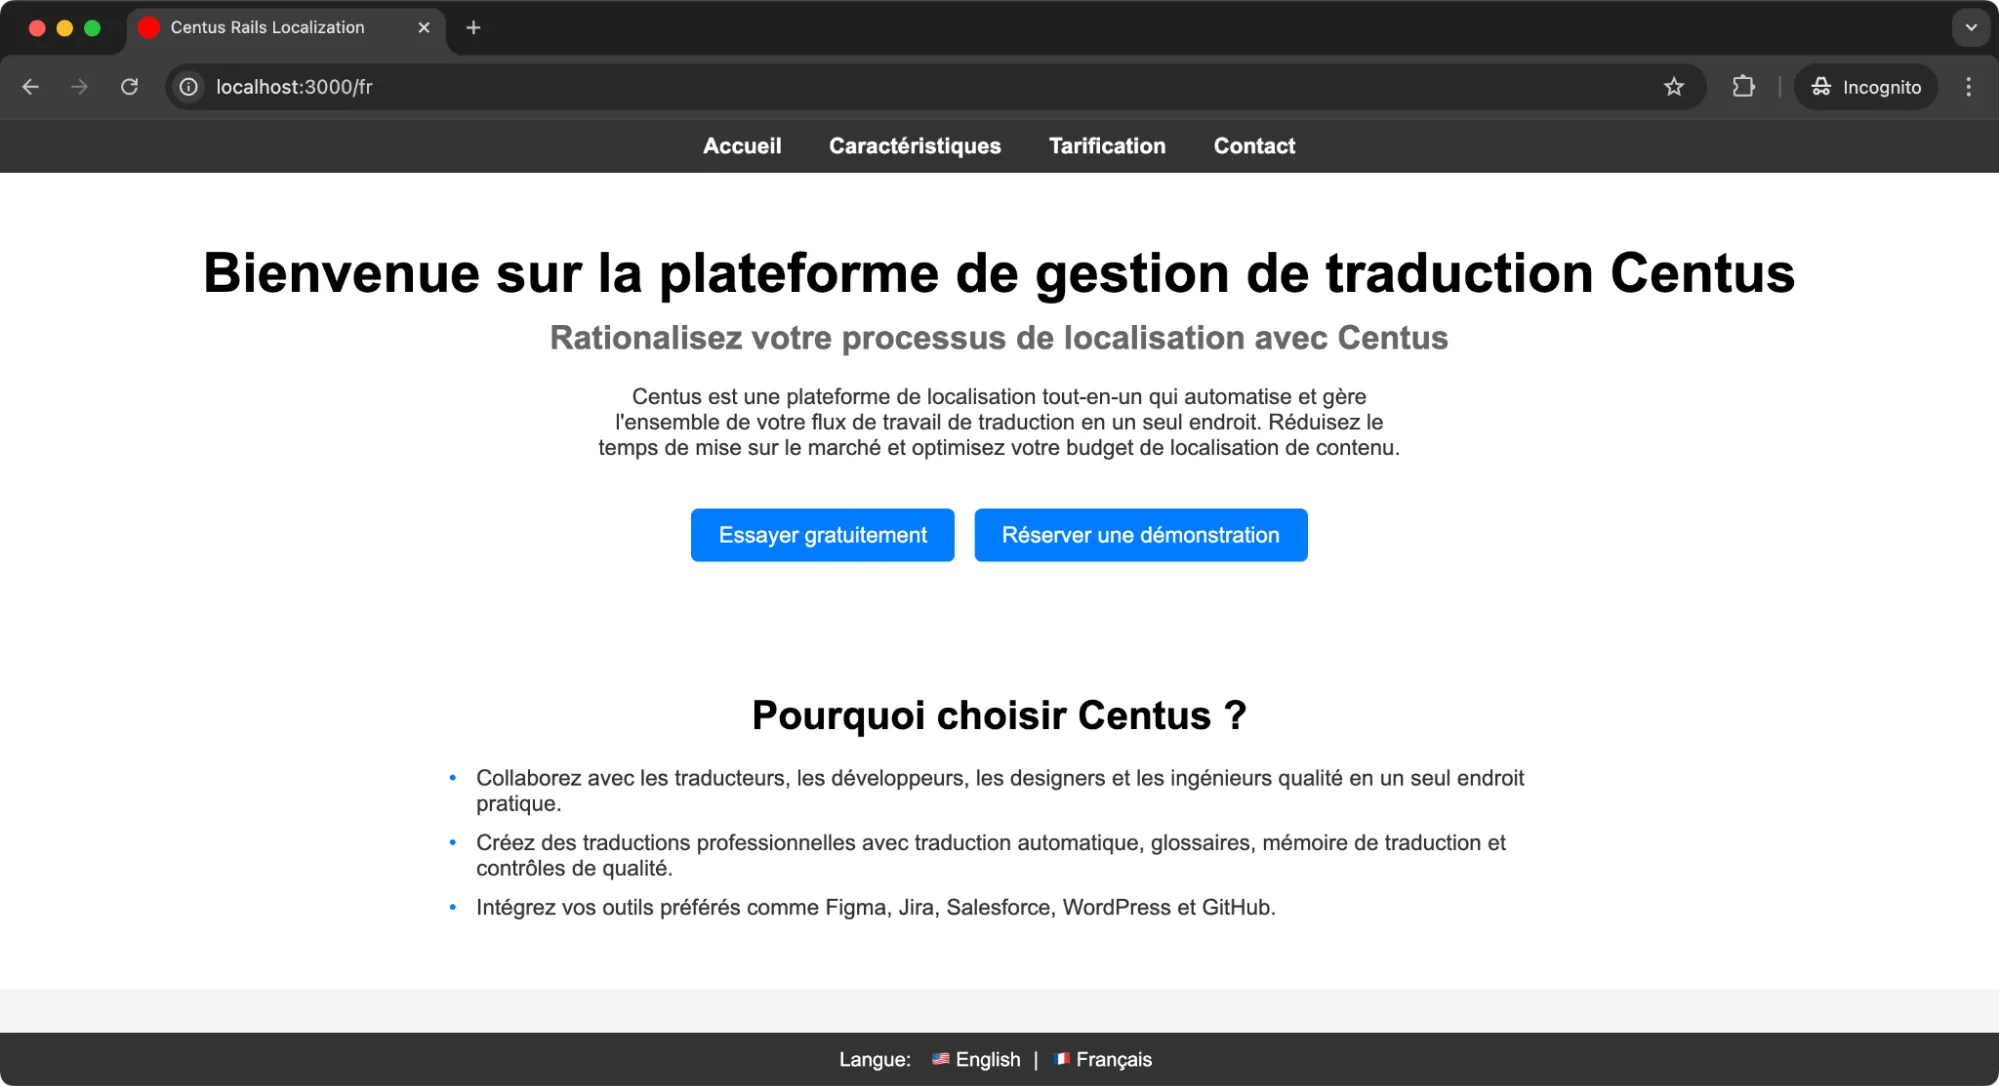
Alright, here’s how I’d approach locale switching based on experience. Imagine we’re building for users who, like us, would rather have content tailored to them automatically.
Locale switching
Now, our users can already change languages at their discretion. But I want to give our users a way to view content in their language automatically.
So here’s something I often like to do—pull the language from the user’s browser settings.
Many users never think about setting language preferences, so making this automatic can create a smoother experience.
Browsers usually send a preferred language with every request in the Accept-Language header. Change the ApplicationController class with the following:
# app/controllers/application_controller.rb
class ApplicationController < ActionController::Base
  before_action :set_locale

  private

  def set_locale
    I18n.locale = params[:locale] || extract_locale_from_accept_language_header || I18n.default_locale
  end

  def extract_locale_from_accept_language_header
    request.env['HTTP_ACCEPT_LANGUAGE']&.scan(/^[a-z]{2}/)&.first
  end


  # Add this to persist locale in URLs
  def default_url_options
    { locale: I18n.locale }
  end
end
It fetches the HTTP_ACCEPT_LANGUAGE variable where the browser locale is available. If the user’s browser is set to French, voilà—our app detects it and automatically serves content in French.
If we don’t have the language set in the user’s browser, we default to English.
Working with date and time
Now that our app speaks the user’s language, let’s make sure it shows dates and times as per their locale too.
After all, seeing dates formatted differently can be jarring. With Rails, we can easily localize dates and times using the l (or “localize”) helper and custom formats.
Localizing dates and times using l helper
Rails’ l helper makes localizing dates and times a breeze.
Here’s how it works. Let’s say I have a timestamp and want to display it in the correct format based on the user’s locale.
Since we’re using l for date and time localization, let’s add a timestamp to our homepage to see it in action. We can simulate this by adding a created_at timestamp directly into our view.
Add the following Rails markup to app/views/home/index.html.erb:
<p><%= l(Time.current, format: :long) %></p>
This simple line in your HTML file will show the date in the format native to the locale.

Now, I’ve added a little CSS to the date so it’s visible here. But you’d see the same results nonetheless.
Defining custom time and date in locale formats
But sometimes we need a specific date or time format that’s not built in.
Rails looks for a date and time format in the yml files before it uses the format from the i18n gem.
Here’s how you can set formats:
# config/locales/en.yml
  date:
    formats:
      long: "%B %d, %Y"   # January 01, 2023
  time:
    formats:
      long: "%B %d, %Y %H:%M"  # January 01, 2023 14:23
# config/locales/fr.yml
  date:
    formats:
      long: "%d %B %Y"    # 01 janvier 2023
      short: "%d/%m/%Y"   # 01/01/2023
  time:
    formats:
      long: "%d %B %Y %H:%M"  # 01 janvier 2023 14:23
      short: "%H:%M"          # 14:23
I’ve also added the default short-time format for French here for demonstration.
Pluralization and interpolation
Handling plurals can be tricky in different languages, but Rails has our back. With pluralization support in the locale files, we can make sure that even the little things—like showing “1 item” vs. “2 items”—feel natural for users.
Defining pluralization rules in locale files
In Rails, we define pluralization rules in the locale files, which helps the t (or “translate”) helper know when to use singular or plural forms.
For example, here’s how to set up item counts in en.yml:
# config/locales/en.yml
en:
  items:
    one: "1 item"
    other: "%{count} items"
Now we can use the t helper with a count parameter to automatically select the correct form:
<p><%= t('items', count: @items_count) %></p>
With the count parameter, Rails picks the singular form for 1 item and the plural form for anything else. It’s one of those little touches that makes an app feel polished.
Using interpolation with the t helper
Interpolation lets you substitute part of a translation string and pass dynamic values directly to it. We wrap these values in %{} placeholders, and Rails fills them in when rendering.
Here’s an example:
# config/locales/en.yml
en:
  welcome_user: "Welcome, %{user_name}!"

# config/locales/fr.yml
fr:
  welcome_user: "Bienvenue, %{user_name}!"
Then, in our view, I pass in the user_name as a string:
<p><%= t('welcome_user', user_name: "Centus") %></p>
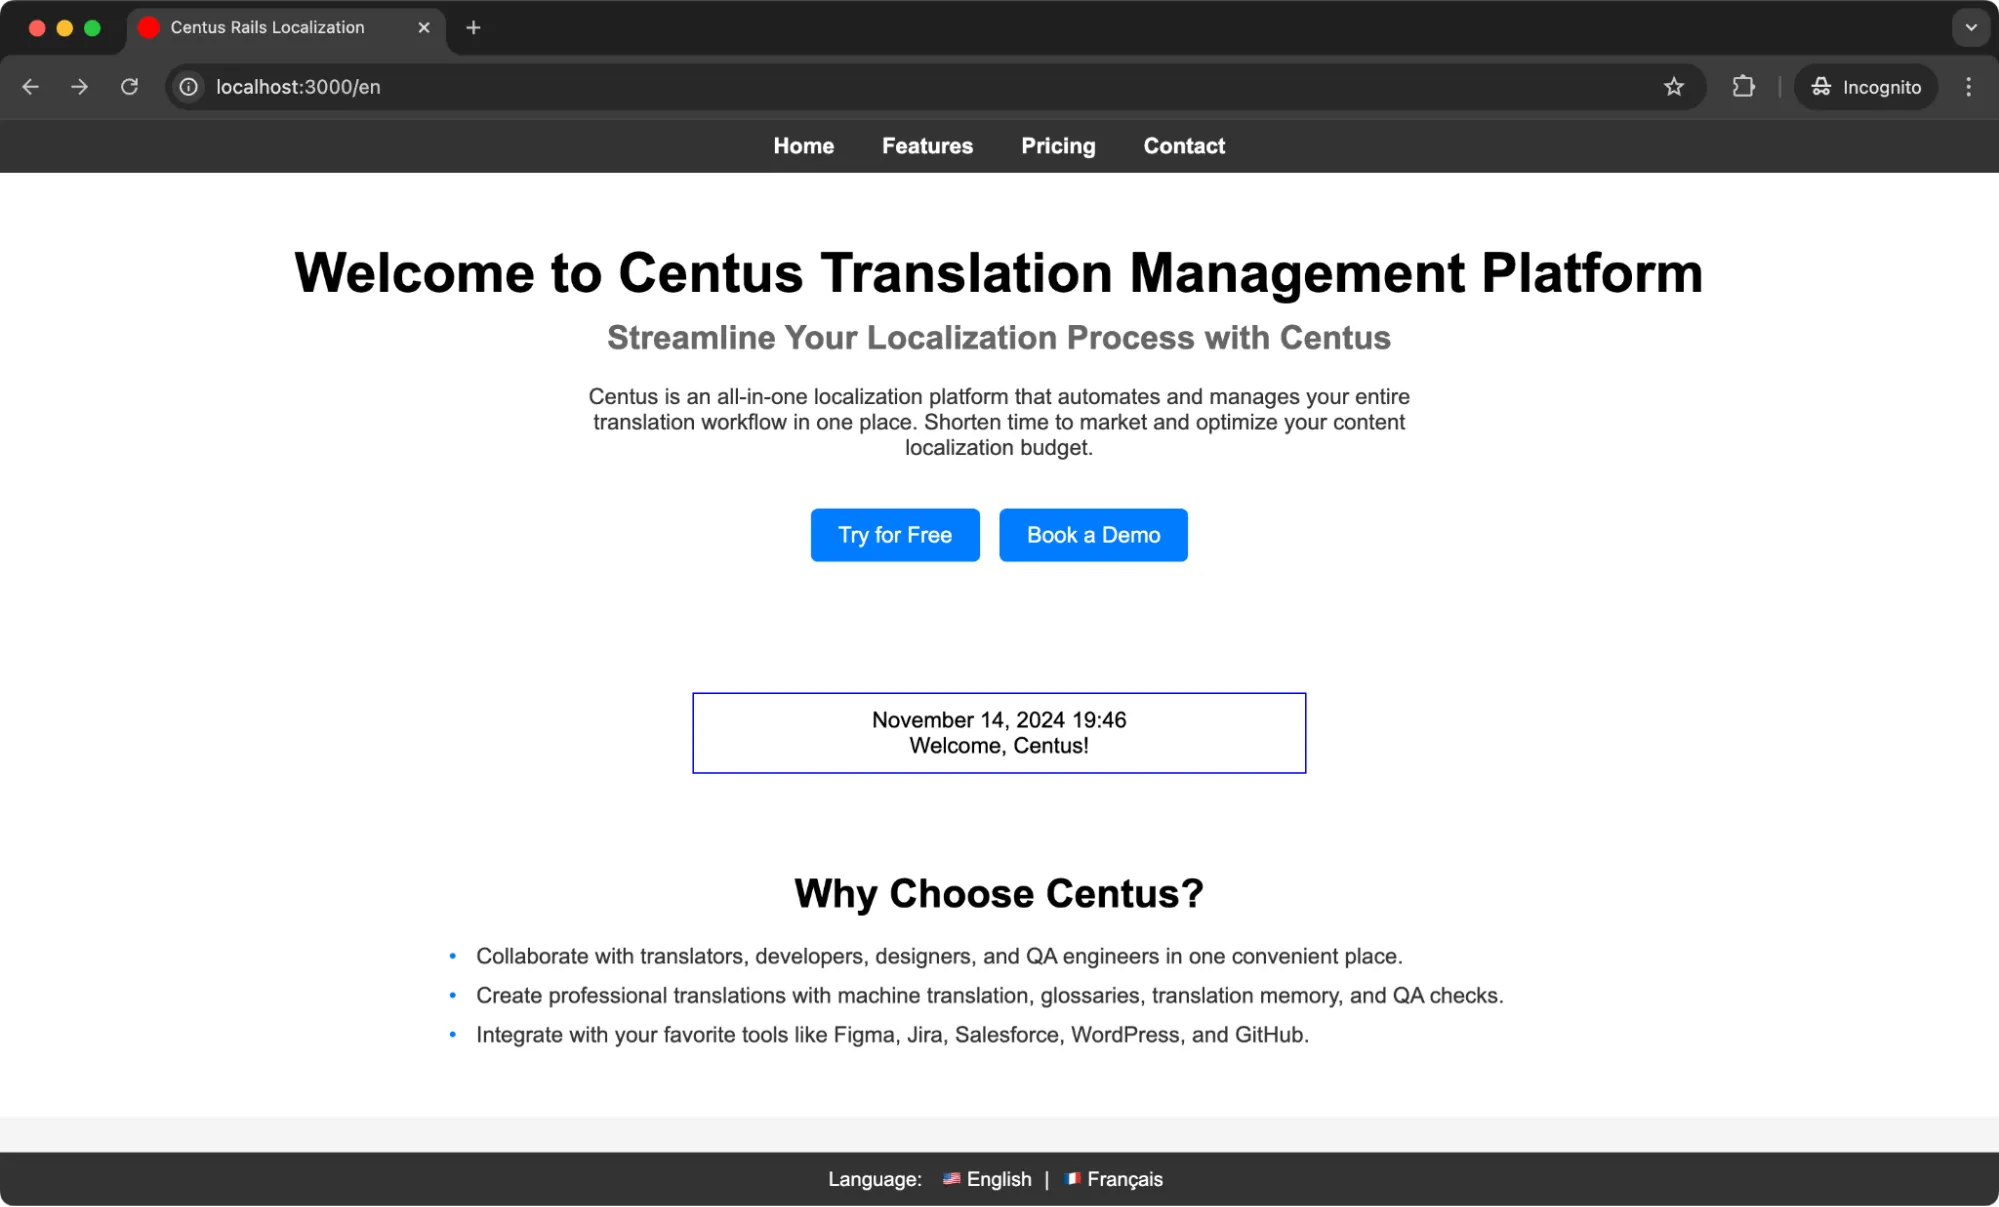
As you’ll see right below the date, it says “Welcome, Centus!”
If you switch the language, the “Centus” that we pass will remain the same while the rest of the string changes as per the set translation string.
Working with gender information
Building up from interpolation, I’ll show you how to add gender-specific translations.
Now, English is quite a gender-neutral language. If you had to greet a person of any gender, you’d say “Hello” or "Welcome.”
However, some languages require gender-specific translations, which can be a challenge in localization.
Luckily, Rails lets us manage gender-based translations smoothly by setting different phrases based on gender.
Managing gender-specific translations
We’ll start by defining gendered versions in our locale files. Let’s say we want a greeting that changes based on the user’s gender:
# config/locales/en.yml
en:
  greetings:
    male: "Welcome, Mr. %{name}"
    female: "Welcome, Ms. %{name}"
    other: "Welcome, %{name}"

# config/locales/fr.yml
  greetings:
    male: "Bienvenue, M. %{name}"
    female: "Bienvenue, Mme %{name}"
    other: "Bienvenue, %{name}"
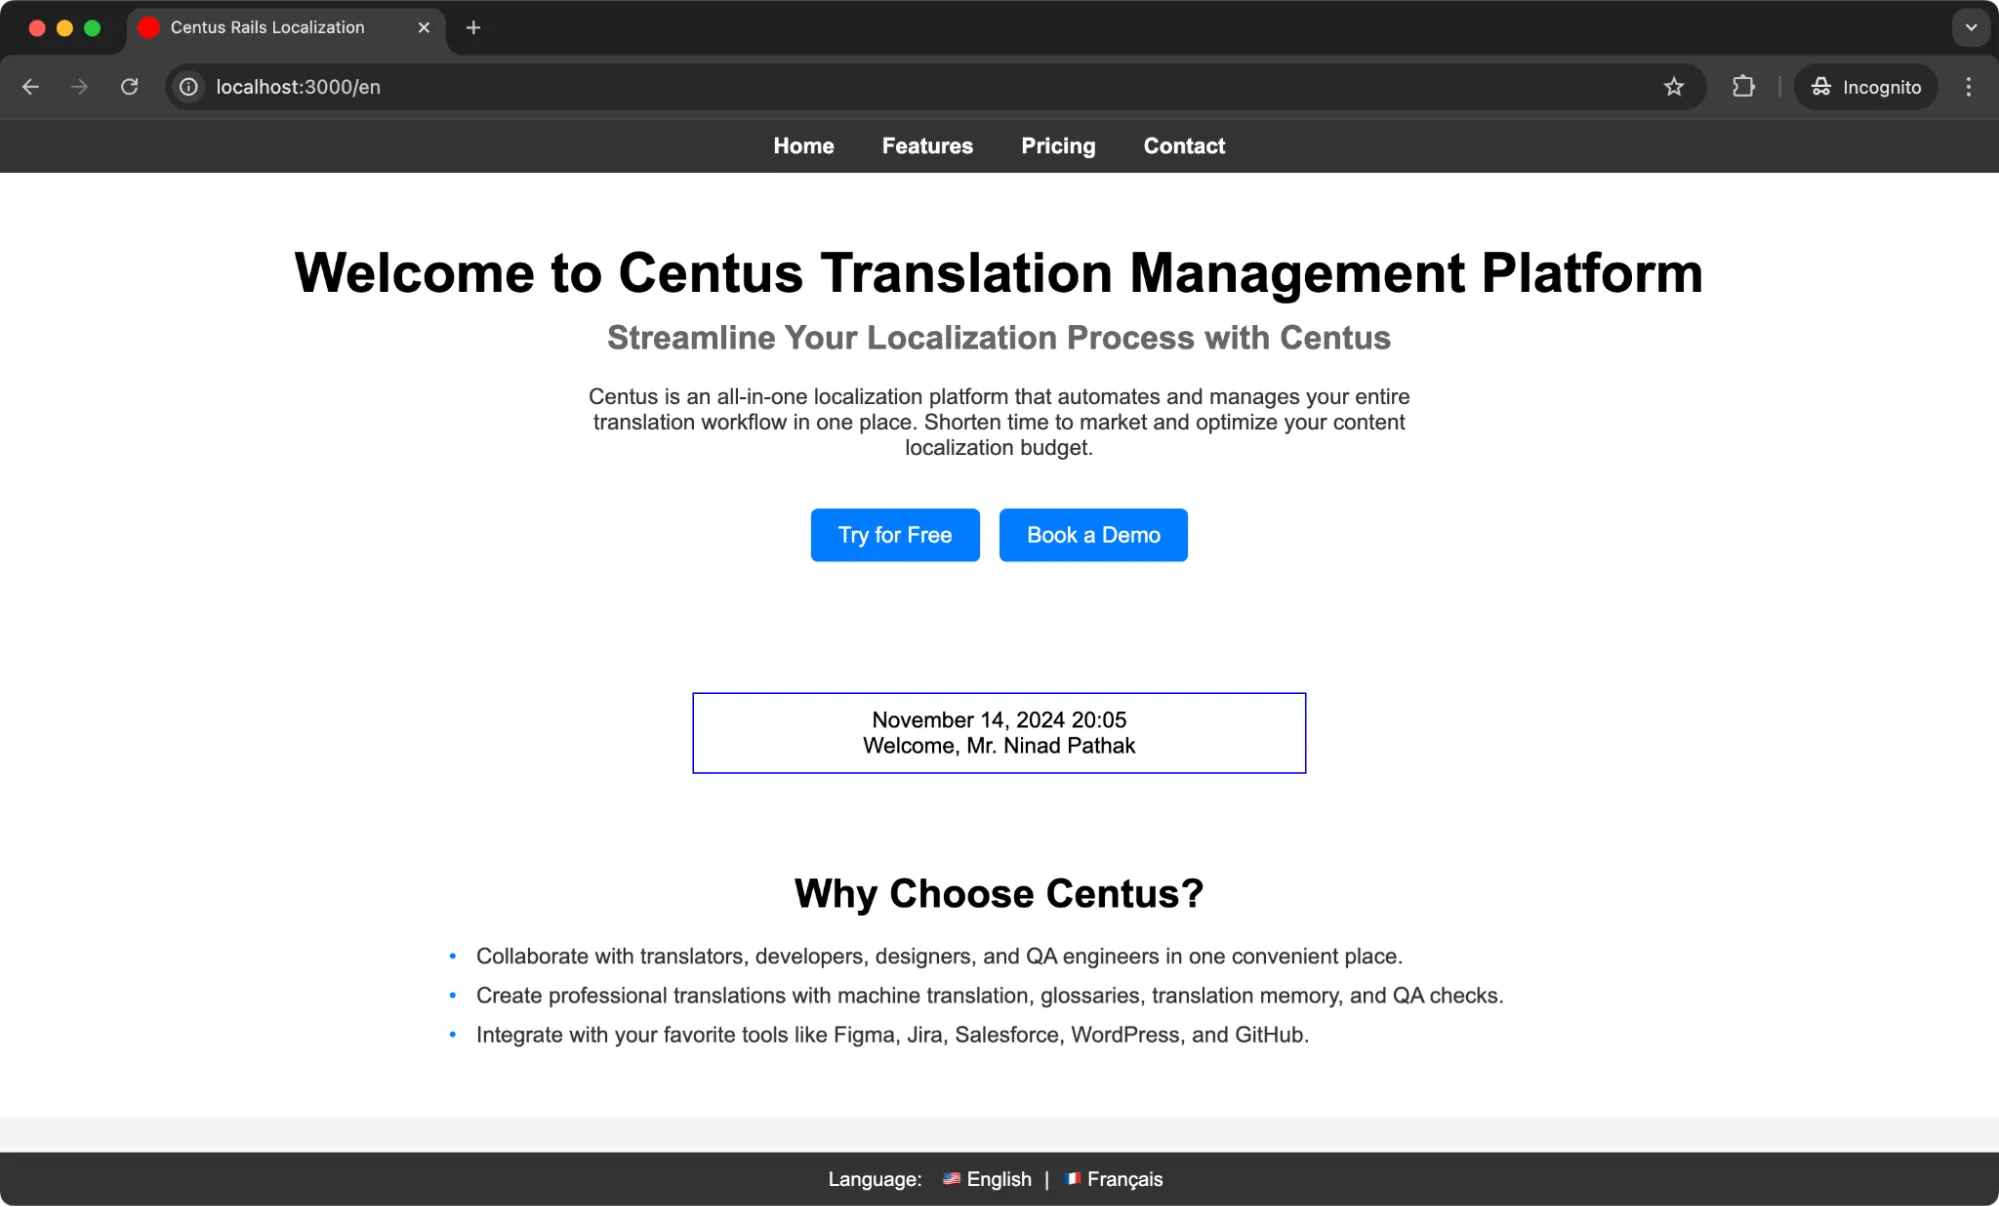
Then, in our view, we pass the appropriate gender key dynamically based on the user’s profile:
<% gender = 'male' %> <!-- Change this to 'female' or 'other' to see the effect -->
 <p><%= t("greetings.#{gender}", name: "Ninad Pathak") %></p>
And then, refresh your page to see the gendered translation string ready.
How to manage Rails app translations
Managing translations in a Rails (or any other) application can become complex as your project grows.
To make the process simpler, use a localization management platform. Preferably, Centus. It goes like this:
First, sign up to Centus. Shouldn’t take longer than a minute.
Then, create a new project by clicking the button at the top right corner.
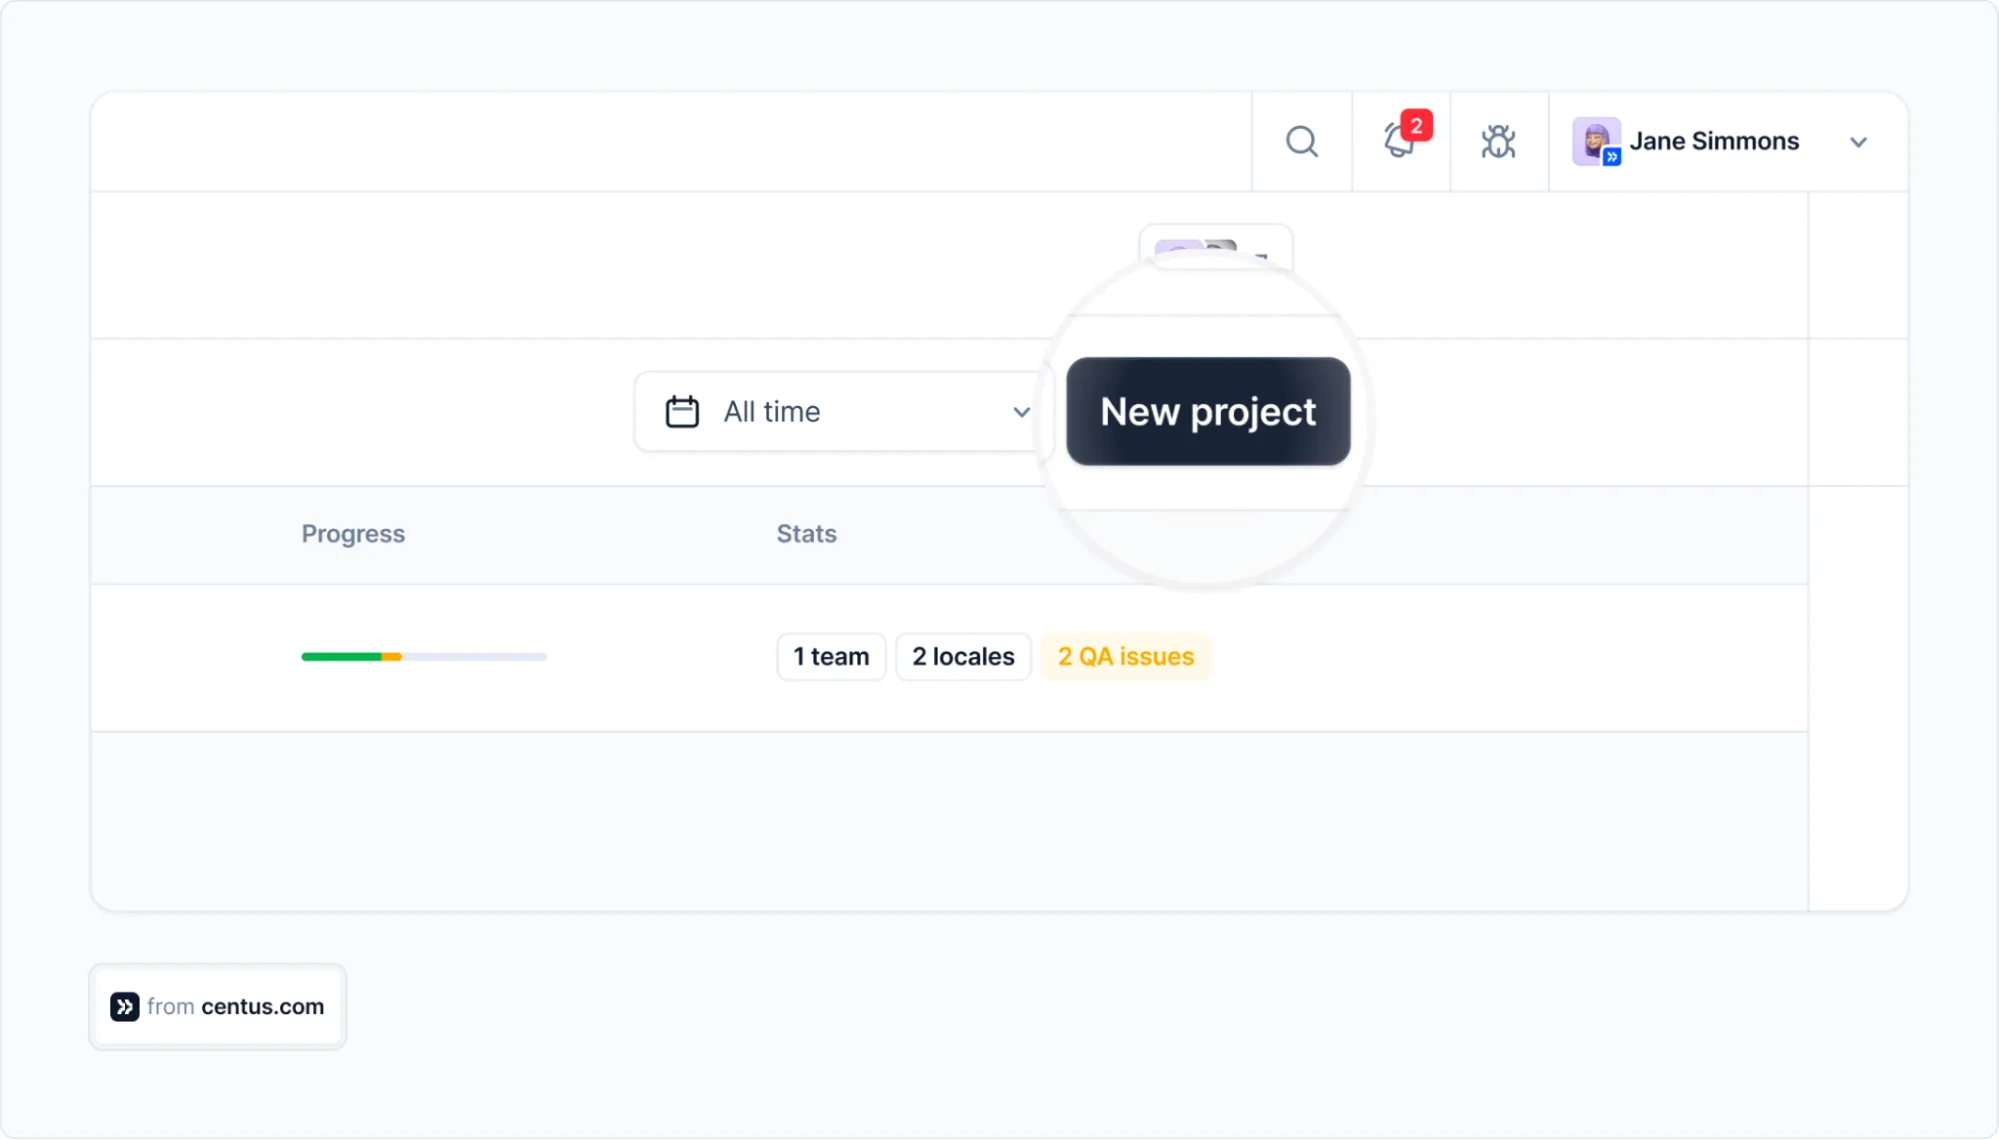
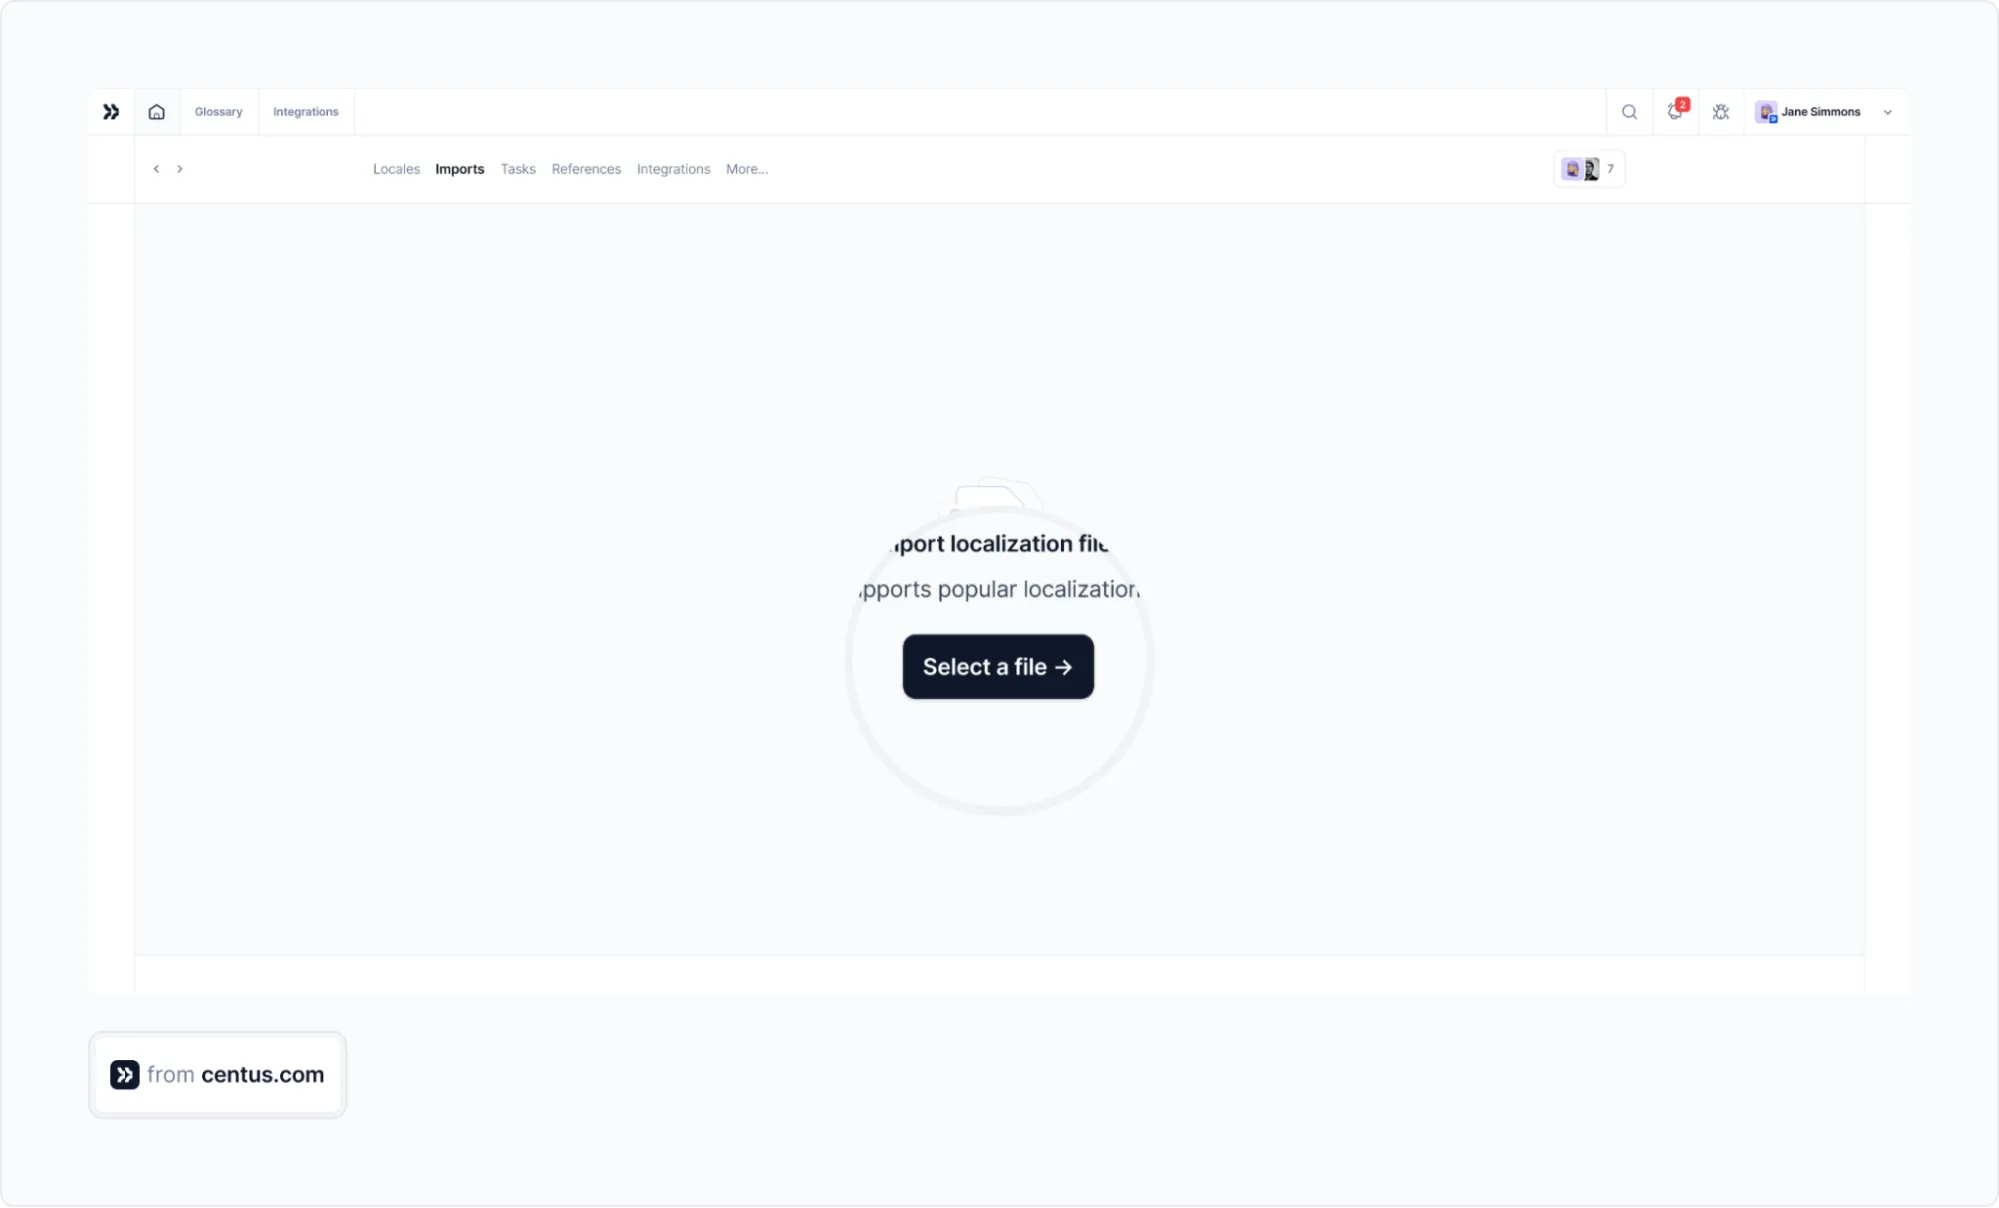
Once you have a project, it’s time to import your YML files to it. To this end, navitate to the Import section and click Select a file:
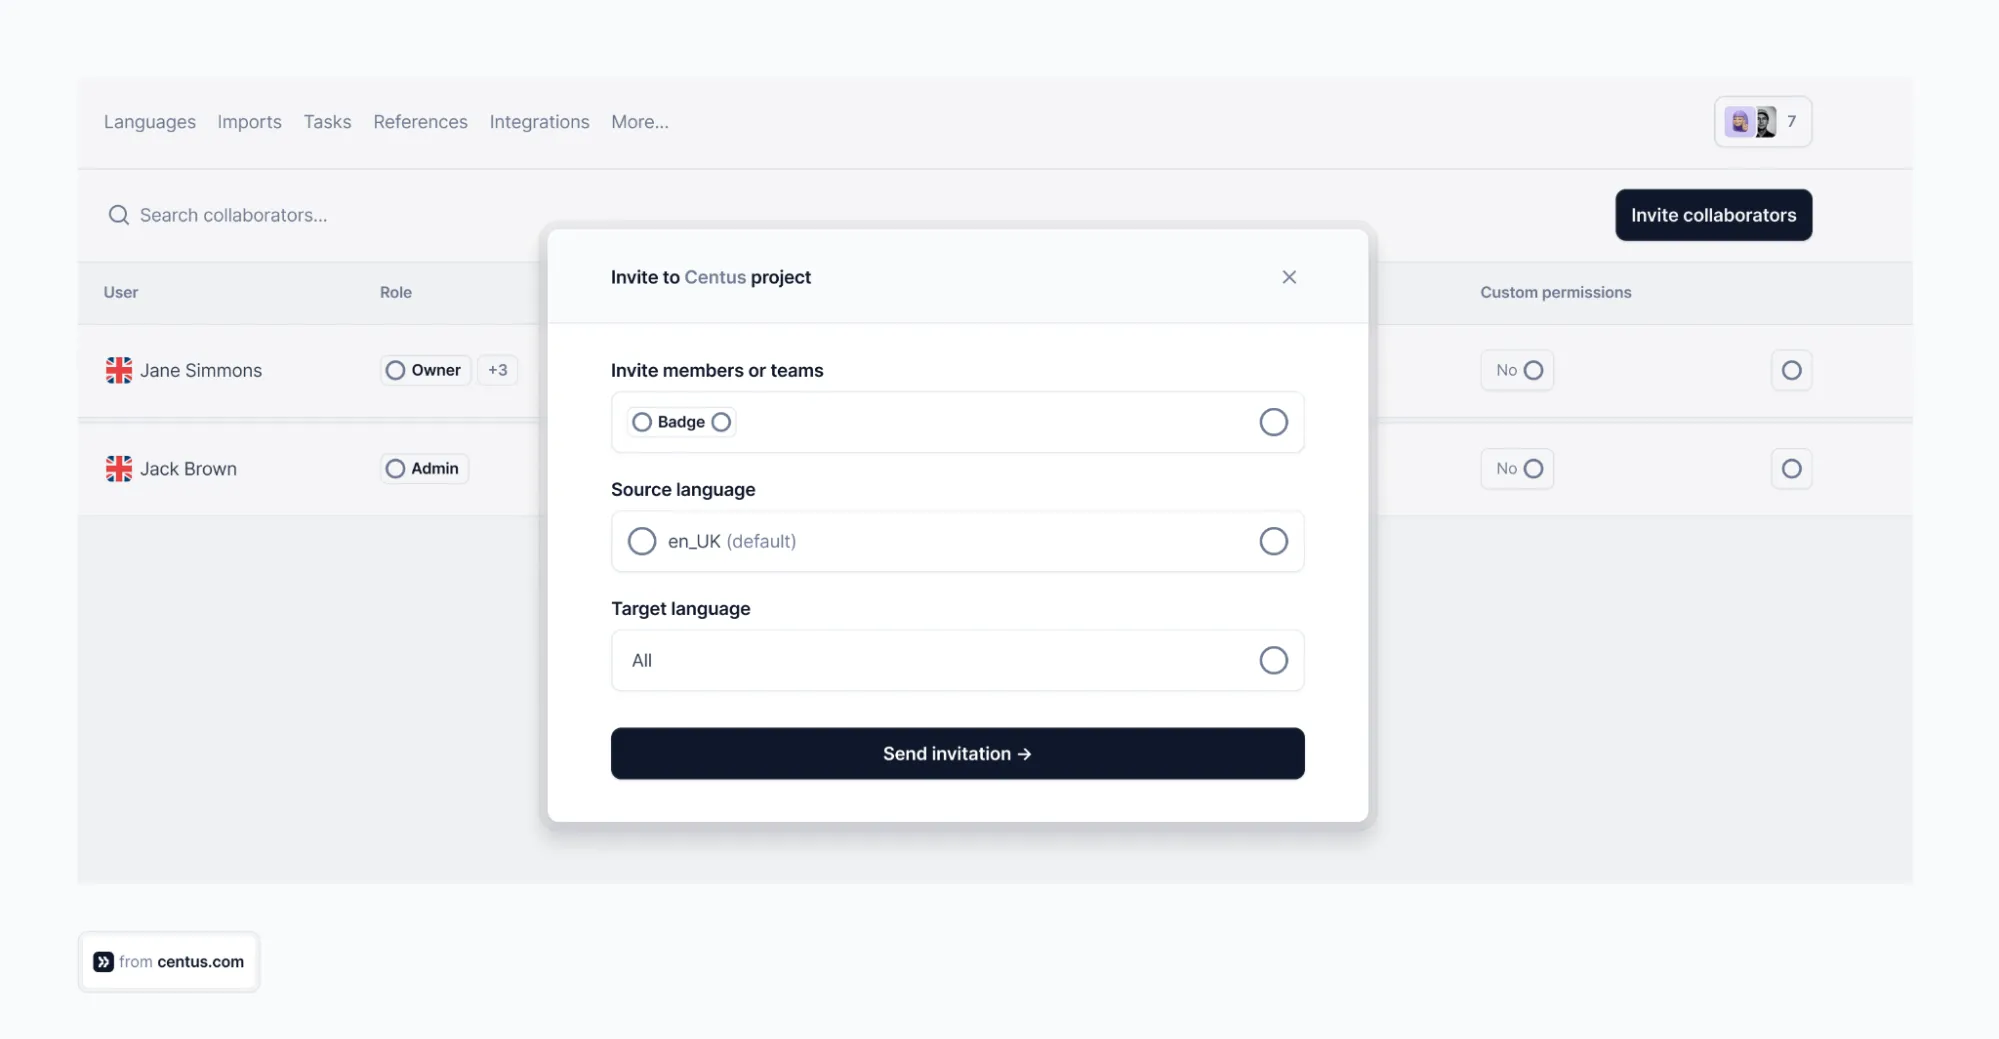
Now you can hand over the project to professional translators. Go to the Contributors section and click Invite collaborators.
Wondering where to find translators and editors? Our helpful guide has you covered.
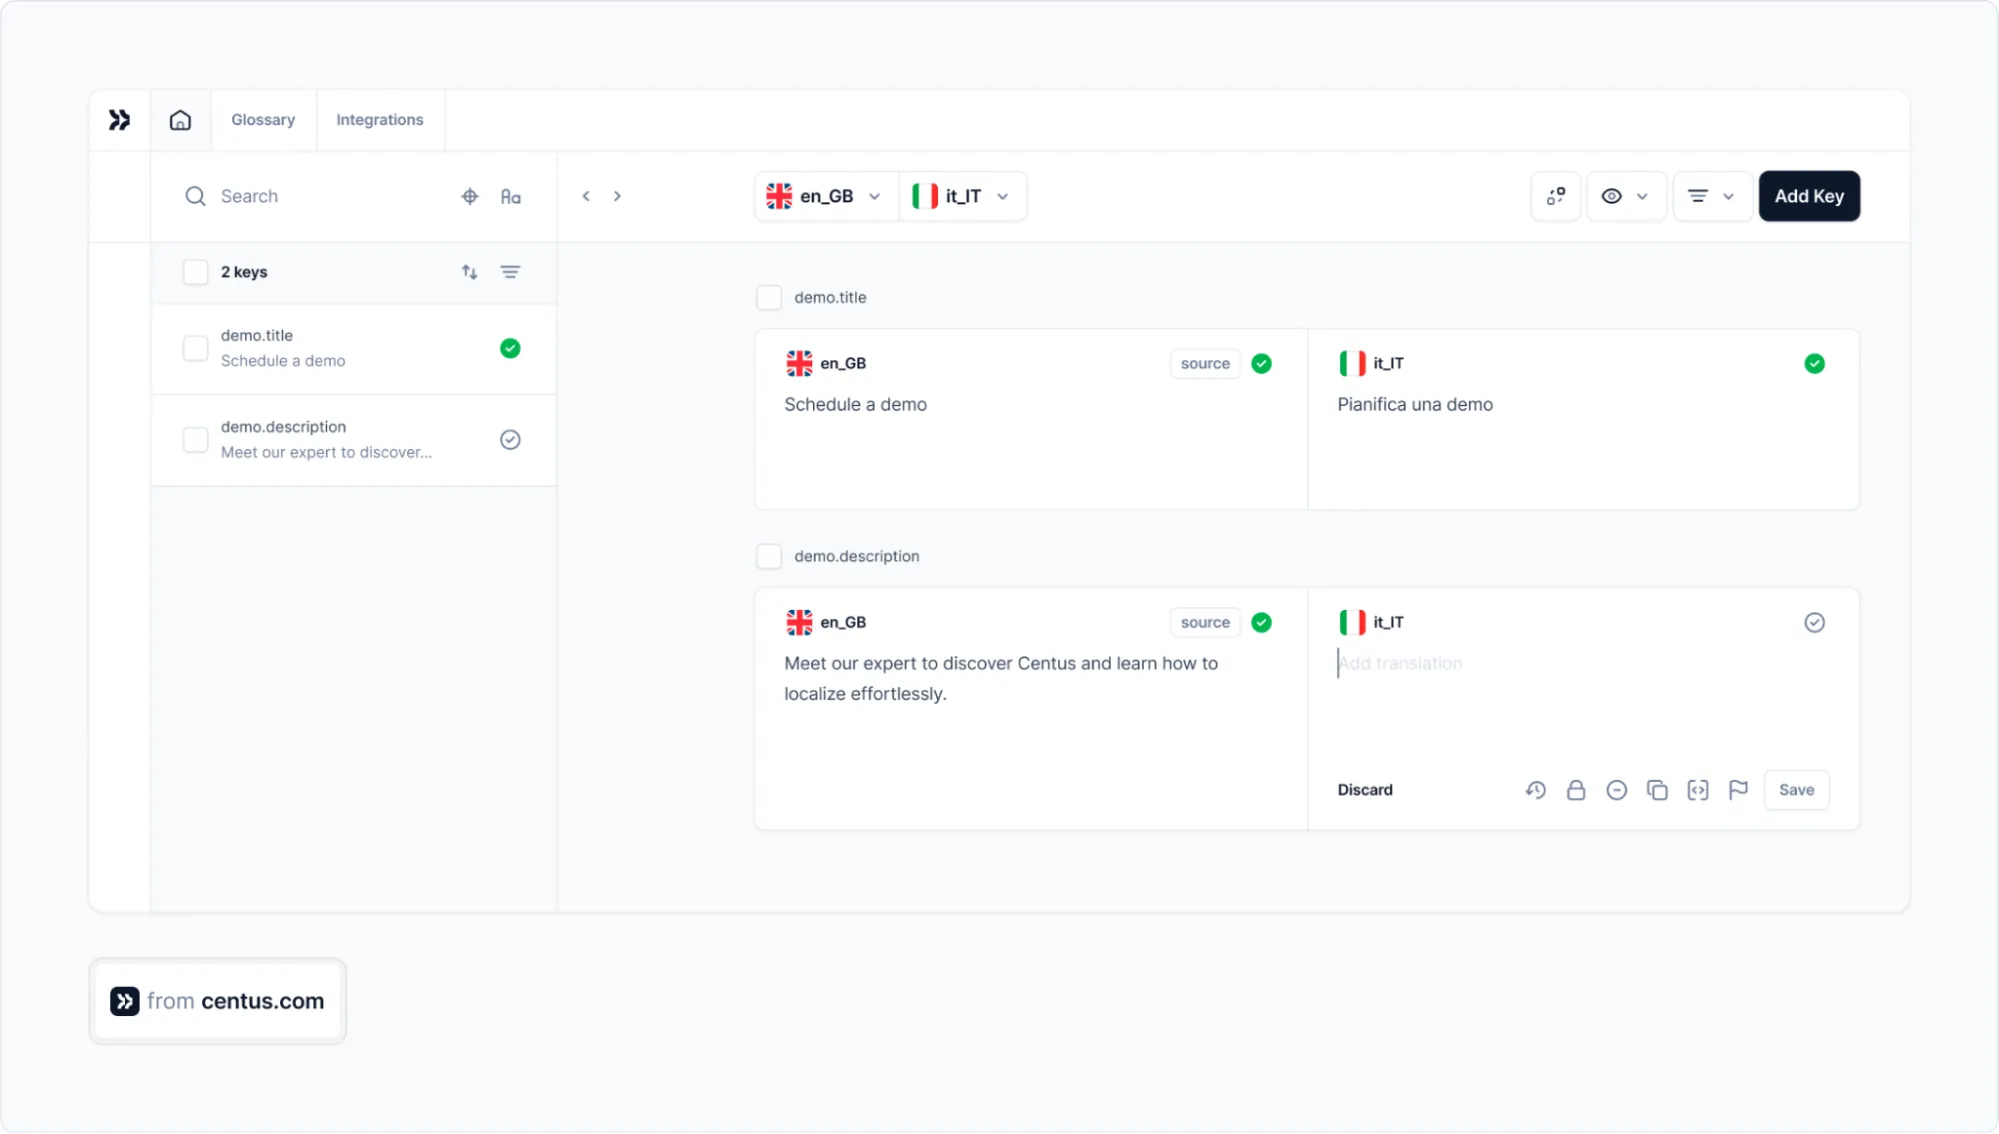
With your team assembled, transaltions can finally kick in. Your language experts can work together in Centus’ convenient Editor to translate your Ruby app into multiple languages simultaneously.
Usually, translators can handle between 2,000 and 3,000 words per day. But Centus can make your team way more efficient.
Centus features built-in support for Google Translate, DeepL, and Microsoft Translator allowing you to bulk translate all strings for your app. With that out of the way, your team can simply edit automatically-generated translations to finish your project days ahead of schedule.
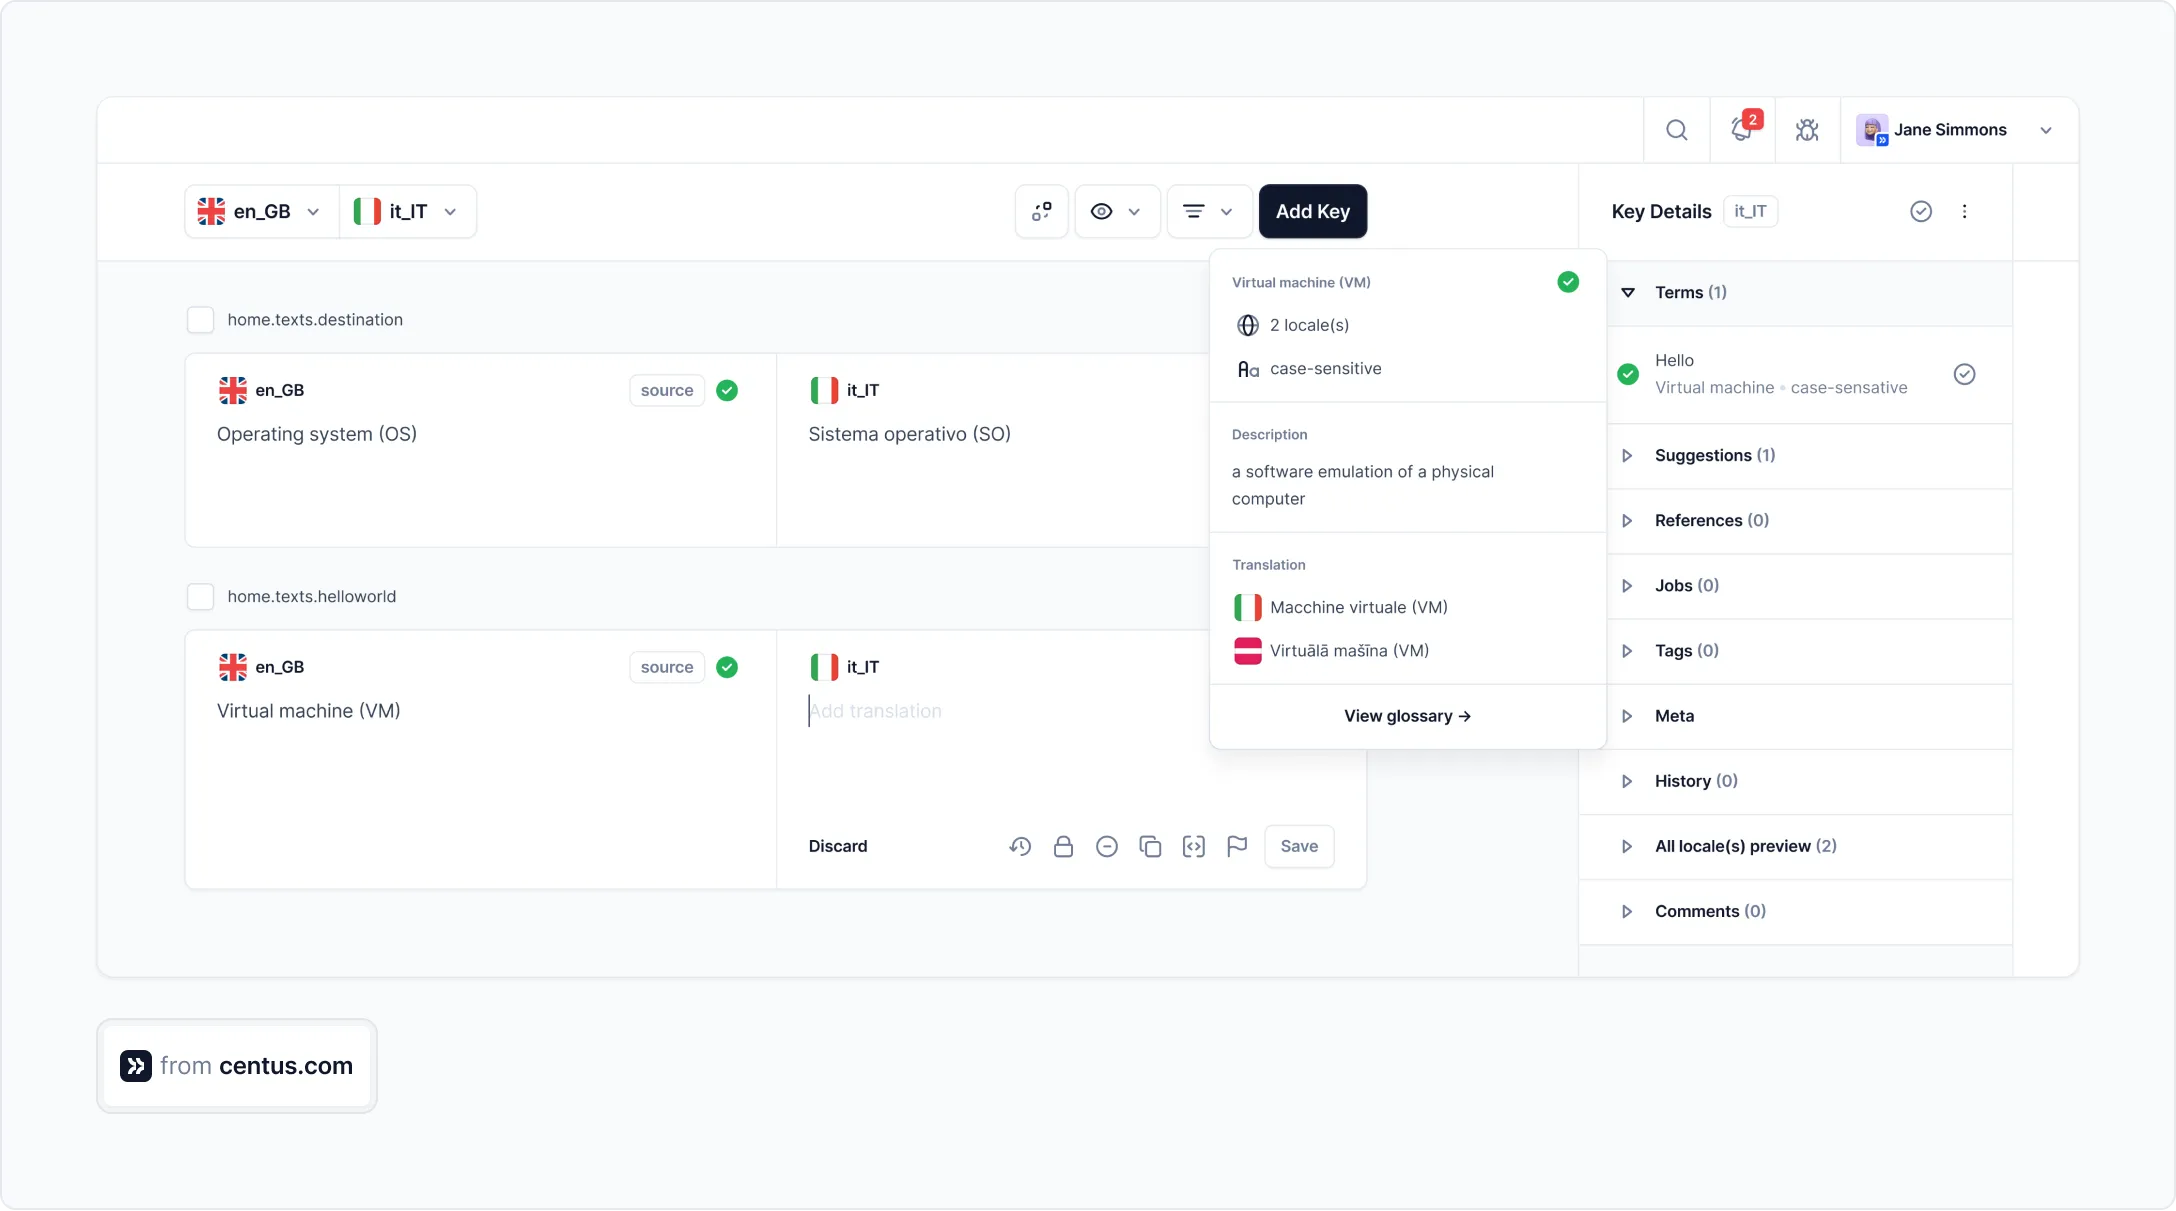
To help your language team further, encourage them to use glossaries. This will help to keep the translations consistent throughout your entire app.
And, of course, ensure that someone from your team who speaks the target language reviews the final translations. Centus makes the review and approval process incredibly easy.
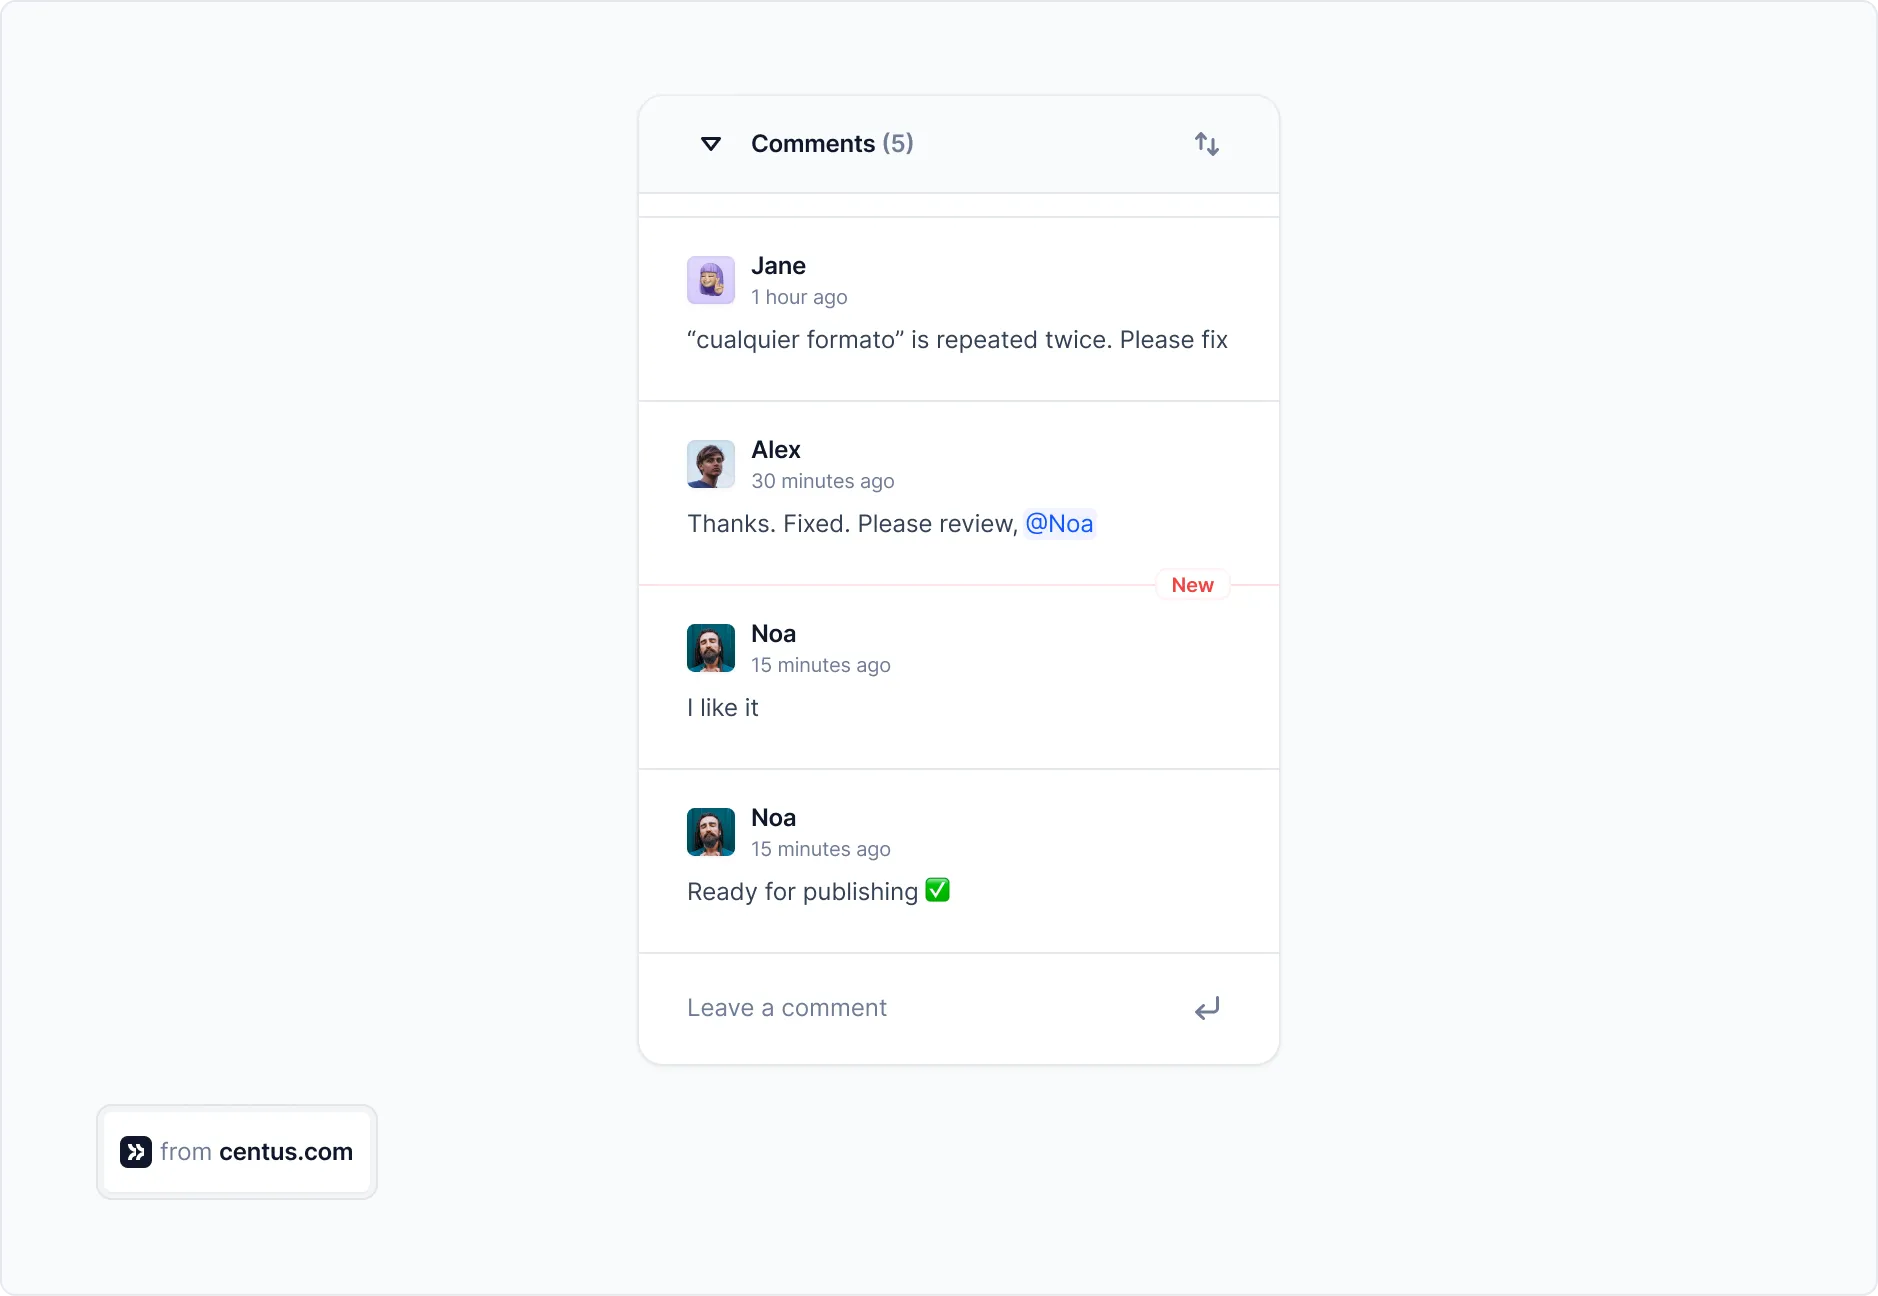
Using Centus you can quickly create translations for your Ruby app, knowing they are accurate and ready for your audience.
Ruby on Rails localization with R18n gem
Now, let's explore another powerful Ruby localization library—R18n.
It can provide greater flexibility for localization needs, especially for handling complex pluralization rules and translation fallback.
R18n is an alternative to the default Rails i18n gem, designed for deeper flexibility in handling translations across various languages and formats.
It offers a rich syntax for translations, model translation, auto-detection of user locales, and support for multiple frameworks like Rails, Sinatra, and desktop applications (what we’ll be using here).
Here are some features of R18n:
- Automatic locale detection: Detects locale based on user or browser settings.
- YAML-based translations: Uses .yml files located in config/locales/, just like Rails’ i18n.
- Complex pluralization: Handles languages with multiple plural forms, ideal for languages like Russian or Arabic.
- Gender-based translations: Enables phrases to change based on gender, enhancing personalization.
Let’s jump right in to setting up the gem.
Setting up r18n-desktop gem
Add the gem to your Rails project’s Gemfile:
gem 'r18n-core'
gem 'r18n-desktop'
Then, bundle install:
bundle install
Load the gem in your application environment:
# config/application.rb
require 'r18n-desktop'
Specify config/locales/ as the directory for translations:
R18n.from_env Rails.root.join('config', 'locales')
R18n.set('en')  # Set default locale
Simple translations
Create YAML files for each locale in config/locales/ (e.g., en.yml, fr.yml):
# config/locales/en.yml
greeting: "Hello, %{name}!"

# config/locales/fr.yml
greeting: "Bonjour, %{name}!"
Retrieve translations using the t helper in your Rails views or controllers:
puts R18n.get.t.greeting(name: 'Alice')
# => "Hello, Alice" (if locale is English)
Switching the locale
To switch locales based on user preference or browser settings, detect the locale from the request’s HTTP_ACCEPT_LANGUAGE header:
def set_locale
  R18n.set(request.env['HTTP_ACCEPT_LANGUAGE']&.scan(/^[a-z]{2}/)&.first || 'en')
end
Or set a specific locale directly:
R18n.set('fr') # Switches to French
Performing localization
Use the l helper to display localized dates and times:
puts R18n.get.l(Time.now)               # Default date/time format
puts R18n.get.l(Time.now, :full)        # Full format with day/month
puts R18n.get.l(Time.now.to_date, :human) # Human-readable format "Today"

Performing pluralization
Define plural forms directly in your YAML files using !!pl:
# config/locales/en.yml
notifications: !!pl
  0: "No notifications"
  1: "1 notification"
  n: "%{count} notifications"

# How to use in the Rails console
count = 5
puts R18n.get.t.en.notifications(count) % {count: count}
# => "5 notifications"

Working with gender information
Define gender-based translations in the YAML files:
# config/locales/en.yml
welcome_message:
  male: "Welcome, Mr. %{name}"
  female: "Welcome, Ms. %{name}"
  other: "Welcome, %{name}"


# config/locales/fr.yml
welcome_message:
  male: "Bienvenue, M. %{name}"
  female: "Bienvenue, Mme %{name}"
  other: "Bienvenue, %{name}"
In the code, use the gender key to access the correct translation:
# How to use in the Rails conosle

R18n.get.t.en.greeting % { name: "Ninad" }

gender = 'male' # Dynamically set to 'male', 'female', or 'other'
puts R18n.get.t.en.greetings[gender] % { name: "Ninad" }

# => "Welcome, Mr. Ninad" (if locale is set to English)
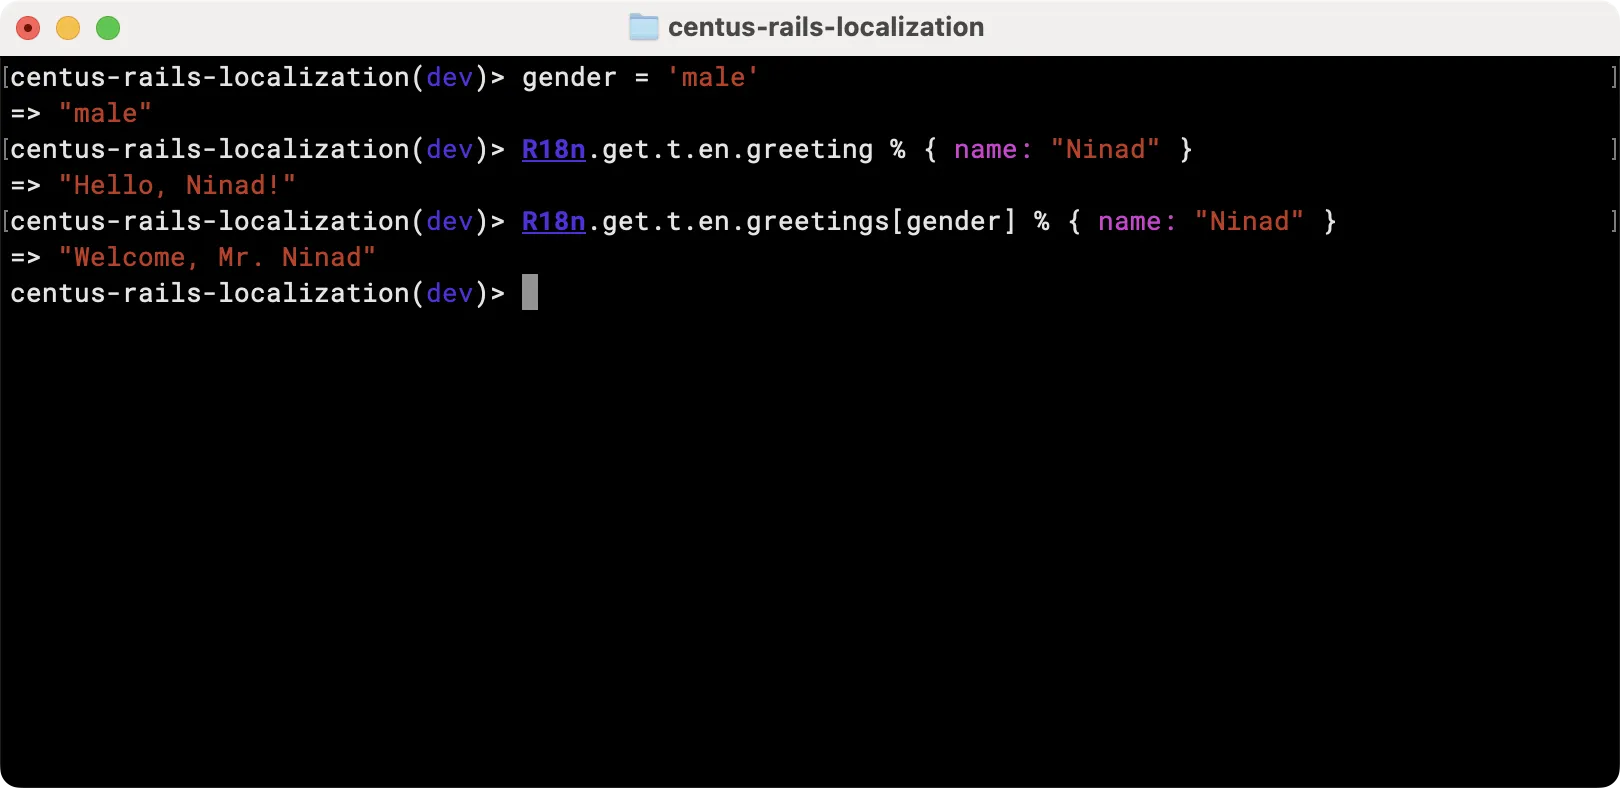
Note that you can access the translations without .en once you set the locale in the console.
Here's a structured guide for using the FastGettext gem with PO files, designed to align with the headers and topics you've provided. Each section includes clear steps for setup, translation, and customization.
FastGettext gem: Translate with PO files
The FastGettext gem is a lightweight, efficient library for handling translations in Ruby applications, and it’s well-suited for using .po files, which are common in many localization workflows. This gem simplifies the process of loading translations, switching locales, and managing pluralizations, and it supports complex translation needs like gender-specific variations.
Key features of FastGettext
-
Support for .po and .mo files
-
High performance and minimal overhead, even for applications with a large number of translations.
-
Fully supports gettext-style pluralization based on locale-specific rules.
-
Change languages at runtime without restarting the application.
-
Easily insert dynamic content into translations.
-
Works well with Rails and other Ruby frameworks.
-
Choose from in-memory, database, or file-based storage for translations.
-
Specify default locales or values if a translation is unavailable.
Setting up FastGettext
To start using FastGettext, add it to your Gemfile:
gem 'fast_gettext', '~> 2.0'
Run bundle install to install the gem.
Next, configure FastGettext in an initializer:
# config/initializers/fast_gettext.rb

require 'fast_gettext'
FastGettext.add_text_domain('app', path: 'locale')
FastGettext.text_domain = 'app'
FastGettext.available_locales = ['en', 'fr']  # Add other locales as needed
FastGettext.locale = 'en'  # Default locale
This setup assumes that your PO files will be located in a locale directory within your project, organized by language.
Setting up the rest of the files for FastGettext
First, I’ll modify the ApplicationController to use FastGettext. Set the locale in FastGettext.locale. You can do this in a controller:
class ApplicationController < ActionController::Base
  before_action :set_locale_and_text_domain

  private

  def set_locale_and_text_domain
    FastGettext.locale = params[:locale] || FastGettext.default_locale
    FastGettext.text_domain = 'app'
  end
end
Then, replace the code in the config/application.rb file with the following:
require_relative "boot"
require "rails/all"

# Require the gems listed in Gemfile, including any gems
# you've limited to :test, :development, or :production.
Bundler.require(*Rails.groups)

module CentusRailsLocalization
  class Application < Rails::Application
    # Rails i18n configuration
    config.i18n.available_locales = [:en, :fr]
    config.i18n.default_locale = :en

    # Initialize FastGettext
    initializer 'fast_gettext_setup' do
      require 'fast_gettext'

      # Configure FastGettext with the text domain and locales path
      FastGettext.add_text_domain('app', path: Rails.root.join('locale'))
      FastGettext.text_domain = 'app'

      # Set available locales and default locale
      FastGettext.available_locales = ['en', 'fr']
      FastGettext.default_locale = 'en'
    end
  end
end
Alright, you’re now ready to use these translations. I’ll now proceed to creating the translation files and adding a few simple translations in each file.
Adding translations in Rails with FastGettext
Add your PO files in the locale directory in the root of the project, organized by locale. The structure should look like this:
locale/
├── en/
│   └── app.po
├── fr/
│   └── app.po
In each PO file, define translations like this:
# locale/en/app.po

msgid ""
msgstr ""

"Project-Id-Version: app 1.0\n"
"POT-Creation-Date: 2024-11-16\n"
"PO-Revision-Date: 2024-11-16\n"
"Last-Translator: Your Name\n"
"Language: en\n"
"MIME-Version: 1.0\n"
"Content-Type: text/plain; charset=UTF-8\n"
"Content-Transfer-Encoding: 8bit\n"
"Plural-Forms: nplurals=2; plural=n != 1;\n"

msgid "welcome"
msgstr "Welcome to Centus Translation Management Platform"

msgid "subheading"
msgstr "Streamline Your Localization Process with Centus"

# Basic translation
msgid "hello_world"
msgstr "Hello World"

# Translation with interpolation
msgid "welcome_name"
msgstr "Welcome, %{name}!"


# locale/fr/app.po

msgid ""
msgstr ""

"Project-Id-Version: 1.0\n"
"POT-Creation-Date: 2024-11-16\n"
"PO-Revision-Date: 2024-11-16\n"
"Last-Translator: Your Name\n"
"Language: fr\n"
"MIME-Version: 1.0\n"
"Content-Type: text/plain; charset=UTF-8\n"
"Content-Transfer-Encoding: 8bit\n"
"Plural-Forms: nplurals=2; plural=n>1;\n"

msgid "hello_world"
msgstr "Bonjour le monde"

msgid "welcome_name"
msgstr "Bienvenue, %{name}!"
Translating page elements
To demonstrate this, I’m creating a fresh HTML page instead of working on our existing one (considering the number of changes required). You can work with an existing page and use the code snippets below to access yout translations from the .po files.
For basic translations, use FastGettext._ (underscore method) in your views or controllers:
<h1><%= _("hello_world") %></h1>
For translations with variables, use FastGettext._ along with Ruby string interpolation:
<p><%= _("welcome_name") % {name: "John"} %></p>
This will display "Welcome, Ninad!" based on the translation in the PO file.
Performing pluralization
Pluralization in FastGettext is straightforward with the n_ method. In your PO files, define both singular and plural forms:
# Plural forms
msgid "item"
msgid_plural "items"
msgstr[0] "1 item"
msgstr[1] "%{count} items"
In the view, use FastGettext.n_ to handle singular and plural:
<% item_count = 5 %>
<p><%= n_("item", "items", item_count) % {count: item_count} %></p>
This method selects the appropriate form based on the count value, handling pluralization based on the locale’s rules.
Working with gender information
To manage gender-specific translations, define variations for each gender in your PO files. For example:
# Gender-specific translations
msgid "greeting_male"
msgstr "Welcome, Mr. %{name}"

msgid "greeting_female"
msgstr "Welcome, Ms. %{name}"

msgid "greeting_other"
msgstr "Welcome, %{name}"
In your view, select the correct message based on the user’s gender:
<p><%= _("greeting_male") % {name: "John"} %></p>
Using Mobility for Rails model translations
If you don’t particularly like FastGettext for your UI translations, let me show you how to handle translations for your database content using Mobility.
This gem is perfect when you need to translate things like product descriptions, blog posts, or any other user-generated content.
Features of Mobility Gem
- Lets you choose how to store translations (PostgreSQL JSON/JSONB, key-value tables, or separate columns)
- Provides a really clean syntax for working with translations
- Handles fallback gracefully
- Integrates beautifully with ActiveRecord
- Offers powerful querying capabilities
Getting started with Mobility
First, let's add Mobility to our Gemfile:
gem 'mobility', '~> 1.2.9'
Then run the setup:
bundle install
rails generate mobility:install
This creates a configuration file that I usually set up like this:
# config/initializers/mobility.rb

Mobility.configure do
  plugins do
    backend :jsonb        # I prefer JSONB for PostgreSQL projects
    active_record         # We need this for Rails
    reader                # Creates our getter methods
    writer                # Creates our setter methods
    query                 # Adds scopes for querying
    cache                 # Adds caching for better performance
    fallbacks             # Super useful for handling missing translations
  end
end
How I use Mobility in my models
Let's say you create a Product model that needs translated attributes. Here's how I’d set it up:
class Product < ApplicationRecord
  extends Mobility
  translates :name, :description, type: :jsonb
end
Now the product model can be used as below:
# Creating a product with translations
product = Product.create(
  name_en: "Coffee Maker",
  name_fr: "Cafetière",
  description_en: "Makes amazing coffee",
  description_fr: "Fait du café extraordinaire"
)

# Reading translations is super easy
I18n.locale = :en
product.name         # => "Coffee Maker"

I18n.locale = :fr
product.name         # => "Cafetière"

# I can also access translations directly
product.name_en      # => "Coffee Maker"
product.name_fr      # => "Cafetière"
Searching translated content
One of my favorite features is how easy it is to search translated content:
# Find products with "coffee" in their name in English
Product.i18n.where(name: "coffee")

# Find products with specific translations
Product.i18n do
  where(name.matches("%coffee%"))
    .or(description.matches("%espresso%"))
end
Handling missing translations
I always set up fallbacks to handle cases where translations are missing:
class Product < ApplicationRecord
  extends Mobility
  translates :name, :description,
            fallbacks: { fr: [:en], default: :en }
end
This means if a French translation is missing, it'll fall back to English. Super useful for gradual content translation!
Some handy tips I picked up
Database setup: I prefer using JSONB storage with PostgreSQL—it's fast and flexible
Fallbacks: Always set up fallbacks early—they're lifesavers when you're gradually adding translations
Locale accessors: Enable them if you want to access translations without changing the locale:
plugins do
  locale_accessors [:en, :fr, :es]
end
Dirty tracking: Super useful for tracking changes:
plugins do
  dirty
end
Make your life easier with Centus
I've walked you through four powerful ways to handle Rails localization: i18n for interface elements, r18n for flexible locale handling, FastGettext for high-performance translations, and Mobility for database content.
Each has its strengths, and I've found they work beautifully together in a complete localization stack. But let's be honest—managing translations across multiple files and systems can get messy fast.
That's why I recommend trying Centus.
Think of Centus as your localization command center: it handles all your translation workflows in one place, integrates seamlessly with Rails, and even connects with your favorite tools like GitHub and Figma.
Try Centus now to streamline your software localization workflow!
Get the week's best content!
By subscribing, you are agreeing to have your personal information managed in accordance with the terms of Centus Privacy Policy ->
Keep learning
18 min. read
JavaScript Localization Guide for Web Apps
19 min. read
NodeJS Internationalization (i18n) and Localization
19 min. read
Laravel Localization: A Step-by-Step Guide
21 min. read
Software Localization Guide for Developers
25 min. read
Vue i18n and Localization: How to Localize a Vue App

21 min. read