If you’re reading this, I’m sure you know how important localization is. It lets you tap into the 75% of the global population that doesn’t speak English at all.
Just look at the map below, where areas with a higher density of English speakers are marked in dark blue.
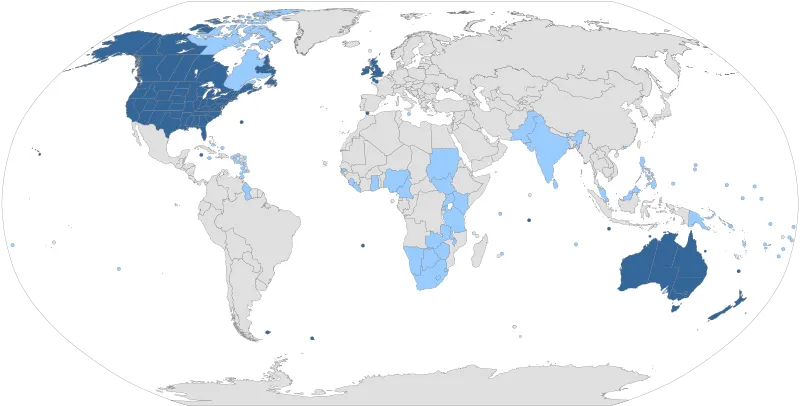 Source: Wikipedia
So, I’ll skip explaining that part.
Instead, let’s jump right into Django localization, what libraries you need, and how you can create a fully localized Django app step-by-step.
Libraries for Django internationalization and localization
Django has built-in support for localization. This makes adding multiple languages and regional formats in Django extremely straightforward.
When localizing Django, you’ll be working primarily with libraries like gettext and Django’s own i18n (internationalization) module.
gettext handles the translation part—marking strings for translation and storing them in translation files.
Django i18n module provides everything else you need to localize apps:
-
settings configuration
-
middleware for automatic language detection
-
and tools for managing translations
For most things localization, these two libraries are more than enough, even if you need to support many languages. They help you define and manage language options, handle complex translations, and make updates as your app grows.
I did come across Django packages like Django-Rosetta and Django-Translations too.
While they seem to make things simpler through user interfaces or easier formats for multiple language management, I will stick to the built-in packages for this demonstration.
Once your app grows, you will benefit from using a translation management platform like Centus to streamline translation and collaboration between all the teams involved in the app localization project.
Setting up a simple Django project
If you’re all set, let’s localize your Django app.
Step 1: Create a Django project
Creating a Django project for localization requires only a few steps.
To start, set up a virtual environment for your project. This isolates your project dependencies, keeping everything organized.
mkdir centus-django-localization
cd centus-django-localization
python3 -m venv venv
The command above creates a virtual environment named myenv.
Activate the environment next. Use the following command for Unix or macOS:
source venv/bin/activate
On Windows, activate the environment like this:
venv\Scripts\activate
Once activated, install Django and verify the installation with the following two commands:
pip3 install django
django-admin --version
I’m using Django version 4.2.16 for this project.

Once you see the version number for your output, you’re ready to move to the next part.
Use this command to set up a project named centus_localization_project inside the same folder.
django-admin startproject centus_django_localization
cd centus_django_localization
Step 2: Create a template
To make localization practical, you’ll need some content that showcases various aspects of a user interface. Let’s build a simple HTML page with a navbar, some text, and a couple of buttons.
Start with creating a templates directory. Also, create a locale directory inside the main folder.
mkdir -p main/templates/main
mkdir -p main/locale
Now, add a new HTML file in this main folder and name it index.html.
Your directory should look like this:
centus_django_localization/
└── main/
    └── locale/
    └── templates/
        └── main/
            └── index.html
I’ll create a simple but nice-looking HTML template that will help demonstrate the Django localization setup.
<!-- main/templates/main/index.html -->
<!DOCTYPE html>
<html lang="en">
<head>
    <meta charset="UTF-8">
    <meta name="viewport" content="width=device-width, initial-scale=1.0">
    <title>Welcome to Centus</title>
    <style>
        /* Reset and basic styling */
        * {
            margin: 0;
            padding: 0;
            box-sizing: border-box;
            font-family: Arial, sans-serif;
        }

        body {
            background-color: #f5f5f5;
            color: #333;
            display: flex;
            flex-direction: column;
            align-items: center;
        }

        /* Navigation styling */
        nav {
            background-color: #333;
            width: 100%;
            padding: 1em 0;
            box-shadow: 0 4px 8px rgba(0, 0, 0, 0.1);
        }

        nav ul {
            list-style: none;
            display: flex;
            justify-content: center;
        }

        nav ul li {
            margin: 0 1.5em;
        }

        nav ul li a {
            color: #fff;
            text-decoration: none;
            font-weight: bold;
            font-size: 1.1em;
            transition: color 0.3s;
        }

        nav ul li a:hover {
            color: #ffcc00;
        }

        /* Header styling */
        header {
            text-align: center;
            margin-top: 2em;
        }

        header h1 {
            font-size: 2.5em;
            color: #333;
            margin-bottom: 0.5em;
        }

        header h2 {
            font-size: 1.5em;
            color: #666;
        }

        /* Section styling */
        section {
            width: 90%;
            max-width: 800px;
            background: #fff;
            padding: 2em;
            margin-top: 2em;
            border-radius: 8px;
            box-shadow: 0 4px 8px rgba(0, 0, 0, 0.1);
            text-align: center;
        }

        section p {
            font-size: 1.1em;
            line-height: 1.6;
            margin-bottom: 2em;
            color: #555;
        }

        /* Button styling */
        .button-group {
            display: flex;
            justify-content: center;
            gap: 1em;
        }

        .button {
            padding: 0.75em 2em;
            font-size: 1em;
            font-weight: bold;
            color: #fff;
            background-color: #333;
            border: none;
            border-radius: 4px;
            cursor: pointer;
            transition: background-color 0.3s;
        }

        .button:hover {
            background-color: #ffcc00;
        }
    </style>
</head>
<body>
    <nav>
        <ul>
            <li><a href="#">Home</a></li>
            <li><a href="#">About</a></li>
            <li><a href="#">Contact</a></li>
        </ul>
    </nav>

    <header>
        <h1>Welcome to Centus</h1>
        <h2>Your gateway to global knowledge</h2>
    </header>

    <section>
        <p>Centus is here to provide you with the best information across various domains, helping you stay informed, learn, and grow. Our goal is to create a platform where knowledge flows freely, connecting people to valuable resources from all around the world.</p>

        <div class="button-group">
            <button class="button">Get Started</button>
            <button class="button">Learn More</button>
        </div>
    </section>
</body>
</html>
Note: You can skip the CSS here, or skip to step 3 if you already have a template ready for localization.
We can’t view this page just yet. If you run the command python3 manage.py runserver
This layout gives you a simple structure with enough content to see the effects of localization. The layout includes:
- A navigation bar with links for different sections
- A main heading and a subheading, acting as a welcoming message
- A couple of buttons for actions
- A footer message
Step 3: Set up the views
With your HTML ready, you’ll need to set up a view to render this template.
Open views.py in the main app.
Add a view function to render the index.html template.
# main/views.py

from django.shortcuts import render

def index(request):
    return render(request, 'main/index.html')
To make the main URLs accessible in your project, open urls.py in the main project directory (centus_localization_project) and include the main URLs.
# centus_django_localization/urls.py

from django.contrib import admin
from django.urls import path
from main import views

urlpatterns = [
    path('admin/', admin.site.urls),
    path('', views.index, name='index'),
]
Step 4: Test your app
Now, create the translation files with
python3 manage.py runserver
Open a browser and go to 127.0.0.1:8000/. You should see the index.html layout with all the hardcoded text.
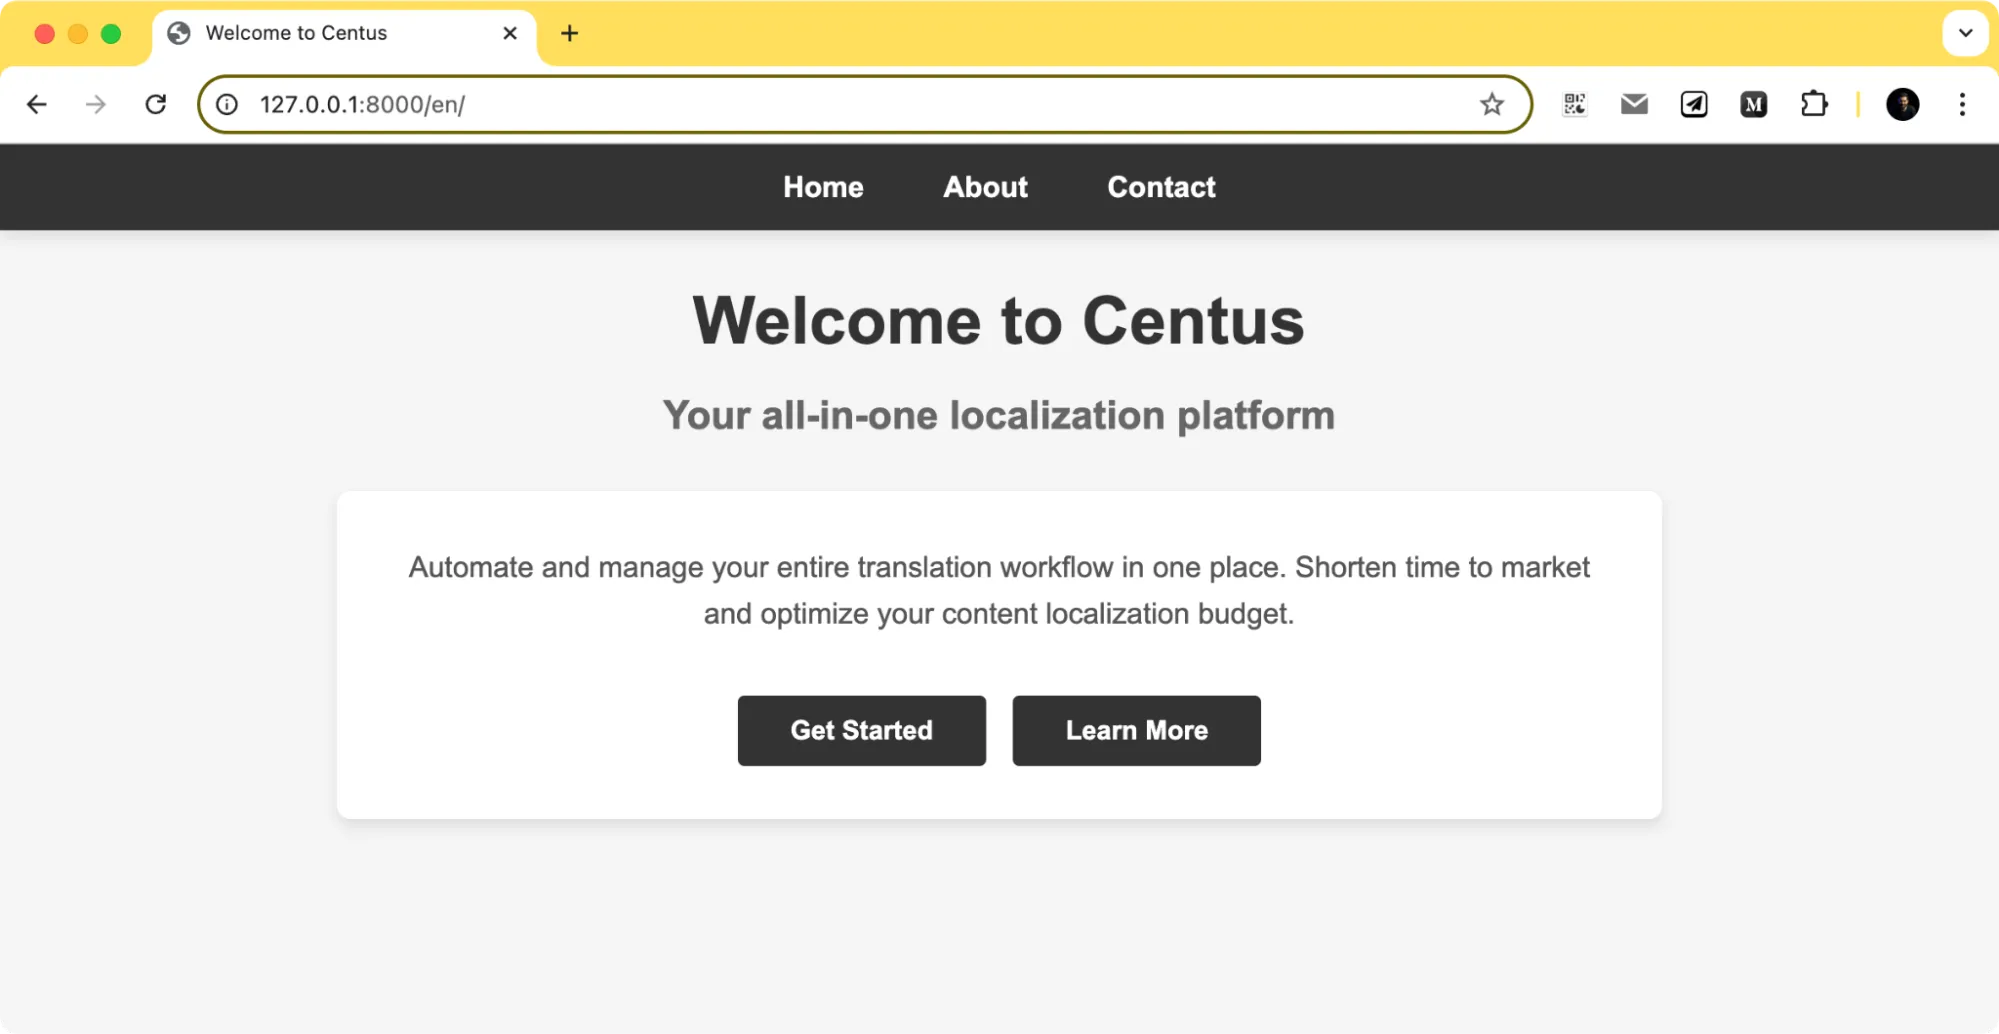
That gives you a basic app page with some text, a navigation bar, and a couple of buttons.
Moving from hard-coded text to translatable strings
Up to this point, I’ve only created a simplistic Django app that uses hard-coded text. If I had to translate it in the current state, I'd need to create one hard-coded page per language.
And that’s cumbersome. Let’s switch the hard-coded text to variables and use the i18n Django capabilities to make this all work.
Step 1: Set up the Django app for translation
If you’re using an IDE or a code editor, open up the centus_django_localization/settings.py and add the following code at the end of the file.
# centus_django_localization/settings.py
import os

LANGUAGE_CODE = 'en-us'  # Default language
USE_I18N = True
USE_L10N = True
USE_TZ = True

LANGUAGES = [
    ('en', 'English'),
    ('es', 'Spanish'),  # Add more languages as needed
]

BASE_DIR = os.path.dirname(os.path.dirname(os.path.abspath(__file__)))
LOCALE_PATHS = [os.path.join(BASE_DIR, 'locale')]
Step 2: Mark the text for translation
In your template (index.html), wrap each text string with the {% trans %} template tag to mark them for translation.
<!-- main/templates/main/index.html -->

{% load i18n %}
<!DOCTYPE html>
<html lang="{{ LANGUAGE_CODE }}">
<head>
    <meta charset="UTF-8">
    <meta name="viewport" content="width=device-width, initial-scale=1.0">
    <title>{% trans "Welcome to Centus" %}</title>
    <style>
     /* Retain the existing styles */
    </style>
</head>

<body>
    <nav>
        <ul>
            <li><a href="#">{% trans "Home" %}</a></li>
            <li><a href="#">{% trans "About" %}</a></li>
            <li><a href="#">{% trans "Contact" %}</a></li>
        </ul>
    </nav>
    <header>
        <h1>{% trans "Welcome to Centus" %}</h1>
        <h2>{% trans "Your gateway to global knowledge" %}</h2>
    </header>
    <section>
        <p>{% trans "Centus is here to provide you with the best information across various domains." %}</p>
        <div class="button-group">
            <button class="button">{% trans "Get Started" %}</button>
            <button class="button">{% trans "Learn More" %}</button>
        </div>
    </section>
</body>
Then, mark the text for translation using the below command:
django-admin makemessages -l es
django-admin makemessages -l en
You’ll use this command anytime you add new translation strings.
If the command runs successfully, you’ll see new files inside the locale directory that we’d created earlier.
You can also use {% blocktrans %} {% endblocktrans %} to club translations into a single block.
{% blocktrans %} This is my variable: {{variable}}{% endblocktrans %}
I didn’t specifically need these blocks here, however, if you have multiple variables on a single line, this is a better way to mark them for translation.
Step 3: Add translation strings
Modify the message strings in the locale/LC_MESSAGES/es/django.po and locale/LC_MESSAGES/en/django.po as I’ve done here.
locale/LC_MESSAGES/es/django.po
#: main/templates/main/index.html:9 main/templates/main/index.html:129
msgid "Welcome to Centus"
msgstr "Welcome to Centus"

#: main/templates/main/index.html:123
msgid "Home"
msgstr "Home"

#: main/templates/main/index.html:124
msgid "About"
msgstr "About"

#: main/templates/main/index.html:125
msgid "Contact"
msgstr ""

#: main/templates/main/index.html:130
msgid "Your gateway to global knowledge"
msgstr "Your gateway to global knowledge"

#: main/templates/main/index.html:133
msgid ""
"Centus is here to provide you with the best information across various "
"domains."
msgstr "Centus is here to provide you with the best information across various "
"domains."

#: main/templates/main/index.html:135
msgid "Get Started"
msgstr "Get Started"

#: main/templates/main/index.html:136
msgid "Learn More"
msgstr "Learn More"
locale/LC_MESSAGES/es/django.po
#: main/templates/main/index.html:10
msgid "Welcome to Centus"
msgstr "Bienvenido a Centus"

#: main/templates/main/index.html:18
msgid "Home"
msgstr "Inicio"

#: main/templates/main/index.html:19
msgid "About"
msgstr "Acerca de"

#: main/templates/main/index.html:20
msgid "Contact"
msgstr "Contacto"

#: main/templates/main/index.html:23
msgid "Your gateway to global knowledge"
msgstr "Su puerta de acceso al conocimiento global"

#: main/templates/main/index.html:27
msgid "Get Started"
msgstr "Comenzar"

#: main/templates/main/index.html:28
msgid "Learn More"
msgstr "Saber más"
Note for newbies: Retain the headers to ensure or the file will stop working.
This contains the translation strings that we have marked in the HTML with place for us to add the message string.
Now, let’s compile the messages
django-admin compilemessages
Step 4: Setup locale URLs
I want the app to display the appropriate language when I pass the locale in the URL.
For that, I’ll add the django.middleware.locale.LocaleMiddleware to the settings.py MIDDLEWARE list.
MIDDLEWARE = [
... other middlewares ...
    'django.middleware.locale.LocaleMiddleware',  # Enable locale middleware
]
Then, append the following code to the urls.py file
# Add language code prefixes to patterns
urlpatterns += i18n_patterns(
    path('', views.index, name='index'),
)
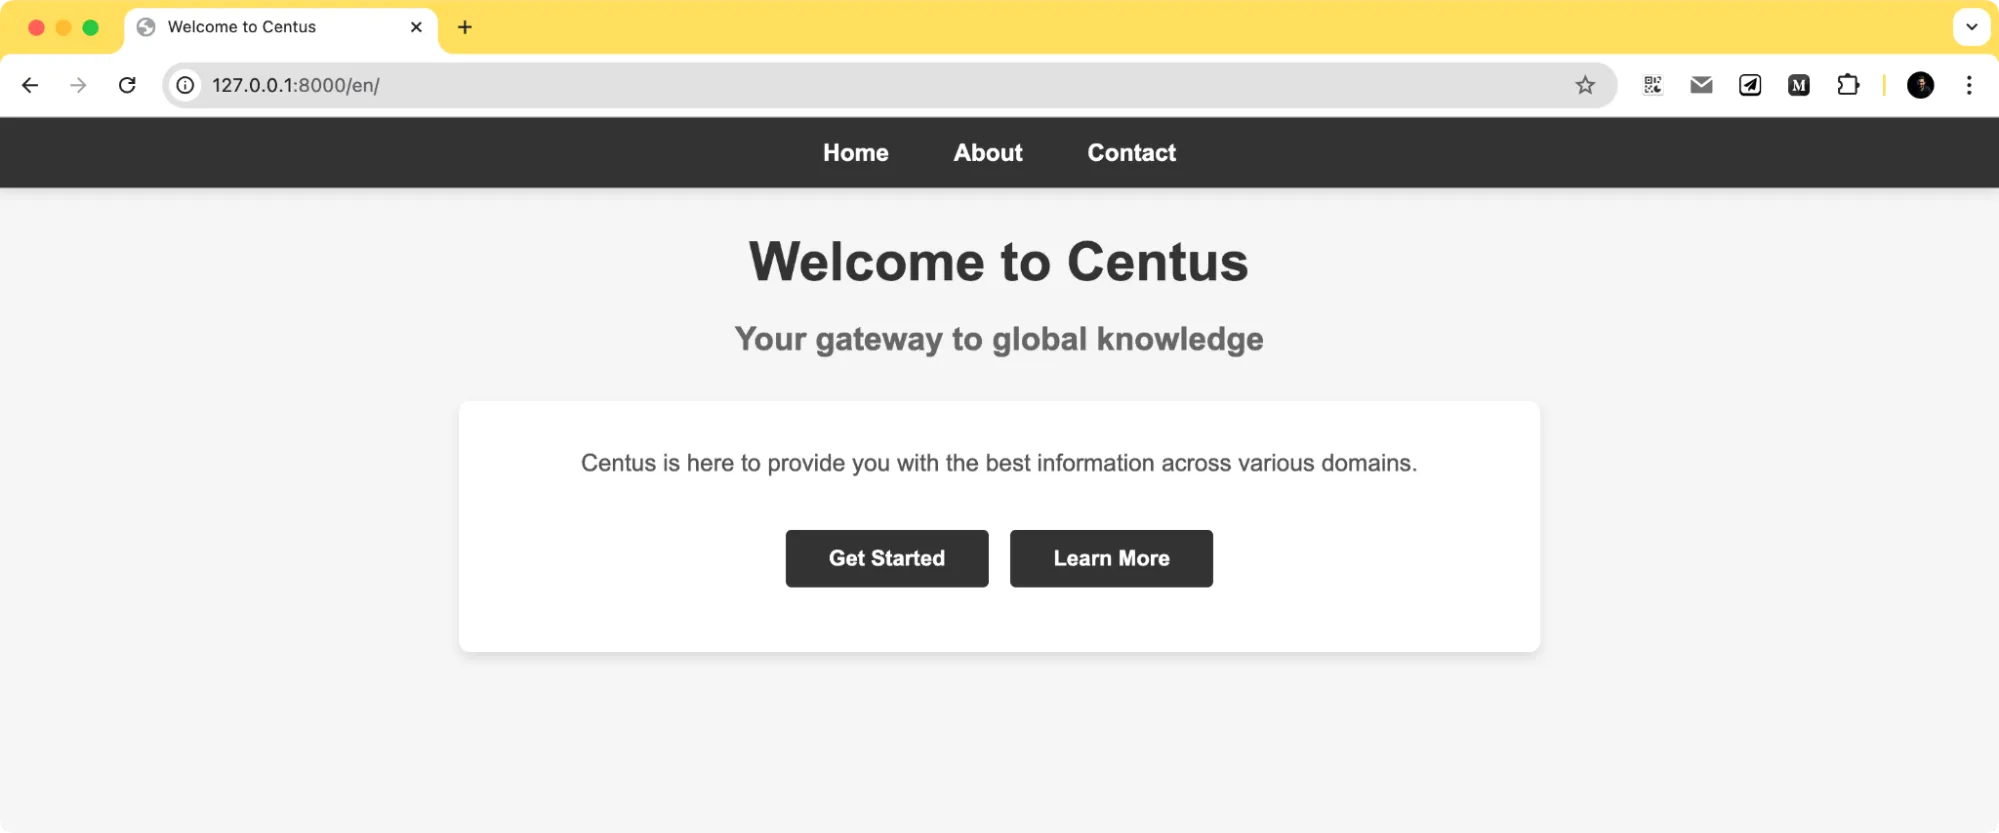
Now, if you run the app again, you should see be able to access the app routing you to the /en/ directory.
Step 5: Adding a language switcher
I’m adding two simple buttons with the country flag emojis for visual appeal.
<!-- Simplified Language Switcher Links -->
<div class="lang-switcher" style="margin-top:1em;">
    <form action="{% url 'set_language' %}" method="post" style="display:inline;">
        {% csrf_token %}
        <input type="hidden" name="language" value="en">
        <button type="submit" style="background:none; border:none; cursor:pointer;">🇺🇸 English</button>
    </form>
    <form action="{% url 'set_language' %}" method="post" style="display:inline;">
        {% csrf_token %}
        <input type="hidden" name="language" value="es">
        <button type="submit" style="background:none; border:none; cursor:pointer;">🇪🇸 Español</button>
    </form>
</div>
Now save all of this and run the server using python3 manage.py runserver and you’ll see this page.
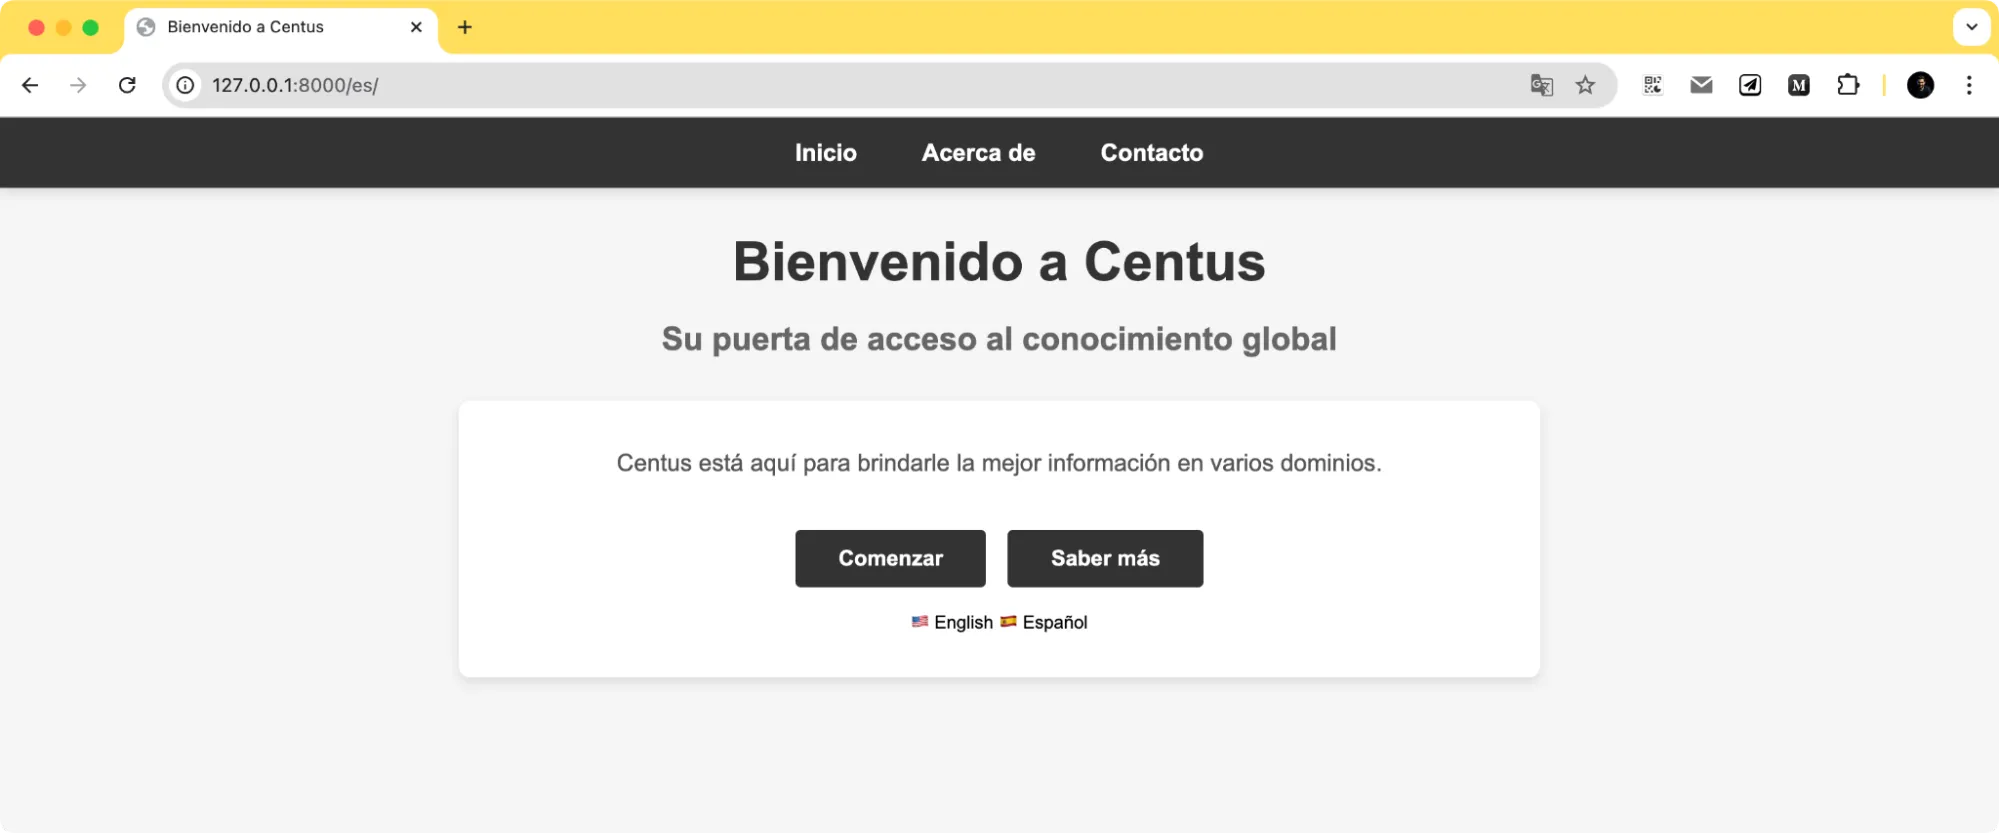
You’ll notice a couple additional things.
First, the page now has two language links right below our existing buttons. (this will change depending on where you placed the language switcher code).
The page redirects you to the /en/ directory to show the English language by default.
Advanced Django localization techniques
If you followed the tutorial up to this point, you should have a translated Django app that also lets you switch the language.
Let’s move to some more advanced localization methods.
Setting up automatic language detection
Asking users to select the language every time isn’t a great user experience. I needed the app to automatically detect the user's preferred language.
For automatic language detection, we could either use visitors’ browser settings or store a cookie so the next time they visit, the language data is fetched from that cookie. The browser detection method is a little more reliable considering most people’s browsers automatically defaults to their system language.
And that’s all we need anyway.
To begin with, we’ll first add a new Django language middleware to detect this locale setting. Edit your settings.py file to add the following line to the middleware list.
MIDDLEWARE = [
    # ... other middleware
    'django.middleware.locale.LocaleMiddleware',  # Enables automatic language detection
    # ... other middleware
]
This middleware checks the Accept-Language header in HTTP requests and sets the language accordingly.
It looks like a small change but makes a significant difference in making the app more intuitive.
Now I know we are supporting only two languages here. What if someone’s browser is set to French?
Well, for that, we have to set a fallback language in the settings.py file again.
LANGUAGE_CODE = 'en-us' # Default language
Now, if a user's preferred language isn't available, the app gracefully falls back to English while the user can still pick another language from our language picker.
Handling plurals
Think of how you display notifications on your app.
You either have a single notification or many notifications. A word changes. Depending on the language, the number of plural forms also changes. For instance, Arabic has 6 plural forms.
How do you handle all that?
Open the django.po file for English and Spanish and add plural translations. Django's ngettext function allows you to specify both singular and plural forms, which will dynamically select the right form based on the count.
locale/en/LC_MESSAGES/django.po
#: main/templates/main/index.html
msgid "You have {count} item in your cart."
msgid_plural "You have {count} items in your cart."
msgstr[0] "You have {count} item in your cart."
msgstr[1] "You have {count} items in your cart."
locale/es/LC_MESSAGES/django.po
#: main/templates/main/index.html
msgid "You have {count} item in your cart."
msgid_plural "You have {count} items in your cart."
msgstr[0] "Tienes {count} artículo en tu carrito."
msgstr[1] "Tienes {count} artículos en tu carrito."
Now I also need the appropriate sentences to be pulled based on the count variable.
For that, I’ll use Django’s ngettext function to dynamically choose between singular and plural forms based on the total_items count.
# main/views.py
from django.shortcuts import render
from django.utils.translation import ngettext

def index(request):
    total_items = 5  # Example item count

    # Use ngettext to choose between singular and plural
    cart_message = ngettext(
        "You have {count} item in your cart.",
        "You have {count} items in your cart.",
        total_items
    ).format(count=total_items)

    return render(request, 'main/index.html', {'cart_message': cart_message})
Here, ngettext takes three arguments:
- The singular form string.
- The plural form string.
- The count, which determines which form to use
Once this is all added, just add the cart_message variable in our index.html file.
<!-- main/templates/main/index.html -->
<p>{{ cart_message }}</p>
I’ve added it right below the subheading, and here’s what the app looks like now.
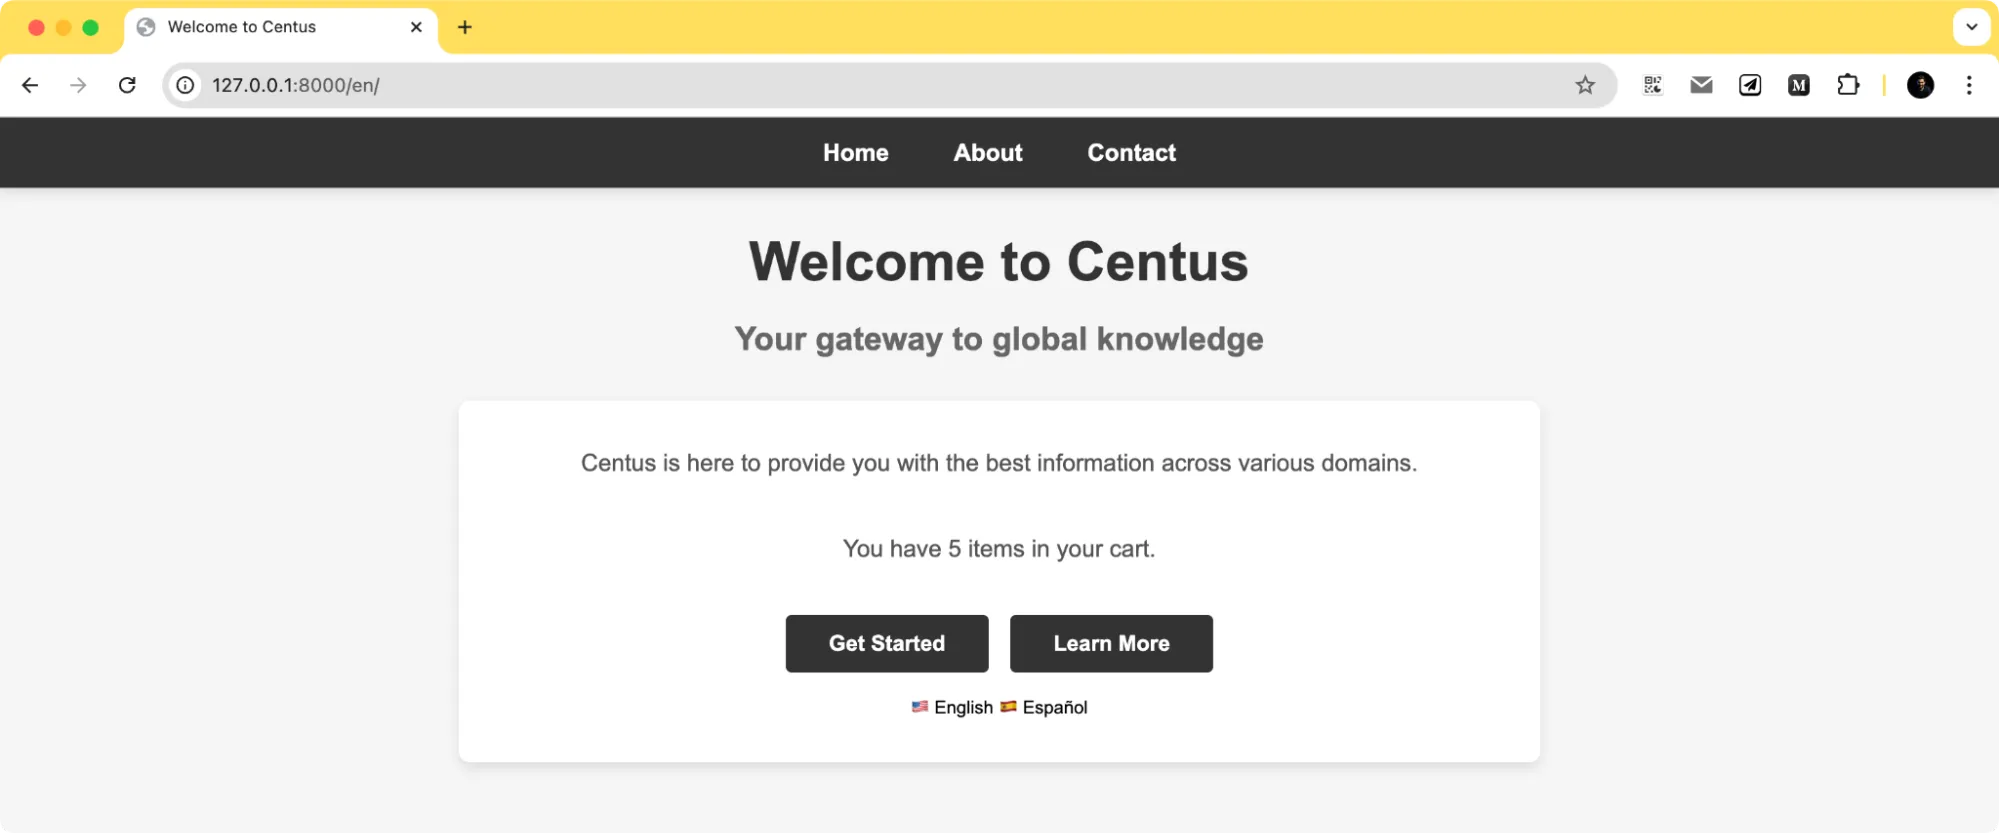
I’ve set the total_count to 5. You can play around with the number to see that it pulls the appropriate plural form.
Note: If the language you want to support has multiple plural forms, you can add the sentences for each form in the .po file of the locale as msgstr[1], msgstr[2], msgstr[3], msgstr[4], and so on. The appropriate plural form will be automatically fetched.
Handling time zones and regional formats
I’ve already talked about date and number formats in our previous posts on React localization, Javascript localization, and other localization tutorials.
These formats differ from country to country and locale to locale.
What that means is, we need to display the numbers and dates in the appropriate format so the user doesn’t get confused.
Let’s edit the settings.py file and add the following variables.
USE_I18N = True  # Enables translation support
USE_L10N = True  # Enables locale-specific formatting for dates and numbers
USE_THOUSAND_SEPARATOR = True  # Enables comma or other locale-specific thousand separators
THOUSAND_SEPARATOR = ','  # Optional: specify the separator (leave empty to use locale default)
Now, we need to create a number variable that we can use on the HTML page.
Here’s what my current index() method looks like in the views.py file.
# main/views.py
from django.shortcuts import render
from django.utils import translation, timezone
from django.utils.translation import ngettext

def index(request):
    total_items = 5  # Example item count
    revenue = 1234567.89  # Sample revenue value to be formatted

    cart_message = ngettext(
        "You have {count} item in your cart.",
        "You have {count} items in your cart.",
        total_items
    ).format(count=total_items)

    return render(request, 'main/index.html', {
        'cart_message': cart_message,
        'revenue': revenue,

    })
Notice the revenue variable where I’ve assigned a random value. Then the same variable has been passed to the render dictionary.
And lastly, I’ve added the revenue variable to our index.html file with the localize option.
<p>{% trans "Total Revenue" %}: {{ revenue | localize }}</p>
If you refresh the page now, you should see the “Total revenue” value displayed.
And even though we’d only added the number there with no formatting, the built-in localization package auto-formats the value based on the selected locale.
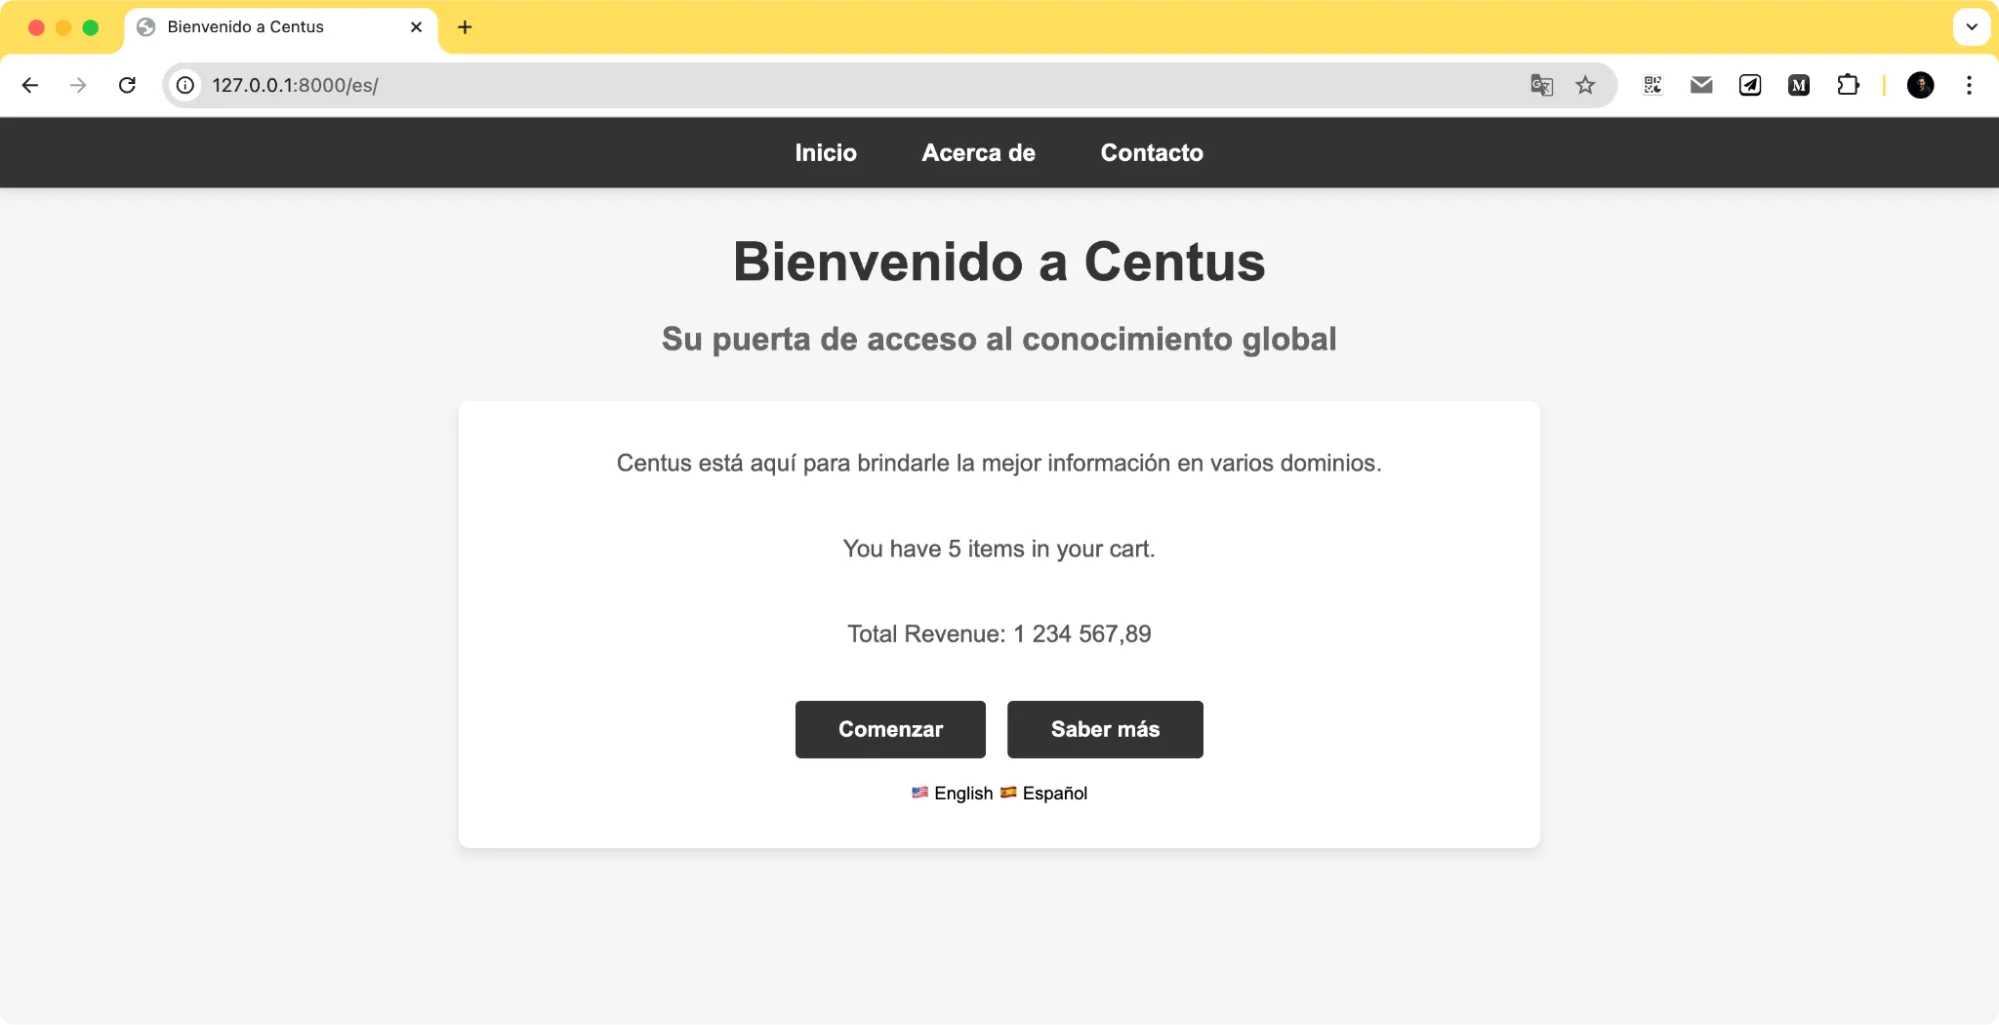
Let’s now see how Django handles date formatting based on locales.
I’ll be modifying my views.py file to pass the time data.
from django.utils import timezone

def index(request):
    today = timezone.now()  # Current date and time
    ...
    return render(request, 'main/index.html', {
        'content': content,
        'cart_message': cart_message,
        'revenue': revenue,
        'today': today
    })
The few things that I’ve changed are—I’ve imported the timezone package, used it to set the today variable, and then returned it within the render set.
In the index.html, add a line to display the today variable and format it using SHORT_DATE_FORMAT or LONG_DATE_FORMAT:
<p>{% trans "Today's Date" %}: {{ today | date:"SHORT_DATE_FORMAT" }}</p>
And that’s it. If you switch between English and Spanish (or any other locales you support), you’ll notice that the date now changes per the locale.
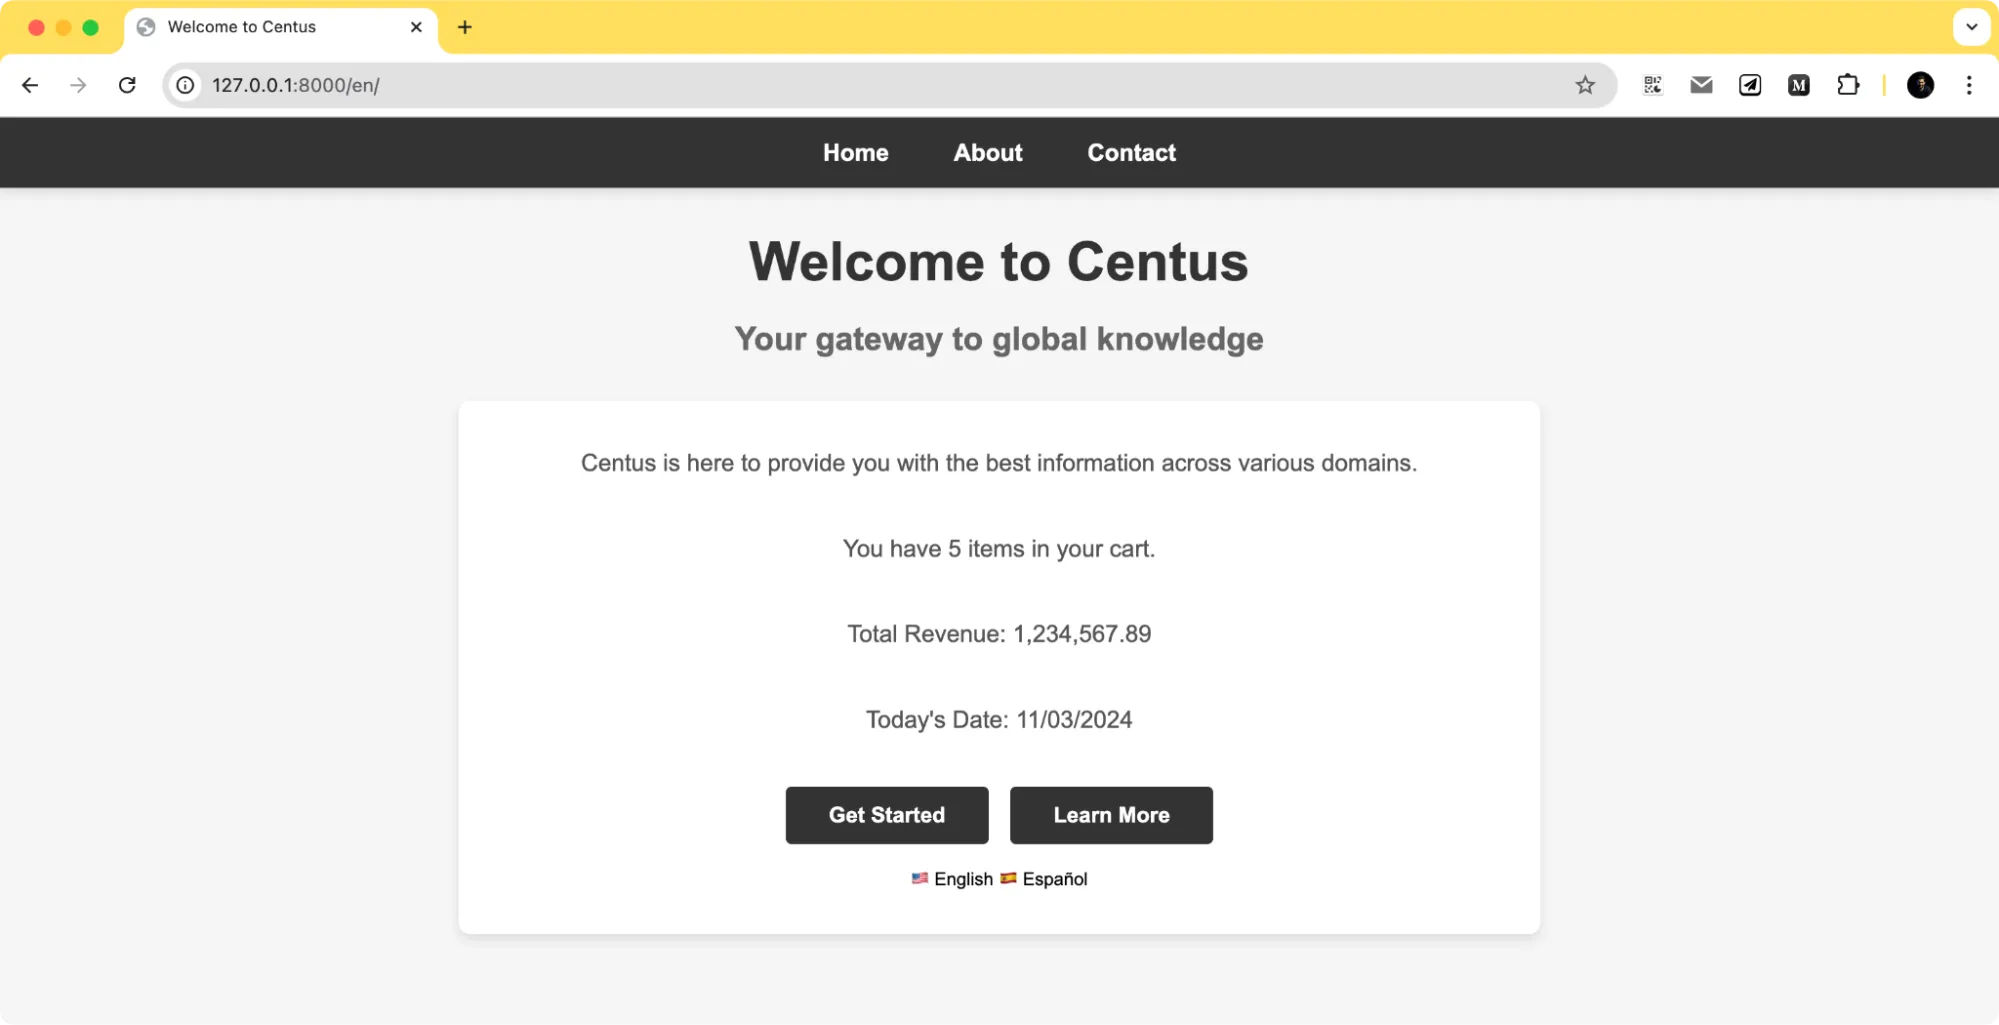
Here, you’ll see it shows the date in a DD/MM/YYYY format, while for English, it shows the same date as MM/DD/YYYY.
I’ve also added the {% trans %} tags to the labels “Today’s date” and “Total revenue”. But we haven’t really added those translations
Run the command:
django-admin makemessages -l es
Then, update the translations in the django.po file for your Spanish locale and then compile messages.
msgid "Total Revenue"
msgstr "Ingresos Totales"


msgid "Today's Date"
msgstr "Fecha de Hoy"
Then run the below command to compile these messages:
django-admin compilemessages
And that’s it. Run the server again, and the page is now fully localized.
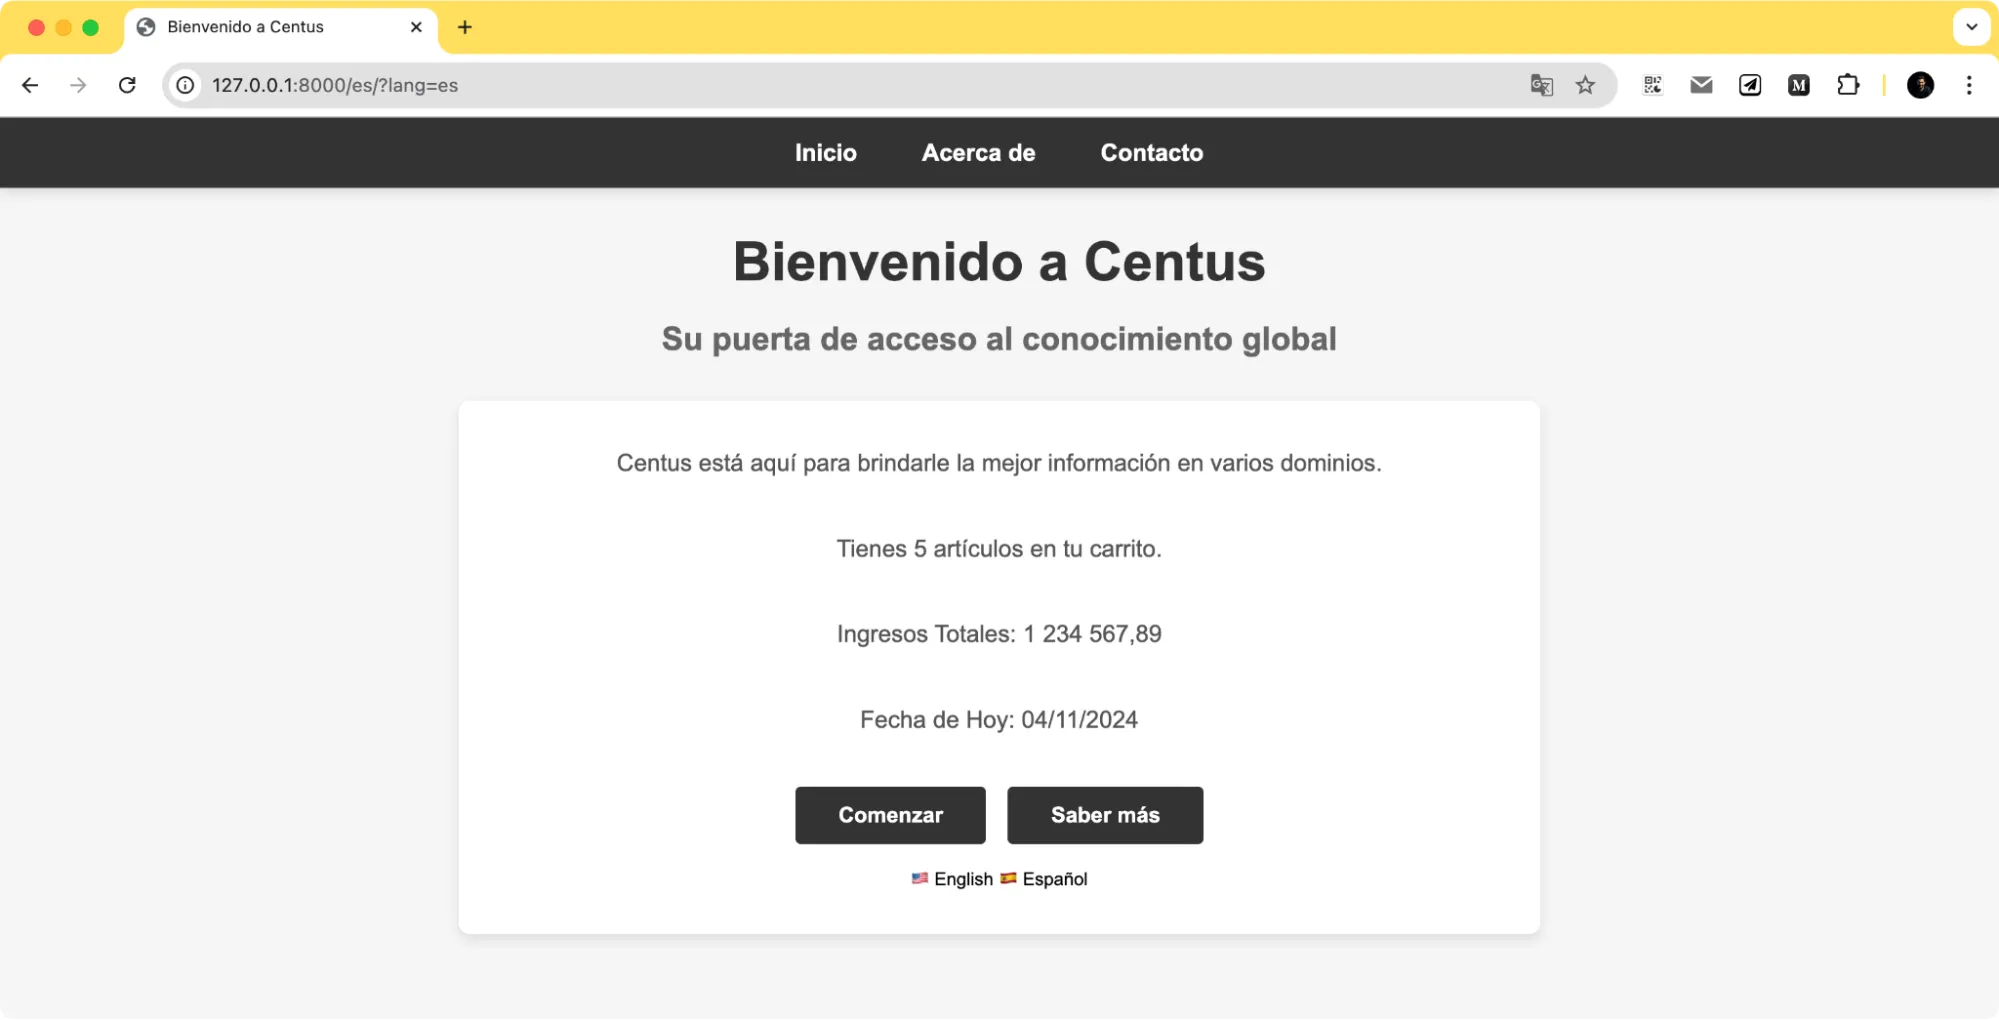
Localizing form input values
Your website will use some sort of form. It could be a sign-up form, a newsletter subscription form, checkout page forms, etc. And the forms, the formatting, and the validation messages—all need to be localized as well.
Let me demonstrate how to localize form input values with a simple form with fields like product name, revenue, and quantity.
Revenue will use locale-specific number formatting to allow users to enter values in their preferred currency format, while the form itself will automatically adapt to each locale.
Create a forms.py file inside the main app folder.
# main/forms.py
from django import forms
from django.utils.translation import gettext_lazy as _


class SalesForm(forms.Form):
    product = forms.CharField(label=_("Product Name"))
    quantity = forms.IntegerField(
        label=_("Quantity"),
        min_value=1,
        error_messages={
            "required": _("This field is required."),
            "min_value": _("Quantity must be at least 1."),
        },
    )
    revenue = forms.DecimalField(
        max_digits=10,
        decimal_places=2,
        localize=True,
        label=_("Revenue"),
        error_messages={
            "required": _("Revenue is required."),
            "invalid": _("Enter a valid amount."),
        },
    )
Here, I used localize=True for the revenue field, allowing it to follow the number format of the active locale.
Notice each label and error message is wrapped in _() so they’re marked for translation using gettext.
With this approach, "Product Name," "Quantity," and "Revenue" show up in the user’s language if translations are available.
Let me make the label translations available. Here are the strings I’ll add in our .po.
English (locale/en/LC_MESSAGES/django.po):
#: main/forms.py
msgid "Product Name"
msgstr "Product Name"

msgid "Quantity"
msgstr "Quantity"

msgid "Revenue"
msgstr "Revenue"

msgid "This field is required."
msgstr "This field is required."

msgid "Quantity must be at least 1."
msgstr "Quantity must be at least 1."

msgid "Revenue is required."
msgstr "Revenue is required."

msgid "Enter a valid amount."
msgstr "Enter a valid amount."
Spanish (locale/es/LC_MESSAGES/django.po):
#: main/forms.py
msgid "Product Name"
msgstr "Nombre del producto"

msgid "Quantity"
msgstr "Cantidad"

msgid "Revenue"
msgstr "Ingresos"

msgid "This field is required."
msgstr "Este campo es obligatorio."

msgid "Quantity must be at least 1."
msgstr "La cantidad debe ser al menos 1."

msgid "Revenue is required."
msgstr "Se requieren ingresos."

msgid "Enter a valid amount."
msgstr "Introduce una cantidad válida."
Now, let’s pass the form to our index using the views.py file. Here’s what my full views.py file looks like right now.
# main/views.py
from django.shortcuts import render
from django.utils import timezone
from .forms import SalesForm
from django.utils.translation import ngettext

def index(request):
    form = SalesForm()  # Initialize the form
    revenue = 1234567.89  # Sample revenue to show localized formatting
    today = timezone.now()  # Current date for locale-based formatting
    total_items = 5

    # Choose the plural or singular form of "cart" message
    cart_message = ngettext(
        "You have {count} item in your cart.",
        "You have {count} items in your cart.",
        total_items
    ).format(count=total_items)

    return render(request, 'main/index.html', {
        'cart_message': cart_message,
        'revenue': revenue,
        'today': today,
        'form': form  # Pass form to the template
    })
Once this is done, we have to add the form to the index.html. Add this bit of HTML somewhere below the CTA buttons.
<h3>Sales Information</h3>
<form method="post" action=".">
    {% csrf_token %}
    <div class="form-group">
        <label>{{ form.product.label }}</label>
        {{ form.product }}
        {% if form.product.errors %}
            <p class="error">{{ form.product.errors }}</p>
        {% endif %}
    </div>

    <div class="form-group">
        <label>{{ form.quantity.label }}</label>
        {{ form.quantity }}
        {% if form.quantity.errors %}
            <p class="error">{{ form.quantity.errors }}</p>
        {% endif %}
    </div>

    <div class="form-group">
        <label>{{ form.revenue.label }}</label>
        {{ form.revenue }}
        {% if form.revenue.errors %}
            <p class="error">{{ form.revenue.errors }}</p>
        {% endif %}
    </div>

    <button type="submit">{% trans "Submit" %}</button>
</form>
I’ve rendered each field individually by calling them one at a time (e.g., {{ form.product }}) to have more control over how they’re displayed (and if I want to style them later).
But I could just as easily use {{ form.as_p }} to render each form field within a <p> tag, so all labels, input fields, and any validation messages are displayed in the user's language and format preferences.
Once the form is in place, restart the server and navigate to the page.
You should see the "Product Name" and "Revenue" fields translated, and entering a number in the "Revenue" field will follow the locale’s conventions.
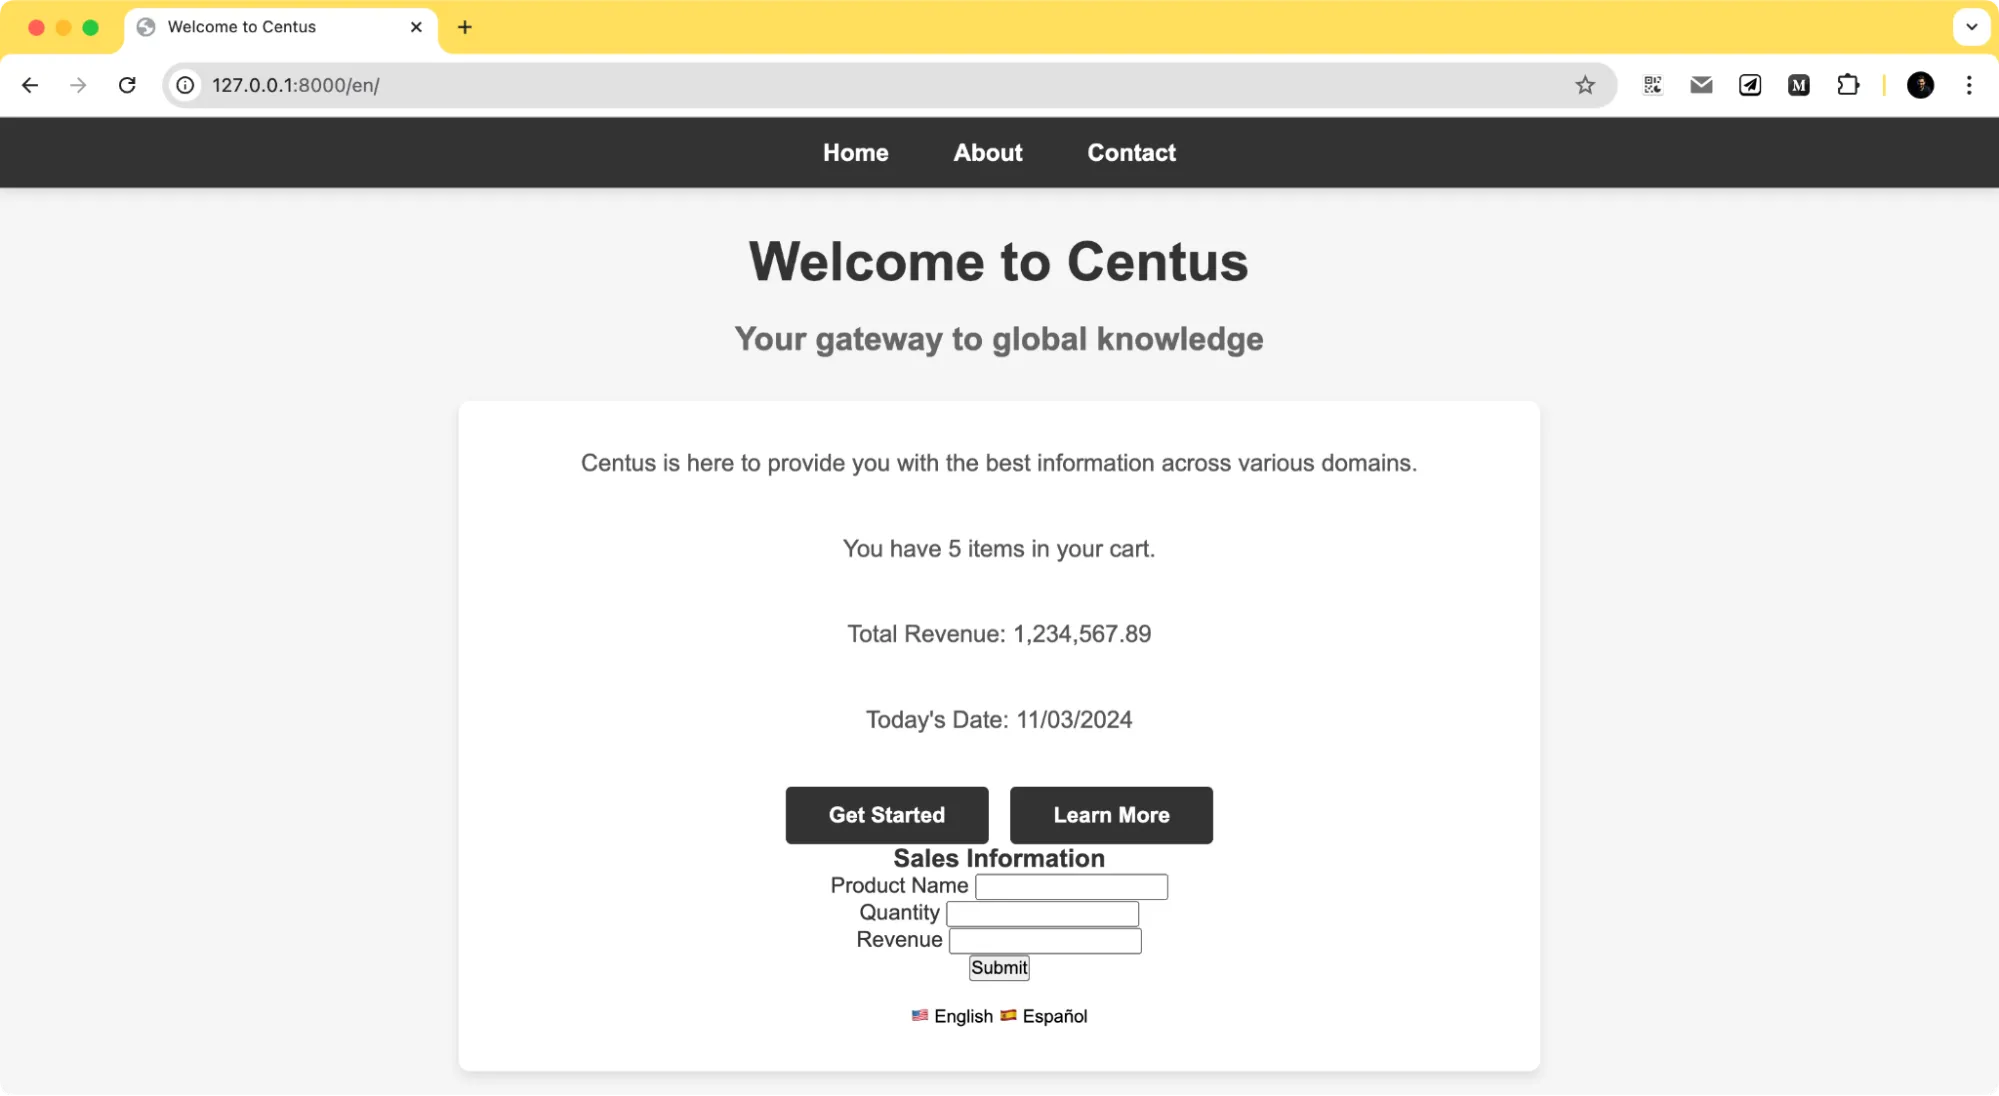
For instance, if the locale is set to Spanish, entering 1.000,50 in "Revenue" will be accepted as 1000.50 in the backend, thanks to localize=True.
Django takes care of parsing these inputs correctly, so users can enter values in a familiar format without thinking twice.
Building multi-language models with django-modeltranslation
Sometimes, you want to store multilingual content in the database. And for that, the django-modeltranslation library comes in handy.
This isn’t built-in, so you’ll first install the library.
pip3 install django-modeltranslation
Also, if you haven’t already created a Django superuser, you can do use with the following command:
python3 manage.py createsuperuser
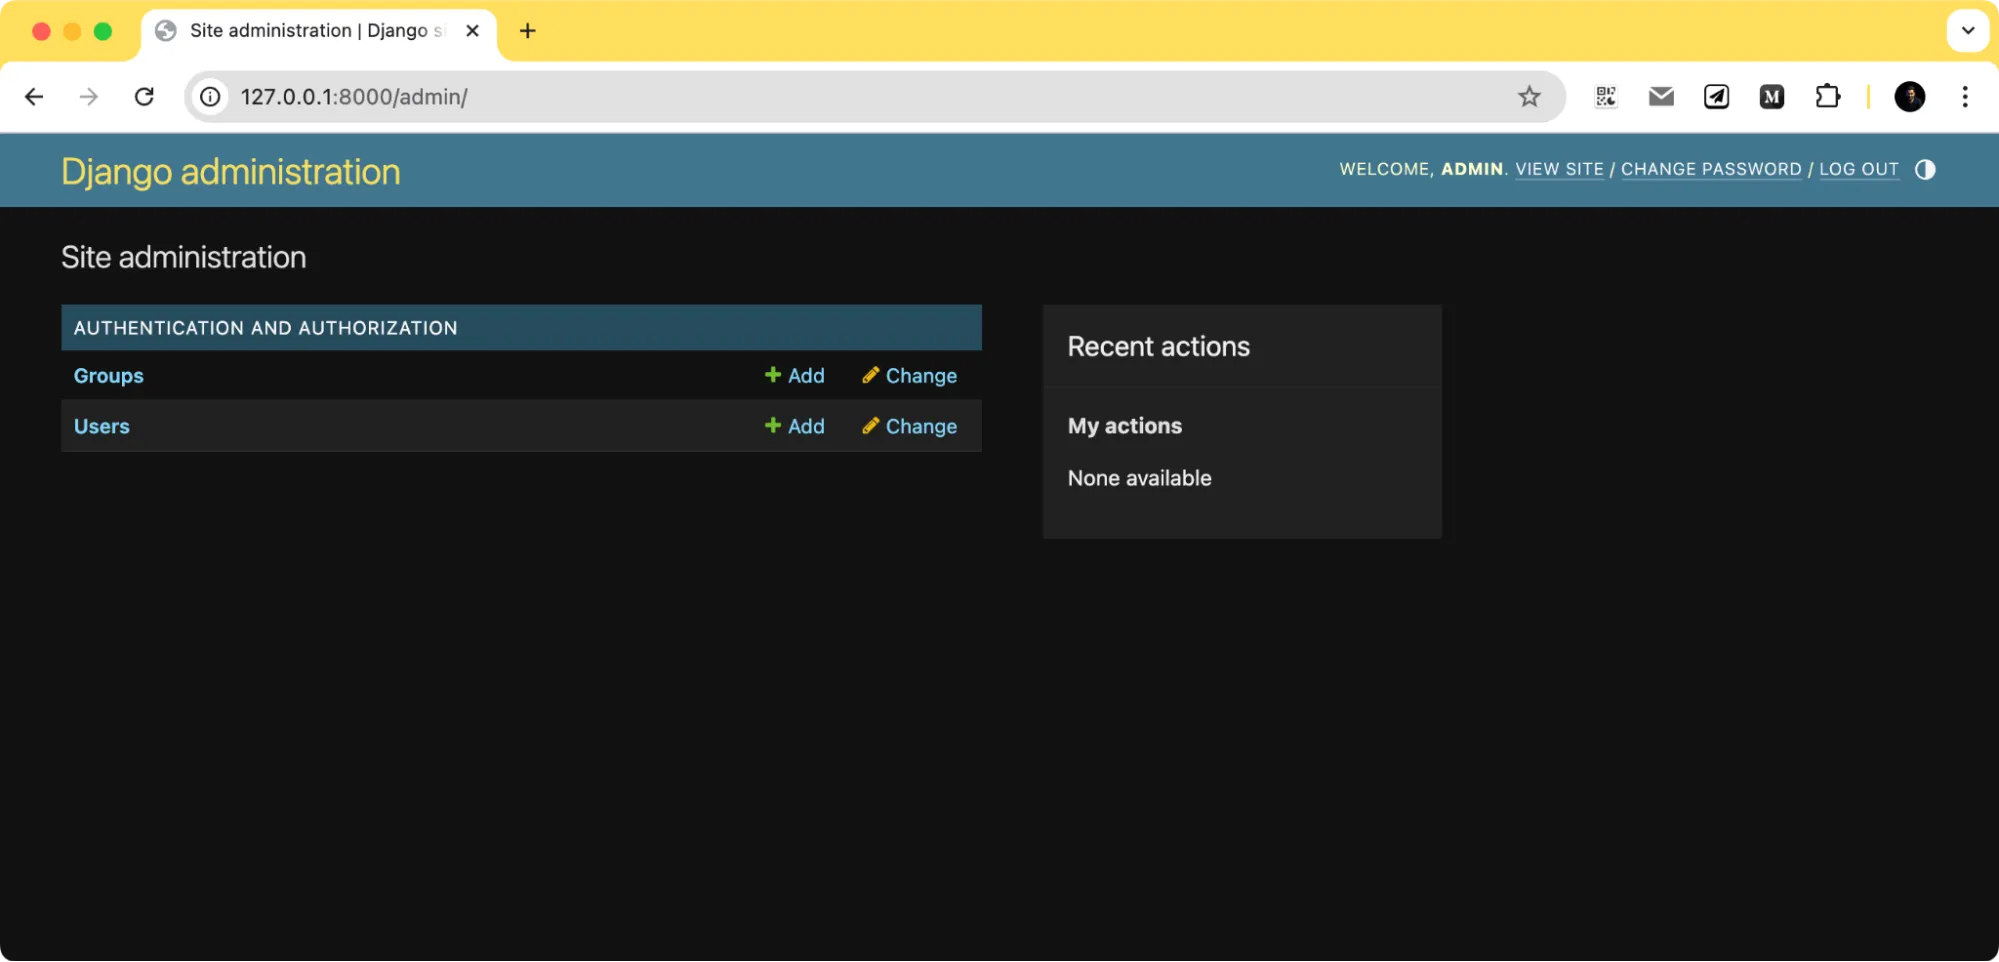
Then, run the server, navigate to 127.0.0.1:8000/admin/, and login with this newly created user. You will see the following two tables here.
We also need to ensure that the modelstranslation app is listed under the settings.py INSTALLED_APPS list.
INSTALLED_APPS = [
    # other installed apps
    'modeltranslation',
]
Now, update your models.py file and add a new Product model.
I’ll keep this simple with just two fields—name and description.
from django.db import models

class Product(models.Model):
    name = models.CharField(max_length=100)
    description = models.TextField()

    def __str__(self):
        return self.name
If you refresh the server, you should see a new Model listed under the databases with the name and description field.
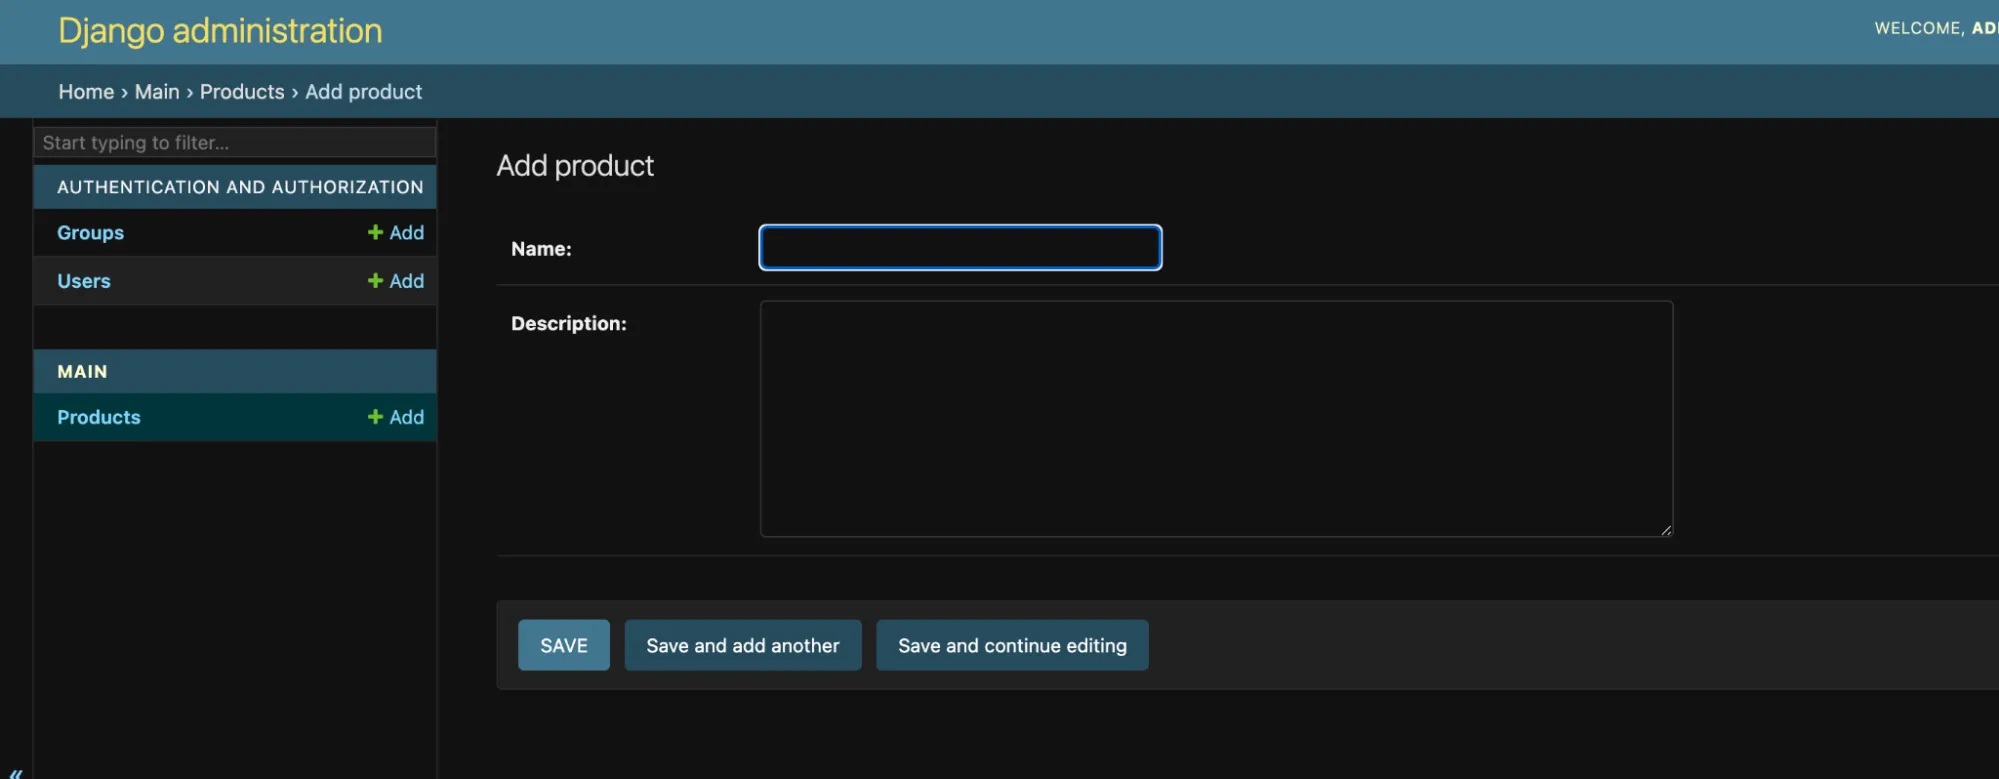
To tell Django that the name and description should support multiple languages, create a translation.py file in the same directory as models.py.
from modeltranslation.translator import register, TranslationOptions
from .models import Product

@register(Product)
class ProductTranslationOptions(TranslationOptions):
    fields = ('name', 'description')
This setup will automatically create language-specific fields in the database, like name_en, name_es, etc., based on your supported languages.
Once this is done, run the following commands to re-run the migrations and to create the new language-specific fields in the database.
python3 manage.py makemigrations
python3 manage.py migrate
And now, you’ll see the following new fields if you visit the admin page again.
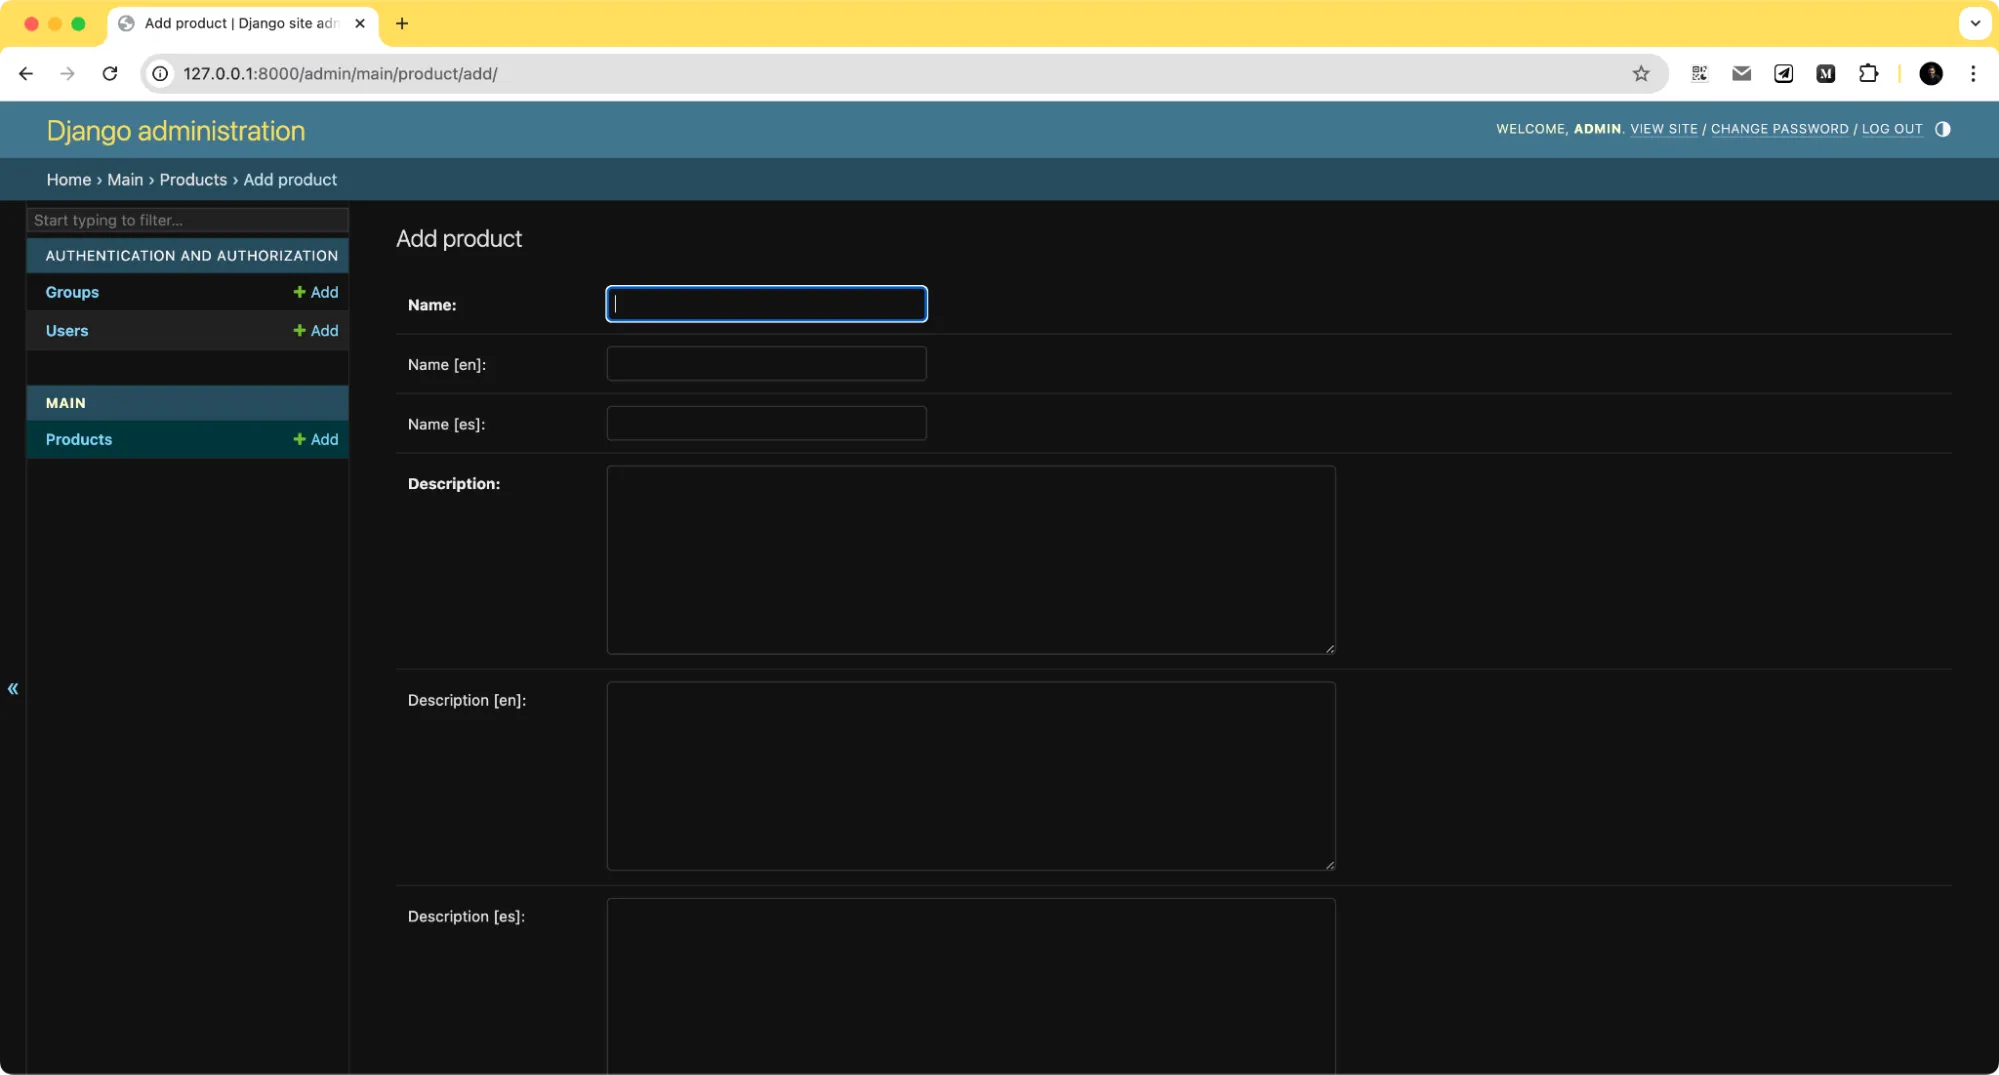
While we still have just name and description, we also have individual fields for the two different locales that I’ve added support for. Do note that this can add a lot of fields if you support a lot of languages.
Localizing JavaScript code in Django templates
Sometimes you need localized text in JavaScript—for example, for dynamic messages or notifications.
Django Translation provides you with the JavaScriptCatalog.
It allows you to translate your JS text with the use of gettext(), just as you do inside of your views.
I’ll start with modifying urls.py to include a route for JavaScriptCatalog.
# urls.py
from django.urls import path
from django.views.i18n import JavaScriptCatalog

urlpatterns = [
    # ... your other URL patterns ...
    path('jsi18n/', JavaScriptCatalog.as_view(), name='javascript-catalog'),
]
Now, I’ll proceed to adding this javascript catalog to our index.html file
<!-- index.html -->
<!DOCTYPE html>
<html lang="{{ LANGUAGE_CODE }}">
<head>
    <!-- ... other head elements ... -->
    <script type="text/javascript" src="{% url 'javascript-catalog' %}"></script>
</head>
<body>
    <!-- ... body content ... -->
</body>
</html>
Great, now let’s create a javascript file that uses the gettext function to fetch the appropriate translations.
I’ve added this javascript file as main/static/js/main.js
const welcomeMessage = alert(gettext("Welcome to Centus"));
Here, the gettext function translates the string 'Welcome to Centus' based on the user's current language setting.
It will also fetch the appropriate plural form using the ngettext method and log it all in the console.
Import the script in the index.html file.
{% load static i18n %}
<script src="{% static 'js/main.js' %}"></script>
And then let’s compile the messages:
python3 manage.py makemessages -d djangojs -l es
python3 manage.py makemessages -d djangojs -l en
python3 manage.py compilemessages
You could also use django-admin compile messages and django-admin makemessages -d.
Once this command runs successfully, you will see a new djangojs.po file in the respective locale directories.
Then simply update the translations in the djangojs.po files as below:
// Spanish djangojs.po

#: main/static/js/main.js:1
msgid "Welcome to Centus"
msgstr "Bienvenido a Centus"


// English djangojs.po

#: main/static/js/main.js:1
msgid "Welcome to Centus"
msgstr "Welcome to Centus"
Once this is all set, run the compile messages command again and run the server.
python3 manage.py compilemessages
python3 manage.py runserver
Now, whenever you visit any locale page, you’ll see a welcome popup in the respective language as per the djangojs.po file.
Here’s the welcome popup in English.
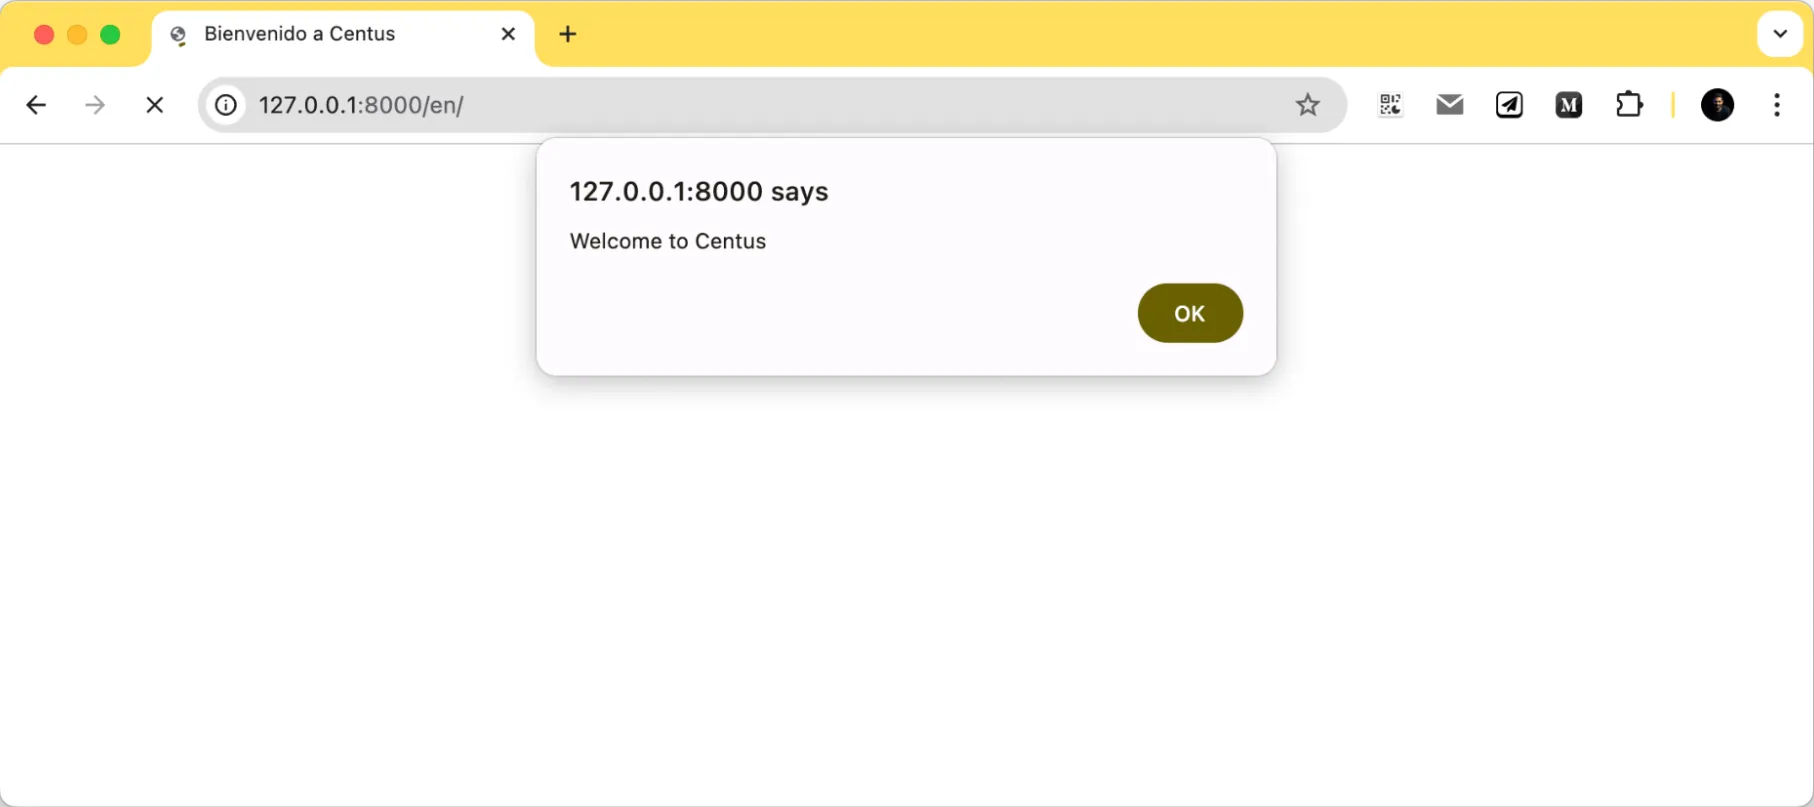
And the welcome popup in Spanish.

That’s it! You can continue to expand your Django JavaScript translations exactly as I’ve done here to create a localized dynamic app.
How to translate PO files
I’ve shared pretty much everything you need to know about Django localization (l10n).
But there’s one thing left.
Handling Django translations for your constantly-growing app.
Manual management of .po files will get increasingly challenging as your Django app grows beyond the simple translations I’ve demonstrated here.
And this becomes even more evident when you want to handle a lot of languages while working with different contributors.
This is where I use Centus.
Centus is a translation management system (TMS) that simplifies app localization for teams.
Key features:
- Centralized translation management: Centus lets you import your .po files into an easy-to-use interface, which makes it easier to handle translations across all of your devices.
- Streamlined collaboration: Team members can translate and review .po files in real time, reducing the risk of errors and ensuring that translations are up-to-date.
- Automation and integration: Centus integrates with many tools and platforms, automating common jobs and keeping your code repository up to date so that deployments happen faster.
- Quality assurance: It offers translation memories and glossaries, as well as QA features to help you maintain consistency and accuracy across translations.
- Scalability: Centus can handle projects of different sizes, so it can be used by both small and big businesses.
Here’s how to use Centus to translate .po files:
We’ll start by signing up to Centus.
It shouldn’t take you more than a minute.
Done?
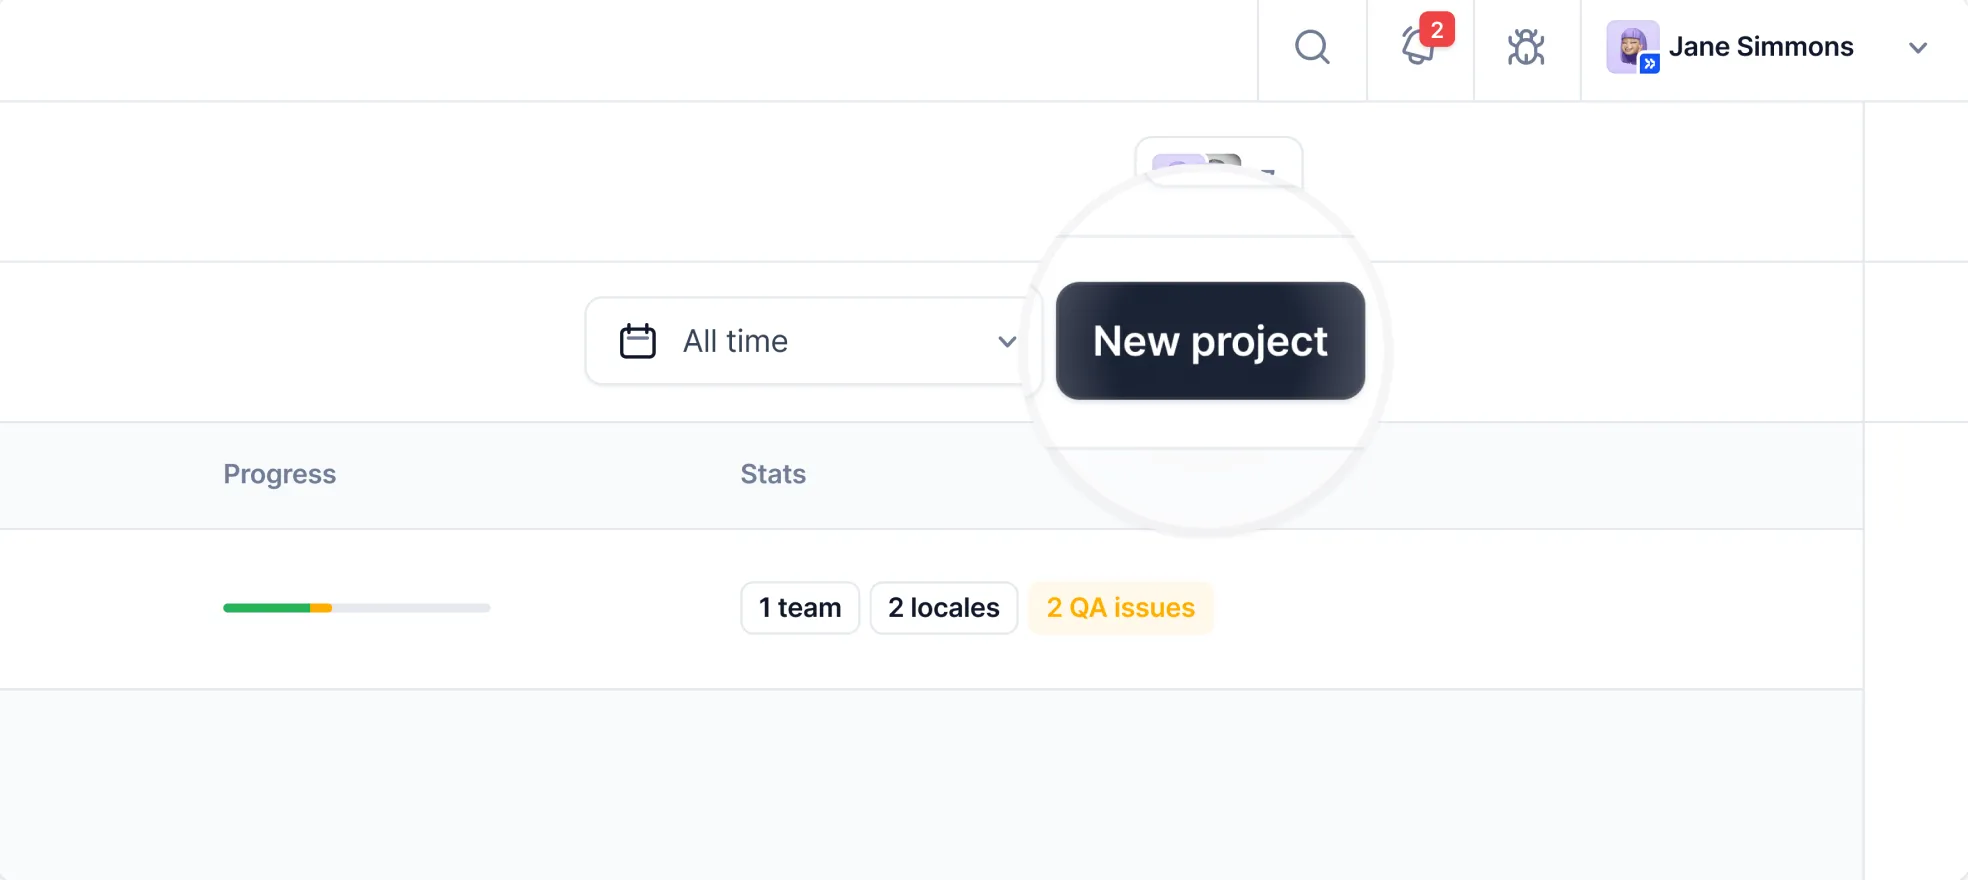
Now, let’s create a project for your Django app. To this end, click the New project button at the top right corner.
The next step is to enter the project name and other details.
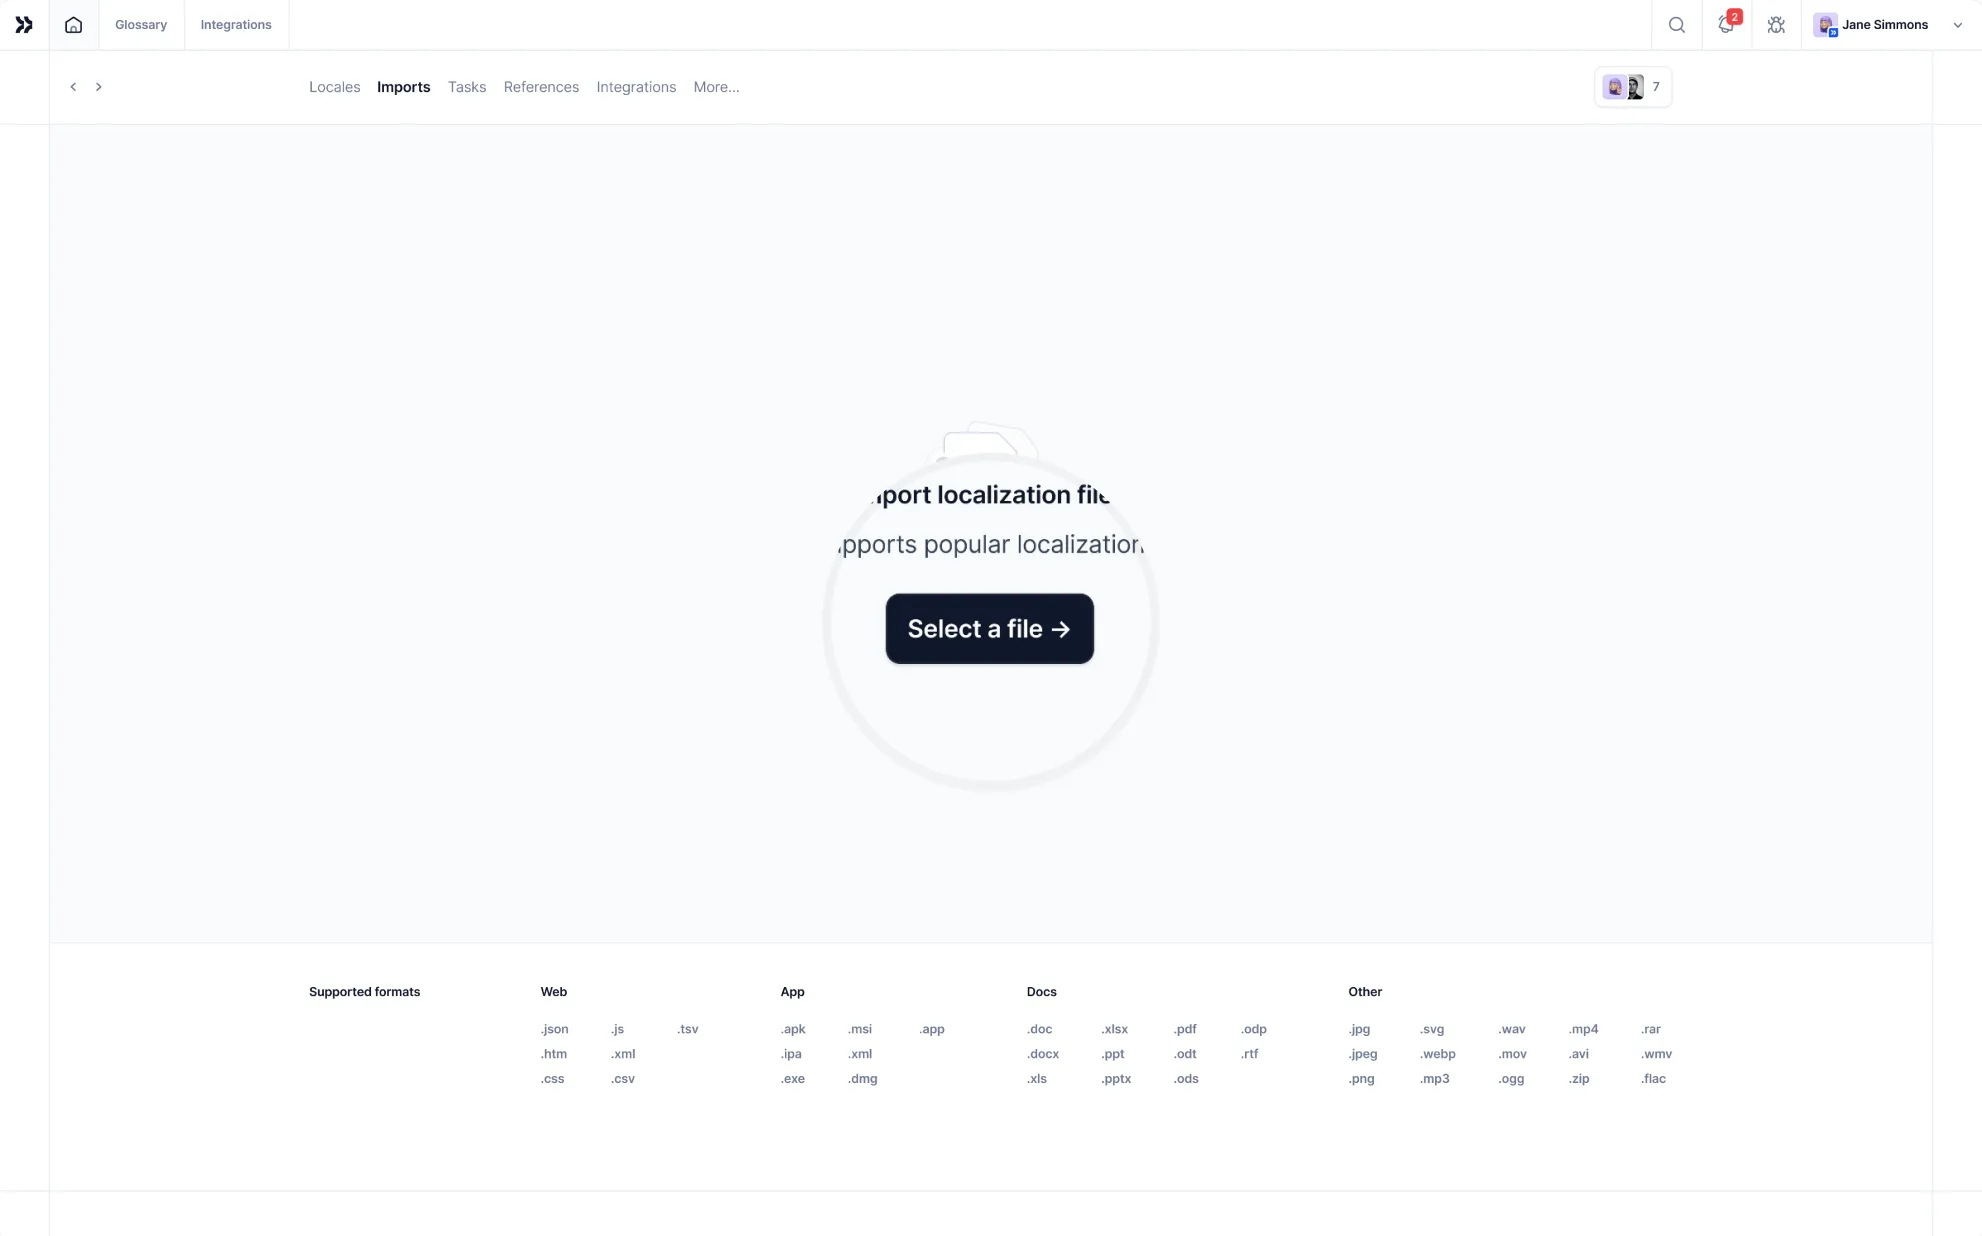
Alright, the only thing your project lacking is your .po files. Drag and drop them in the Imports section.
Now you should see the Centus Editor with the files segmented into strings:
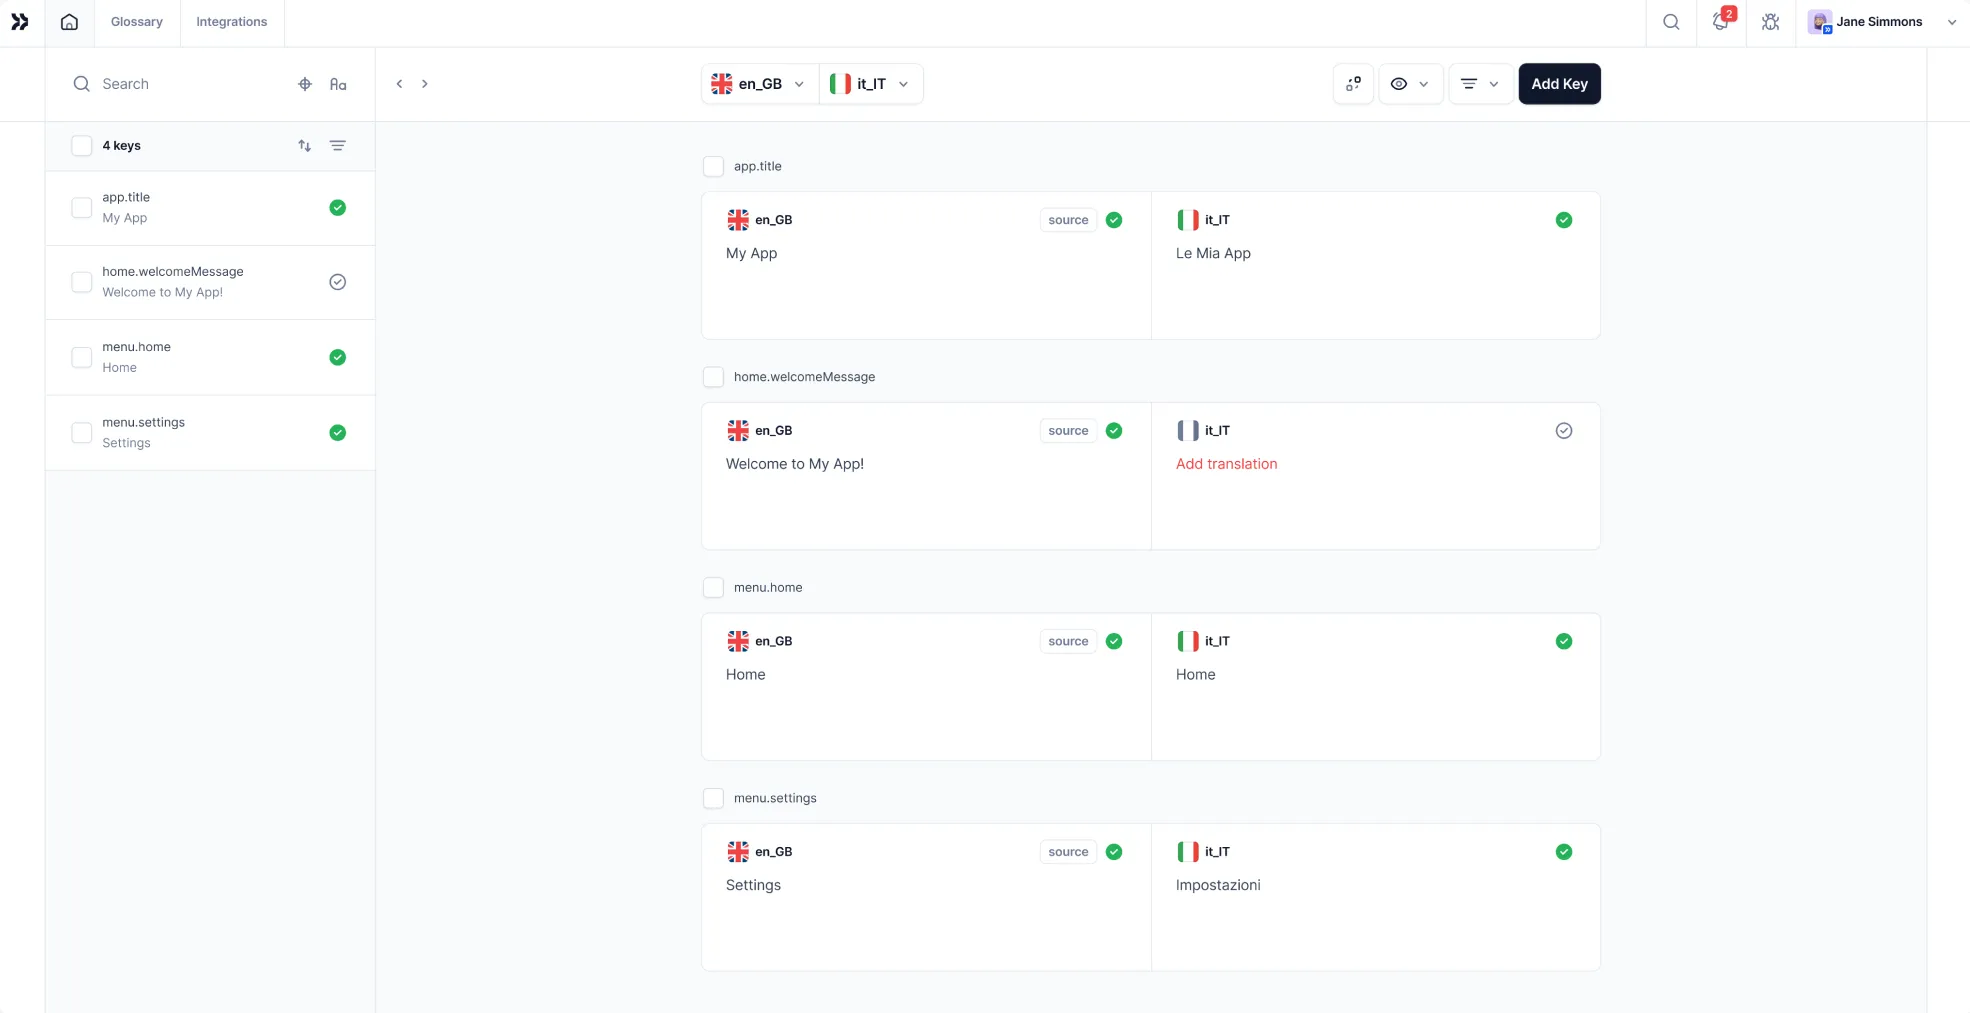
This Editor is a shared digital space where translators, editors, and reviewers can localize your Django app.
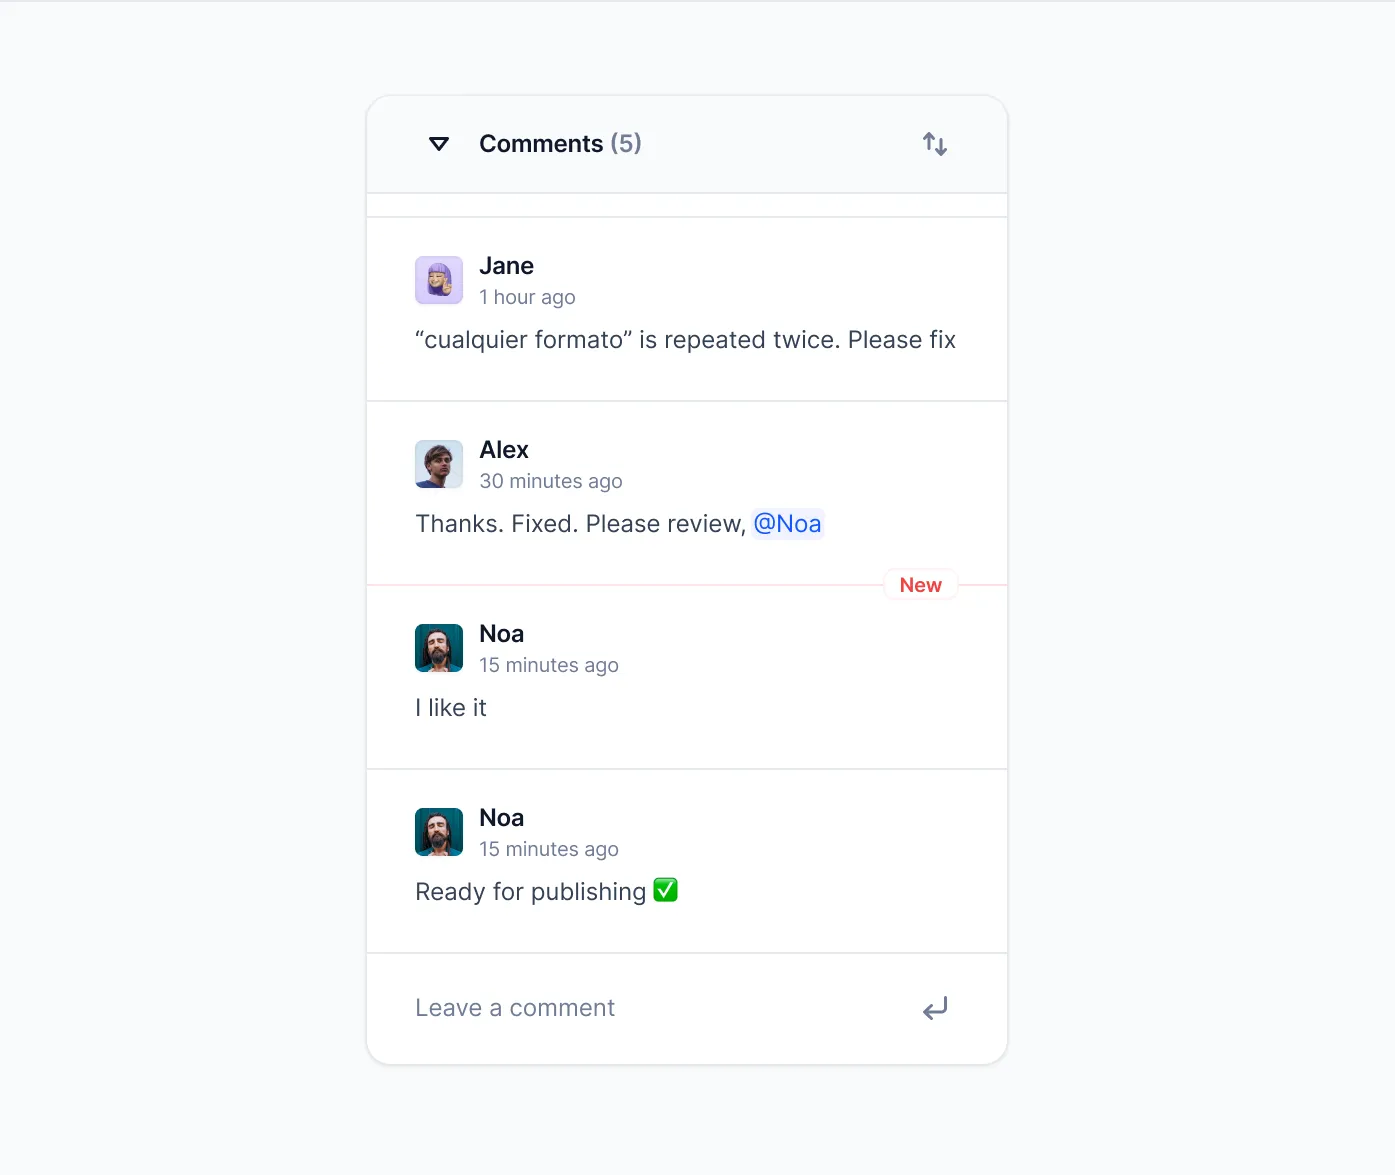
In the Editor, your team can translate the strings that are conveniently separated from code syntax elements. They can also leave comments, approve translations, and even share app screenshots.
So let’s not waste another minute and bring your language experts to the project.
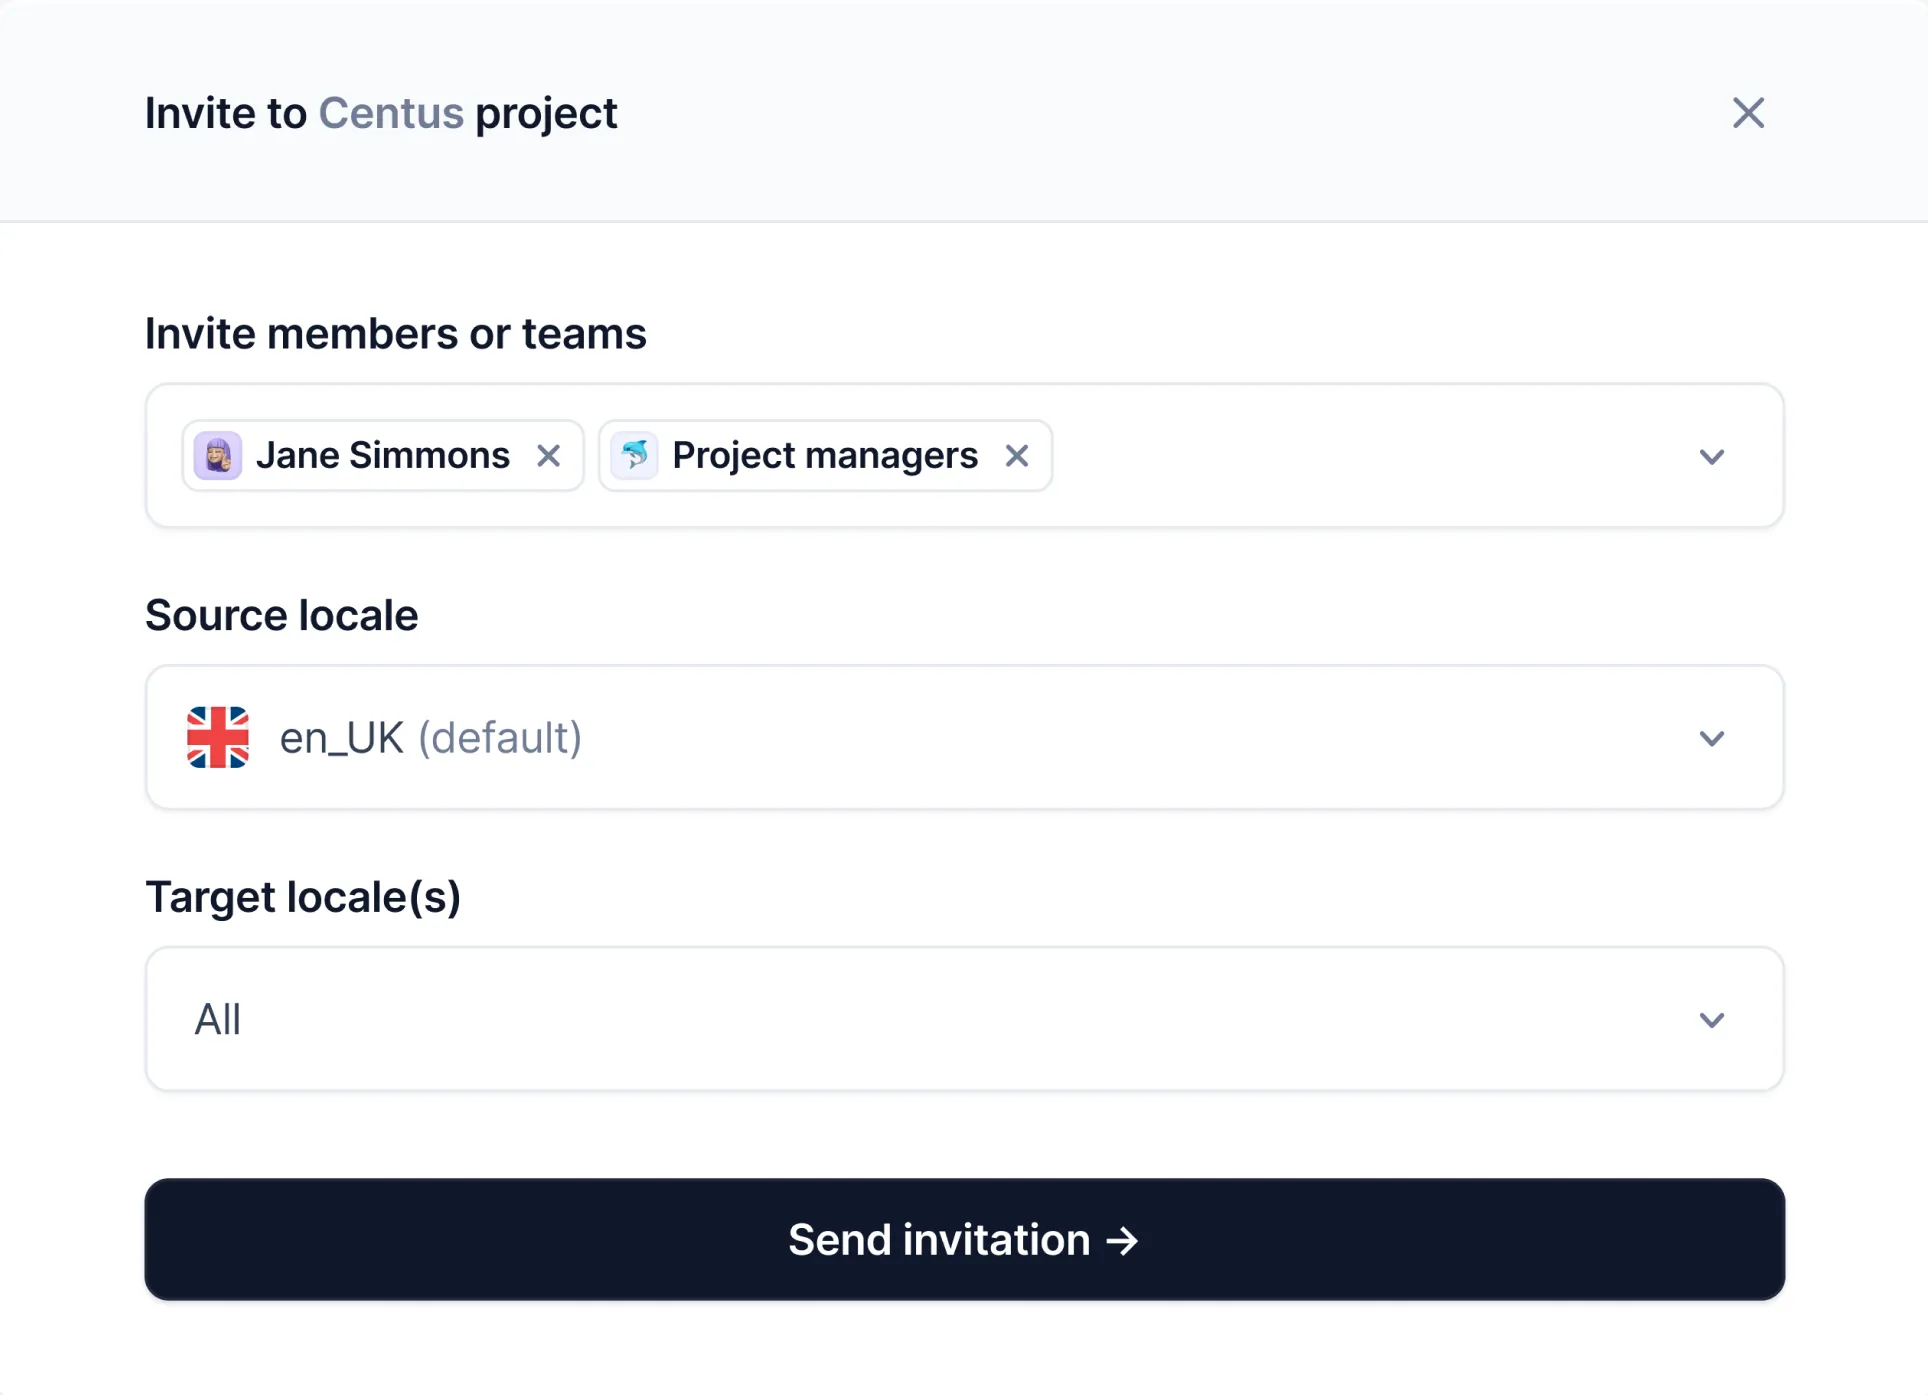
In the Contributors section, click Invite collaborators.
📘 Relevant reading: How to hire translators
Once your team of language experts is assembled, encourage them to use tools like Google Translate, Microsoft Translator, or DeepL. With their help, your translators can quickly create initial automated translations that can be fine-tuned later.
The result?
Fater translations and lower expenses.
Also encourage your team to exchange insights, to prevent major errors early on.
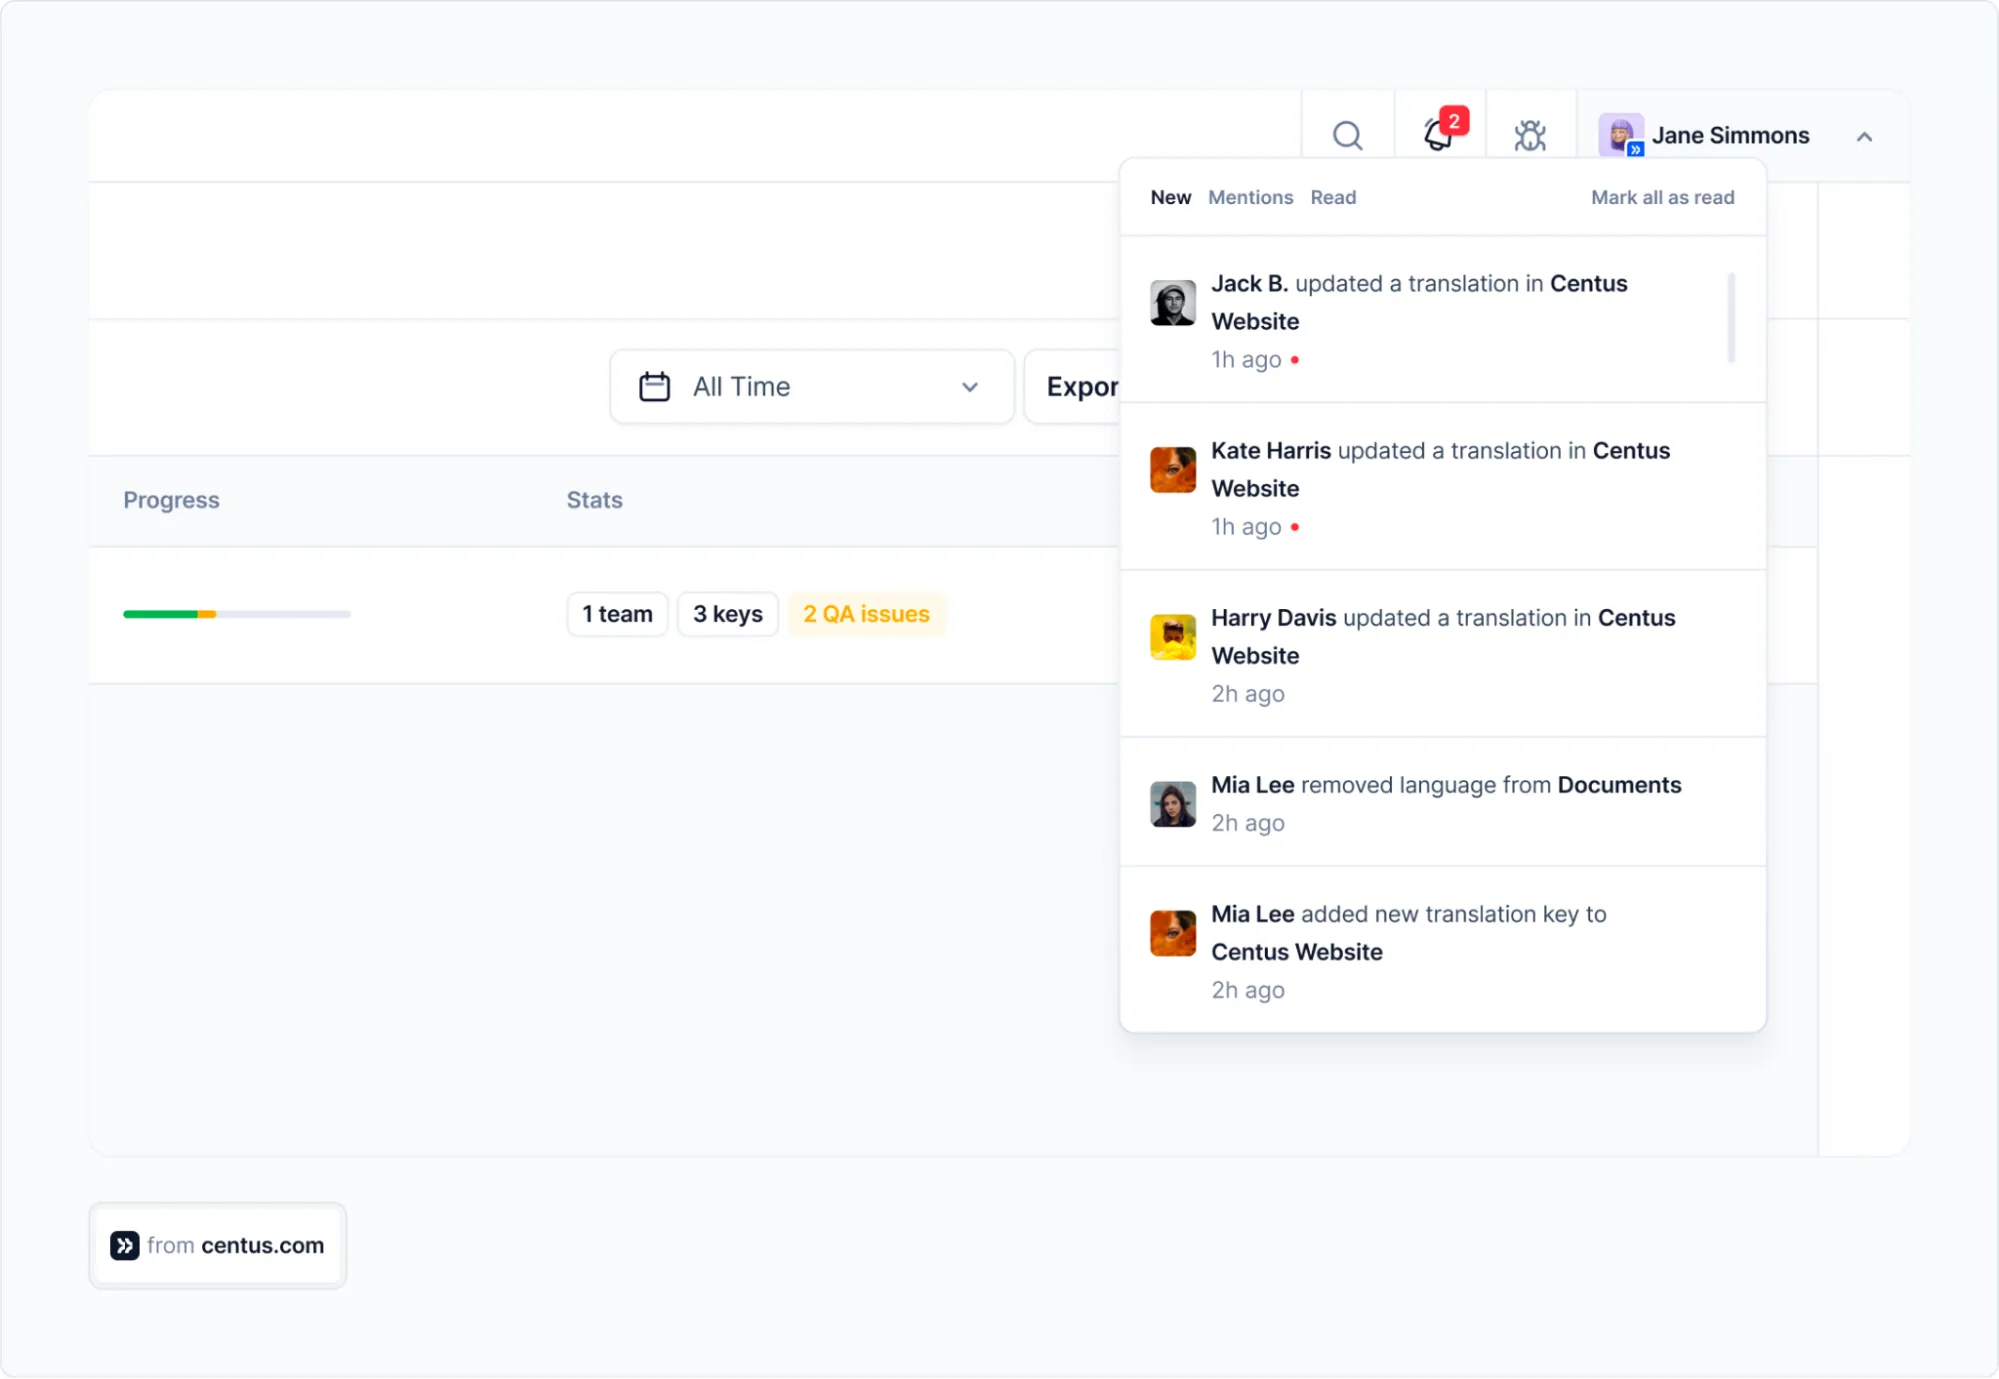
To stay on top your project, go to the Dashboard. There, you could review the progress on multiple localization projects at once.

For a granular view, use the Notification panel to track all major project milestones.
Basically, that’s all you need to know to translate your .po files.
Should you need more advanced features, I’m sure you’ll quickly figure out the rest as soon as you start using Centus. The learning curve is miniscule!
Wrapping up
It’s been quite a ride! But your efforts will pay off.
If you followed me over to the end, your Django app is now ready to connect with people all around the world, letting them enjoy it in their own language and cultural nuances.
And thanks to Django’s built-in toolsets, we didn’t have to spend too long learning a third-party library to set up translations, format dates and numbers, or even handle different plural forms—all the essential elements of a perfectly localized Django app.
As your app grows, you need a helping hand to manage all the translation files, collaborators, and progress across the board.
Centus is the perfect translation management system to simplify localization for everyone involved.
Get the week's best content!
By subscribing, you are agreeing to have your personal information managed in accordance with the terms of Centus Privacy Policy ->
Keep learning
25 min. read
Vue i18n and Localization: How to Localize a Vue App
19 min. read
Laravel Localization: A Step-by-Step Guide
19 min. read
NextJS Internationalization: A Complete Walkthrough
18 min. read
JavaScript Localization Guide for Web Apps
22 min. read
Angular with ngx-translate: Practical Guide
22 min. read