Nuxt i18n and Localization: Make Your App Multilingual
After building international Vue applications, I've learned a crucial lesson: the true complexity of NuxtJS i18n lies not in its configuration, but in gracefully handling the nuances of each language.
In this short guide, I'll share my approach to implementing i18n in Nuxt.js applications, focusing on real-world scenarios I've encountered.
A step-by-step guide to NuxtJS internationalization
Let's build something practical together—a landing page where we can do a clean i18n implementation.
Step 1: Set up the project environment for Nuxt i18n
Let's start by creating a new Nuxt.js project and installing the necessary dependencies:
mkdir centus-nuxtjs-localization
cd centus-nuxtjs-localization
npm init nuxt@latest

# Install required dependencies
npm install @nuxtjs/i18n@next lucide-vue-next
npm install -D tailwindcss postcss autoprefixer
npx tailwindcss init
The final line will create a new file /assets/styles/tailwind.css. Add the following lines to the file:
@tailwind base;
@tailwind components;
@tailwind utilities;
We now need to configure our app to fetch all the required files and be able to use them.
Create a sample Nuxt i18n web app
Create a components directory in the root of the project and add a CentusLanding.vue file with the following code. This will be the app we’ll be working with.
<script setup lang="ts">
import { Globe2, ArrowRight } from 'lucide-vue-next';
</script>
<template>
  <title> Centus Localization </title>
  <div class="min-h-screen bg-white">
    <nav class="border-b py-4">
      <div class="container mx-auto px-4 flex items-center justify-between">
        <div class="flex items-center space-x-2">
          <Globe2 class="h-6 w-6 text-blue-600" />
          <span class="text-xl font-bold">Centus</span>
        </div>
        <div class="flex items-center space-x-8">
          <NuxtLink
            v-for="item in ['Features', 'Pricing', 'Resources']"
            :key="item"
            to="#"
            class="text-gray-600 hover:text-gray-900"
          >
            {{ item }}
          </NuxtLink>
        </div>
      </div>
    </nav>
    <main class="container mx-auto px-4 py-16">
      <div class="max-w-3xl mx-auto text-center">
        <h1 class="text-4xl font-bold mb-6">
          Your all-in-one localization platform
        </h1>
        <p class="text-xl text-gray-600 mb-8">
          Automate and manage your entire translation workflow in one place. Shorten time to market and optimize your content localization budget.
        </p>
        <div class="flex justify-center space-x-4 rtl:space-x-reverse">
          <button class="inline-flex items-center px-4 py-2 bg-blue-600 hover:bg-blue-700 text-white rounded-md">
            Try for free
            <ArrowRight class="ml-2 h-4 w-4" />
          </button>
          <button class="inline-flex items-center px-4 py-2 border border-gray-300 hover:border-gray-400 rounded-md">
            Book a demo
            <ArrowRight class="ml-2 h-4 w-4" />
          </button>
        </div>
      </div>
    </main>
  </div>
</template>
This is a simple landing page that has a few text snippets.
Over the next few steps, we’ll be replacing these hard-coded text blocks with variables that fetch the correct text based on the language.
Now, to run this, add the following line in your nuxt.config.js
export default defineNuxtConfig({
  modules: ['@nuxtjs/i18n', '@nuxtjs/tailwindcss'],
})
And update the app.vue file to include the following:
<!-- app.vue -->
<template>
  <CentusLanding />
</template>
Once you’re done, enter npm run dev in your terminal, and go to localhost:3000 to see the below page.
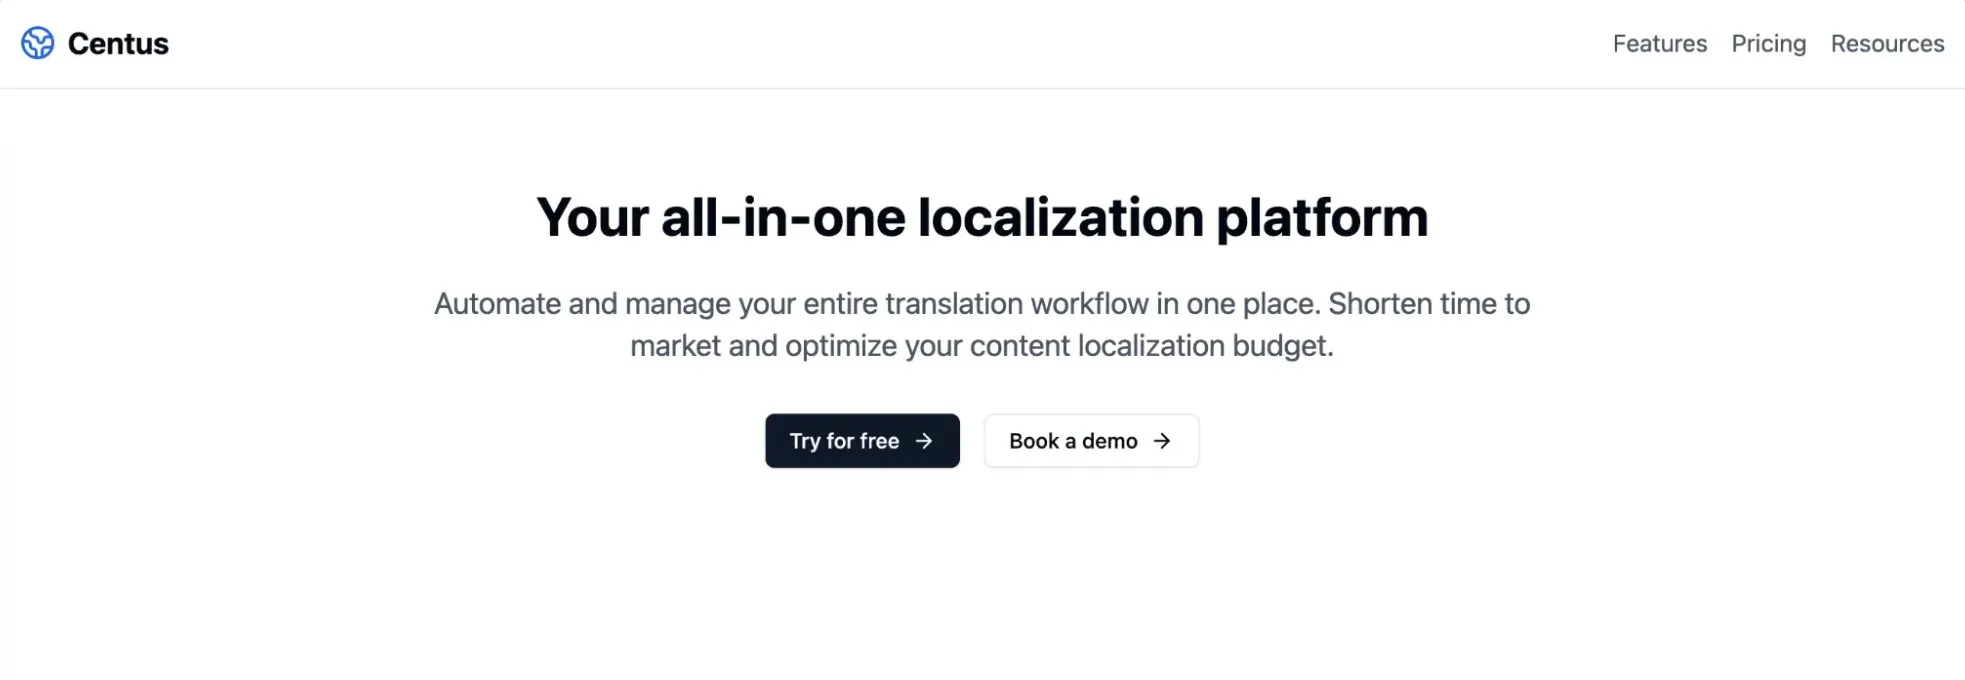
Awesome! You’re ready to start localizing. We’ll be turning this landing page into a fully localized NuxtJS app with plurals, genders, number and date formatting, etc.
Step 2: Prepare config files for Nuxt localization
Proper configuration from the start can save countless hours down the line.
So, let’s just get that set up right now. Add the following configuration in the nuxt.config.ts file:
export default defineNuxtConfig({
  modules: ['@nuxtjs/i18n','@nuxtjs/tailwindcss'],
  css: ['@/assets/styles/tailwind.css'],
  i18n: {
    locales: [
      { code: 'en', iso: 'en-US', name: 'English', file: 'en.ts' },
      { code: 'fr', iso: 'fr-FR', name: 'Français', file: 'fr.ts' },
      { code: 'es', iso: 'es-ES', name: 'Español', file: 'es.ts' }
    ],
    lazy: true,
    langDir: 'locales', // Ensure this matches your folder structure
    defaultLocale: 'en',
    strategy: 'prefix_except_default',
    detectBrowserLanguage: {
      useCookie: true,
      cookieKey: 'i18n_redirected',
      redirectOn: 'root'
    }
  },
});
You’ll notice I’ve also added a detectBrowserLanguage key that takes care of detecting the default language and saves the previously used language in a cookie.
So the next time you visit the page again, you will see the same language set up.
Step 3: Create translation files
Alright, our app is now ready to fetch the translation files. Let's organize our translations in a way that helps us scale without messing up the application.
For now, I’m creating an i18n/locales directory with one language file per locale.
If you have a large app or have a lot of pages, you could consider creating one file per page per language, or maybe go further and create one file per feature of your app.
// i81n/locales/en.ts
export default {
  nav: {
    features: 'Features',
    pricing: 'Pricing',
    resources: 'Resources'
  },
  hero: {
    title: 'Your all-in-one localization platform',
    subtitle: 'Automate and manage your entire translation workflow in one place. Shorten time to market and optimize your content localization budget.',
    cta: {
      try: 'Try for free',
      demo: 'Book a demo'
    }
  }
}


// i81n/locales/fr.ts
export default {
  nav: {
    features: 'Fonctionnalités',
    pricing: 'Tarification',
    resources: 'Ressources'
  },
  hero: {
    title: 'Votre plateforme de localisation tout-en-un',
    subtitle: 'Automatisez et gérez l\'ensemble de votre flux de traduction en un seul endroit. Réduisez vos délais de mise sur le marché et optimizez votre budget.',
    cta: {
      try: 'Essayer gratuitement',
      demo: 'Réserver une démo'
    }
  }
}


// i81n/locales/es.ts
export default {
  nav: {
    features: 'Características',
    pricing: 'Precios',
    resources: 'Recursos'
  },
  hero: {
    title: 'Tu plataforma de localización todo en uno',
    subtitle: 'Automatiza y gestiona todo tu flujo de trabajo de traducción en un solo lugar. Reduce el tiempo de comercialización y optimiza tu presupuesto.',
    cta: {
      try: 'Prueba gratis',
      demo: 'Solicitar demo'
    }
  }
}
I prefer this nested structure as it makes translations more maintainable later down the line.
Each section of your application has its own namespace, making it easier to locate and update specific translations.
Step 4: Add a language switcher component
The language switcher is probably the most important part of our localization efforts. Considering the amount of effort that goes into localizing a NuxtJS app and maintaining it, you want the feature to be used.
Create a new file named LanguageSwitcher.vue and add the following code.
<script setup lang="ts">
import { useI18n } from 'vue-i18n';
import { ref } from 'vue';

type LocaleCode = 'en' | 'fr' | 'es';

const { locale, setLocale } = useI18n<LocaleCode>();
const isOpen = ref(false);

const languages: { code: LocaleCode; name: string; nativeName: string; flag: string }[] = [
  { code: 'en', name: 'English', nativeName: 'English', flag: '🇺🇸' },
  { code: 'fr', name: 'French', nativeName: 'Français', flag: '🇫🇷' },
  { code: 'es', name: 'Spanish', nativeName: 'Español', flag: '🇪🇸' },
];

const switchLanguage = async (code: LocaleCode) => {
  await setLocale(code); // Type-safe locale switching
  isOpen.value = false;
};

const getCurrentLanguage = () => languages.find(l => l.code === locale.value);
</script>

<template>
  <div class="relative">
    <button
      @click="isOpen = !isOpen"
      class="flex items-center space-x-2 px-3 py-2 rounded-md hover:bg-gray-50"
    >
      <span>{{ getCurrentLanguage()?.flag }}</span>
      <span>{{ getCurrentLanguage()?.nativeName }}</span>
    </button>

    <div
      v-if="isOpen"
      class="absolute right-0 mt-2 w-56 rounded-md shadow-lg bg-white ring-1 ring-black ring-opacity-5"
    >
      <div class="py-1">
        <button
          v-for="language in languages"
          :key="language.code"
          @click="switchLanguage(language.code)"
          class="flex items-center w-full px-4 py-2 text-sm hover:bg-gray-100"
        >
          <span class="mr-3">{{ language.flag }}</span>
          <span class="flex-grow text-left">{{ language.nativeName }}</span>
        </button>
      </div>
    </div>
  </div>
</template>
To make the language switcher a little nicer, I’ve added the country flag emojis here. You can always customize how the language switcher displays languages on the front end. For now, this works.
Step 5: Put it all together
We have the translation files, our Nuxt config has the required information to fetch the translation files and use them, and we have a nice-looking language switcher.
The last thing is to switch out the hard-coded English text with variables that we’ve used in our language files.
Here’s what my CentusLanding.vue component looks like right now:
<!-- components/CentusLanding.vue -->
<script setup lang="ts">
import { useI18n } from 'vue-i18n'
import { Globe2, ArrowRight } from 'lucide-vue-next'

const { t } = useI18n()
</script>

<template>
  <title> Centus Localization </title>
  <div class="min-h-screen bg-white">
    <nav class="border-b py-4">
      <div class="container mx-auto px-4 flex items-center justify-between">
        <div class="flex items-center space-x-2">
          <Globe2 class="h-6 w-6 text-blue-600" />
          <span class="text-xl font-bold">Centus</span>
        </div>
        <div class="flex items-center space-x-8">
          <NuxtLink
            v-for="item in ['features', 'pricing', 'resources']"
            :key="item"
            to="#"
            class="text-gray-600 hover:text-gray-900"
          >
            {{ t(`nav.${item}`) }}
          </NuxtLink>
          <LanguageSwitcher />
        </div>
      </div>
    </nav>

    <main class="container mx-auto px-4 py-16">
      <div class="max-w-3xl mx-auto text-center">
        <h1 class="text-4xl font-bold mb-6">
          {{ t('hero.title') }}
        </h1>
        <p class="text-xl text-gray-600 mb-8">
          {{ t('hero.subtitle') }}
        </p>
        <div class="flex justify-center space-x-4">
          <button class="inline-flex items-center px-4 py-2 bg-blue-600 hover:bg-blue-700 text-white rounded-md">
            {{ t('hero.cta.try') }}
            <ArrowRight class="ml-2 h-4 w-4" />
          </button>
          <button class="inline-flex items-center px-4 py-2 border border-gray-300 hover:border-gray-400 rounded-md">
            {{ t('hero.cta.demo') }}
            <ArrowRight class="ml-2 h-4 w-4" />
          </button>
        </div>
      </div>
    </main>
  </div>
</template>
You’ll also notice that I’ve added the <LanguageSwitcher /> component inside the <nav> blocks. That’s because I wanted the dropdown clearly visible at all times.
Run the app again, and you should see the following page:

Alright! We’re ready to proceed to advanced localization. But before we do, let me show you…
How to manage translations for your NuxtJS app
You may have already noticed how overwhelming translation management can be. Even when you’re dealing with a handful of strings. Now, imagine your app strikes a chord with users and keeps growing, adding pages and languages.
This is where localization management platforms like Centus, become truly invaluable.
Here’s how I use Centus to manage translations for my NuxtJS and other apps:
I start by importing my app’s strings into Centus, where they’re automatically translated using powerful tools like Google Translate, DeepL, or Microsoft Translator.
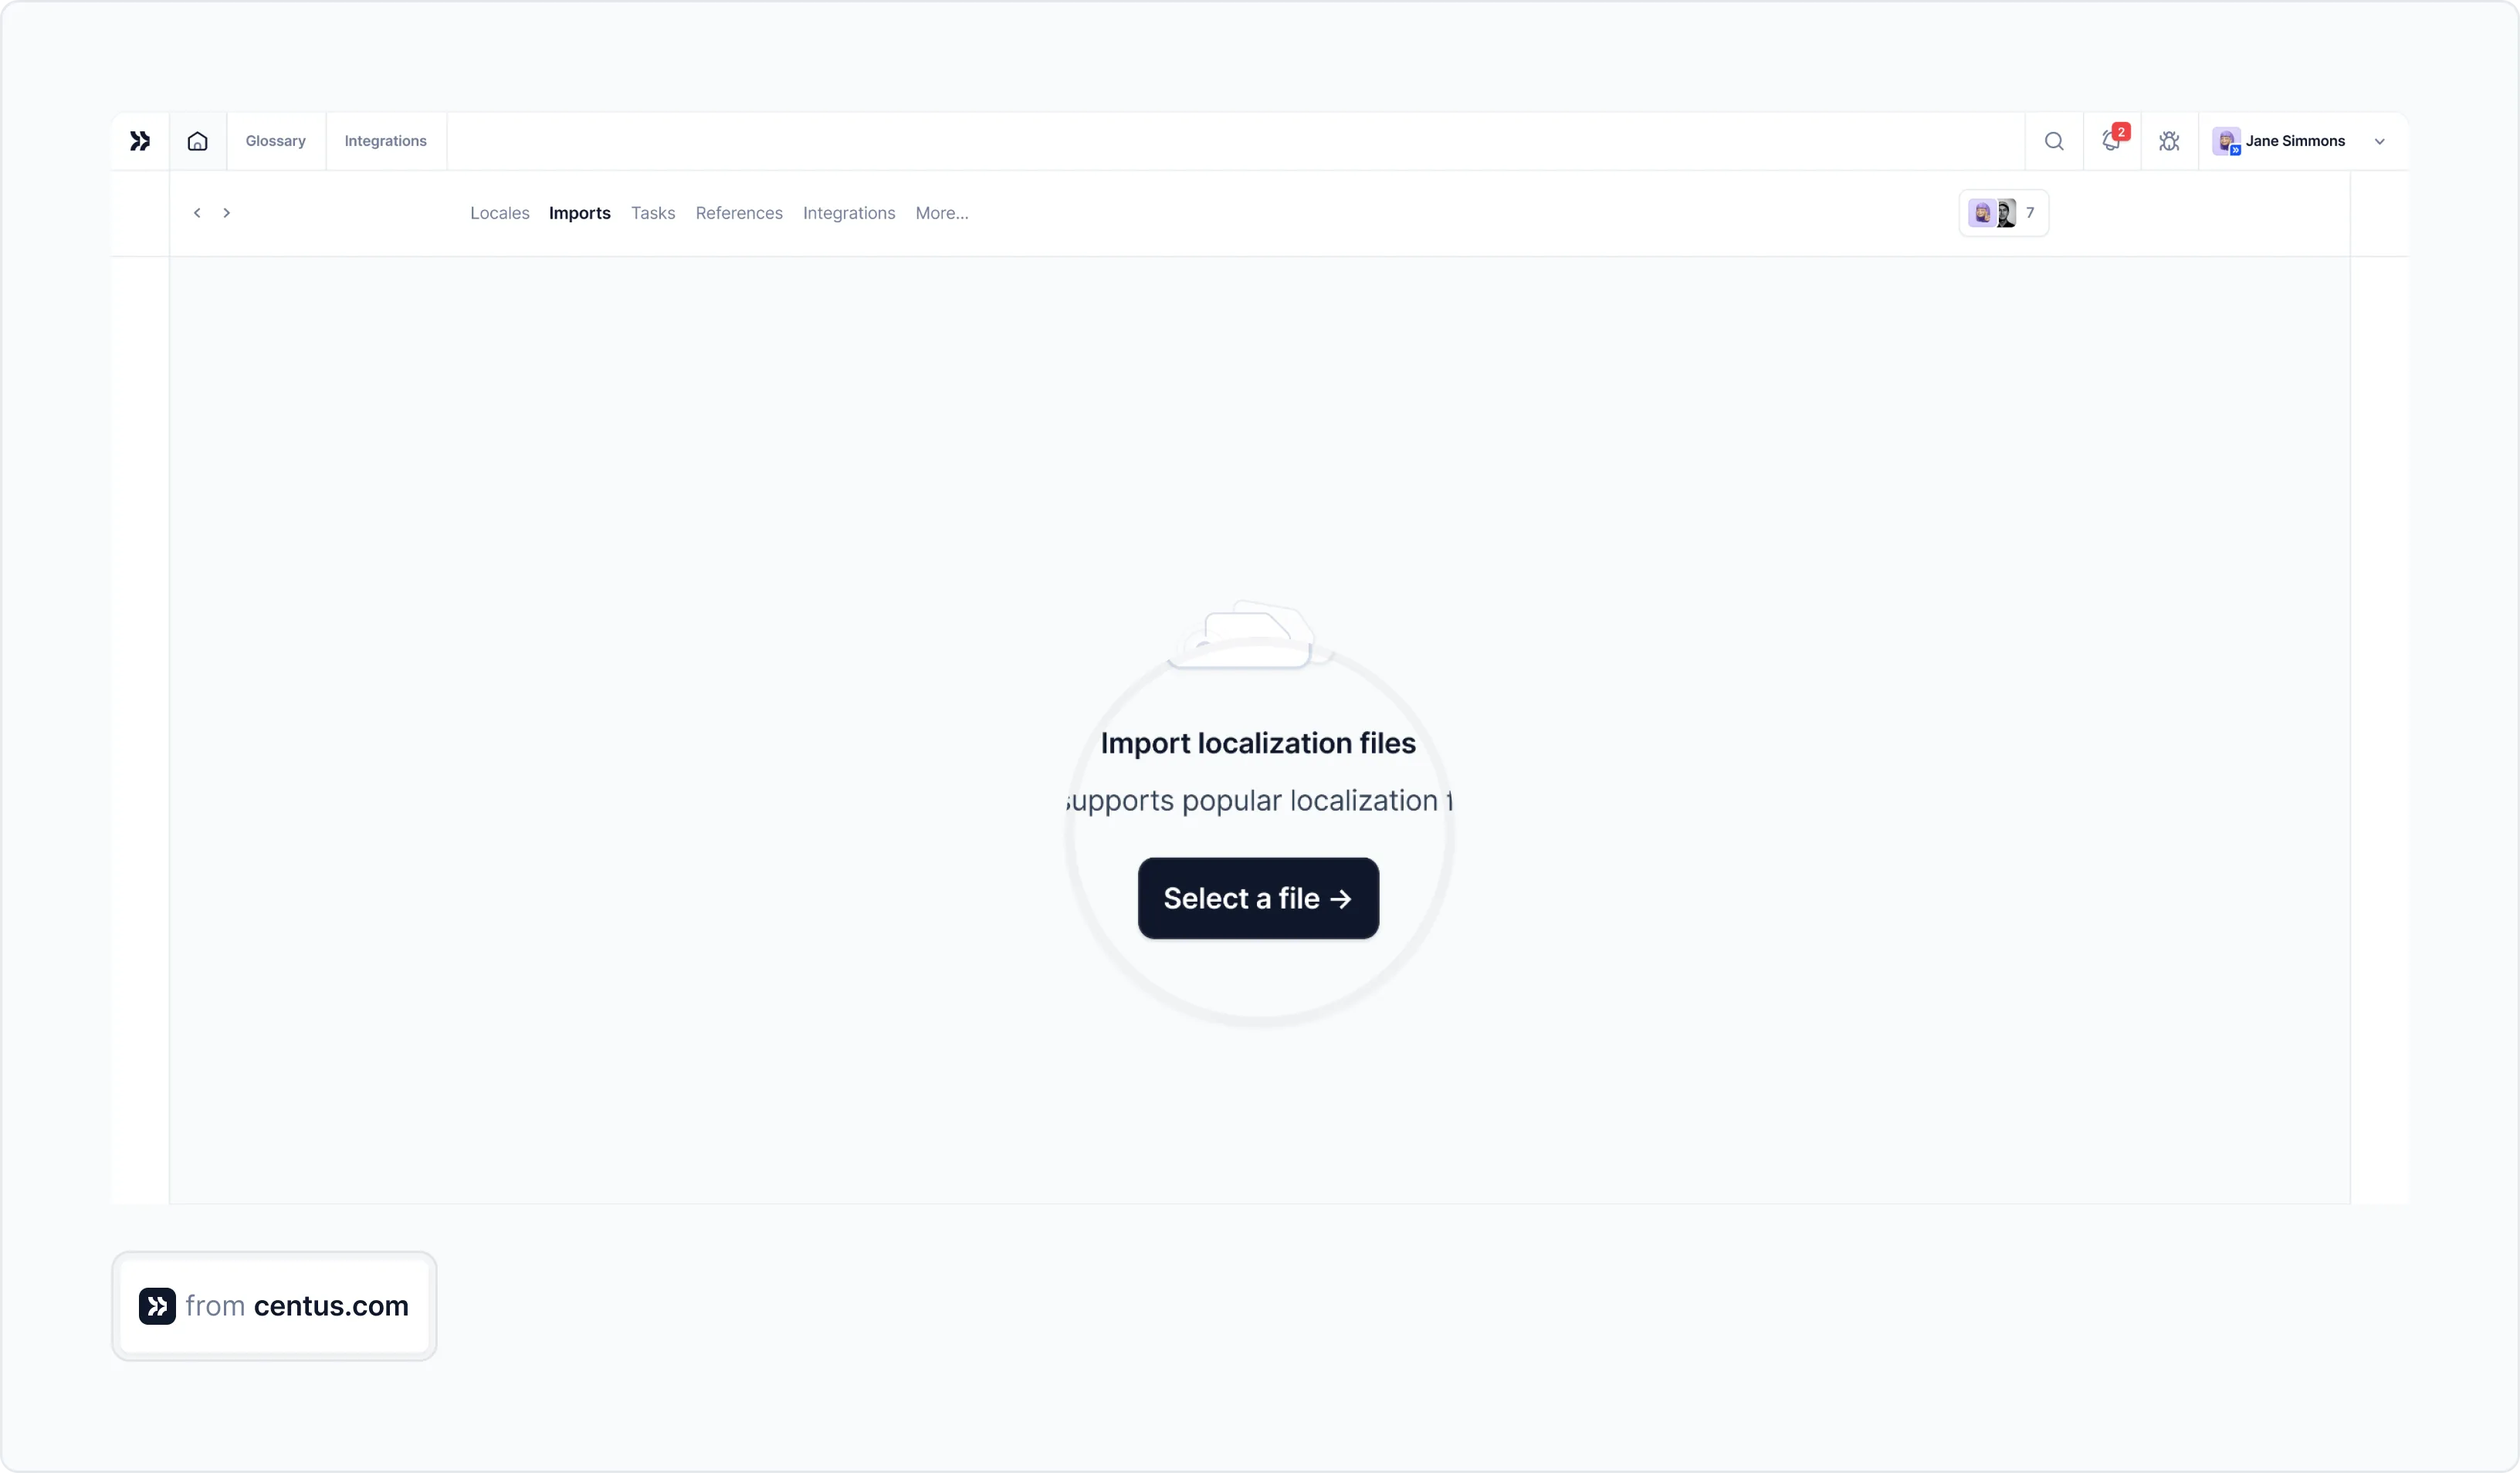
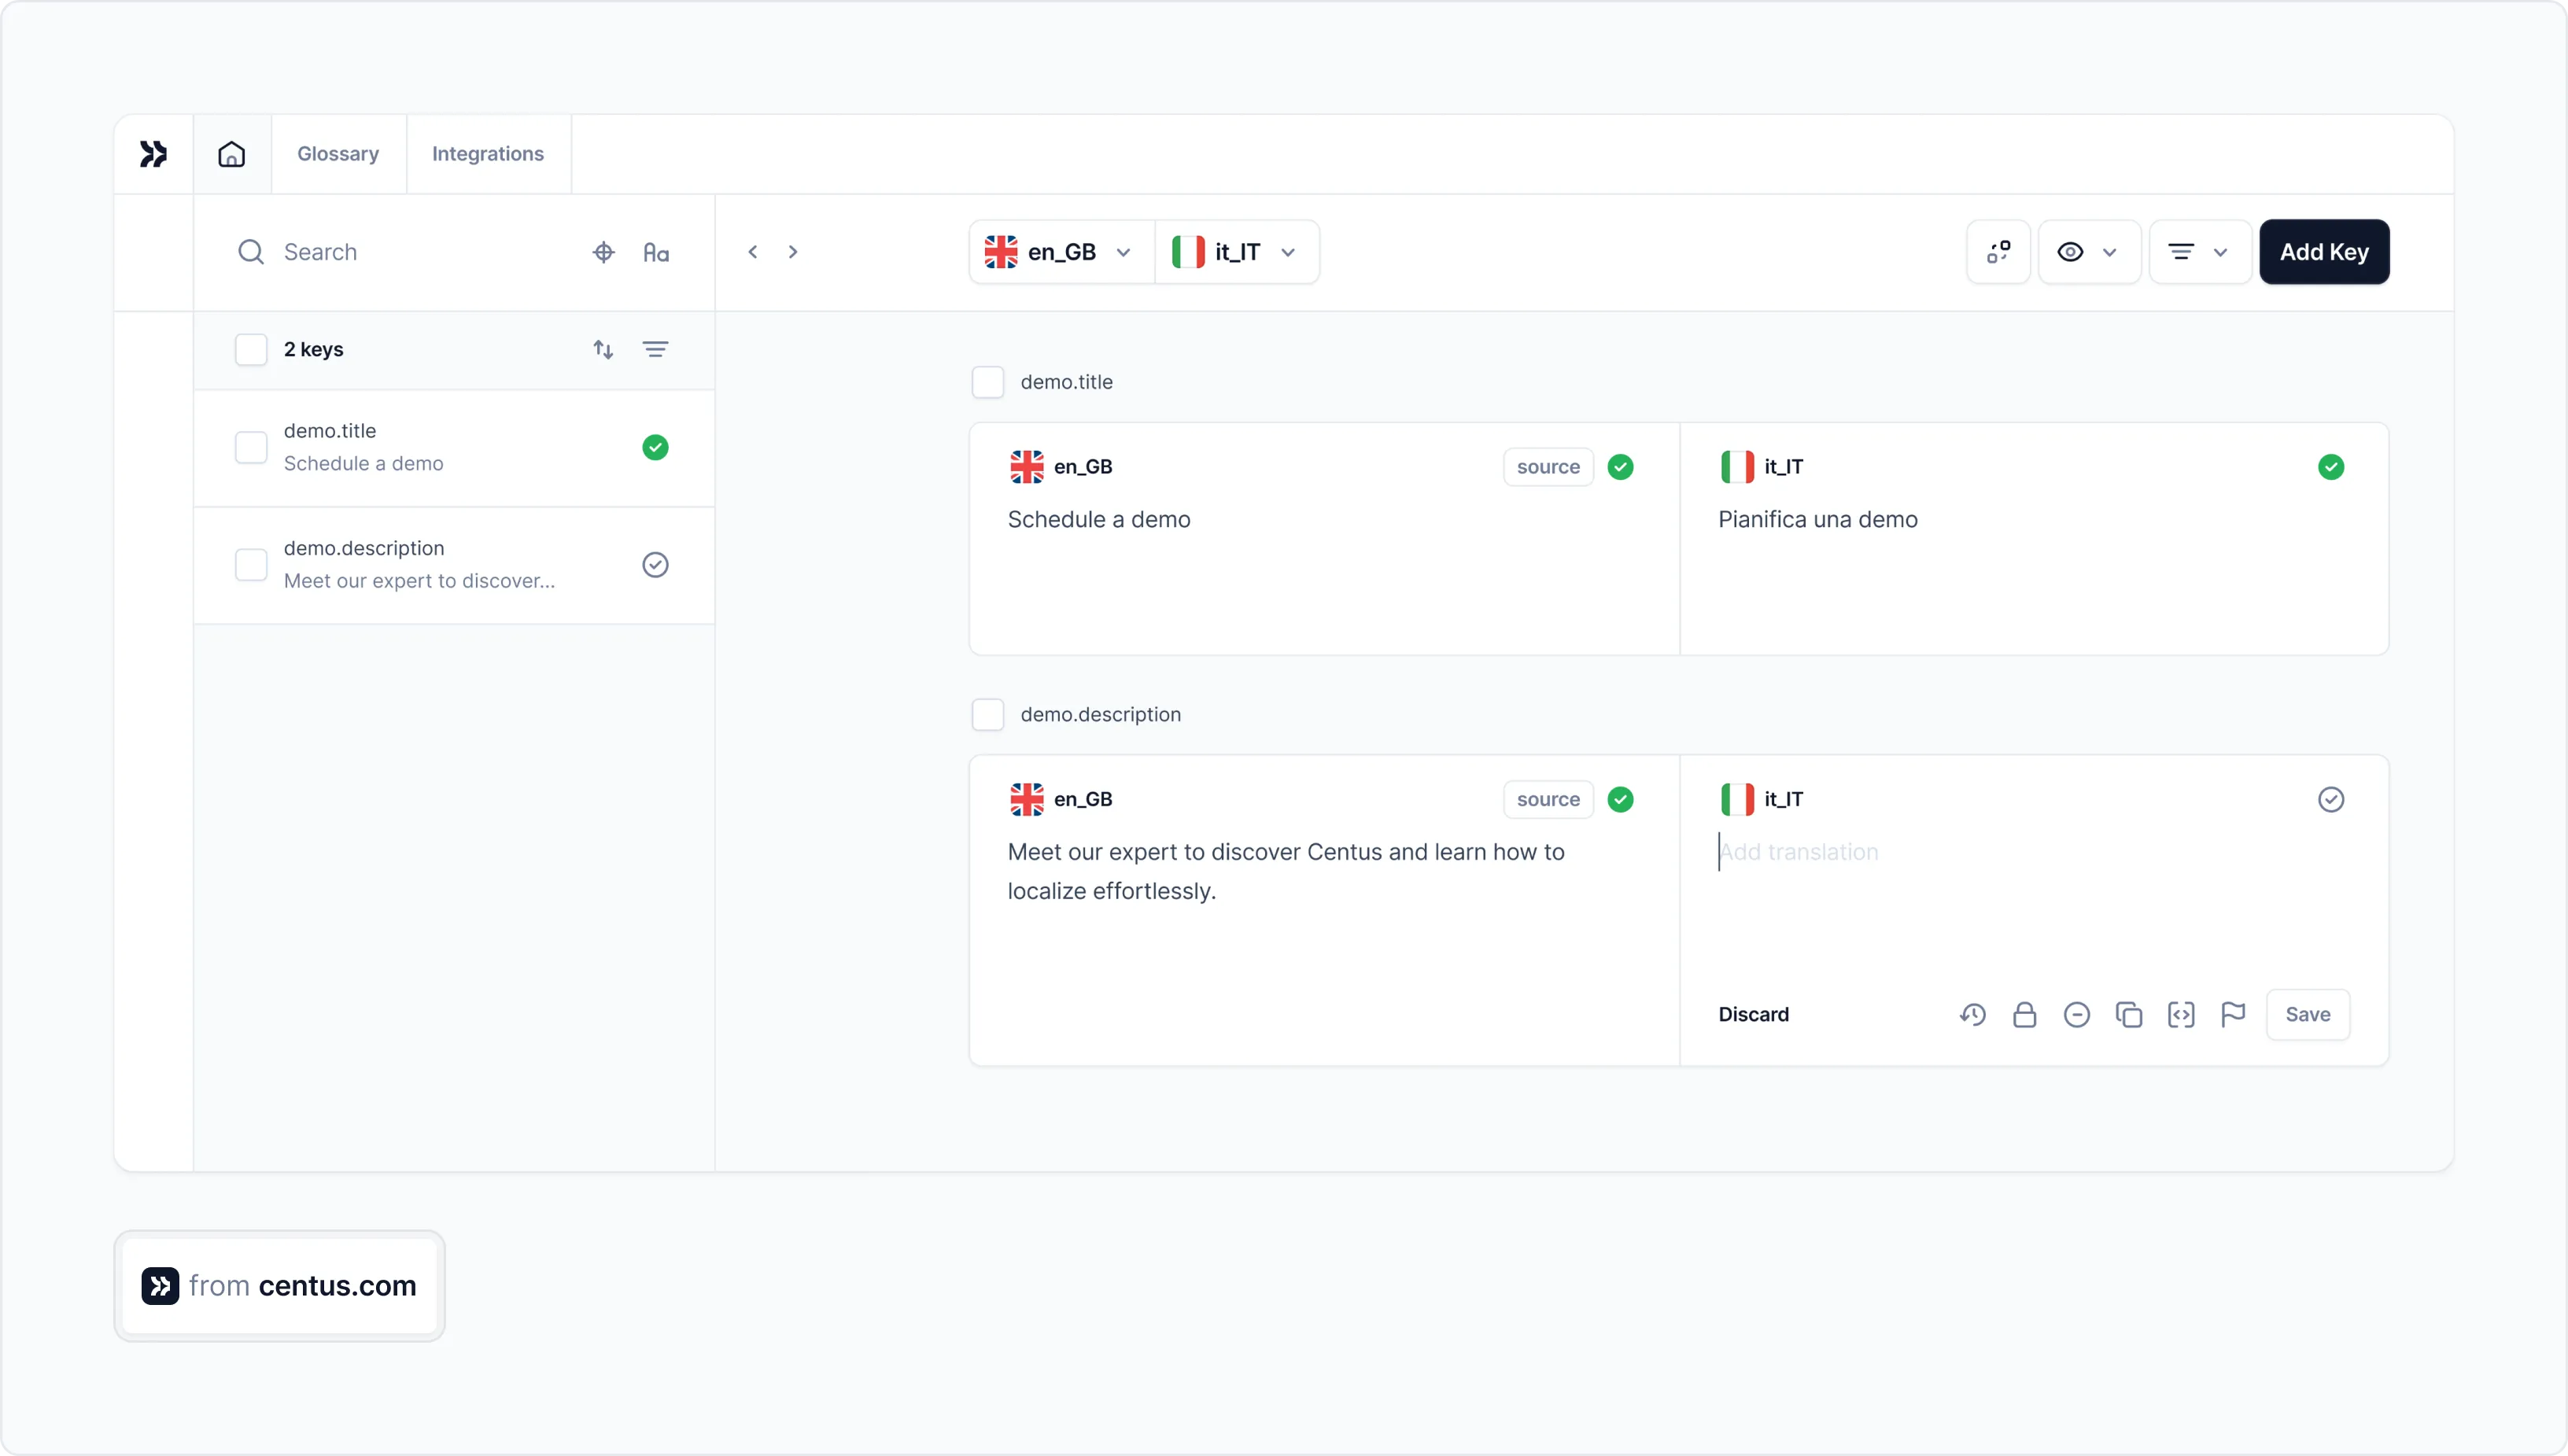
While automatic translations are a good start, my language experts refine them using Centus’ convenient Editor.
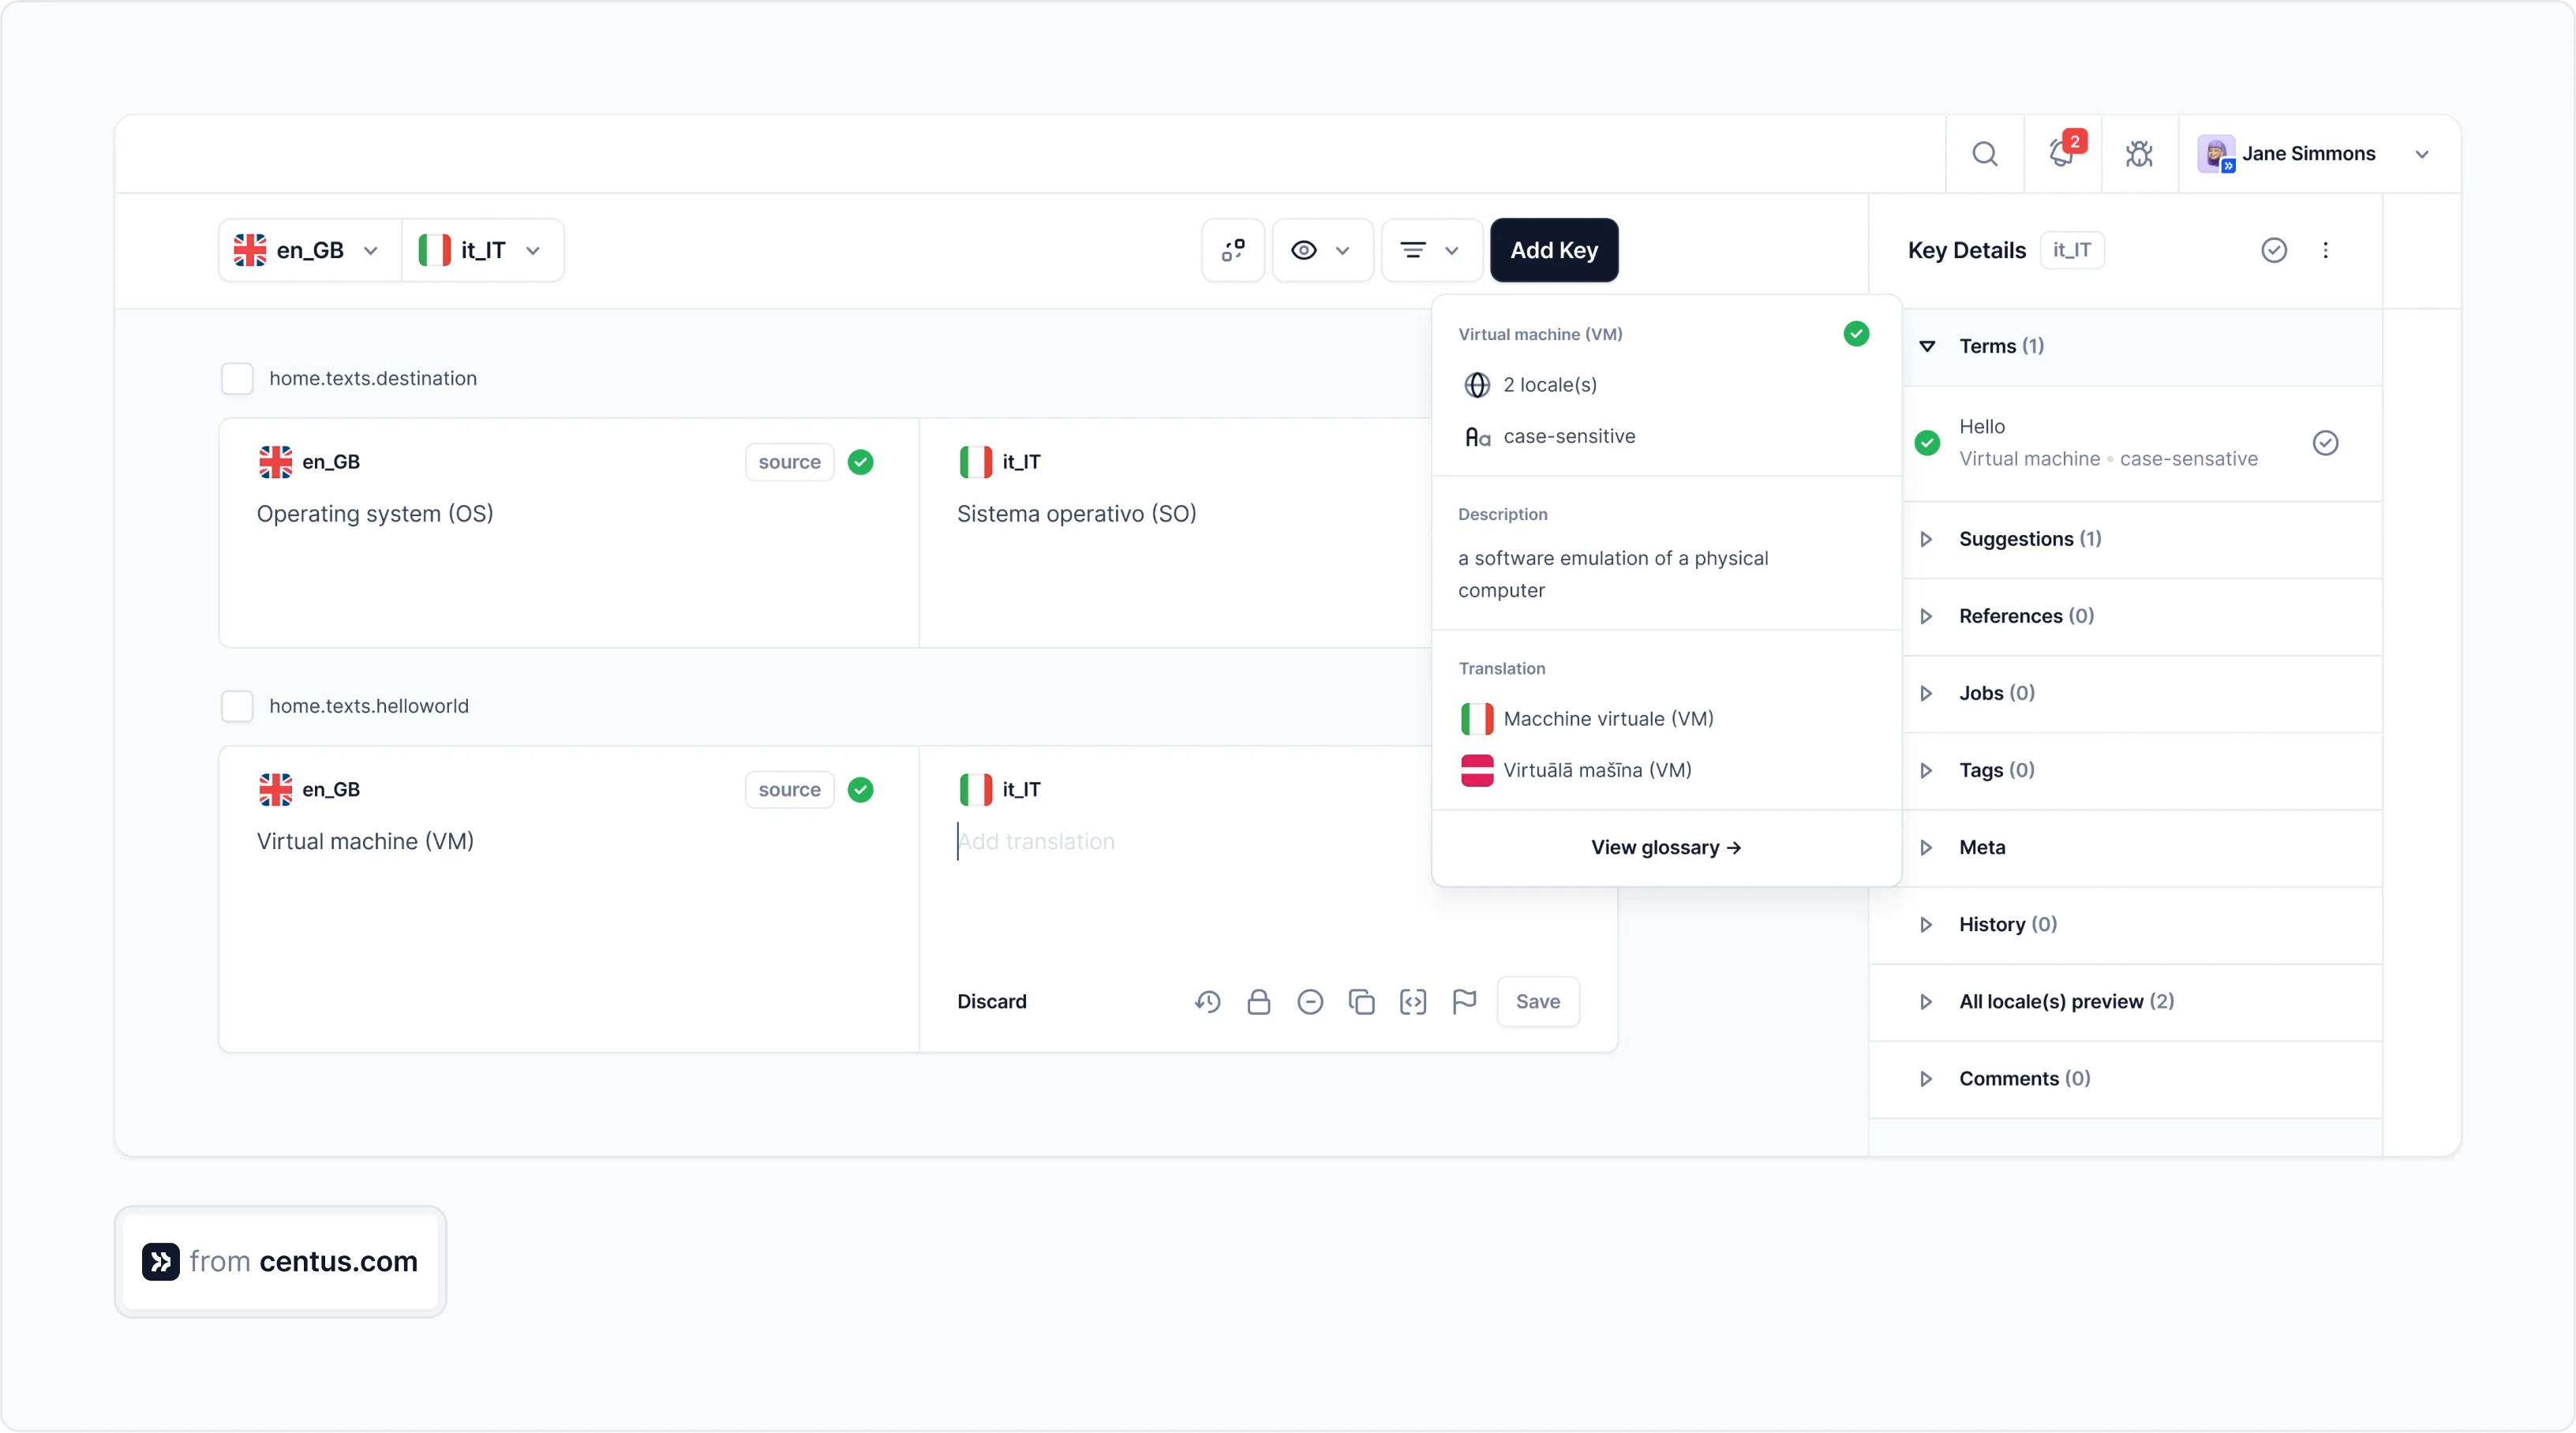
To keep translations consistent across the app, my team uses Centus glossaries. Once they add a new translation to the glossary, it’s automatically suggested in the Editor.
Since NuxtJS localization is a team effort, I need an easy way to keep everyone on the same page. Fortunately, I don’t need third-party chat tools for that.
Centus allows my translators, developers, designers, and managers to share app screenshots and comments right in the Editor.

The best part?
With Centus, translation bug fixing takes minutes instead of days.
Normally, the process can be painfully slow:
- You notice truncated text in your app.
- You email translators to shorten the text.
- You wait for the translations, then run regression testing. If the text still doesn’t fit, you repeat the process.
This constant back-and-forth can delay your project for days or even weeks.
But with Centus, bug-fixing becomes a matter of minutes:
- You notice the truncated text.
- You leave a comment for translators directly in Centus.
- Translators make adjustments, and the strings are automatically updated via Centus API.
This seamless bug-fixing process dramatically reduces turnaround time.
Now you should have a good idea of how to manage translations for your NuxtJS app. Read to give it a try? Sign up for Centus now!
Advanced NuxtJS localization and internationalization
We’re not done yet. There’s so much more to localization than just translating text. And till now, that’s all we’ve accomplished.
Let’s change that and add some nuance to our NextJs i18n and l8n efforts with some advanced localization techniques.
Pluralization
English has just two forms for plurals—singular and plural.
But quite a few languages, like Arabic and Welsh, have six forms. To properly localize the app for these languages (if you plan to serve these regions), you need to know how to handle plurals.
// en.ts
items: {
 cart: 'You have {count} item in your cart | You have {count} items in your cart'
}

// fr.ts
items: {
 cart: 'Vous avez {count} article dans votre panier | Vous avez {count} articles dans votre panier'
}

// es.ts
items: {
 cart: 'Tienes {count} artículo en tu carrito | Tienes {count} artículos en tu carrito'
}
All the languages we’re localizing have just two forms of plurals. But here’s how you’d pluralize for Russian, Arabic, Welsh, etc with more forms:
export default {
  items: {
    cart: `У вас {count} {count, plural,
      one {товар в корзине}
      few {товара в корзине}
      many {товаров в корзине}
      other {товара в корзине}
    }`
  }
};
That’s Russian pluralization, and it has quite complex rules:
-
one: Singular form (e.g., 1 товар).
- Applies for numbers like 1, 21, 31.
-
few: Applies to numbers like 2, 3, 4, 22, 23, 24.
-
many: Applies to numbers like 0, 5, 6, 7, 8, 9, 11–14.
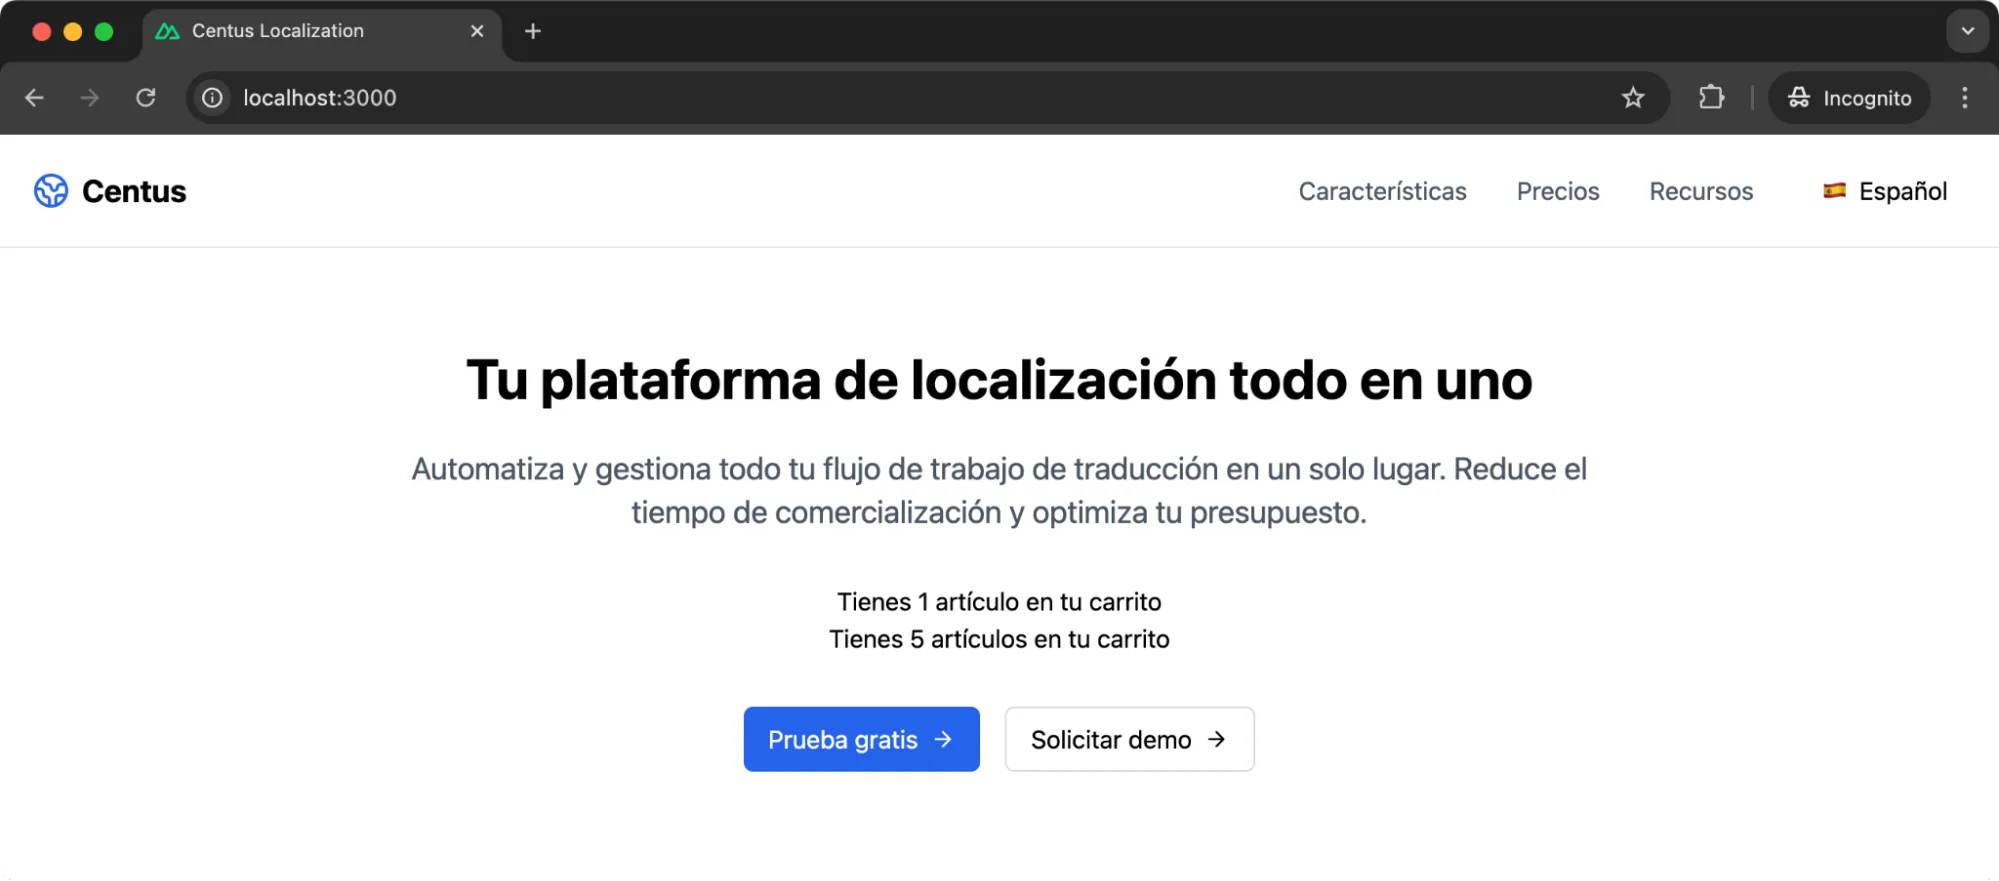
Now that this is out of the way, let’s move to add these pluralized pieces of text to our CentusLanding.vue template. Add this div block anywhere on the visible part of the page.
<div class="mb-8">
  <p>{{ t('items.cart', 1, { count: 1 }) }}</p>
  <p>{{ t('items.cart', 5, { count: 5 }) }}</p>
</div>
Then refresh the page and you should see two lines, one in its singular form, another in the plural form.
Gendered sentences
Similar to plurals, many languages change the word based on the gender. For instance, the word “Welcome” is the same in English irrespective of who we’re welcoming.
But for French? We have two words—one for male and neutral, and another for female.
Spanish has one word for each gender Start by adding the following translation keys in the respective files.
// en.ts
  welcome: {
    male: 'Welcome, Sir! How are you?',
    female: 'Welcome, Ma\'am! How are you?',
    neutral: 'Welcome, User! How are you?'
  },

// fr.ts
  welcome: {
    male: 'Bienvenue, Monsieur! Comment ça va?',
    female: 'Bienvenue, Madame! Comment ça va?',
    neutral: 'Bienvenue, Utilisateur! Comment ça va?'
  },

// es.ts
  welcome: {
    male: '¡Bienvenido, Señor! ¿Cómo estás?',
    female: '¡Bienvenida, Señora! ¿Cómo estás?',
    neutral: '¡Bienvenido/a, Usuario! ¿Cómo estás?'
  },
Next, we need to assign a value to the gender variable on the CentusLanding.vue page. Add this line at the end of the script tag.
const gender = ref<'male' | 'female' | 'neutral'>('female')
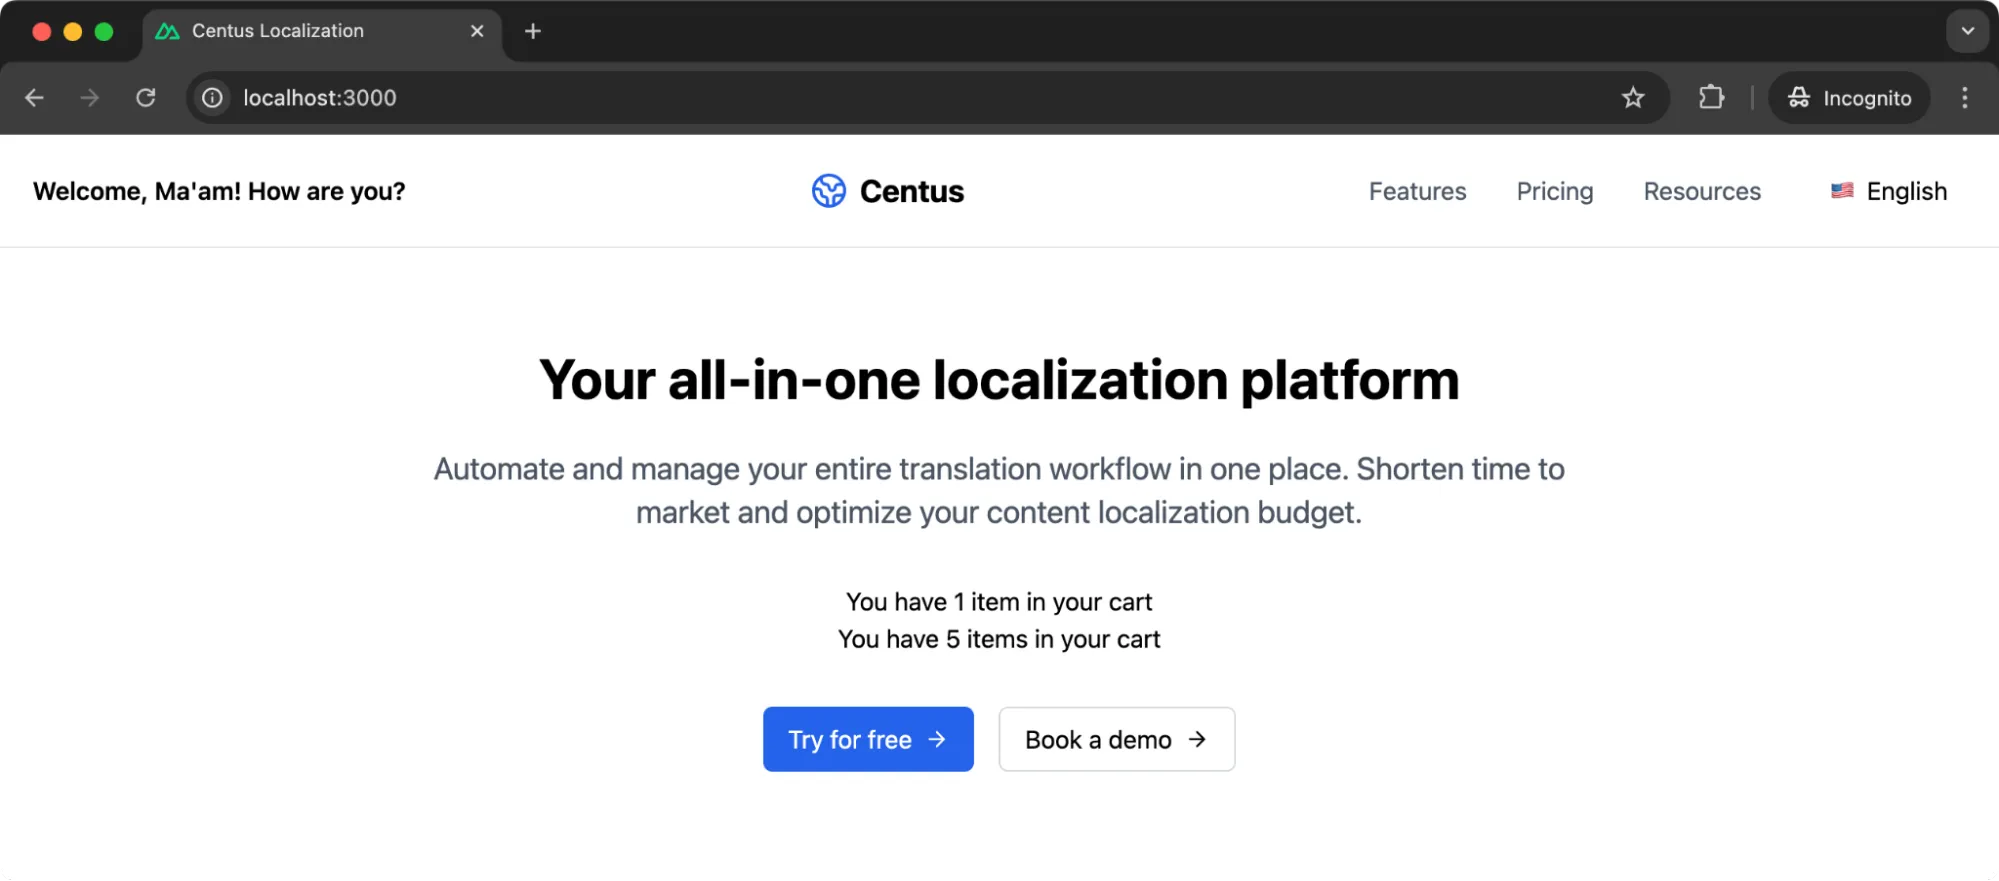
Now, I want to welcome the user at the top of the page.
Instead of making it part of the body, I’m adding the welcome message in the navbar.
<div>
  <h3 class="text-l font-semibold">
    {{ t(`welcome.${gender}`) }}
  </h3>
</div>
If you see on the top left, we have the welcome message.
Date and time formatting
Now we’re moving on to some of the easier aspects of advanced localization in NuxtJS. Here, we’ll take advantage of the existing Intl.DateTimeFormat object to handle the formatting for us.
// en.ts
dateExample: 'Today is {date}',

// fr.ts
dateExample: 'Aujourd\'hui, c\'est {date}',

// es.ts
dateExample: 'Hoy es {date}',
Start by creating a utils directory inside the project root. Add a dateFormatter.ts file in this with the following function:
export function formatDate(date: Date, locale: string): string {
  return new Intl.DateTimeFormat(locale, {
    year: 'numeric',
    month: 'long',
    day: 'numeric',
  }).format(date);
}
All I’m doing is abstracting away the logic in a different file for better maintainability. You can choose to bring all the formatting functions (including the number and currency formatter I’ll demonstrate in a bit) in a single file as well.
We now need to import the file in our CentusLanding.vue page, pass the currently locale variable to the formatter, and then store the formatted date in the today variable.
import { formatDate } from '@/utils/dateFormatter';
const { t, locale } = useI18n();
const today = formatDate(new Date(), locale.value);
You’re all set now. Just add the following paragraph block under the subtitle:
<p class="text-lg text-gray-700 mb-4">
  {{ t('date', { date: today }) }}
</p>
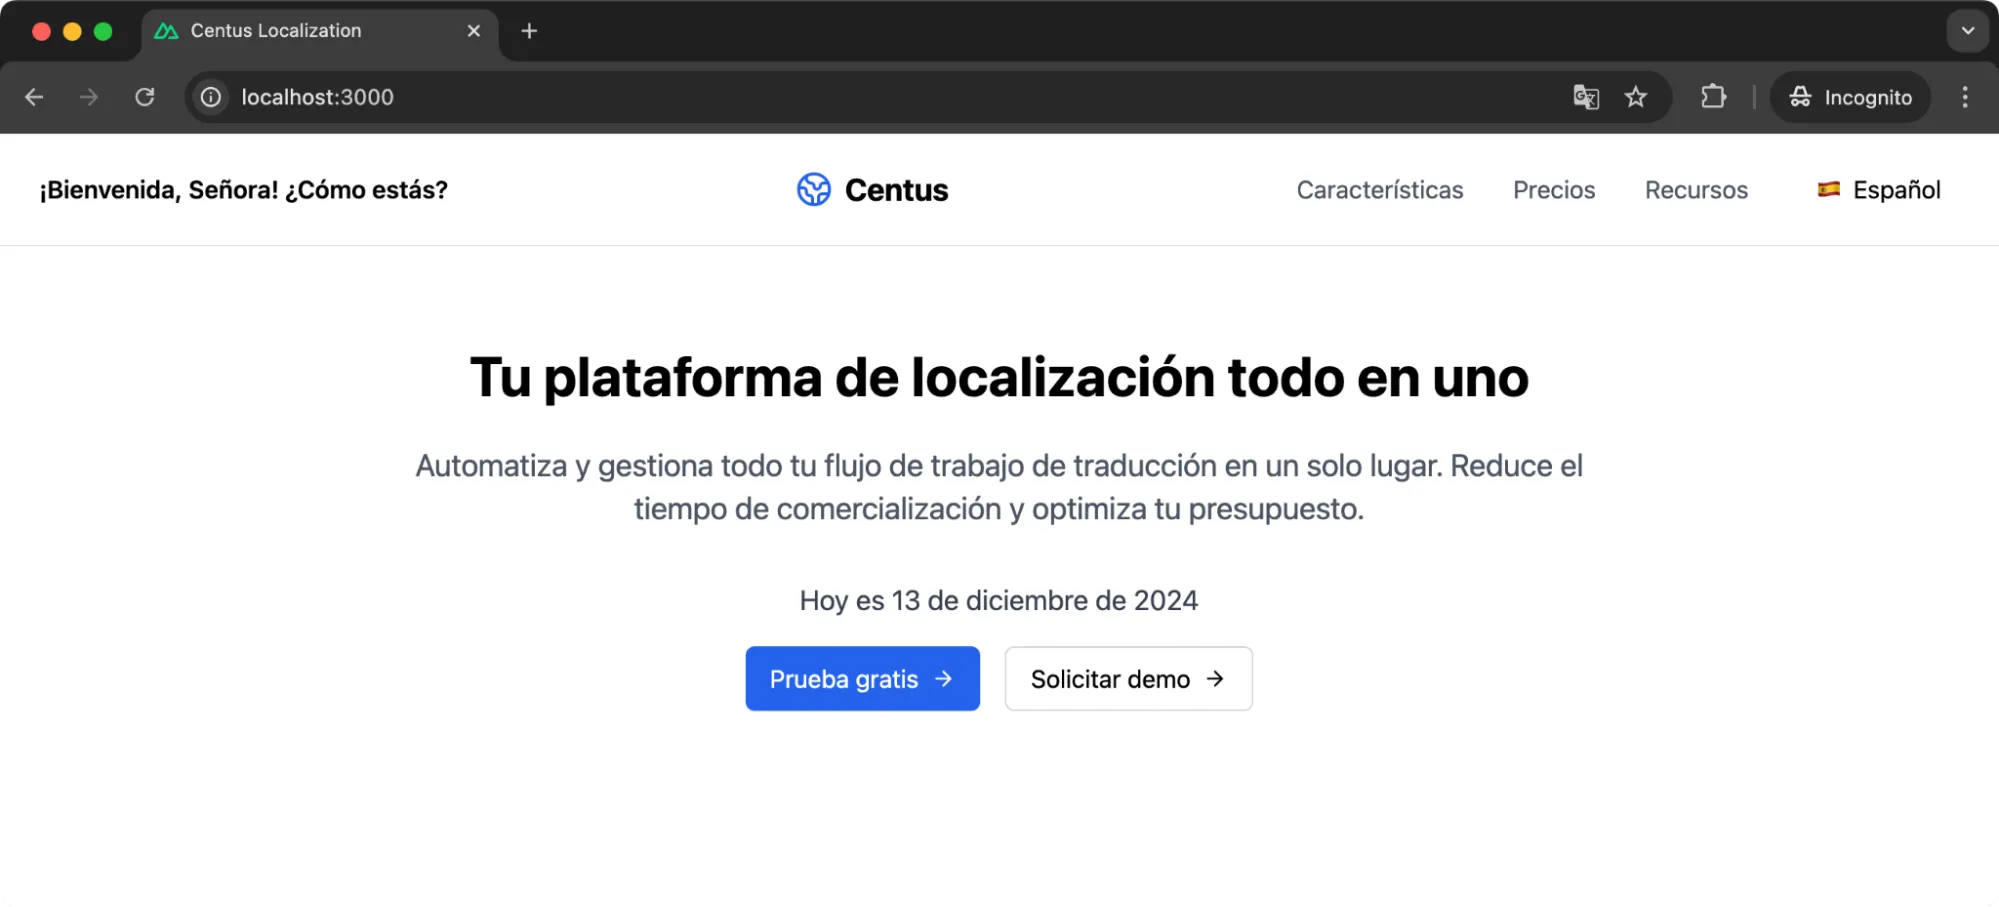
And refresh the page if it hasn’t already refreshed.
And here’s French:
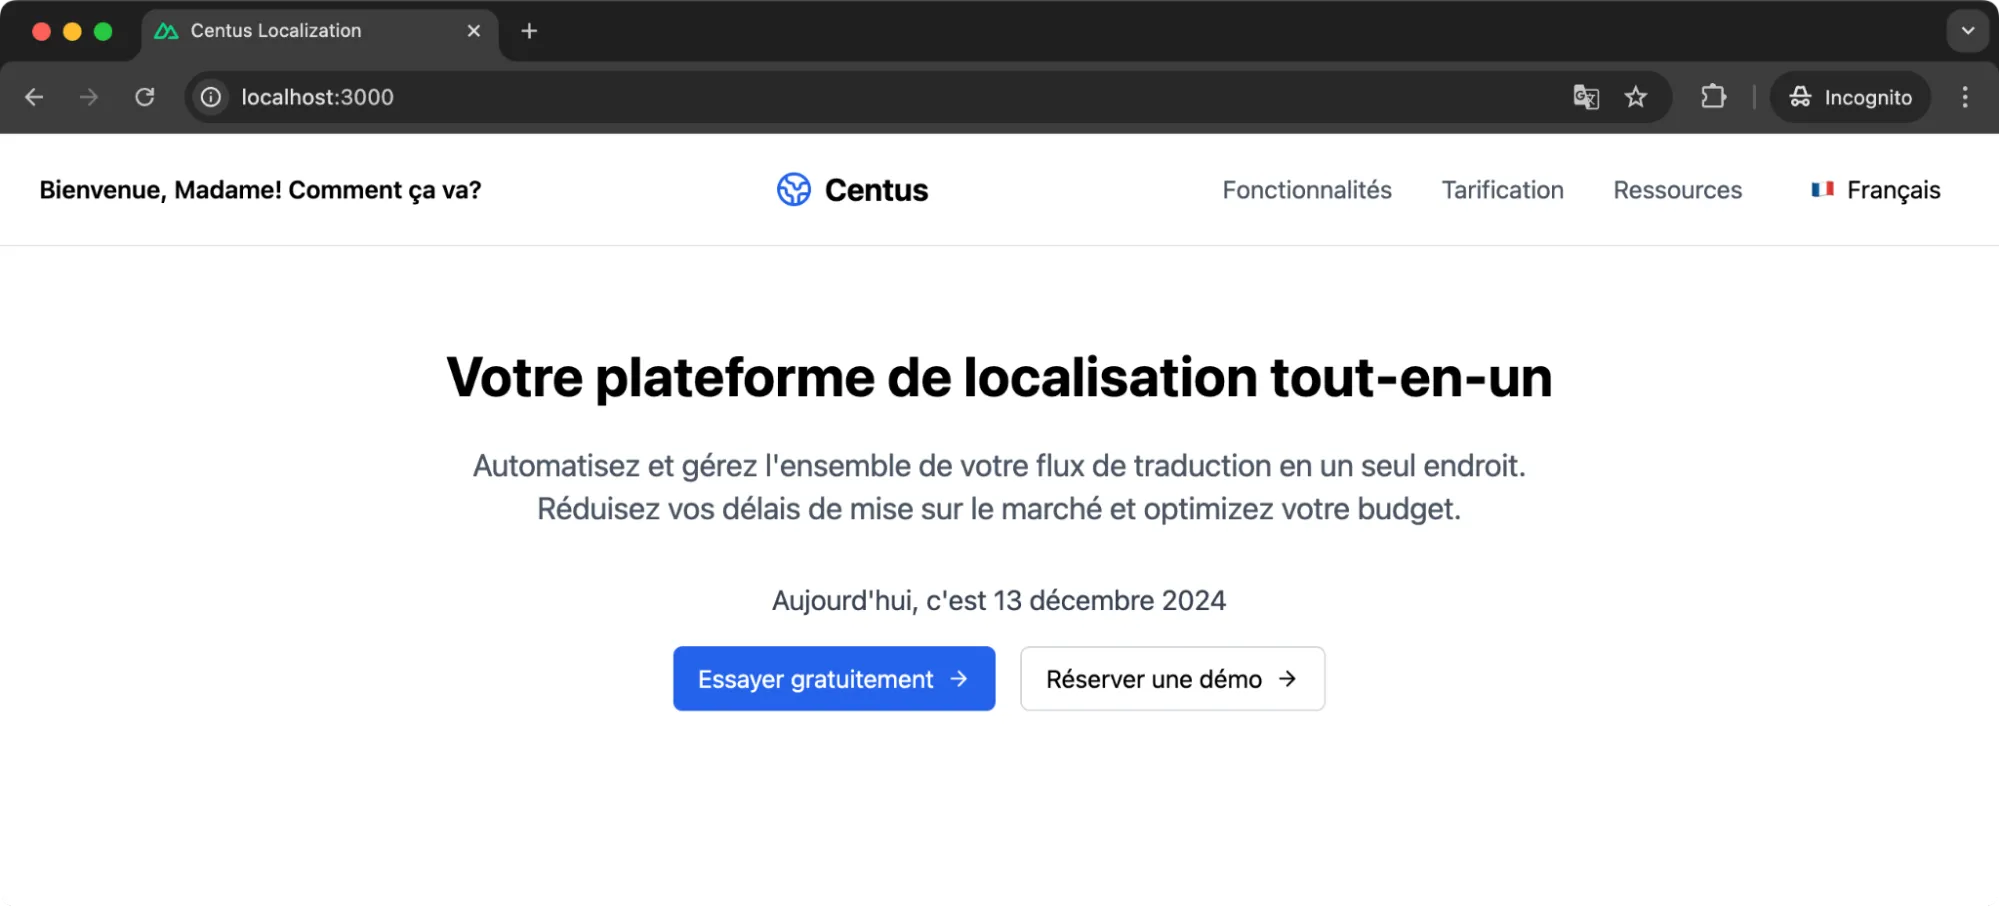
You’ll notice that the way the date is written, including the month names, automatically change based on the selected language.
Currency and number formatting
Similar to date and time formatting, numbers and currencies are formatted quite differently across the world. Some use commas to separate thousands, while some use commas to separate decimals.
Showing the same number can mean two separate things to different people. And I’d not want to create that confusion for the user.
We have an Intl.NumberFormat object that helps you with managing these different number formats in NuxtJS.
// en.ts
  currency: 'The price is {price}',
  number: 'The formatted number is {number}',

// fr.ts
  currency: 'Le prix est {price}',
  number: 'Le nombre formaté est {number}',

// es.ts
  currency: 'El precio es {price}',
  number: 'El número formateado es {number}',
In the utils directory, create a numberFormatter.ts now:
export function formatNumber(value: number, locale: string): string {
    return new Intl.NumberFormat(locale, {
      maximumFractionDigits: 2,
    }).format(value);
  }

  export function formatCurrency(value: number, locale: string, currency: string): string {
    return new Intl.NumberFormat(locale, {
      style: 'currency',
      currency,
    }).format(value);
  }
Now, let’s add the numberFormatter and other information required to format the numbers in our CentusLanding.vue file.
import { formatNumber, formatCurrency } from '@/utils/numberFormatter';
const { t, locale } = useI18n();
const formattedNumber = formatNumber(1234567.89, locale.value);
const formattedCurrency = formatCurrency(99.99, locale.value, 'USD'); // Change currency code as needed
And finally, add these paragraph blocks in any place on the HTML body.
<p class="text-lg text-gray-700 mb-4">
  {{ t('number', { number: formattedNumber }) }}
</p>

<p class="text-lg text-gray-700 mb-4">
  {{ t('currency', { price: formattedCurrency }) }}
</p>
Here’s how the numbers are formatted for English:

And then, this is what happens when the French locale is selected:
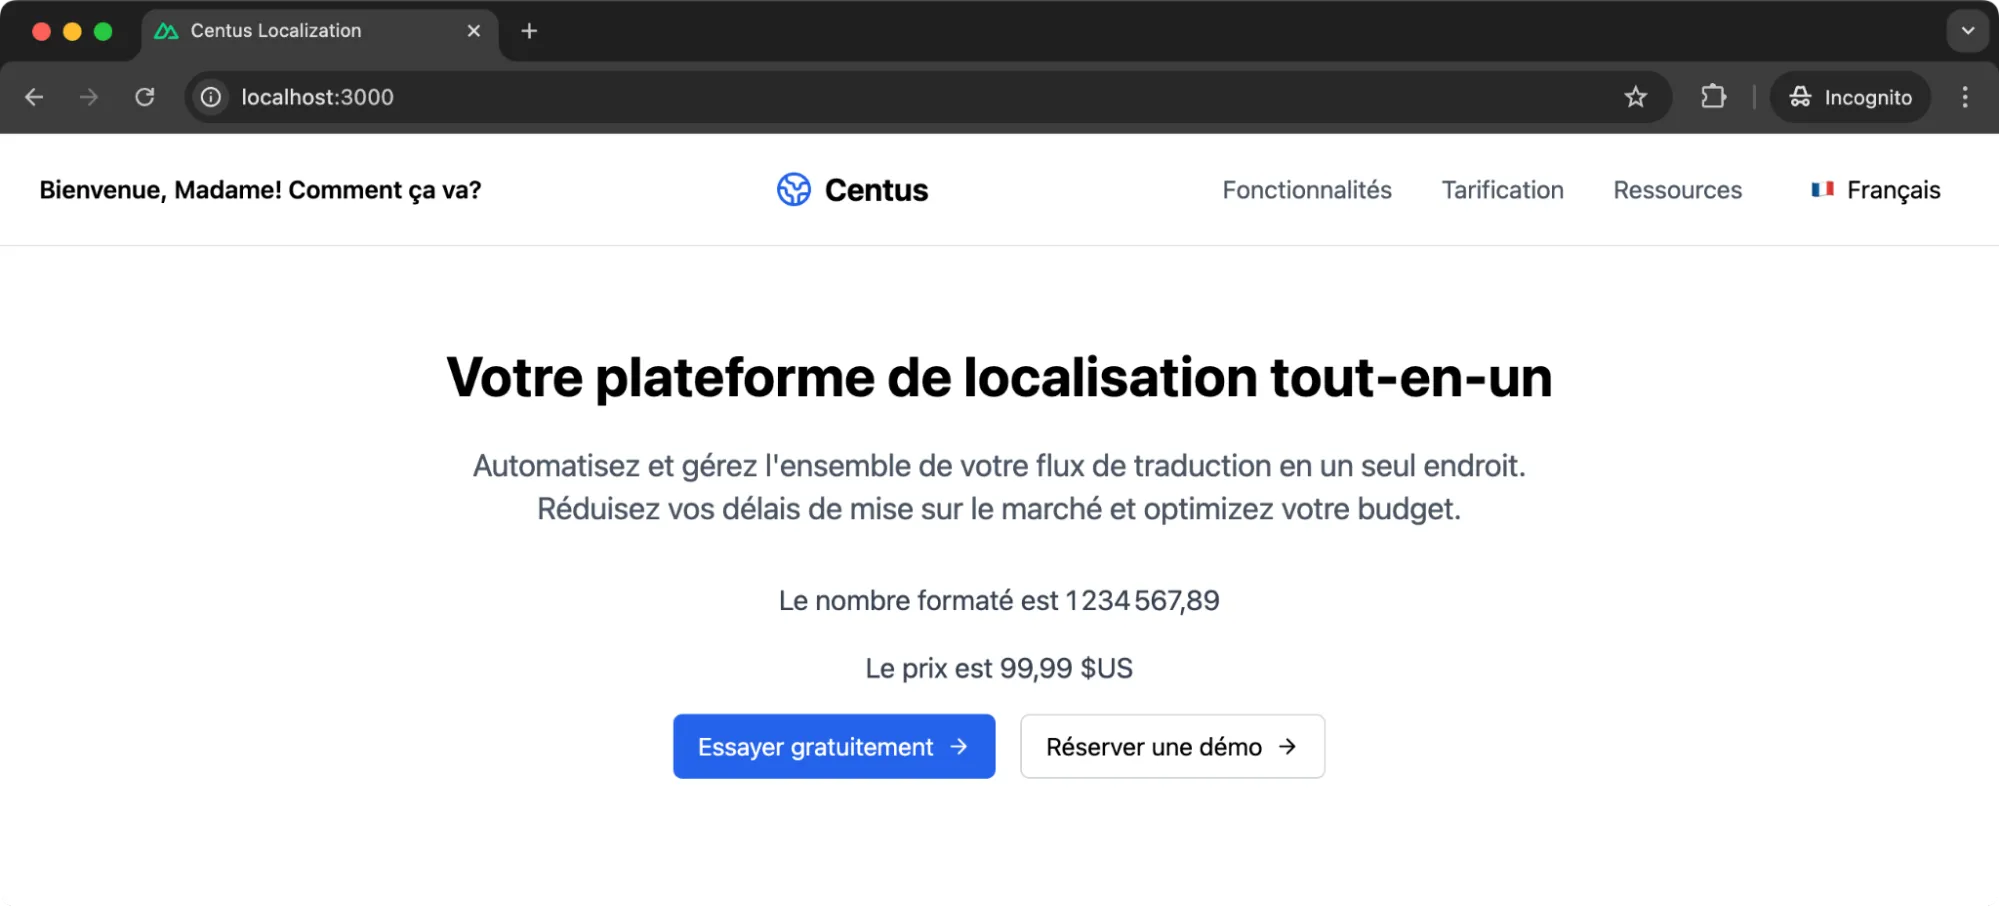
The Intl.NumberFormat and Intl.DateFormat objects have been saviors for anyone who manages localization. Without these, you’d have to manually set the number and date formats for each language which can be a mess to handle.
RTL (right-to-left) support
One of the biggest challenges I’ve faced while localizing NuxtJS apps is adding RTL (right-to-left) support.
You can’t just flip the text direction. The entire layout often needs to be mirrored.
And that can cause a lot of complications if you’re localizing an already established application.
Languages like Arabic and Hebrew require this, and if you’re serving users in these regions, then you need to have proper RTL support.
To handle this, the first step is to set the dir attribute dynamically based on the selected language. In NuxtJS, we can use Vue’s reactivity to achieve this seamlessly.
Start by updating the <html> tag in app.vue:
<script setup lang="ts">
import { useI18n } from 'vue-i18n';

const { locale } = useI18n();
</script>

<template>
  <html :dir="locale === 'ar' ? 'rtl' : 'ltr'" lang="locale">
    <NuxtPage />
  </html>
</template>
This ensures that when the Arabic locale is selected, the direction switches to rtl.
But we also need to adjust the CSS so the layout mirrors properly. For this, TailwindCSS makes it easy to add RTL support without bloating the CSS file.
I added this to the assets/styles/tailwind.css:
[dir='rtl'] {
  direction: rtl;
  text-align: right;
}

[dir='ltr'] {
  direction: ltr;
  text-align: left;
}
NOTE: Since I haven’t set up Arabic localization, I’m setting the app to flip to RTL when the French locale is selected.
You’ll notice how everything flips when you switch to Arabic.
Navigation, buttons, and text all align to the right.
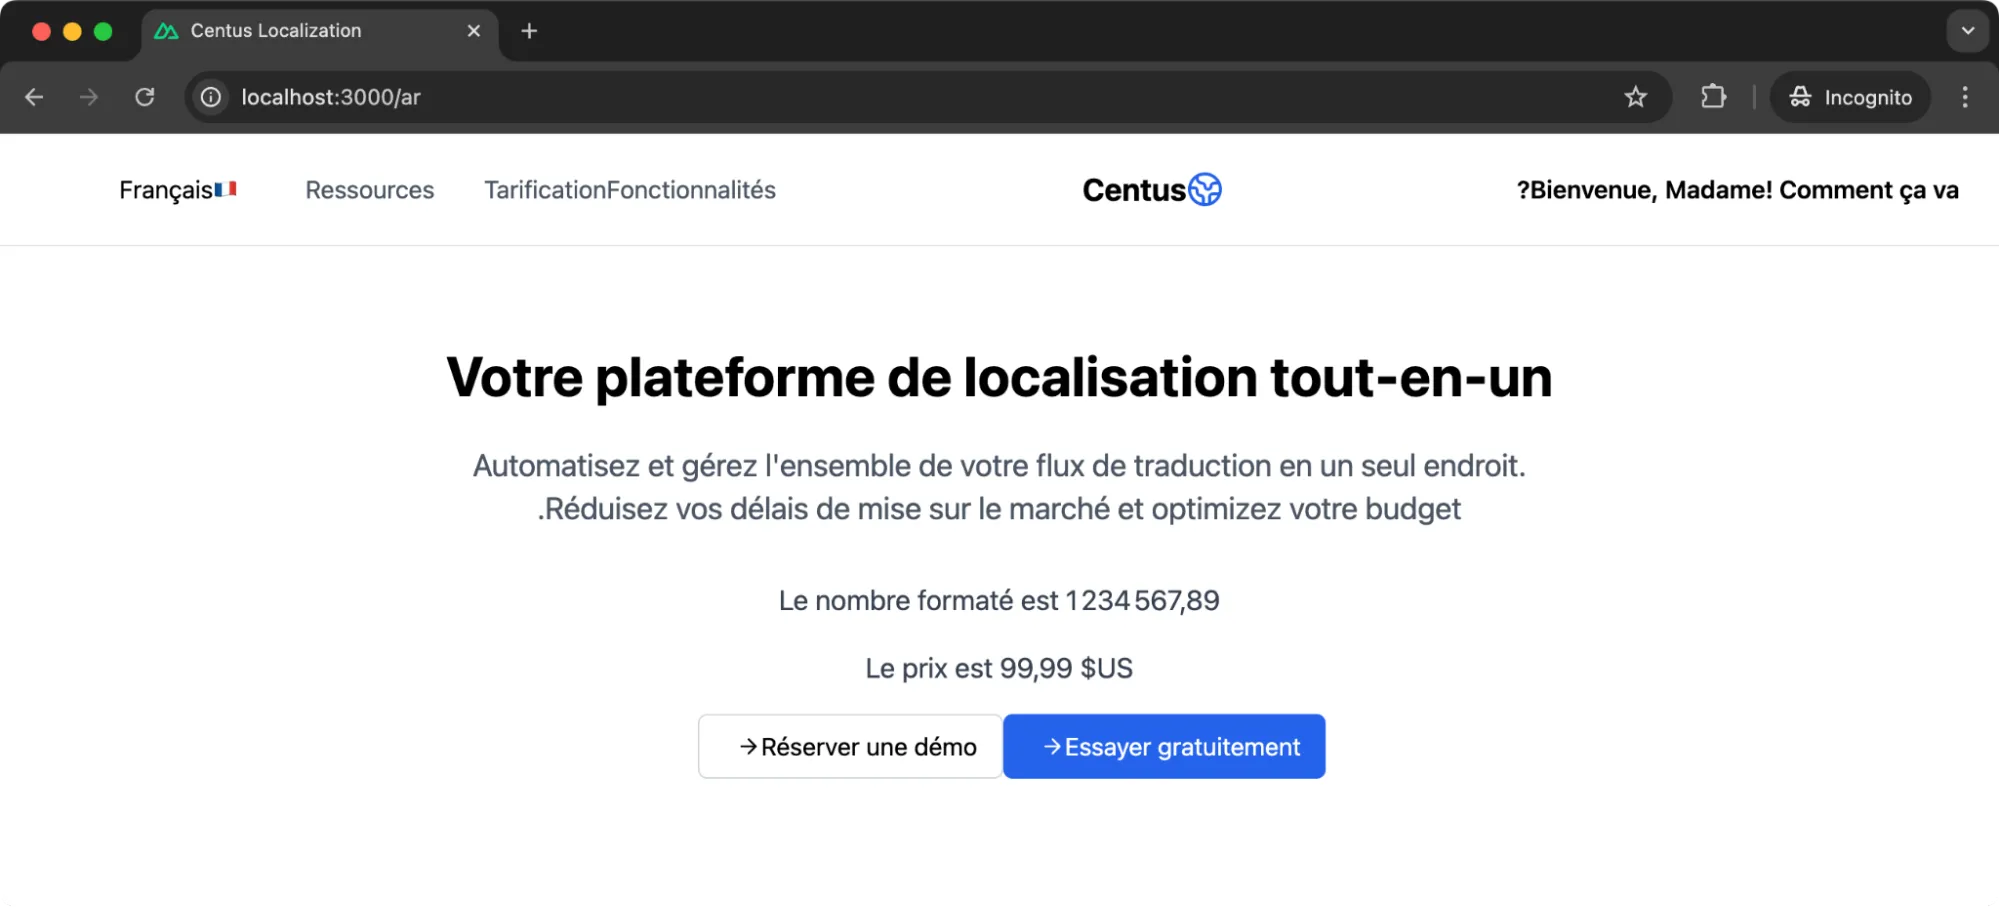
Now, keep in mind that some design elements, like padding and margin, might still feel off.
TailwindCSS’s ltr and rtl utilities help fine-tune these details.
For instance, I had to ensure that buttons and icons aligned correctly. Here's an example of a minor tweak I made:
<template>
  <div class="flex space-x-2 rtl:space-x-reverse">
    <button class="px-4 py-2">Save</button>
    <button class="px-4 py-2">Cancel</button>
  </div>
</template>
This small change (rtl:space-x-reverse) automatically mirrors the spacing when the direction changes. It’s a lifesaver for maintaining consistency across layouts.
Once you refresh the page and switch to Arabic (or French in this case), the layout should look natural for RTL users.
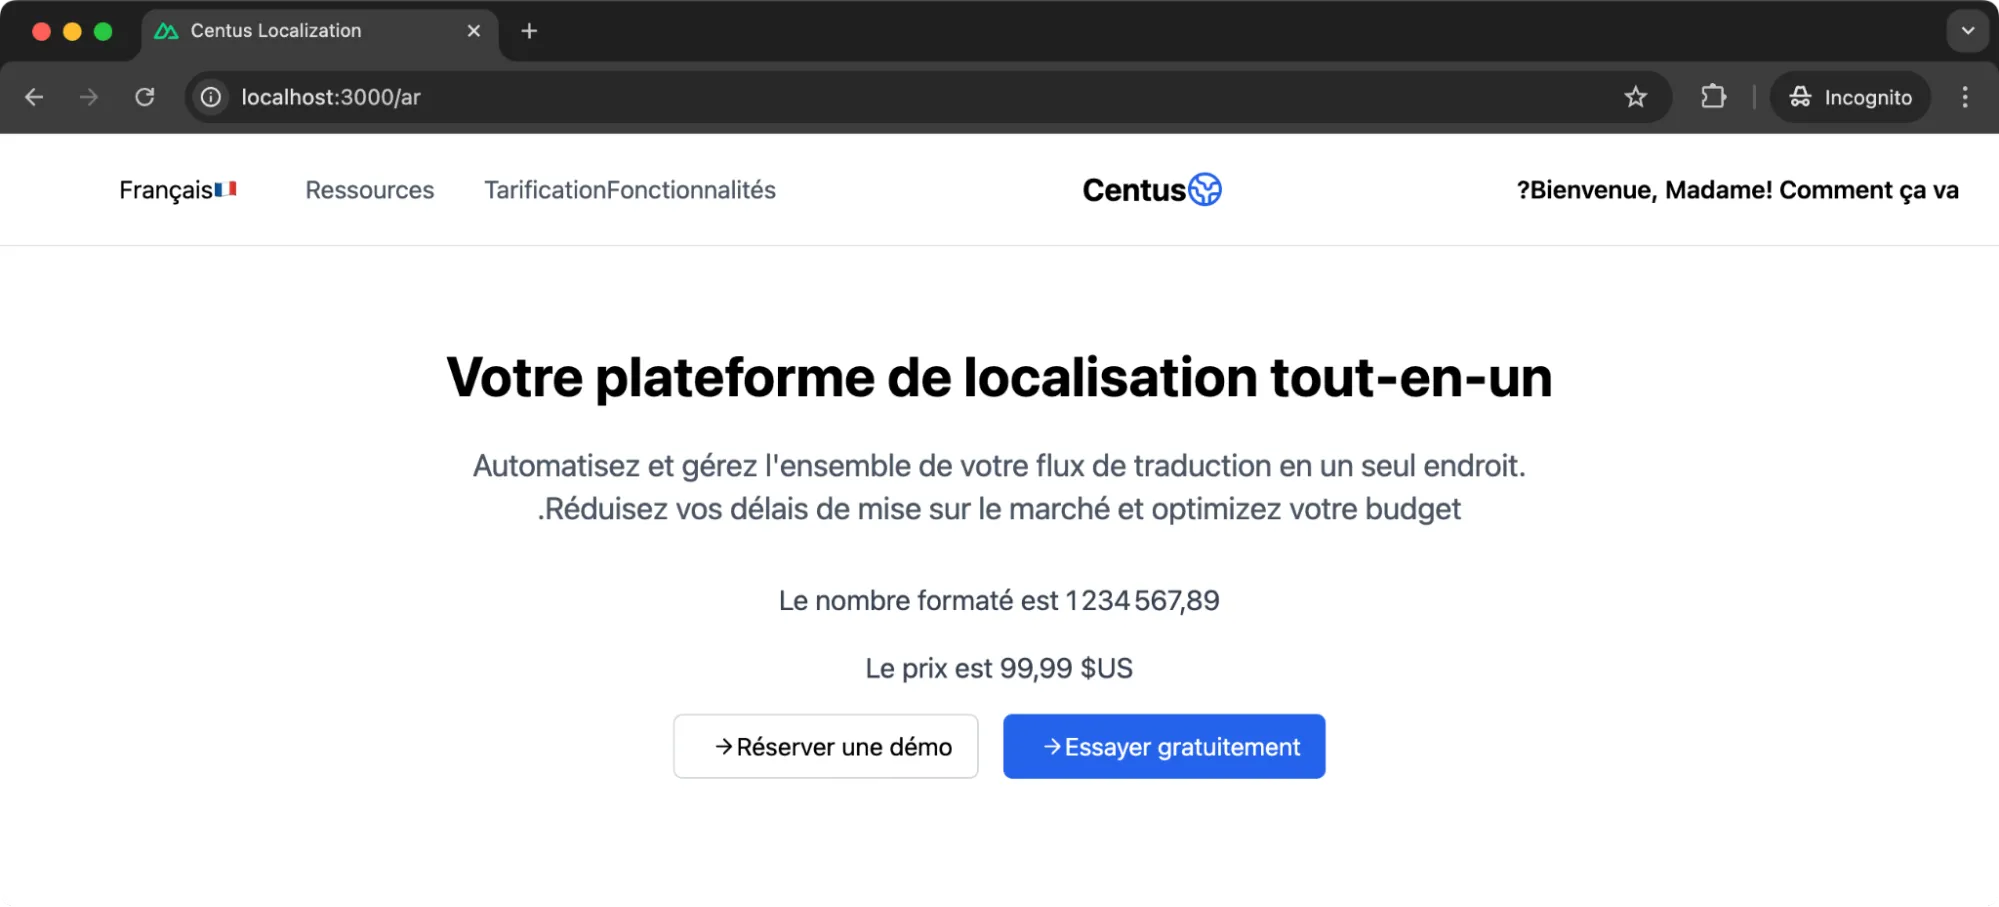
Notice how the buttons now have the space they didn’t before. If you’ve done it right, your NuxtJS app should feel like the design was specifically created for these languages.
Dynamic content localization
If you’re worried about performance, you need to understand dynamic content localization—it's a must for apps with a large number of translations or CMS-driven content.
You don’t want to load all translations upfront because it’s a waste of resources.
Instead, translations should load dynamically when the user switches languages or visits specific pages.
In NuxtJS, this is pretty straightforward with lazy-loading.
I updated the i18n configuration in nuxt.config.ts to fetch translations asynchronously as below:
export default defineNuxtConfig({
  i18n: {
    lazy: true,
    langDir: 'locales/', // Directory for translation files
    loadLocaleAsync: (locale) => import(`@/locales/${locale}.ts`), // Dynamic import
    detectBrowserLanguage: {
      useCookie: true,
      cookieKey: 'i18n_redirected',
      redirectOn: 'root',
    },
    locales: [
      { code: 'en', name: 'English', file: 'en.ts' },
      { code: 'fr', name: 'Français', file: 'fr.ts' },
      { code: 'es', name: 'Español', file: 'es.ts' },
      { code: 'ar', name: 'العربية', file: 'ar.ts' },
    ],
    defaultLocale: 'en',
  },
});
Notice the loadLocaleAsync function. It dynamically imports the translation file for the current locale. For example, if the user switches to French, only fr.ts gets loaded.
This keeps the app lightweight and fast, especially for users on slow networks.
To test this, I added a few logs to check when a file is being loaded. Switching between languages now results in a network request only for the required file.
And what if the user switches back to a previously used language? That’s where cookies come in.
The detectBrowserLanguage configuration ensures the app remembers the user’s preference and doesn’t reload the file unnecessarily.
Wrapping up
After implementing internationalization in React, Svelte, JavaScript, and Django, I can tell you one thing with absolute certainty: the difference between a good multilingual app and a great one lies in those nuances we've covered.
While tools and frameworks make i18n possible, it's our attention to user experience and nuance that makes it exceptional.
Speaking of exceptional multilingual experiences, I'd be remiss not to mention that Centus makes localization exceptionally easy. You don’t have to wonder who’s working on what translation file or if one of your translation specialists might accidentally delete something.
With Centus, you can simplify your NuxtJS localization and internationalization workflows with ease. Centus offers:
-
Translation memory and terminology management
-
Integration with machine translation
-
Centralized localization workflows
-
Streamlined collaboration
-
And so much more!
If you're looking to scale your application globally without the implementation headaches, sign up for Centus. Your developers and translators will thank you, and your users will too!
Get the week's best content!
By subscribing, you are agreeing to have your personal information managed in accordance with the terms of Centus Privacy Policy ->
Keep learning
19 min. read
NextJS Internationalization: A Complete Walkthrough
22 min. read
Spring Boot i18n and Localization Guide
30 min. read
Your Complete Guide to Django i18n
19 min. read
NodeJS Internationalization (i18n) and Localization
21 min. read
Nuxt i18n and Localization: Make Your App Multilingual
18 min. read