Here’s my Spanish friend’s take on my new app:
“It looks great, but I don’t fully understand it!”
Since English is her second language, that made sense. But that’s when it hit me—I had built the app only for English speakers. So, I jumped into figuring out how to localize my React app.
If you’re reading this, chances are you’ve had a similar situation. Maybe you’re just starting out with React Native and want to build a strong foundation before diving into mobile development, or maybe you're looking for a way to make your localization journey much smoother.
Either way, you’re in the right place. I’ll walk you through everything I learned about localizing React Native apps, from the basics to some advanced techniques, and more. Let’s jump right in.
Why localization matters
Only about 18% of the world, or 1.4 billion people, speak English. That may seem like a big number, but most of these 1.4 billion people are never going to use the app. And we’re still leaving out 82% of the world.

So, if you’re planning on reaching wider audiences, localization cannot be an afterthought. It has to be baked into the app from the beginning.
Localization is more than translating your app’s text (though that’s a big part of it). It’s about making your app feel native to users around the world. This means adapting to different languages, yes, but also to different cultural norms, date formats, number systems, and even reading directions.
And there are a lot of benefits to localizing. Here’s why you should consider localizing your apps:
- Increased downloads: More people will download your app if it's available in their local language in the app store.
- Better user retention: People are more likely to keep using an app that is easy to understand and feels like a familiar friend.
- Higher ratings and reviews: Apps that speak and understand the users' language and society tend to get higher scores and reviews.
- Competitive advantage: There is less competition in many non-English-speaking regions and you can stand out by localizing your content.
- Compliance with local regulations: In some countries, digital goods must be offered in the local language.
Now, I understand what you are thinking. "This must take a lot of work." And you are right. Localization requires continuous work.
But with the correct tools and mindset, it's not as difficult as it appears. And the payoff? It may be massive.
What localization options can you use for React Native apps
Before jumping into the code, let's understand two key terms:
- Internationalization (i18n) involves designing your app to support various languages and dialects. This means separating translatable content and preparing the app for bidirectional text.
- Localization (l10n) takes the i18n process further by creating versions of your project for different regions. It involves translating content and adapting it to local customs and preferences.
You have a few solid options to choose from when it comes to React Native localization as well as internationalization. Let's take a quick look at some popular choices:
- React’s Native localization features: React offers some basic localization features that you can benefit from. While it has its limitations in terms of handling advanced localization, it’s great for small projects—which in this case, we’re creating.
- react-native-localize: This is a lightweight, core module that gives you access to the device's locale information. It's great for finding out what language and area the user prefers, but it doesn't make the changes for you.
- i18next with react-i18next: It’s simple and comprehensive enough for both small and large localization projects. It also includes pluralization, formatting, and interpolation within the module.
- react-intl: While not a comprehensive localization library, react-intl helps you with date and number formatting and can be quite useful when combined with other comprehensive localization and internationalization libraries.
- Translation management platform: If you have a large, complex app with many pages and many translators working on it, using just the React libraries will be cumbersome and unorganized. You need a platform to help you organize translations, collaborate across teams working on the translations, and also track progress.
Getting started with React Native localization
Let's get down to business. I’ll be using the React native localization features offered by React. But please feel free to use i18n or any other library you prefer.
Step 1: Set up your React Native project
First things first, let's create a new React Native project:
npx @react-native-community/cli init CentusReactLocalizationDemo
cd CentusReactLocalizationDemo
Now, let’s set up our localization structure. I like to create a localization folder in my project root to keep everything organized.
mkdir localization
mkdir localization/translations
You should now have a folder structure that looks like this.
CentusReactLocalizationDemo/
├── android/
├── ios/
├── localization/
│   ├── translations/
├── App.tsx
└── package.json
Step 2: Create translation files
Let’s create those translation files. In the same translations folder, add en.json and es.json files as shown below.
CentusReactLocalizationDemo/
├── android/
├── ios/
├── localization/
│   ├── translations/
│   │   ├── en.json
│   │   └── es.json
│   └── index.js
├── App.tsx
└── package.json
Next, add your translation strings to both files.
// localization/translations/en.json
{
	"welcome": "Welcome",
	"description": "This is a localized app"
}

// localization/translations/es.json
{
	"welcome": "Bienvenido",
	"description": "Esta es una aplicación localizada"
}
Step 3: Building Our Localization Engine
Create the index.js file and add the following code:
import { Platform, NativeModules } from 'react-native';

// Import translations
import en from './translations/en.json';
import es from './translations/es.json';

const translations = { en, es };

export const getDeviceLanguage = () => {
  let locale;

  if (Platform.OS === 'ios') {
    locale = NativeModules.SettingsManager.settings.AppleLocale ||
             NativeModules.SettingsManager.settings.AppleLanguages[0];
  } else {
    locale = NativeModules.I18nManager.localeIdentifier;
  }

  return locale.split('_')[0];
};

let currentLanguage = getDeviceLanguage();

export const t = (key) => {
  return translations[currentLanguage]?.[key] ||
         translations.en[key] ||
         key;
};

export const changeLanguage = (language) => {
  if (translations[language]) {
    currentLanguage = language;
  }
};
This is the file that handles fetching the locale set on the user’s device and changes the language accordingly for the app.
Step 4: Creating Our First App Screen
Great! Now we have our basic setup. But we still don’t have a front-end. So let’s build that out. Here’s a simple code snippet you can add to the App.tsx
import React from 'react';
import { View, Text, Button } from 'react-native';
import { t, changeLanguage } from './localization';

function App(): React.JSX.Element {
  return (
    <View style={{ padding: 20 }}>
      <Text>{t('welcome')}</Text>
      <Text>{t('description')}</Text>
    </View>
  );
}

export default App;
Now, when you run your app, you should see the text in either English or Spanish, depending on your device settings.
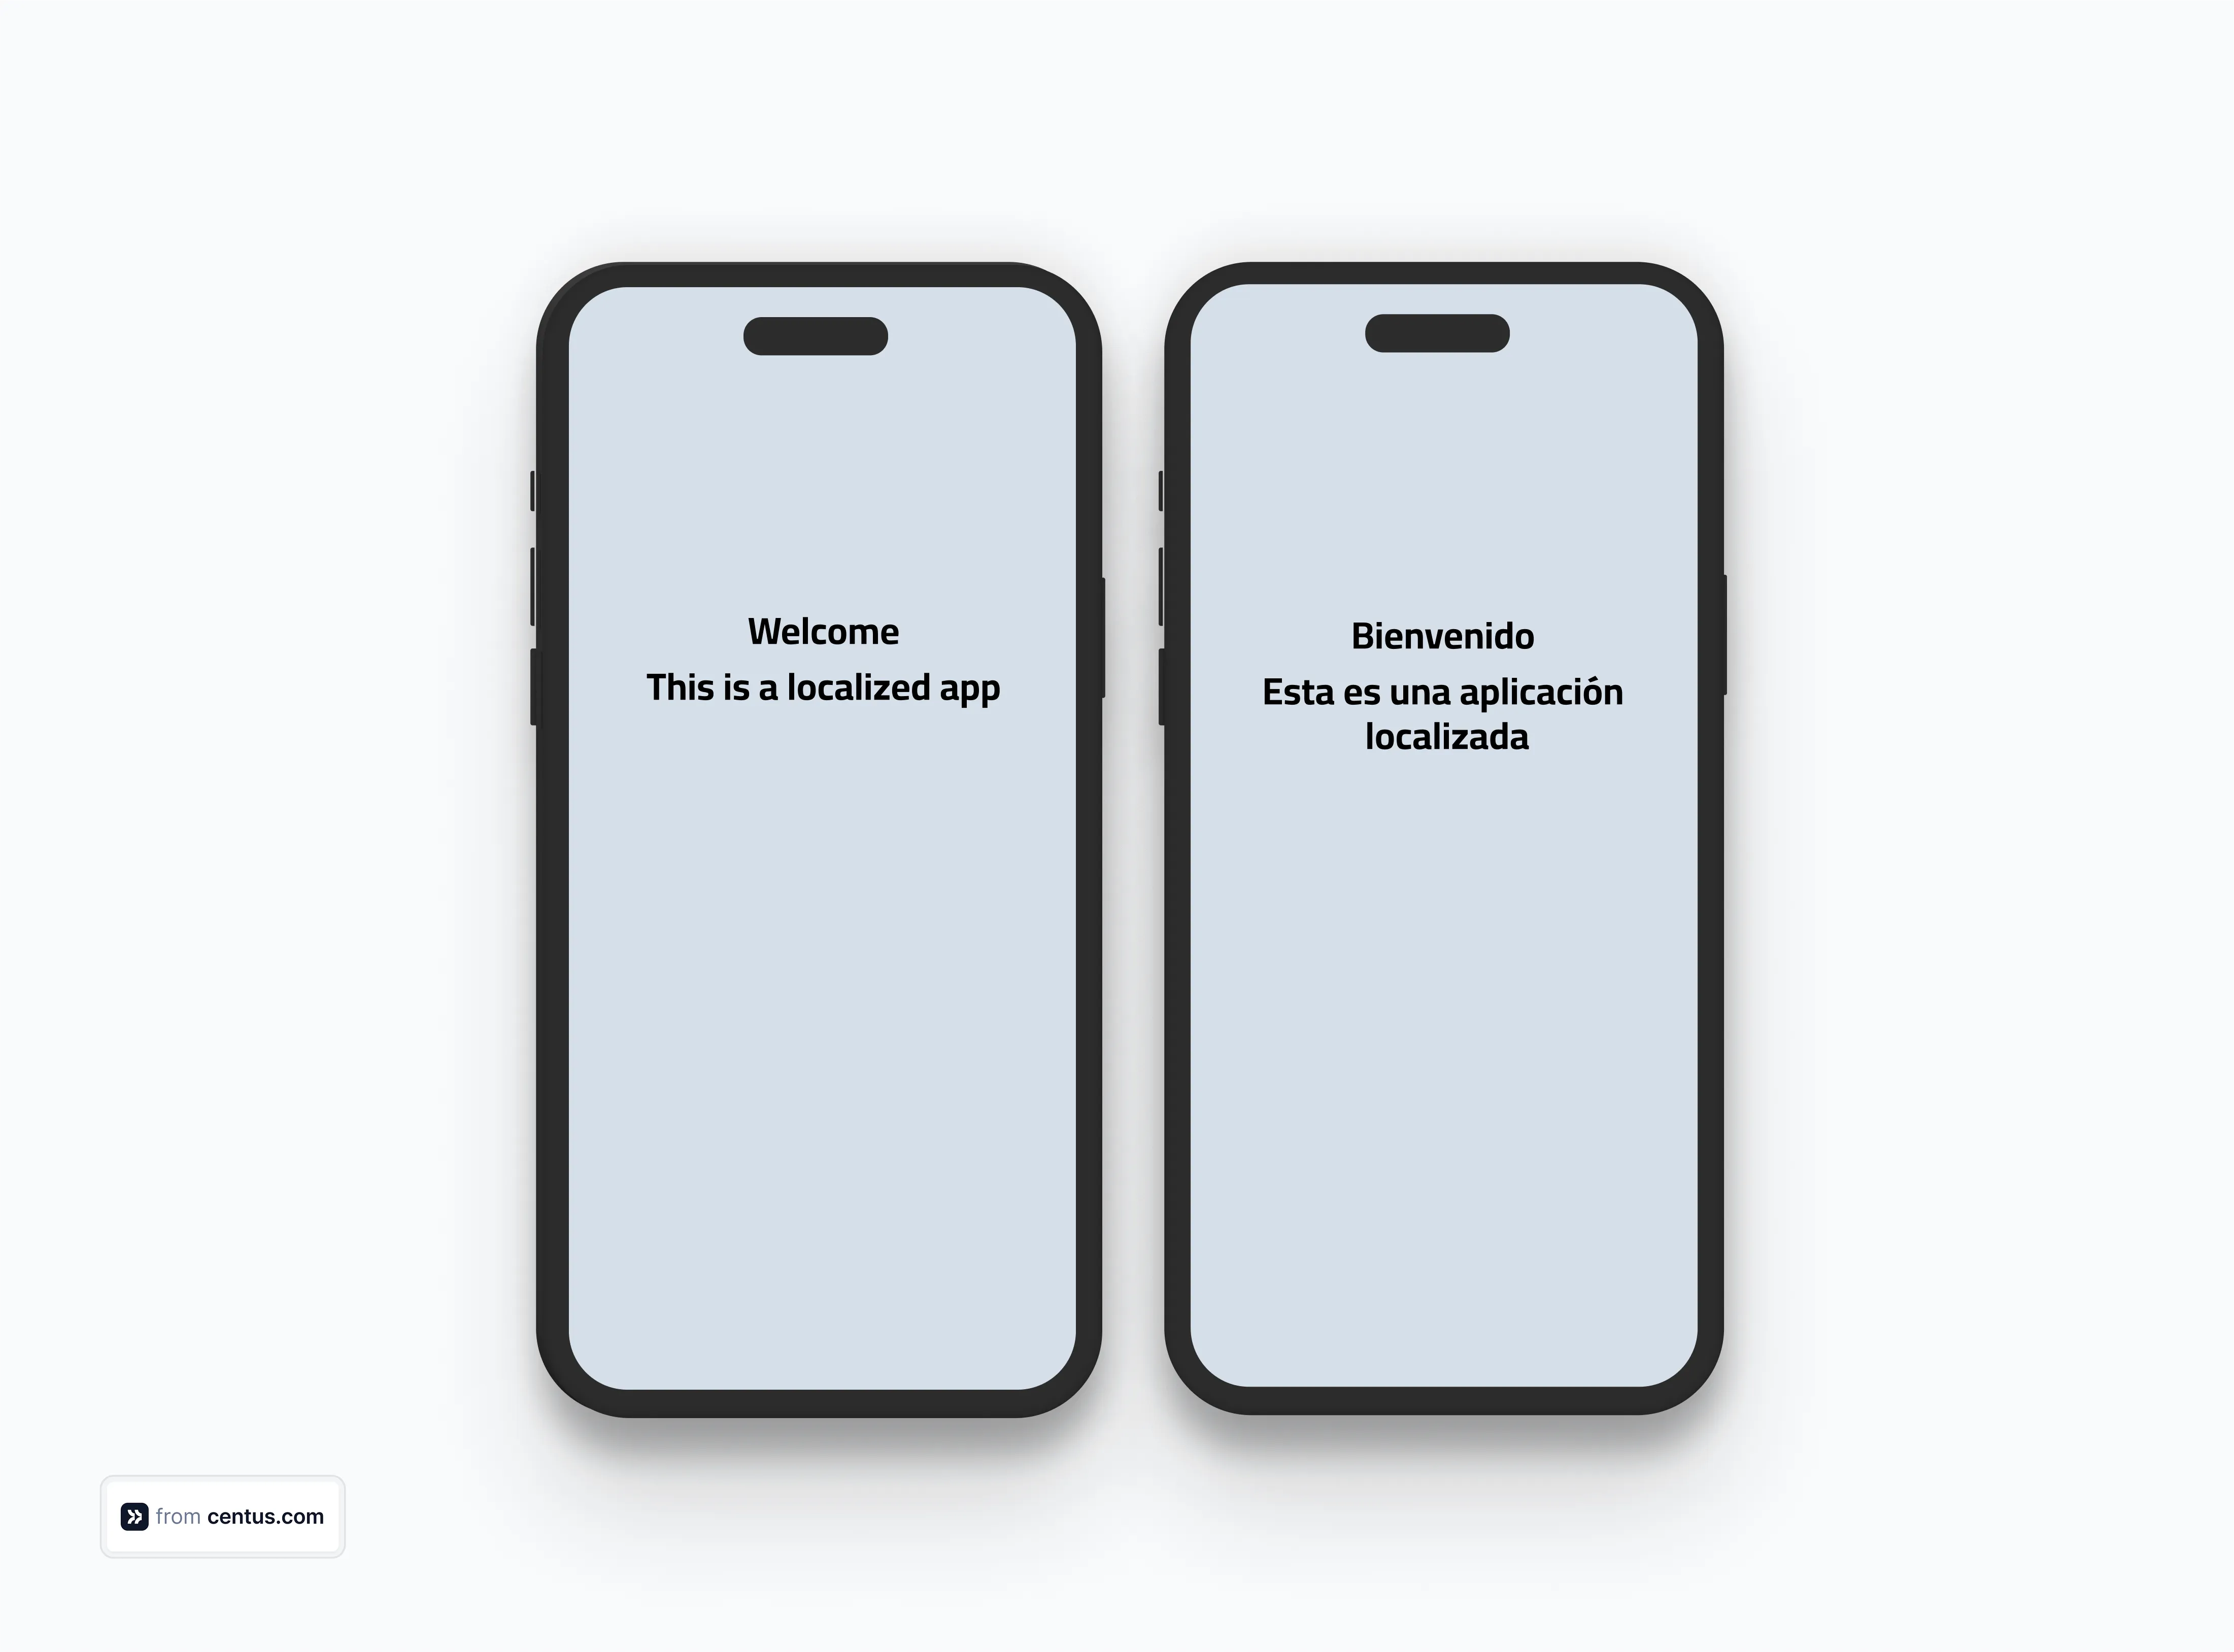
But this setup works great for simple apps. What if you’re working on something more complex? That’s where things can get a bit tricky.
Advanced localization with React Native
Now that we've got the basics down, let's dive into some advanced techniques that'll help you go beyond just text translation.
Handling plurals
Remember learning about singular and plural in school? Well, it seems easy for our brains, but when coding, you actually have to let React know what plural to use for every word.
Let me give you an example here.
// localization/translations/en.json
{
  "welcome": "Welcome",
  "description": "This is a localized app",
  "items_one": "{{count}} item in cart",
  "items_other": "{{count}} items in cart"
}

// localization/translations/es.json
{
  "welcome": "Bienvenido",
  "description": "Esta es una aplicación localizada",
  "items_one": "{{count}} artículo en carrito",
  "items_other": "{{count}} artículos en carrito"
}
Add the following at the end of your index.js
export const tPlural = (key, count) => {
  const pluralKey = `${key}_${count === 1 ? 'one' : 'other'}`;
  return t(pluralKey, { count });
};
This code helps you handle displaying plurals based on the count. You can use the above translation in your components like I’ve done below:
<Text>{tPlural('items', itemCount)}</Text>

<View style={{ flexDirection: 'row', marginTop: 10 }}>

<Button
    title="-"
    onPress={() => setItemCount(Math.max(0, itemCount - 1))}
/>
<View style={{ width: 20 }} />
<Button
    title="+"
    onPress={() => setItemCount(itemCount + 1)}
/>
</View>
You can run the app as an Android or iOS app and see two buttons a plus and minus added to the page along with the item count text. As you increase or decrease the count, you can see the text change.
Context-based translations
Sometimes, a word might have different translations depending on the context. You can easily handle this with the underscore naming convention.
// localization/translations/en.json
{

  "open": "Open",
  "open_status": "Currently Open",
  "open_action": "Open File"
}

// localization/translations/es.json
{

  "open": "Abrir",
  "open_status": "Abierto",
  "open_action": "Abrir Archivo"
}
Add the following function at the end of the index.js to handle these context-based translations:
export const tContext = (key, context) => {
    const contextKey = context ? `${key}_${context}` : key;
    return t(contextKey);
  };
In App.tsx, add these lines to see the context in action:
<Text>{tContext('open')}</Text>
<Text>{tContext('open', 'status')}</Text>
<Text>{tContext('open', 'action')}</Text>
This way, you can have different translations for the same word based on context.
Formatting dates and numbers
As I mentioned before, localization is more than just text translation.
Different countries have different numbers and date formats. For instance, the US uses MM/DD/YYYY for dates, the UK uses DD/MM/YYYY, and the European documents use YYYY-MM-DD.
Imagine if you showed the same date, 01/03/2024, to a person from the US and the UK.
The person from the US will interpret it as January 3, 2024, while the person from the UK will think it’s March 1, 2024.
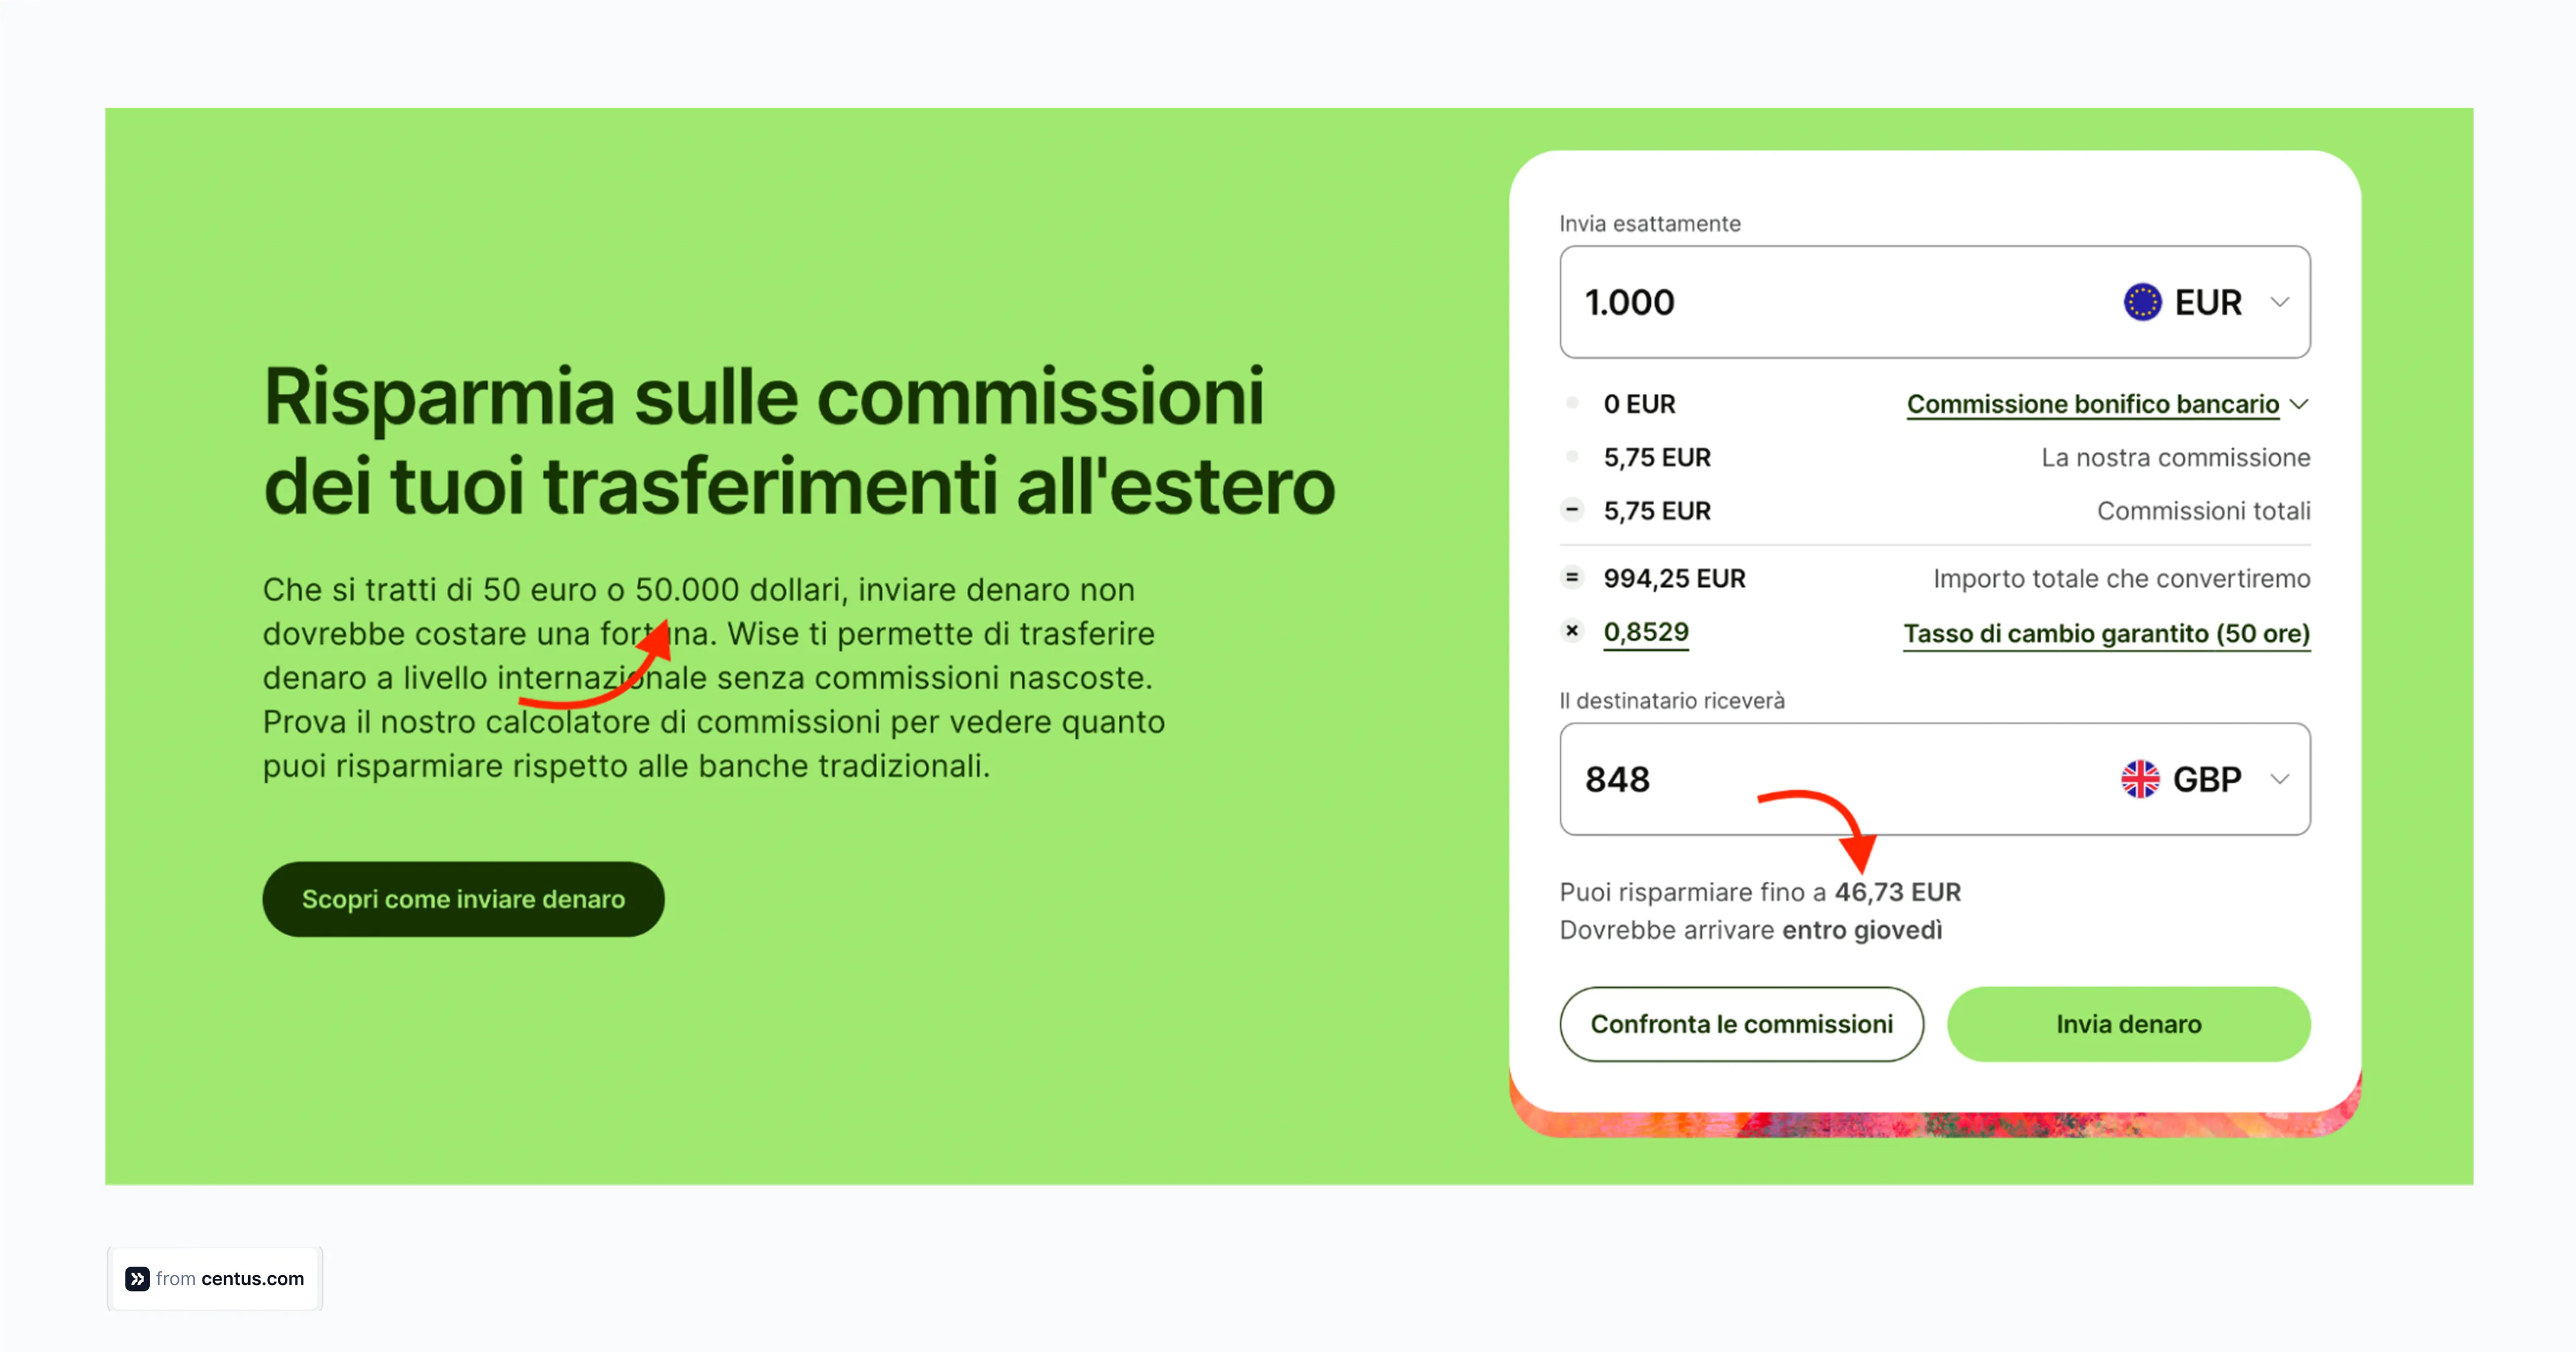
Similarly, some countries, like Italy, use a comma for decimal separators and a period for number formatting. For instance, the number fifty thousand is written as 50.000 in Italian. To the English eye, this may seem like 50 followed by 3 decimal places and not 50,000.
49 dollars and 99 cents will be written as $49,99 when using Italian instead of $49.99 that the English world is used to seeing.
There are many more nuances that become difficult to manage, especially as our apps begin to grow. Luckily, the Intl dateformat and timeformat packages automatically apply them to our app text.
To display some date and time text on the page, let’s add some keys to the en.json file. You can create the same additional keys in the es.json file:
// localization/translations/en.json
{
 // ... previous translations ...
  "current_balance": "Balance: {{amount}}",
  "last_login": "Last login: {{date}}"
}
You’ll notice that I’m not adding the exact formats to display here. Next, we need to add the following function to the index.js
// localization/index.js
// ... existing code ...

export const formatDate = (date) => {
  return new Intl.DateTimeFormat(currentLanguage, {
    year: 'numeric',
    month: 'long',
    day: 'numeric'
  }).format(date);
};

export const formatNumber = (number) => {
  return new Intl.NumberFormat(currentLanguage, {
    style: 'decimal',
    minimumFractionDigits: 2,
    maximumFractionDigits: 2
  }).format(number);
};

export const formatCurrency = (amount) => {
  return new Intl.NumberFormat(currentLanguage, {
    style: 'currency',
    currency: currentLanguage === 'en' ? 'USD' : 'EUR'
  }).format(amount);
};
I’ve created a simplistic example of how we can format numbers and dates here.
import React, { useState } from 'react';
import { View, Text, Button } from 'react-native';
import { t, tPlural, formatDate, formatNumber, formatCurrency, changeLanguage } from './localization';

function App(): React.JSX.Element {
  const [itemCount, setItemCount] = useState(0);
  const now = new Date();
  const balance = 1234.56;

  return (
    <View style={{ padding: 20 }}>
      <Text>{t('welcome')}</Text>
      <Text>{t('description')}</Text>

      {/* See how dates adjust to local formats */}
      <Text>Today: {formatDate(now)}</Text>

      {/* Watch numbers transform between regions */}
      <Text>Amount: {formatNumber(balance)}</Text>
      <Text>Balance: {formatCurrency(balance)}</Text>

      <Text>{tPlural('items', itemCount)}</Text>

      <View style={{ flexDirection: 'row', marginTop: 10 }}>
        <Button
          title="-"
          onPress={() => setItemCount(Math.max(0, itemCount - 1))}
        />
        <View style={{ width: 20 }} />
        <Button
          title="+"
          onPress={() => setItemCount(itemCount + 1)}
        />
      </View>
    </View>
  );
}

export default App;
Note these two lines:
<Text>Amount: {formatNumber(balance)}</Text>
<Text>Balance: {formatCurrency(balance)}</Text>
These use the Intl methods to automatically internationalize the specific date and number strings based on the locale being used in the app.
Handling right-to-left (RTL) languages
A few languages, like Persian, Hebrew, and Arabic, are written from the right to the left. If you want to support these languages, you want to ensure that your UI supports this writing direction.
For instance, here’s a page that uses the same left-to-right text alignment for RTL languages.

This may “look” normal to us, but it can be quite a disaster for the user to read and understand.
Let’s fix this with a few modifications to our code. In the imports, I’m importing the I18nManager from the react-native package. This helps us set the language direction easily.
// localization/index.js
import { Platform, NativeModules, I18nManager } from 'react-native';

// ... previous imports and translations ...

export const isRTL = () => {
  const rtlLanguages = ['ar', 'he', 'fa'];
  return rtlLanguages.includes(currentLanguage);
};

// Enhance our changeLanguage function
export const changeLanguage = (language) => {
  if (translations[language]) {
    currentLanguage = language;
    const shouldBeRTL = isRTL();

    // Only force RTL change if needed
    if (I18nManager.isRTL !== shouldBeRTL) {
      I18nManager.allowRTL(shouldBeRTL);
      I18nManager.forceRTL(shouldBeRTL);
    }
  }
};
Now, let’s update the App.tsx file with the following code:
import React, { useState } from 'react';
import { View, Text, Button, I18nManager } from 'react-native';
import { t, tPlural, formatDate, formatNumber, formatCurrency, changeLanguage, isRTL } from './localization';

function App(): React.JSX.Element {
  const [itemCount, setItemCount] = useState(0);
  const now = new Date();
  const balance = 1234.56;

  // Create RTL-aware styles
  const containerStyle = {
    padding: 20,
    alignItems: isRTL() ? 'flex-end' : 'flex-start'
  };

  const rowStyle = {
    flexDirection: isRTL() ? 'row-reverse' : 'row',
    alignItems: 'center',
    marginTop: 10
  };

  return (
    <View style={containerStyle}>
      <Text>{t('welcome')}</Text>
      <Text>{t('description')}</Text>

      <Text>Today: {formatDate(now)}</Text>
      <Text>Amount: {formatNumber(balance)}</Text>
      <Text>Balance: {formatCurrency(balance)}</Text>

      <Text>{tPlural('items', itemCount)}</Text>

      <View style={rowStyle}>
        <Button
          title="-"
          onPress={() => setItemCount(Math.max(0, itemCount - 1))}
        />
        <View style={{ width: 20 }} />
        <Button
          title="+"
          onPress={() => setItemCount(itemCount + 1)}
        />
      </View>

      <View style={{ marginTop: 20 }}>
        <Button
          title="Switch to Arabic"
          onPress={() => changeLanguage('ar')}
        />
        <View style={{ height: 10 }} />
        <Button
          title="Switch to English"
          onPress={() => changeLanguage('en')}
        />
      </View>
    </View>
  );
}

export default App;
Of course, to make use of our RTL set, we need to have a right-to-left language. Let’s add Arabic:
// localization/translations/ar.json
{
  "welcome": "مرحباً",
  "description": "هذا تطبيق متعدد اللغات",
  "items_one": "{{count}} عنصر في السلة",
  "items_other": "{{count}} عناصر في السلة"
}
And then, update our index.js to import this language file:
// localization/index.js
import ar from './translations/ar.json';

const translations = { en, es, ar };
Always remember to test your app with actual RTL language users. Their insights can help catch subtle layout issues that aren’t obvious to our LTR-trained eyes.
Some general RTL tips:
- If you don't want to use flexbox, you can use text-align: start too.
- When working with RTL layouts, always use start/end instead of left/right in your styles. For example:
// Don't do this
const styles = {
  paddingLeft: 10,
  marginRight: 20
};

// Do this instead
const styles = {
  paddingStart: 10,
  marginEnd: 20
};
Dynamically changing locale based on user selection
Sometimes locale detection can be wrong. Or maybe a person is in a different country where they don’t understand the language. At such times, you want to give them the option to change the language.
You’ll see most websites have a language switcher somewhere on the page. For instance, here’s Wise with their language switching dropdown.
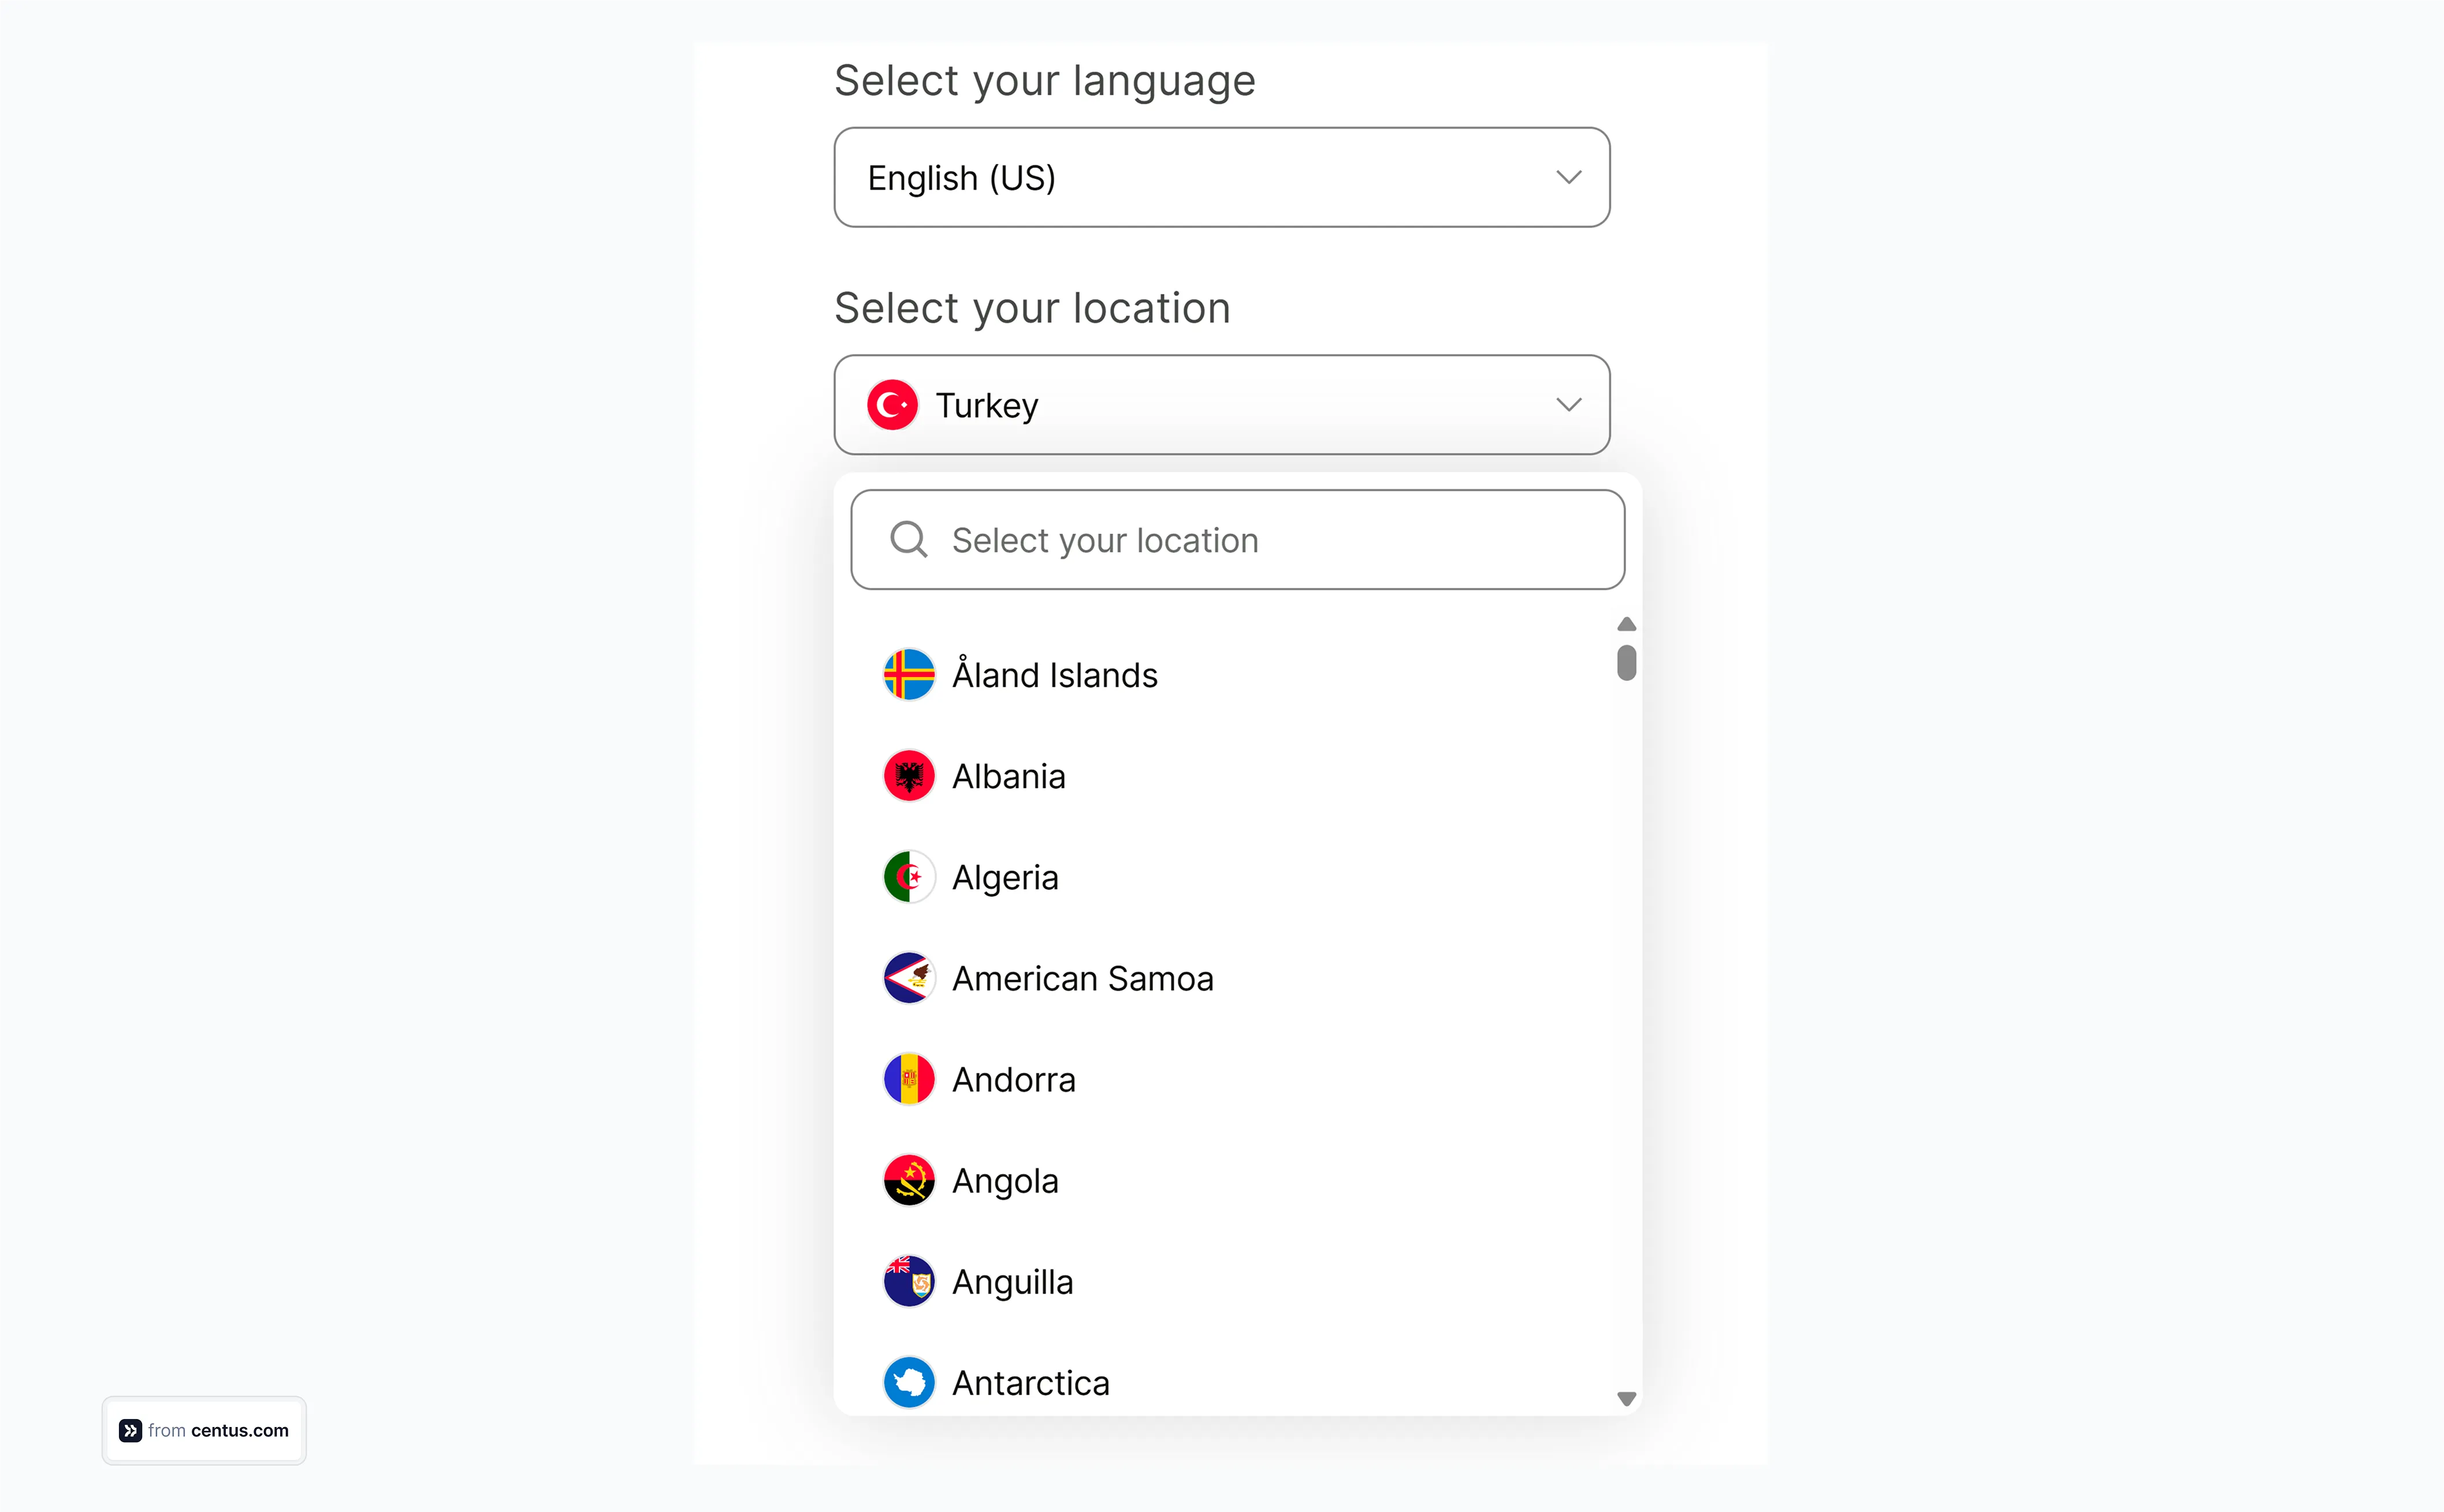
You can add a similar language switcher to your app pages, letting users switch between locales while the app automatically pulls the required language files.
Here’s a very simple example of how I’ve implemented a language switcher. You can use the same code for your app too. First, update the localization/index.js file to handle dynamic language switching by adding the following methods:
// localization/index.js
import { Platform, NativeModules } from 'react-native';
import EventEmitter from 'react-native/Libraries/vendor/emitter/EventEmitter';

// ... previous imports and code ...

const localizationEmitter = new EventEmitter();

export const changeLanguage = (language) => {
  if (translations[language]) {
    currentLanguage = language;
    localizationEmitter.emit('languageChanged', language);
  }
};

export const onLanguageChange = (callback) => {
  localizationEmitter.addListener('languageChanged', callback);
  return () => localizationEmitter.removeListener('languageChanged', callback);
};
We need to also show the language switching buttons on the front-end of the app by adding the code to our App.tsx file as below.
// App.tsx
import React, { useState, useEffect } from 'react';
import { View, Text, Button } from 'react-native';
import { t, changeLanguage, onLanguageChange } from './localization';

function App(): React.JSX.Element {
  const [currentLang, setCurrentLang] = useState('en');

  useEffect(() => {
    // Listen for language changes
    const unsubscribe = onLanguageChange((newLang) => {
      setCurrentLang(newLang);
    });

    return () => unsubscribe();
  }, []);

  return (
    <View style={{ padding: 20 }}>
      <Text>{t('welcome')}</Text>
      <Text>{t('description')}</Text>

      <View style={{ marginTop: 20 }}>
        <Text>Current Language: {currentLang.toUpperCase()}</Text>

        <Button
          title="Switch to Spanish"
          onPress={() => changeLanguage('es')}
        />
        <View style={{ height: 10 }} />
        <Button
          title="Switch to English"
          onPress={() => changeLanguage('en')}
        />
      </View>
    </View>
  );
}

export default App;
This creates two buttons with the text “Switch to Spanish” and “Switch to English." On pressing any of these buttons, the app will change the language automatically and pull the required files.
Lazy loading of translation files
While you want to support multiple locales, you also don’t want to bog your app down by loading all translation files at once. And this becomes evident, especially after the app grows in size and you have multiple large translation files being downloaded at the same time when your app loads.
You can always use deferred Javascripts or dynamic imports. While there are different ways to handle lazy loading, since we’re sticking to using the default set, I’ll go with the async-away setup.
Let me share an example:
// localization/index.js
// ... previous code ...

const loadTranslation = async (language) => {
  try {
    // Dynamic import based on language
    const module = await import(`./translations/${language}.json`);
    translations[language] = module.default;
    return true;
  } catch (error) {
    console.warn(`Failed to load ${language} translations`);
    return false;
  }
};

export const changeLanguage = async (language) => {
  // Only load if we don't have it yet
  if (!translations[language]) {
    const success = await loadTranslation(language);
    if (!success) return;
  }

  currentLanguage = language;
  localizationEmitter.emit('languageChanged', language);
};
We also need to make a couple of changes to the App.tsx file to implement a loading state when switching languages:
// App.tsx
function App(): React.JSX.Element {
  const [currentLang, setCurrentLang] = useState('en');
  const [isLoading, setIsLoading] = useState(false);

  const handleLanguageChange = async (lang: string) => {
    setIsLoading(true);
    await changeLanguage(lang);
    setIsLoading(false);
  };

  return (
    <View style={{ padding: 20 }}>
      {/* ... other UI elements ... */}

      <Button
        title={`Switch to ${currentLang === 'en' ? 'Spanish' : 'English'}`}
        onPress={() => handleLanguageChange(currentLang === 'en' ? 'es' : 'en')}
        disabled={isLoading}
      />
      {isLoading && <Text>Changing language...</Text>}
    </View>
  );
}
Whenever a user switches languages, the variables are populated with the required details, and only that language file is downloaded from the server.
For instance, if the user is on the home page and changes to Spanish, the file path will become /translations/es.json
I think we can already see how this will make our app way more efficient than simply downloading everything.
Challenges with localizing complex React Native apps
Translating one page was definitely fun and easy. But as I went along, translating more and more pages, I noticed that this approach was extremely cumbersome.
The main problem was that it was hard to keep track of translations across multiple files. I kept moving between files, trying to find what I’d translated a specific string to. And when I had to update something on one page, it needed to be updated across all translation files.
There was also a problem with the contextual understanding of these text snippets. When used in different places in the app, the same word or phrase may have more than one meaning. For example, “post” could mean to send something or to do a task “after” another task.
There was also the whole process of sending translations to real people and getting them back into the app. It took me hours to copy and paste between spreadsheets and these language JSON files.
I figured there had to be a better way.
How to streamline React Native localization with Centus
Centus is an app localization platform that solves a lot of the problems I was facing.
Here’s how it works:
- You upload your app’s strings to Centus.
- Translators work directly with the Centus interface, seeing the full context of each string and leveraging automatic translation.
- You pull the translated strings to your code repo.

Now, let’s break down this process step by step.
First, sign up to Centus and click New project. Then, enter project details.
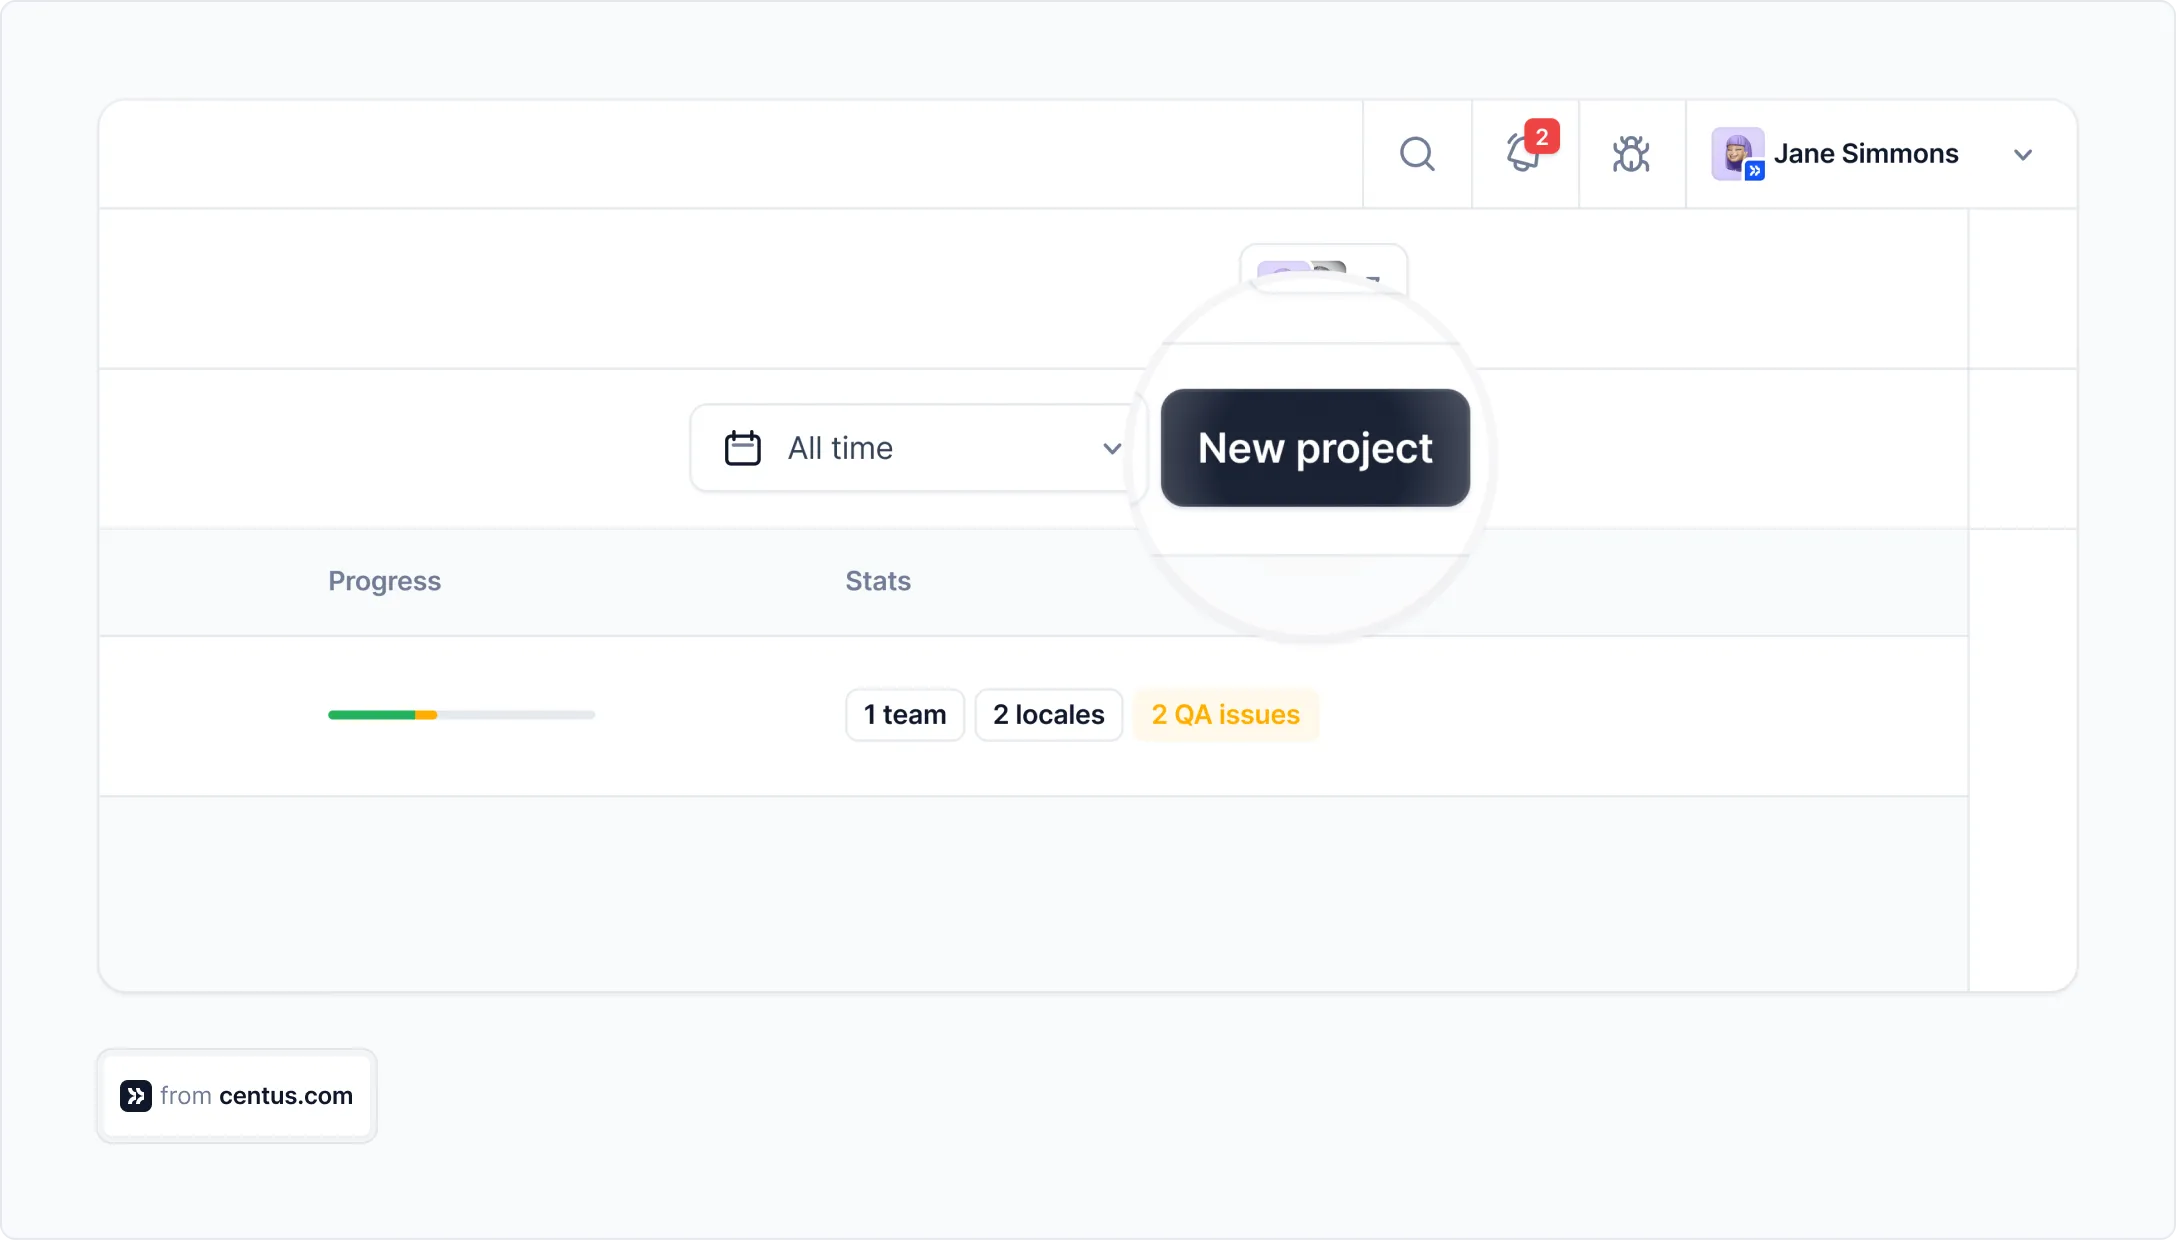
Now you have your very first translation project in Centus.
To start translating your app, add JSON files to the project. It can be done in the Imports section, by clicking Select a file.
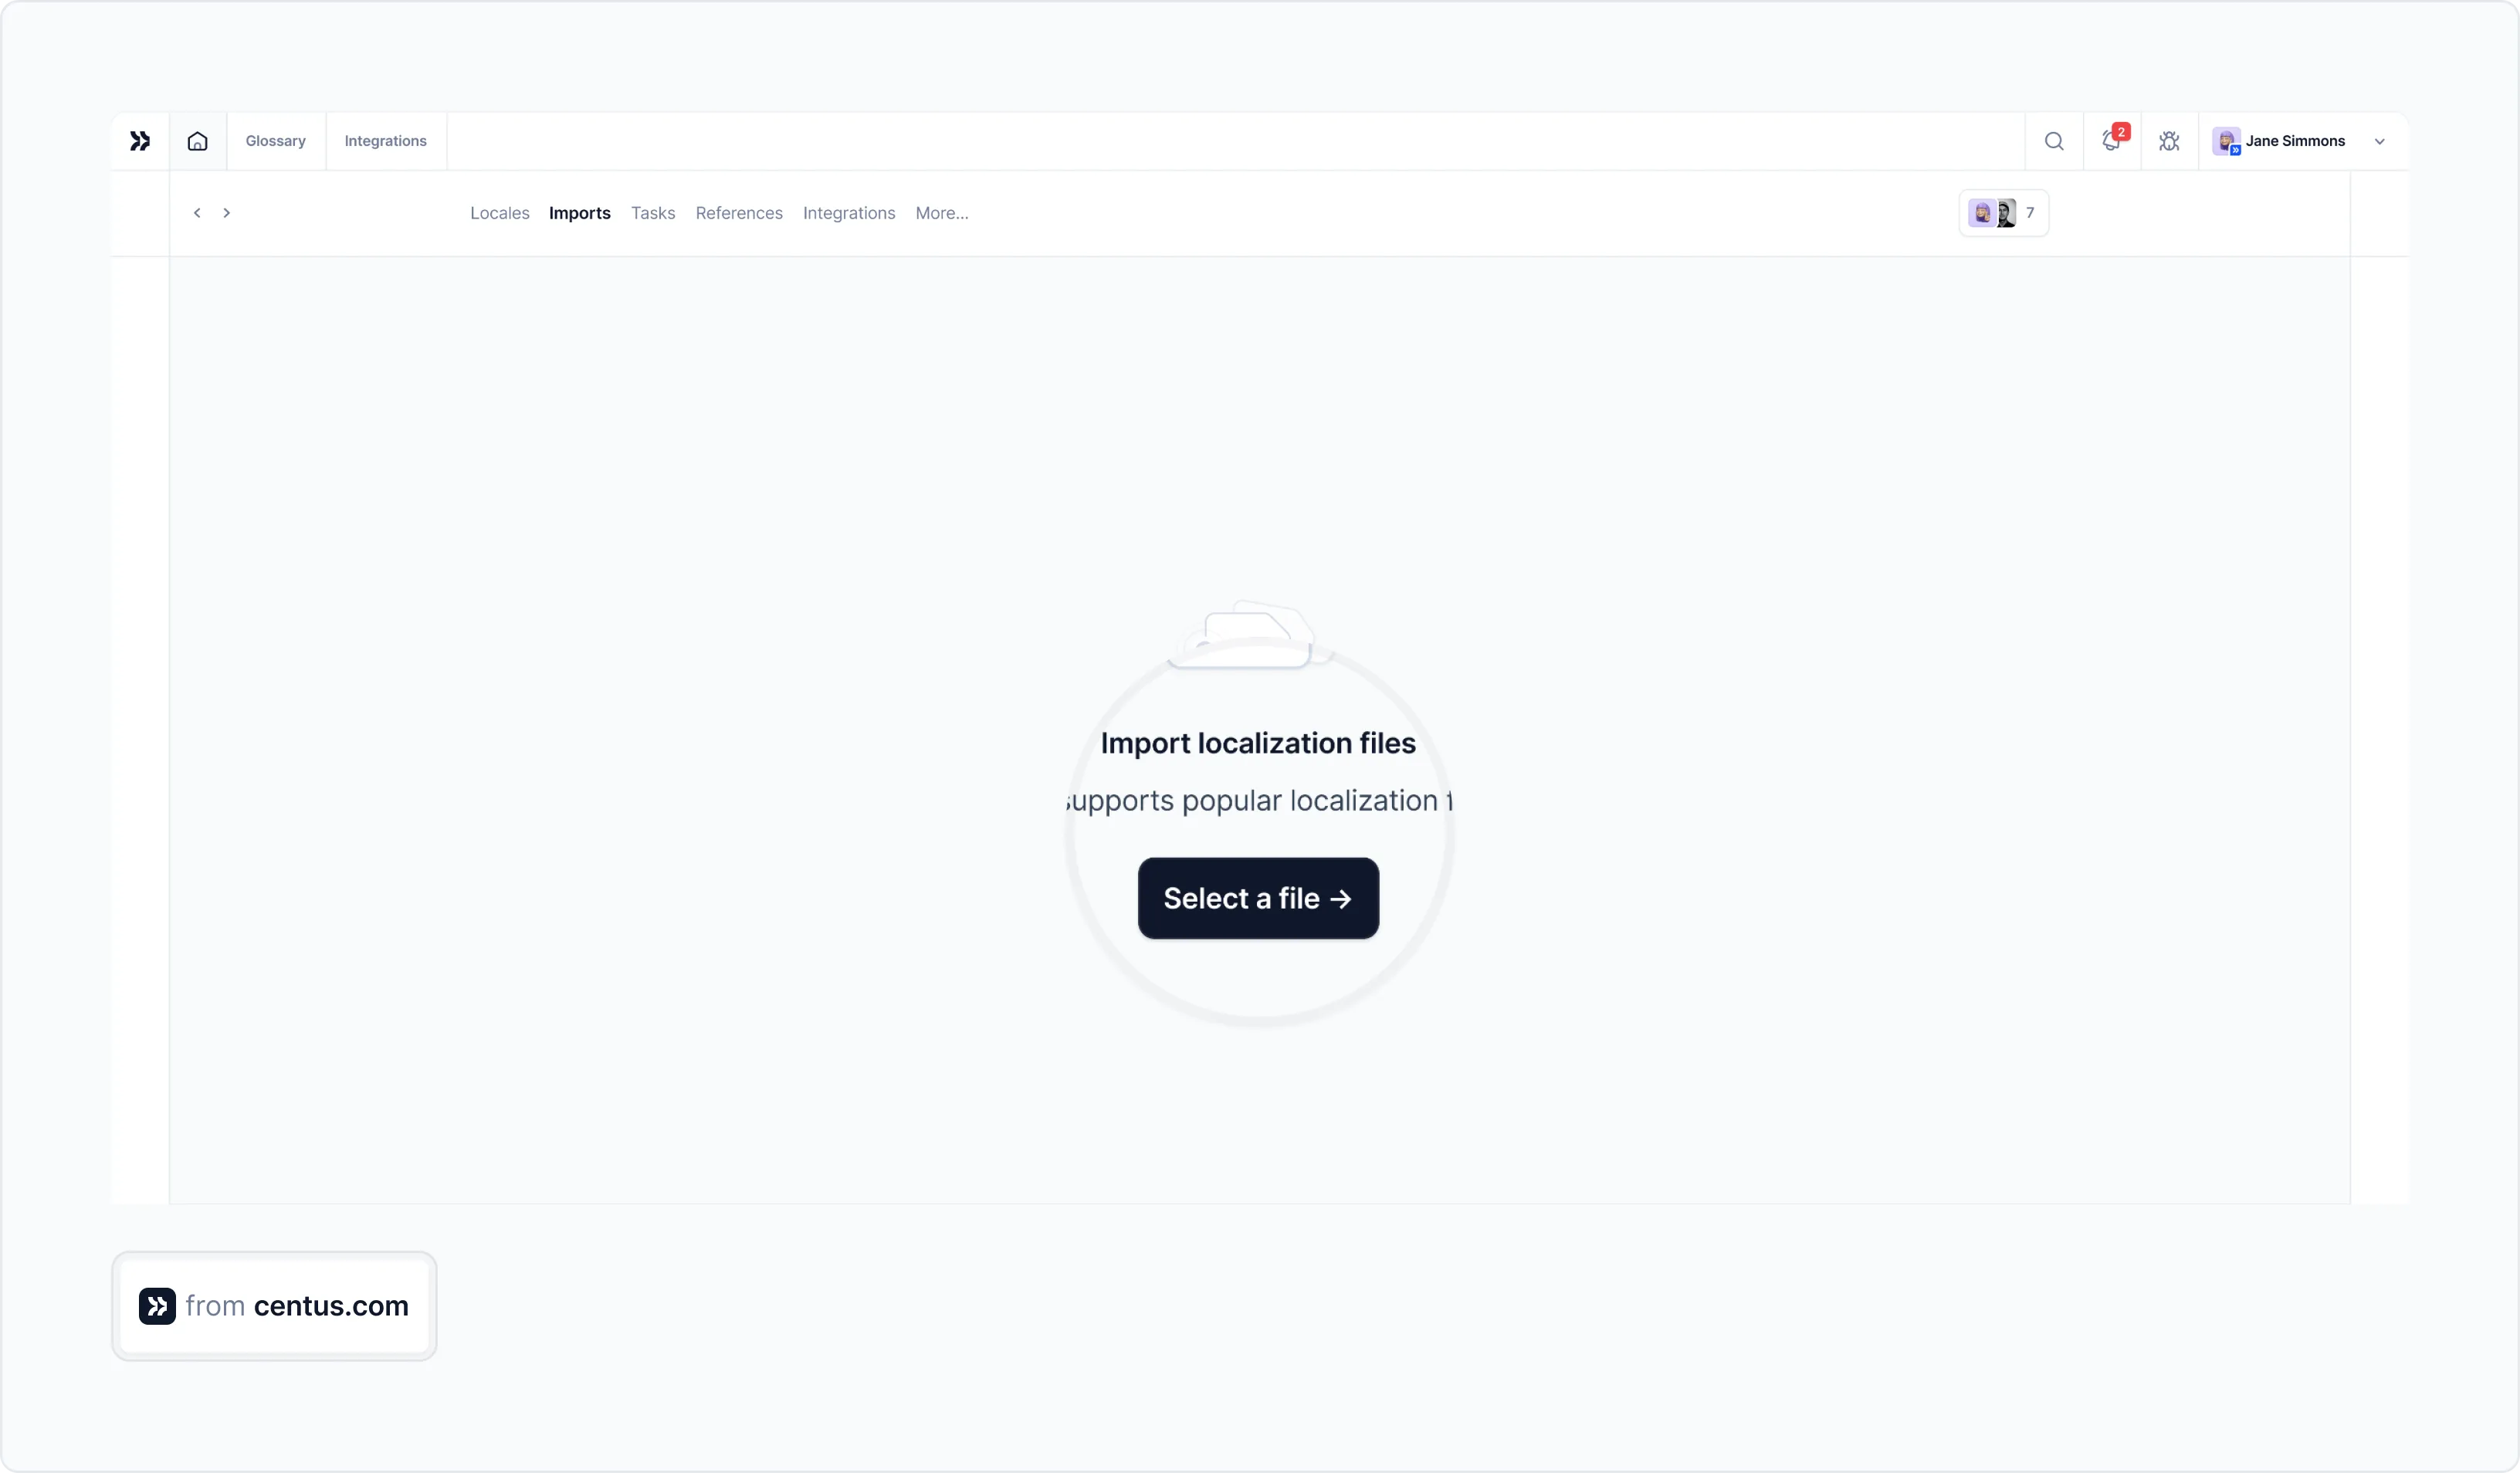
Centus will automatically segment your JSON file into strings. Like this 👇
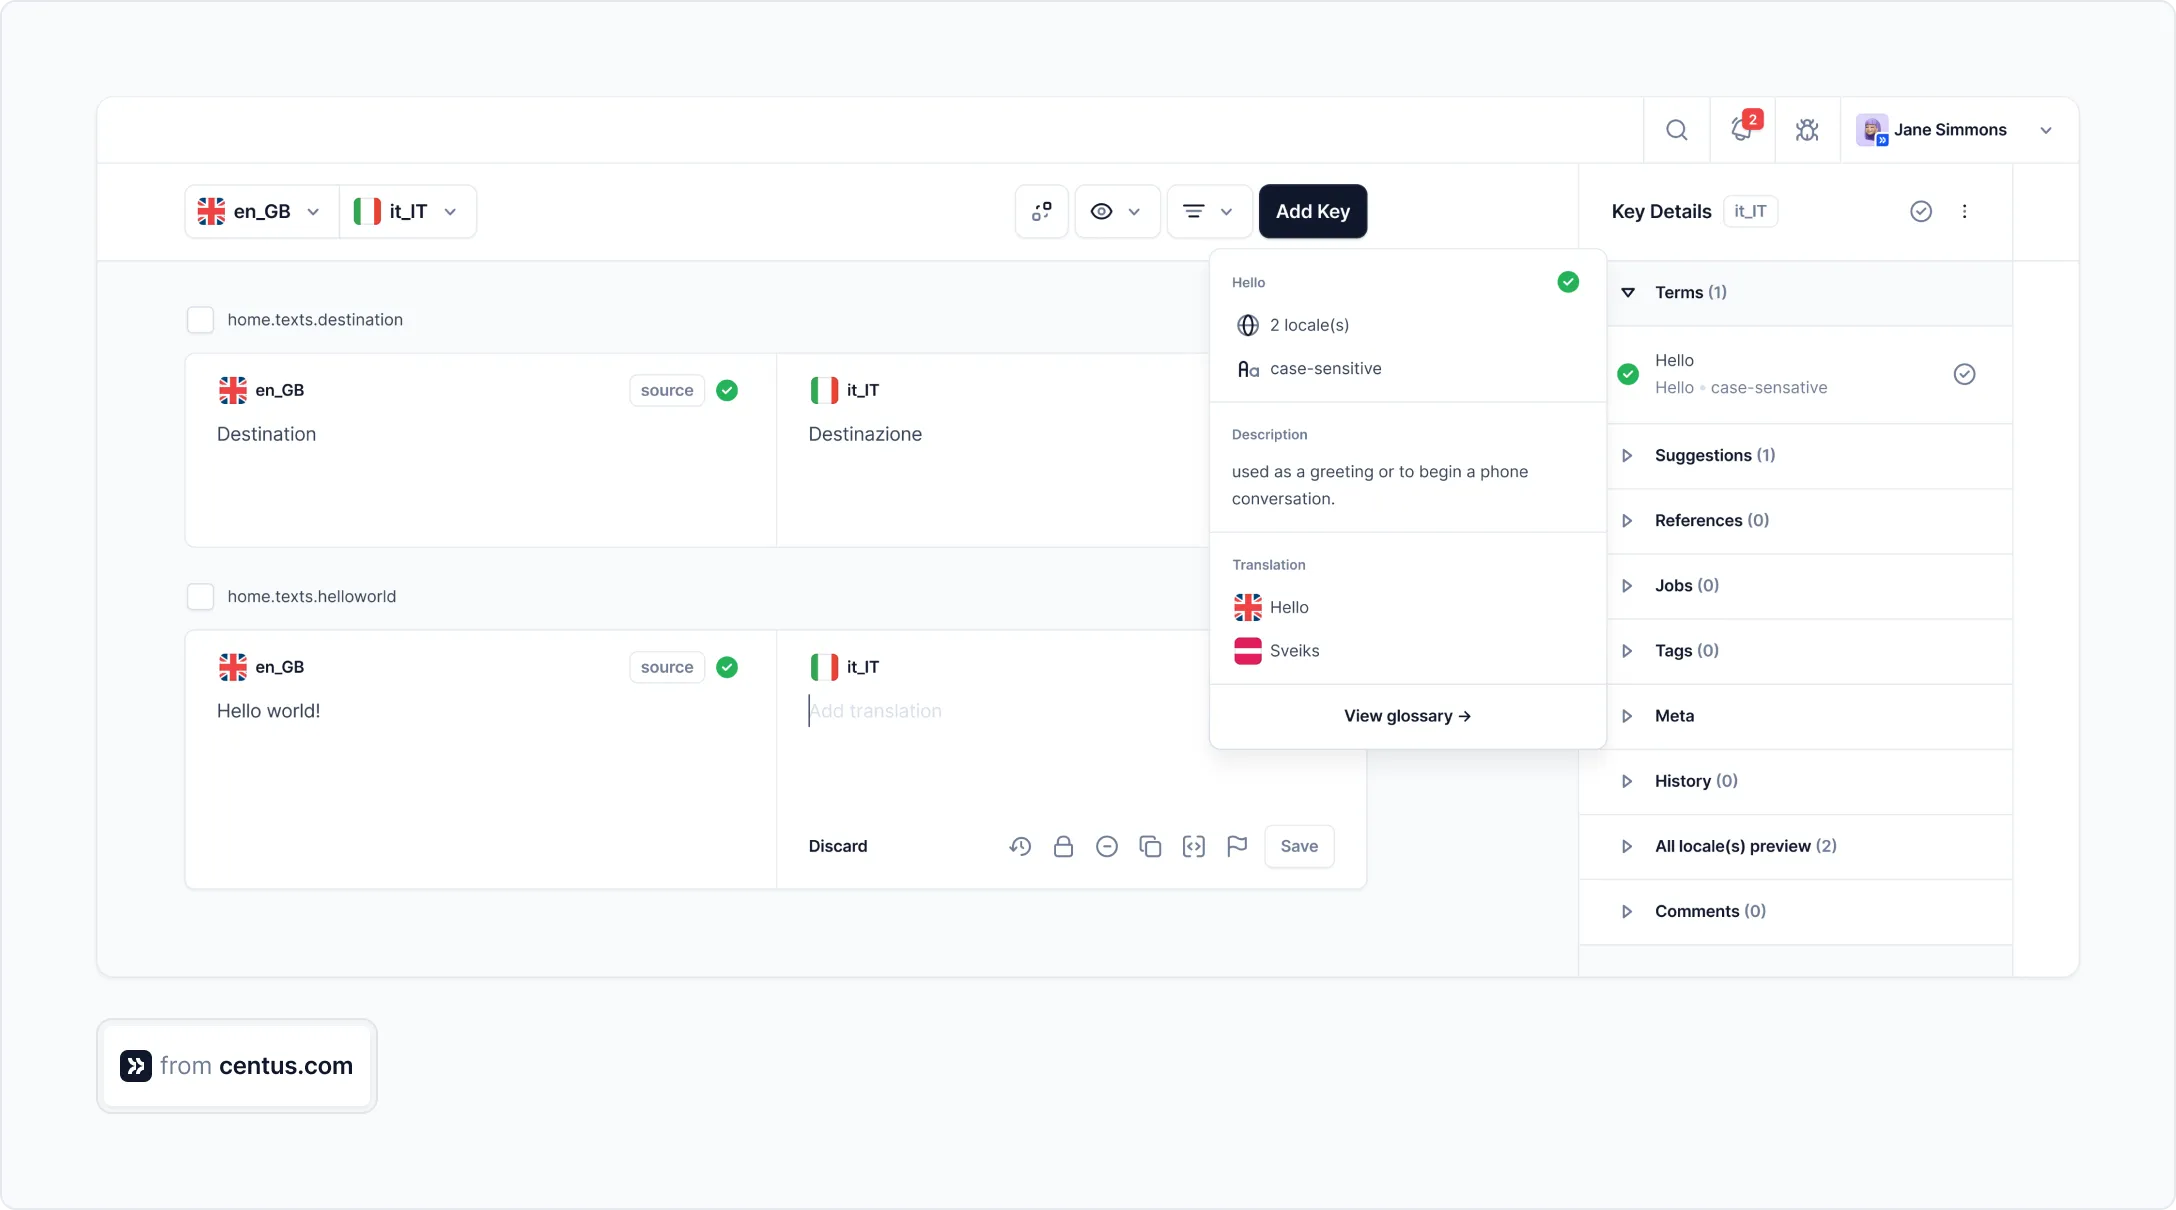
Now you can add translations for the languages you know. Just pre-translate the strings with Google Translate, DeepL, or Microsoft Translate and edit them manually.
For other languages, it’s better to hand over your project to language professionals. Check this simple guide on how to find translators.
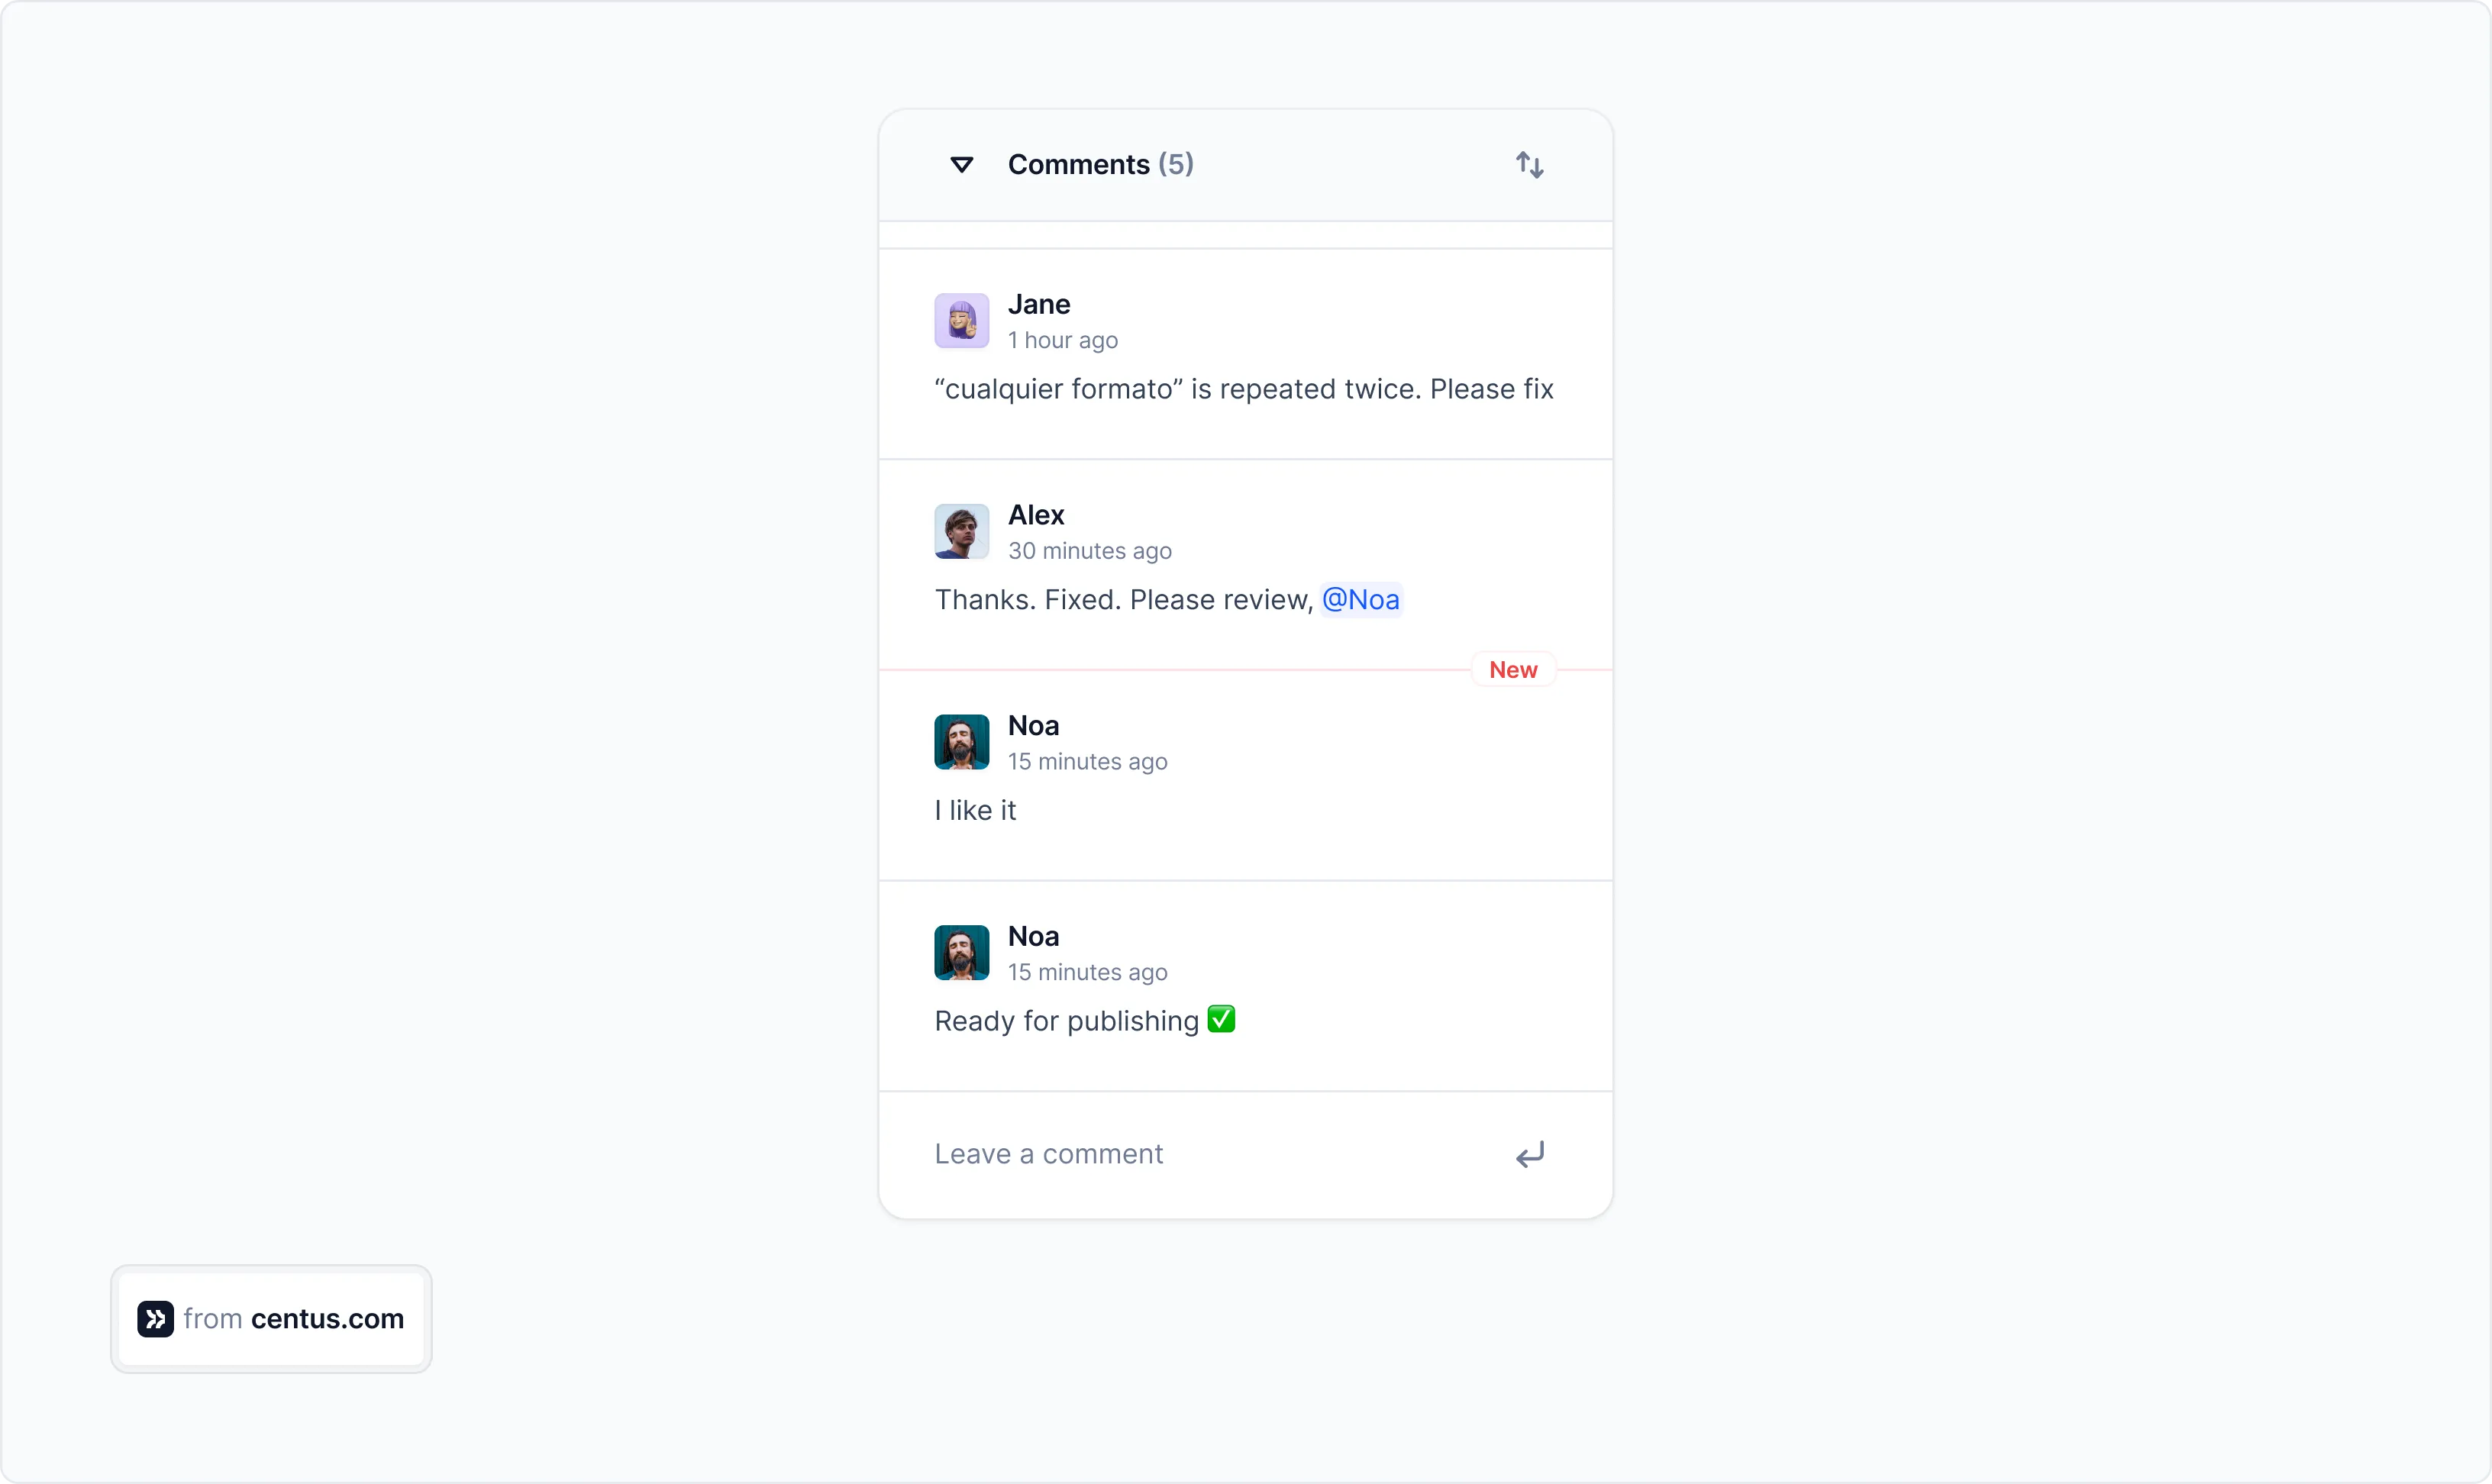
When you find translators and editors for your React translation project, go to the Collaborators section of the Projects page. There, click Invite collaborators and enter their details and roles.
Now your translators and editors can collaborate and share feedback, allowing you to ship your React app much faster.
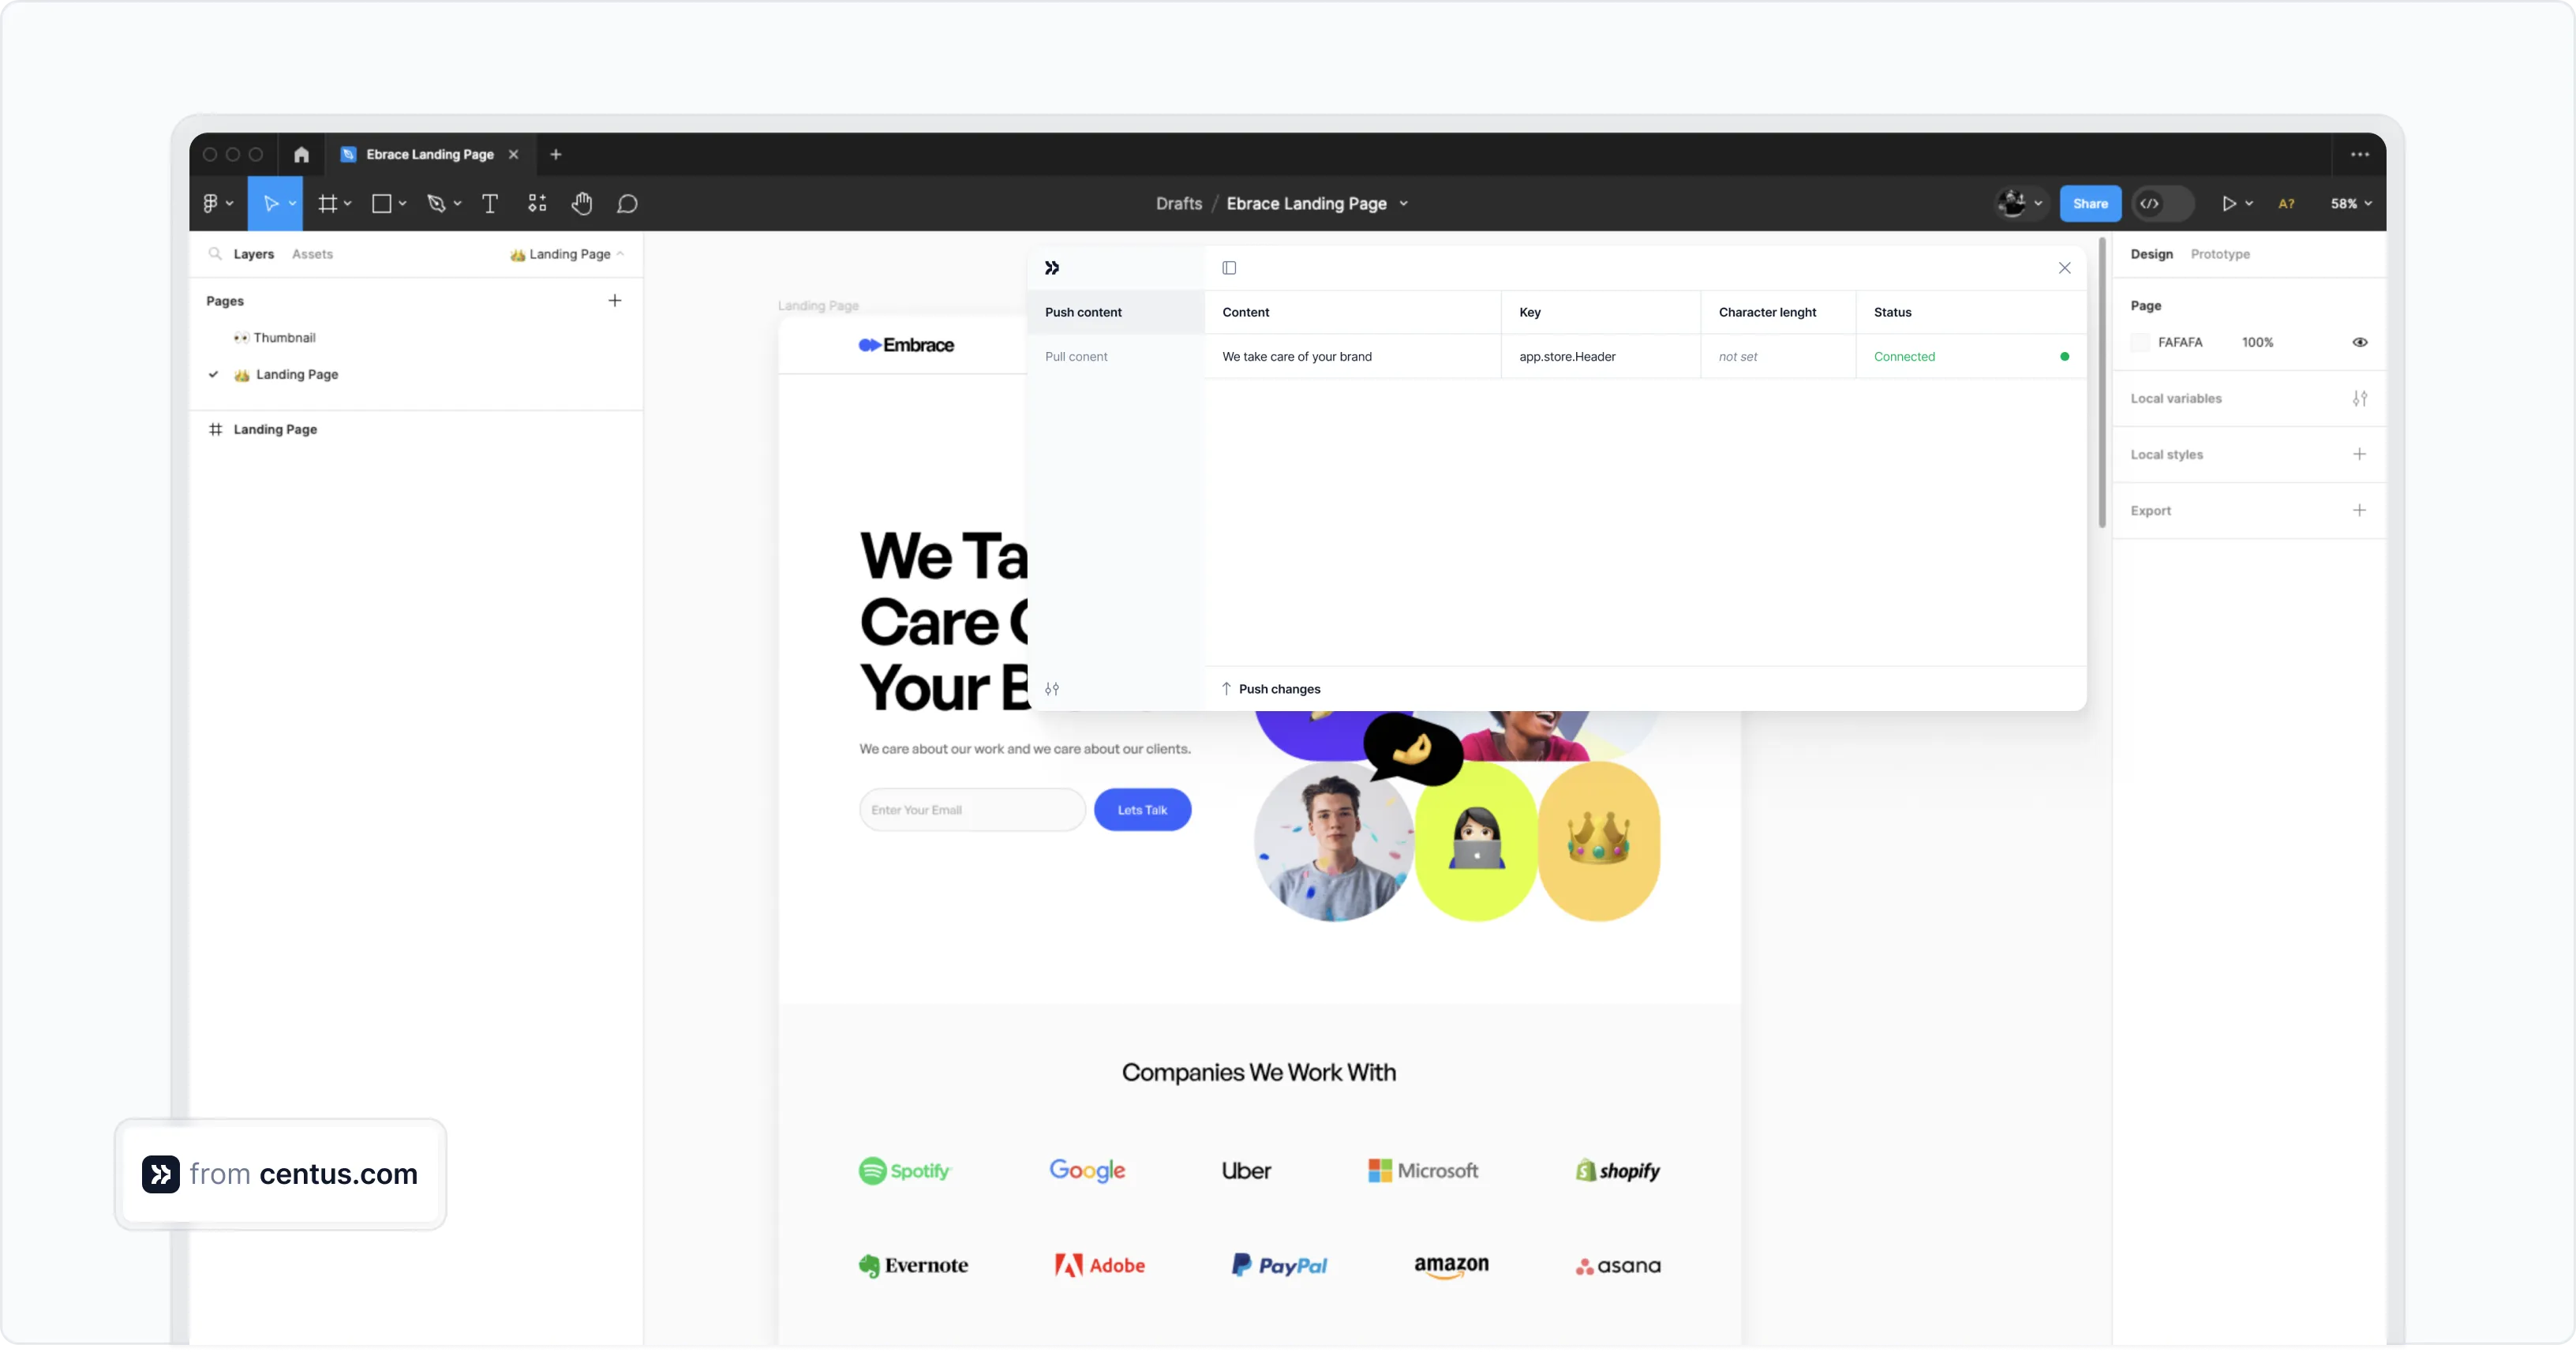
Very often React Native localization also involves design tweaks. Luckily, Centus has got you covered.
To adjust your React app design, use the Centus plugin for Figma. The plugin automatically pulls translations to Figma, sparing you manual effort and helping avoid truncated or overlapping text.
When translations are ready, go to the Export section, There, choose languages, content, and file format. To proceed, click Export translations. Alternatively, pull the translations to your code repo using Centus-GitHub integration.
Congratulations! Your translations are ready and you can test your localized app.
Testing your localized React Native app
After implementing all these localization features, how do we make sure everything’s working correctly? We also need to run testing. You could either do unit tests or ask someone on your team to manually go through the app, checking each part of the UI to find any missing translations or translation issues.
1. Creating unit tests for automated testing
Start by creating a tests directory and add some test files:
import React from 'react';
import { render } from '@testing-library/react-native';
import App from '../App';
import i18n from '../i18n';

test('renders welcome message in English', () => {
  i18n.changeLanguage('en');
  const { getByText } = render(<App />);
  expect(getByText('Welcome')).toBeTruthy();
});

test('renders welcome message in Spanish', () => {
  i18n.changeLanguage('es');
  const { getByText } = render(<App />);
  expect(getByText('Bienvenido')).toBeTruthy();
});
Now, you can run the test using the following command:
npm test
2. Running manual tests for more comprehensive testing
You can also test your app localization by manually switching between different languages and checking each screen of your app. Here’s a checklist I use:
- Does all the text appear in the correct language?
- Are plurals handled correctly?
- Are dates and times formatted correctly?
- For RTL languages, is the layout correct?
- Do all images and icons look appropriate for each locale?
And this cannot be a one-time thing. Try keeping a cadence for running tests regularly as you update your website and your translations. You don’t want to have untranslated sections on your website and risk giving your app an unprofessional or unpolished feel.
Wrapping up
Phew! We've covered all React localization steps, from how to set up translation to more complex topics like how to deal with plurals and RTL languages.
As you know by now, managing all those translation files, providing translation context, and keeping translations up-to-date is a challenge and a half.
Centus can help you manage the localization process, making it easy not just for you but also for language experts on your team. Why don't you give it a try?
Sign up for Centus and see how it can improve your app localization and internationalization experience!
Get the week's best content!
By subscribing, you are agreeing to have your personal information managed in accordance with the terms of Centus Privacy Policy ->
Keep learning

19 min. read
NextJS Internationalization: A Complete Walkthrough

18 min. read
JavaScript Localization Guide for Web Apps

25 min. read
Vue i18n and Localization: How to Localize a Vue App

19 min. read
Laravel Localization: A Step-by-Step Guide

21 min. read
Svelte i18n and Localization Made Easy

15 min. read