NodeJS Internationalization (i18n) and Localization
You search for a web app in your native language, only to open it and realize…it’s in English. Isn’t it frustrating?
Think about it—would you rather have your potential customers experience:
-
a warm welcome in their own language?
-
or a jarring experience making them hit the back button ASAP?
If you prefer the first option, this NodeJS internationalization guide is for you.
The guide will take you step-by-step from installing the i18n package to handling plurals until you have a fully localized NodeJS app.
Aren’t NodeJS localization and translation the same?
Not really.
NodeJS language translation is just a step in a long localization process.
Node JS localization includes nuanced changes, like handling number and date formats, gendered words and sentences, pluralization, and much more.
A localized app makes the user feel like it was created specifically for them. This means changing any images, anecdotes, metaphors, and other content on the page to bring it closer to what’s relevant to the people you serve.
Spotify is an excellent example of localization.
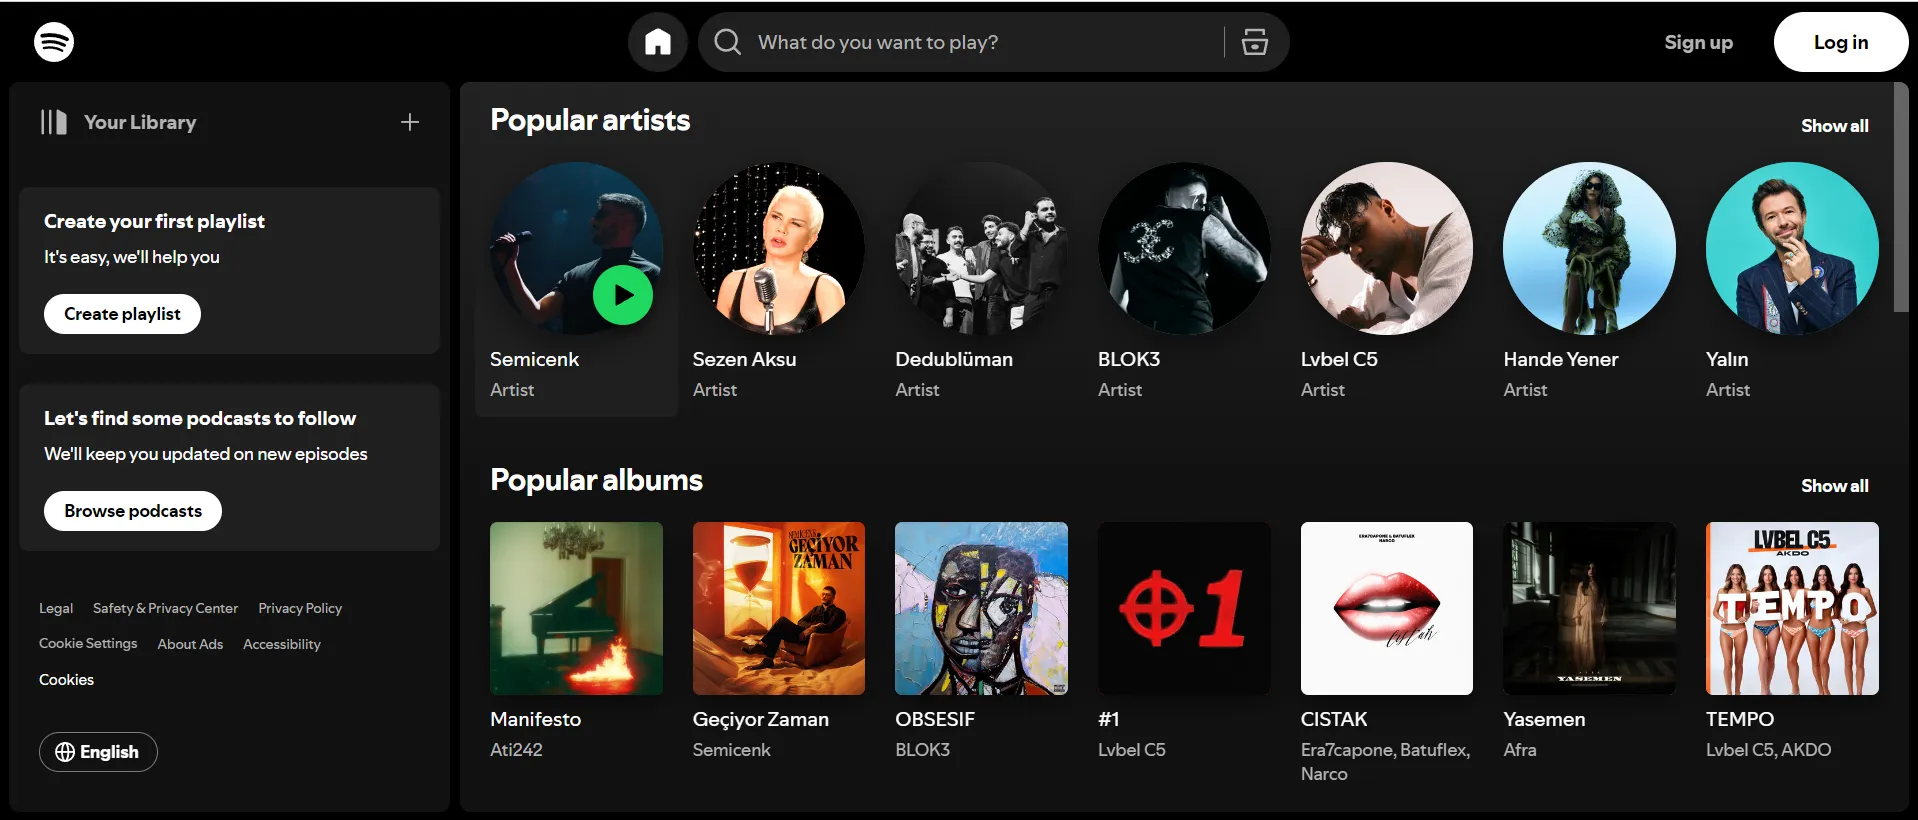
In different locations, you’ll see a different set of artists shown on the homepage.
In fact, you don’t even have to be signed in to see their algorithm at work.
Of course, after you sign in, your feed automatically adapts and becomes highly personalized. So it may not reflect what your region listens to.
But you’ll see this trend with all major tech-entertainment companies like YouTube and Netflix as well. Their original feed is already relevant to the region.
That’s the goal of localization—to make the user feel at home right away.
Setting up a basic Node.js app for localization
Let's start by setting up a simple Node.js application. This will be the foundation that I’ll use for to add localization features later in this article.
Prerequisites
Before we begin, you need to have the following installed on your system:
-
Node.js (v20 or higher)
-
npm (Node Package Manager, comes with Node.js)
Running the below commands will confirm if you have these installed:
node -v
npm -v
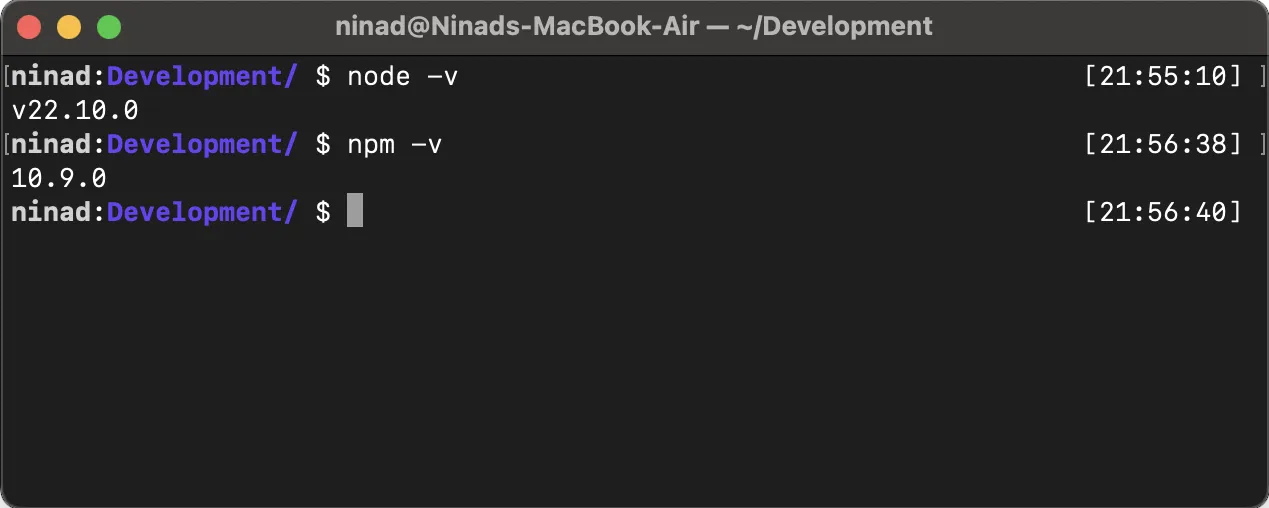
If you see the versions above, you should be good to go. However, if you have an older version or the command doesn’t work, download Node and NPM from the official Node.js website.
Step 1: Initialize the Node project
To begin with, I’ll create a project directory called centus-nodejs-localization that will hold all the application files.
mkdir centus-nodejs-localization
cd centus-nodejs-localization
Once done, you can initialize a node project in the directory using the below command:
npm init -y
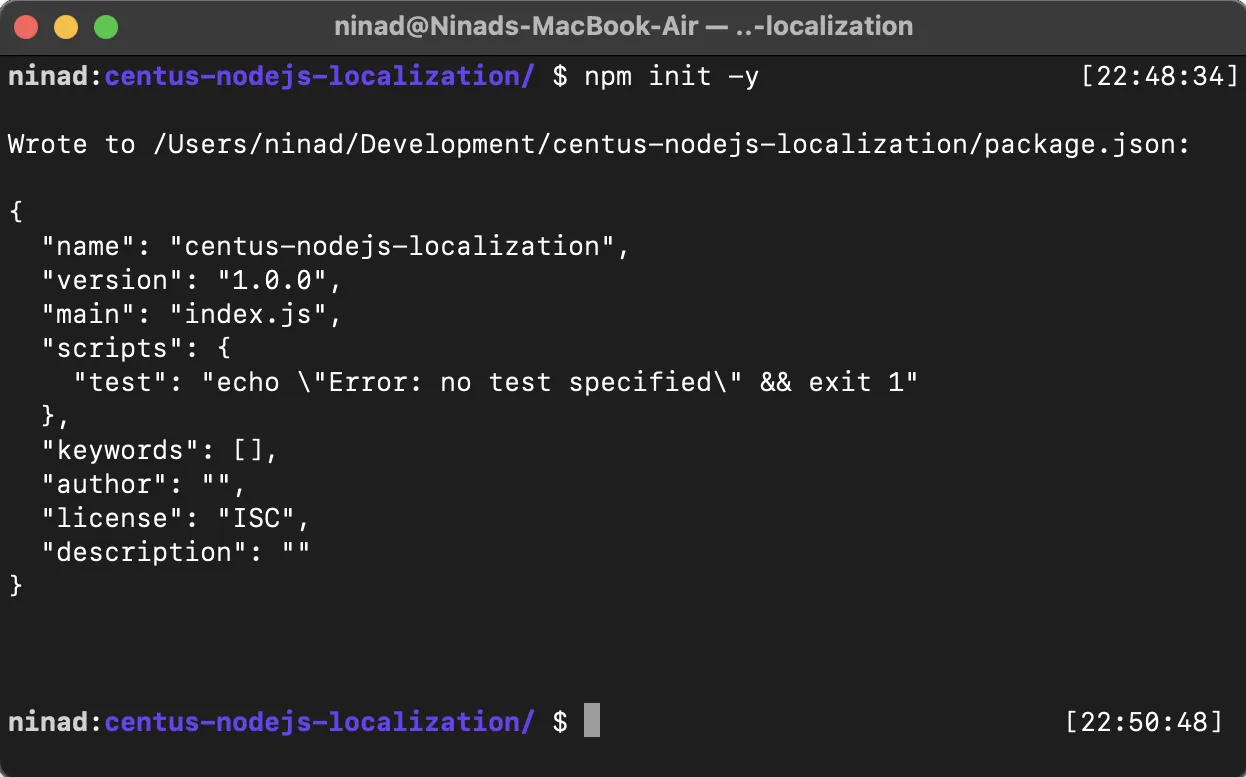
This command will create a package.json file with all default settings.
Step 2: Write a basic HTTP server
Create an app.js file which will be the entry point for our application
touch app.js
Then, copy the following code into the app.js file:
// app.js

const http = require('http');

const server = http.createServer((request, response) => {
    // Set the response HTTP header with HTTP status and content type
    response.writeHead(200, { 'Content-Type': 'text/plain' });

    // Send the response body
    response.end('Hello, World!\n');
});

// Define a port number and start listening
const port = 3000;
server.listen(port, () => {
    console.log(`Server running at http://localhost:${port}/`);
});
The code listens to port 3000 on localhost and responds with a “Hello, World!” message whenever you visit the page.
Step 3: Run the application
Finally, run the below command to confirm that the code is listening and your servers are functional.
node app.js
Then, open your browser and go to localhost:3000/.
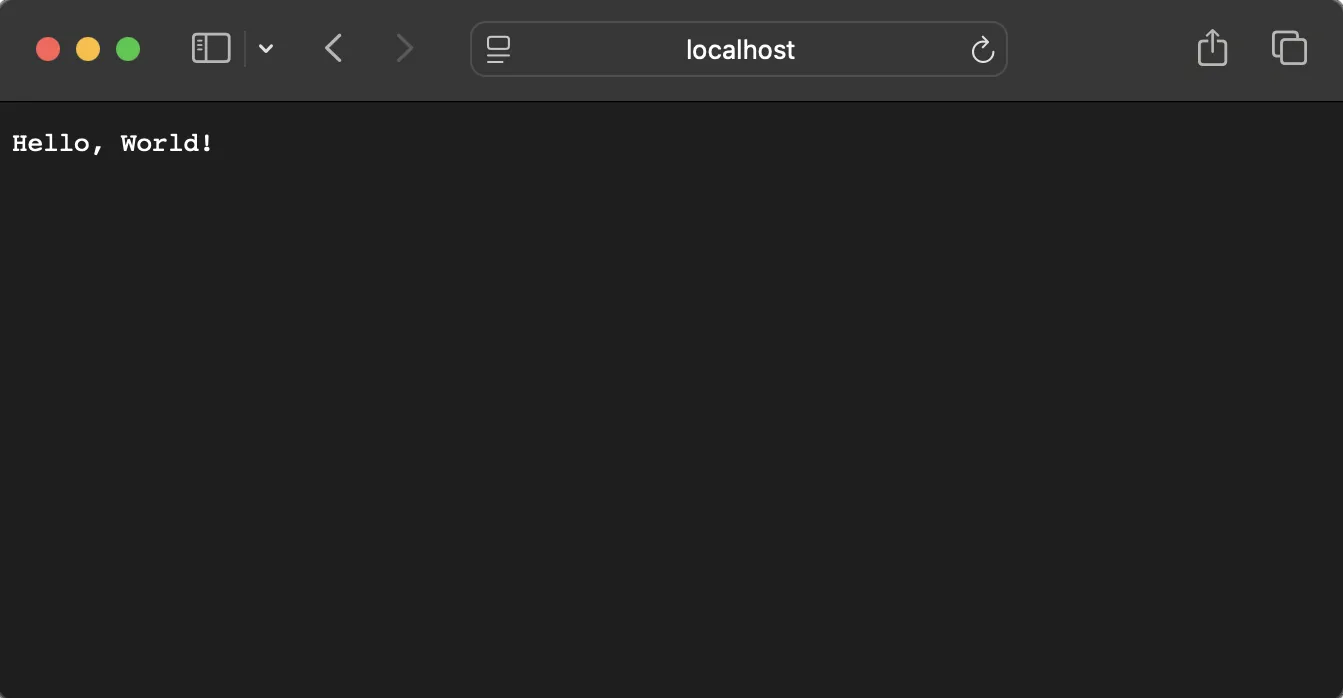
If you see a page like the screenshot above, you’re ready to move ahead!
Basic NodeJS i18n and localization for a vanilla app
Now that our sample application is ready, let’s add localization support to it.
Step 1: Install the i18n package
We’ll use the i18n package for localization throughout this tutorial. I picked this for two reasons:
-
i18n is lightweight and simple to use
-
i18n supports vanilla Node.js apps as well as frameworks like Express, Restify, and others.
Run the command below to install it:
npm install i18n
Step 2: Configure i18n in the Node.js app
With Node i18n installed, we’ll now modify our app.js file to use the functionality offered by this package.
// app.js

const http = require('http');
const url = require('url');
const i18n = require('i18n');

// Configure i18n
i18n.configure({
    locales: ['en', 'es'], // English and Spanish
    directory: __dirname + '/locales',
    defaultLocale: 'en',
    objectNotation: true
});

const server = http.createServer((request, response) => {
    // Parse the query parameters to get the language
    const queryObject = url.parse(request.url, true).query;
    const lang = queryObject.lang || 'en';

    // Set the locale based on query parameter
    i18n.setLocale(lang);

     // Set the locale based on query parameter
    i18n.setLocale(lang);

    // Set the response HTTP header with HTTP status and content type
    response.writeHead(200, { 'Content-Type': 'text/html; charset=utf-8' });

    // Enhanced HTML content
    const htmlContent = `
        <!DOCTYPE html>
        <html lang="${lang}">
        <head>
            <meta charset="UTF-8">
            <title>${i18n.__('title')}</title>
            <style>
                body {
                    font-family: Arial, sans-serif;
                    margin: 0;
                    padding: 0;
                }
                .navbar {
                    background-color: #333;
                    overflow: hidden;
                }
                .navbar a {
                    float: left;
                    display: block;
                    color: #f2f2f2;
                    text-align: center;
                    padding: 14px 16px;
                    text-decoration: none;
                }
                .navbar a:hover {
                    background-color: #ddd;
                    color: black;
                }
                .container {
                    padding: 60px 20px;
                    text-align: center;
                }
                h1 {
                    font-size: 50px;
                }
                                p.subtitle {
                    font-size: 24px;
                    color: #555;
                }
                .cta-button {
                    background-color: #28a745;
                    color: white;
                    padding: 15px 30px;
                    font-size: 18px;
                    border: none;
                    cursor: pointer;
                    margin-top: 30px;
                }
                .cta-button:hover {
                    background-color: #218838;
                }
                .language-switcher {
                    margin-top: 40px;
                }
                .language-switcher a {
                    margin: 0 10px;
                    text-decoration: none;
                    color: #007bff;
                }
                .language-switcher a:hover {
                    text-decoration: underline;
                }
            </style>
        </head>
        <body>
            <div class="navbar">
                <a href="#">${i18n.__('nav.home')}</a>
                <a href="#">${i18n.__('nav.about')}</a>
                <a href="#">${i18n.__('nav.contact')}</a>
            </div>
            <div class="container">
                <h1>${i18n.__('header')}</h1>
                <p class="subtitle">${i18n.__('subtitle')}</p>
                <button class="cta-button">${i18n.__('cta')}</button>
                <div class="language-switcher">
                    <p>${i18n.__('instruction')}</p>
                    <a href="/?lang=en">English</a> | <a href="/?lang=es">Español</a>
                </div>
            </div>
        </body>
        </html>
    `;

    // Send the HTML response
    response.end(htmlContent);
});

// Define a port number and start listening
const port = 3000;
server.listen(port, () => {
    console.log(`Server running at http://localhost:${port}/`);
});
There’s a lot going on here.
So let’s break it down.
-
To start with, I’m importing the i18n package to translate text.
-
I’ve also added quite a few new elements to the page.
-
We have a navbar, a header, a subheader, and a CTA button.
-
Then, there’s quite a bit of CSS sprinkled around to make things look pretty.
-
I’ve also added a simple language switcher right below the CTA to allow you to switch to a different language when required.
Step 3: Creating the localization files
Until now, we’ve modified our app to pull the translated text dynamically.
But we haven’t created the translation files.
So let’s create those now. Create a locales directory.
mkdir locales
I’m planning on supporting two languages here—English and Spanish. Create two files in this directory.
locales/en.json
{
   "title": "Welcome",
   "nav": {
       "home": "Home",
       "about": "About",
       "contact": "Contact"
   },
   "header": "Welcome to the Centus localization guide!",
   "subtitle": "We offer the best translation management platform to help you succeed.",
   "cta": "Get Started",
   "instruction": "Select your language:"
}
locales/es.json
{
   "title": "Bienvenido",
   "nav": {
       "home": "Inicio",
       "about": "Acerca de",
       "contact": "Contacto"
   },
   "header": "¡Bienvenido a la guía de localización de Centus!",
   "subtitle": "Ofrecemos la mejor plataforma de gestión de traducción para ayudarle a tener éxito.",
   "cta": "Comenzar",
   "instruction": "Selecciona tu idioma:"
}
You can extend this to include as many locales as required. Just remember to also update the locales list in the app.js file.
Step 4: Re-run the node server
The app is ready to use the translations. Re-run your node server now:
node app.js
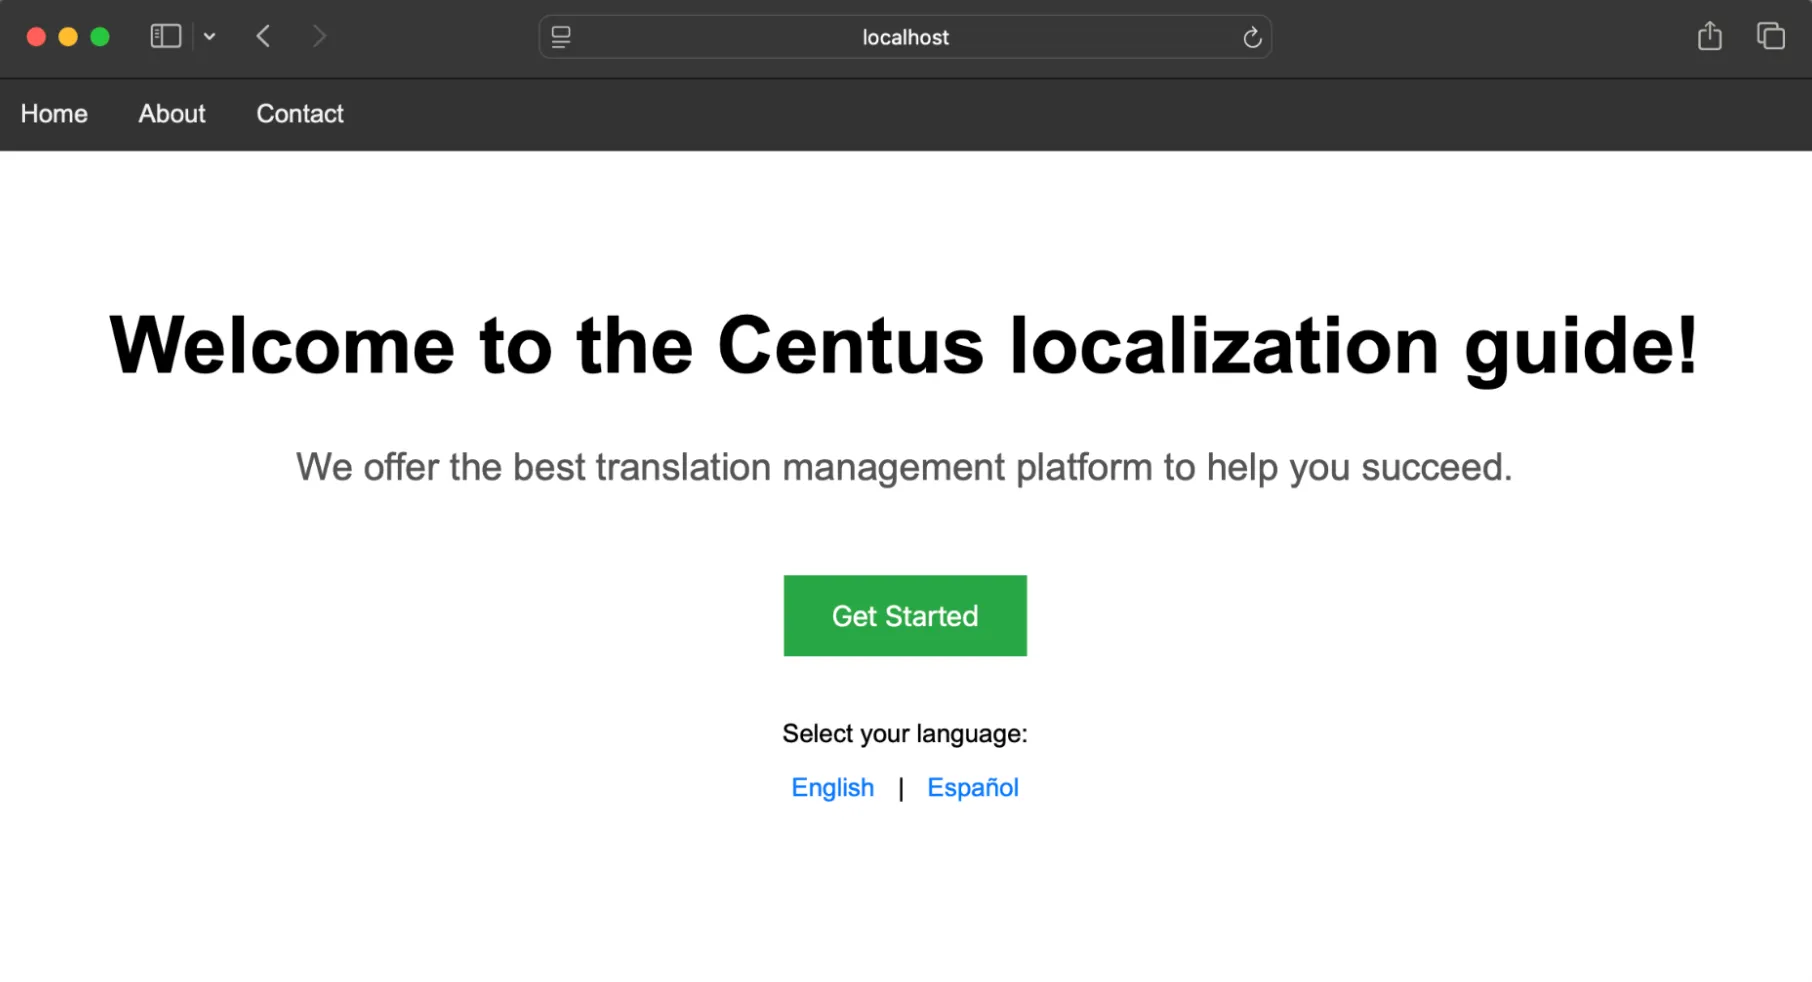
Navigate to localhost:3000/ (the default language is English). You will see "Welcome to the Centus localization guide!"
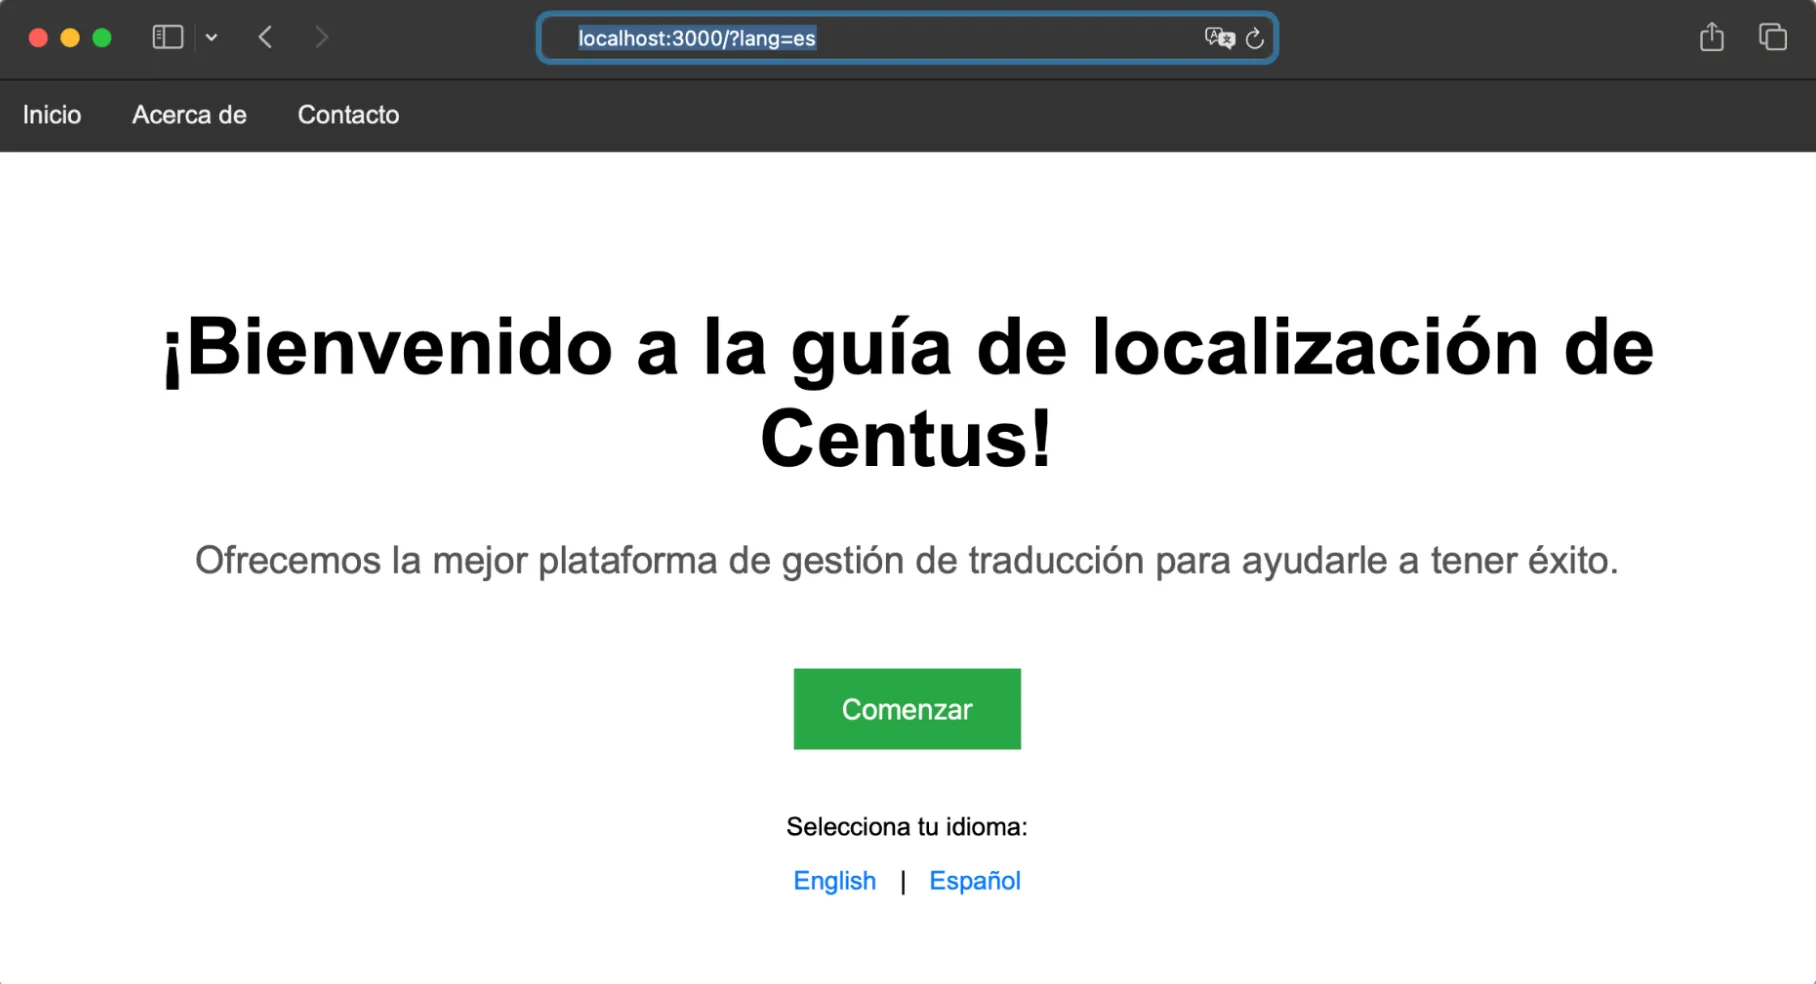
Navigate to localhost:3000/?lang=es. You will see "¡Bienvenido a la guía de localización de Centus!"
Excellent! You’ve now completed basic NodeJS localization.
How to translate localization files
If you’ve followed through on my advice, you should have at least two JSON files: the source language file and the target language file. In my case, those are English and Spanish files stored in the locations directory.
So how do you translate localization files?
It’s simple: with the help of a localization management system. Like Centus.
Using Centus for your NodeJS localization project, you get:
- Centralized repository: All translations are stored in one place, improving standardization and making updates easier.
- Streamline collaboration: Translators, developers, and managers can work together seamlessly without manual file handling.
- Automated string extraction: Integrate Centus with your code repo to automatically push and pull translatable strings.
- Contextual translations: Share translation context and screenshots to show translators how strings are used.
- Version control: Tracks changes and offers rollback options.
- Scalability: Easily manage translations for multiple languages as your app grows.
- Tool integration: Integrates with popular development tools to streamline importing and exporting translations.
Here’s how to use Centus for JSON file translation:
First, sign up to Centus.
Done?
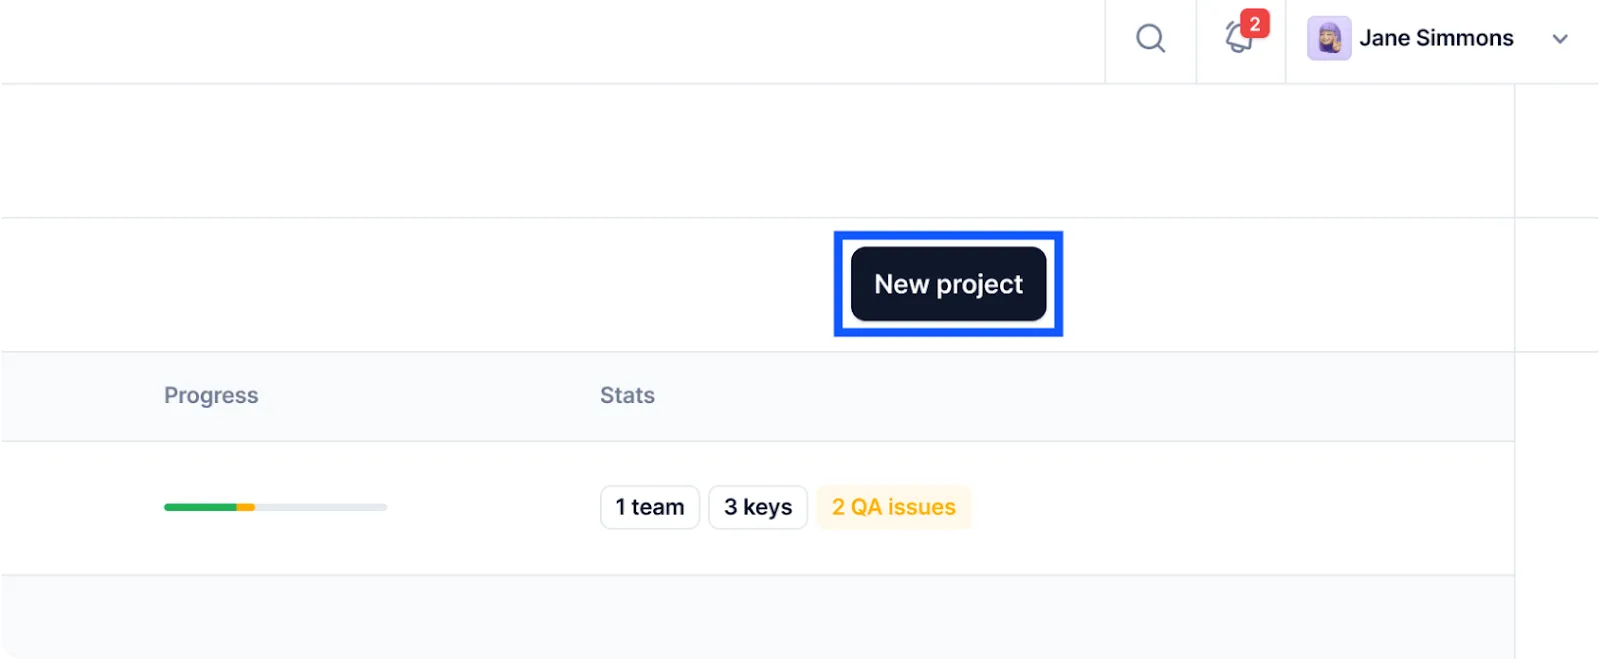
Now, click the New project button at the top-right corner.
This should bring you a modal where you’ll be prompted to enter your project details.
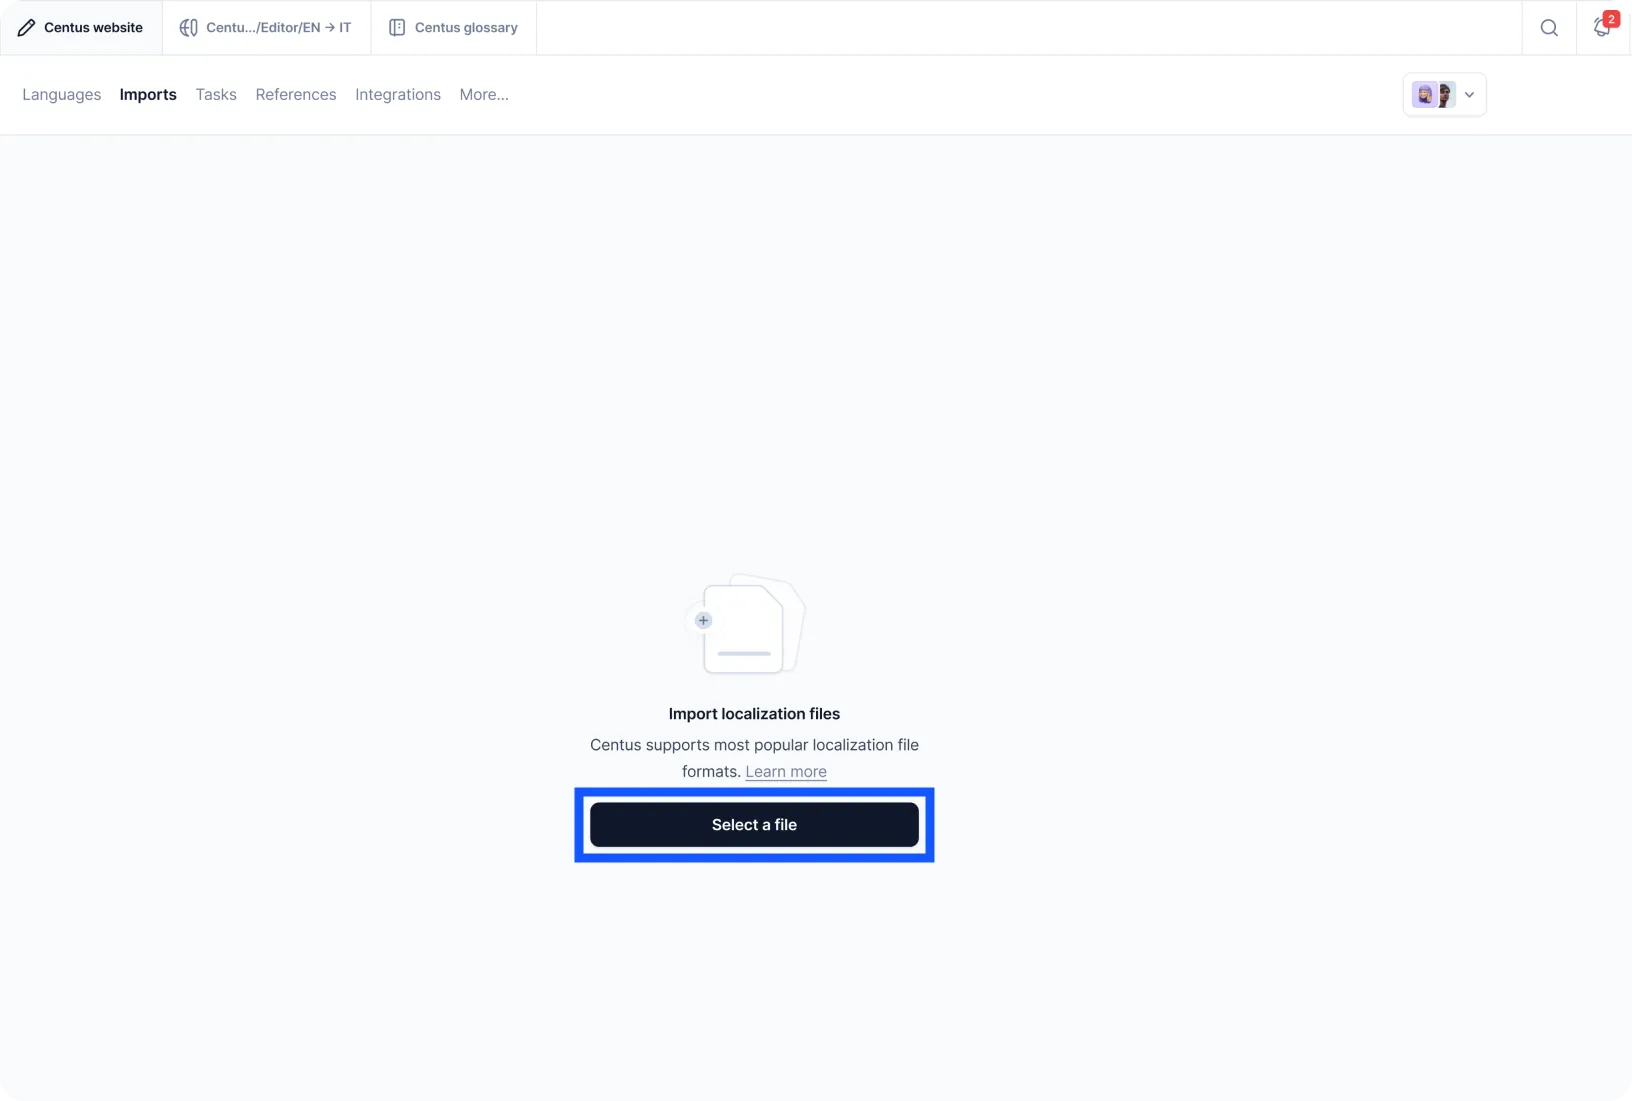
Select your source and target language, and proceed to the Imports section. Here, you can drag and drop your JSON files.
The localization files will look like this in the Centus Editor:
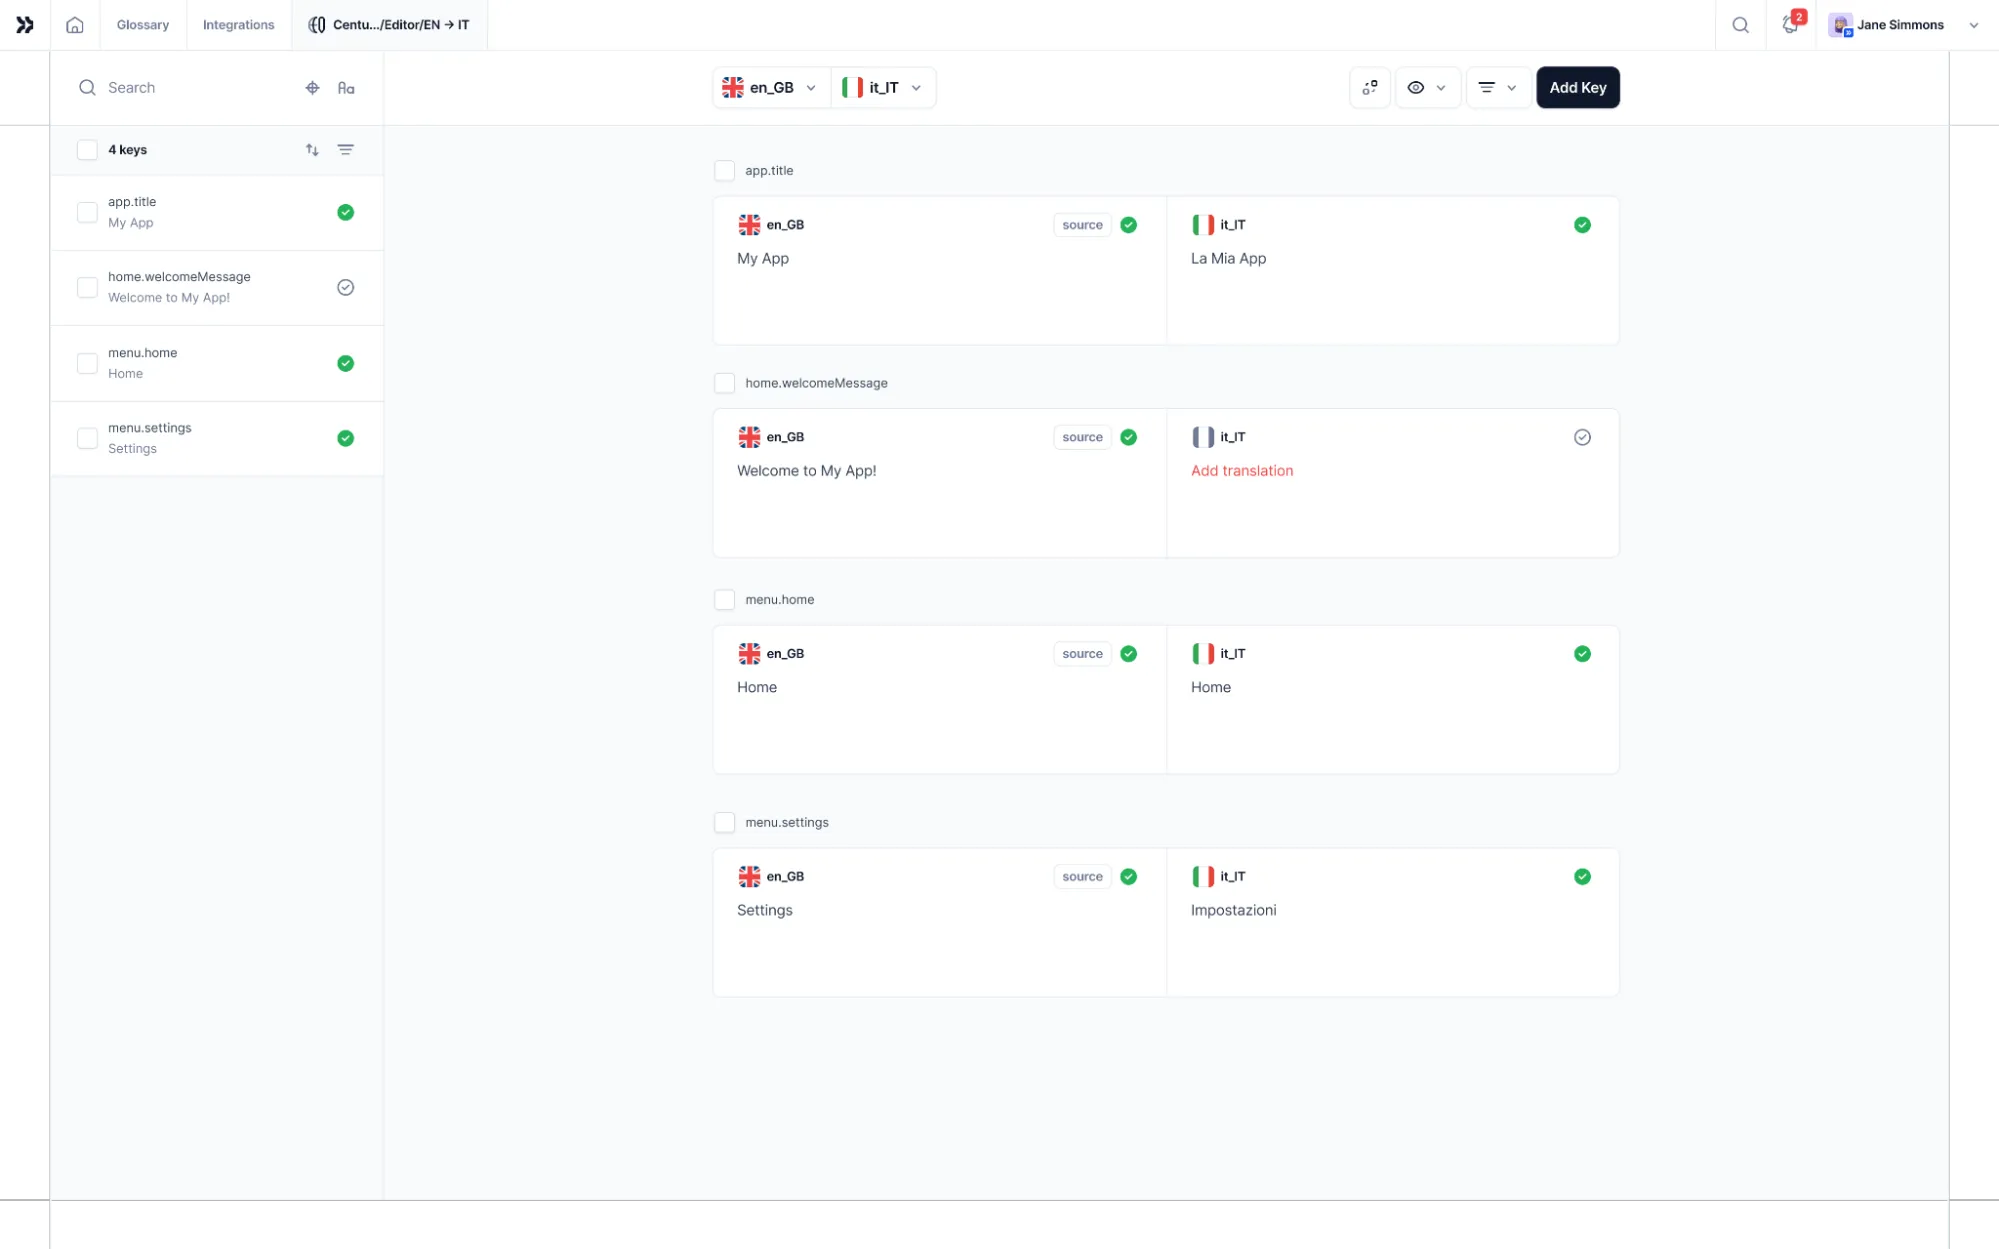
Note that Centus automatically filters out all code syntax elements, showing translators only translatable text. Super convenient!
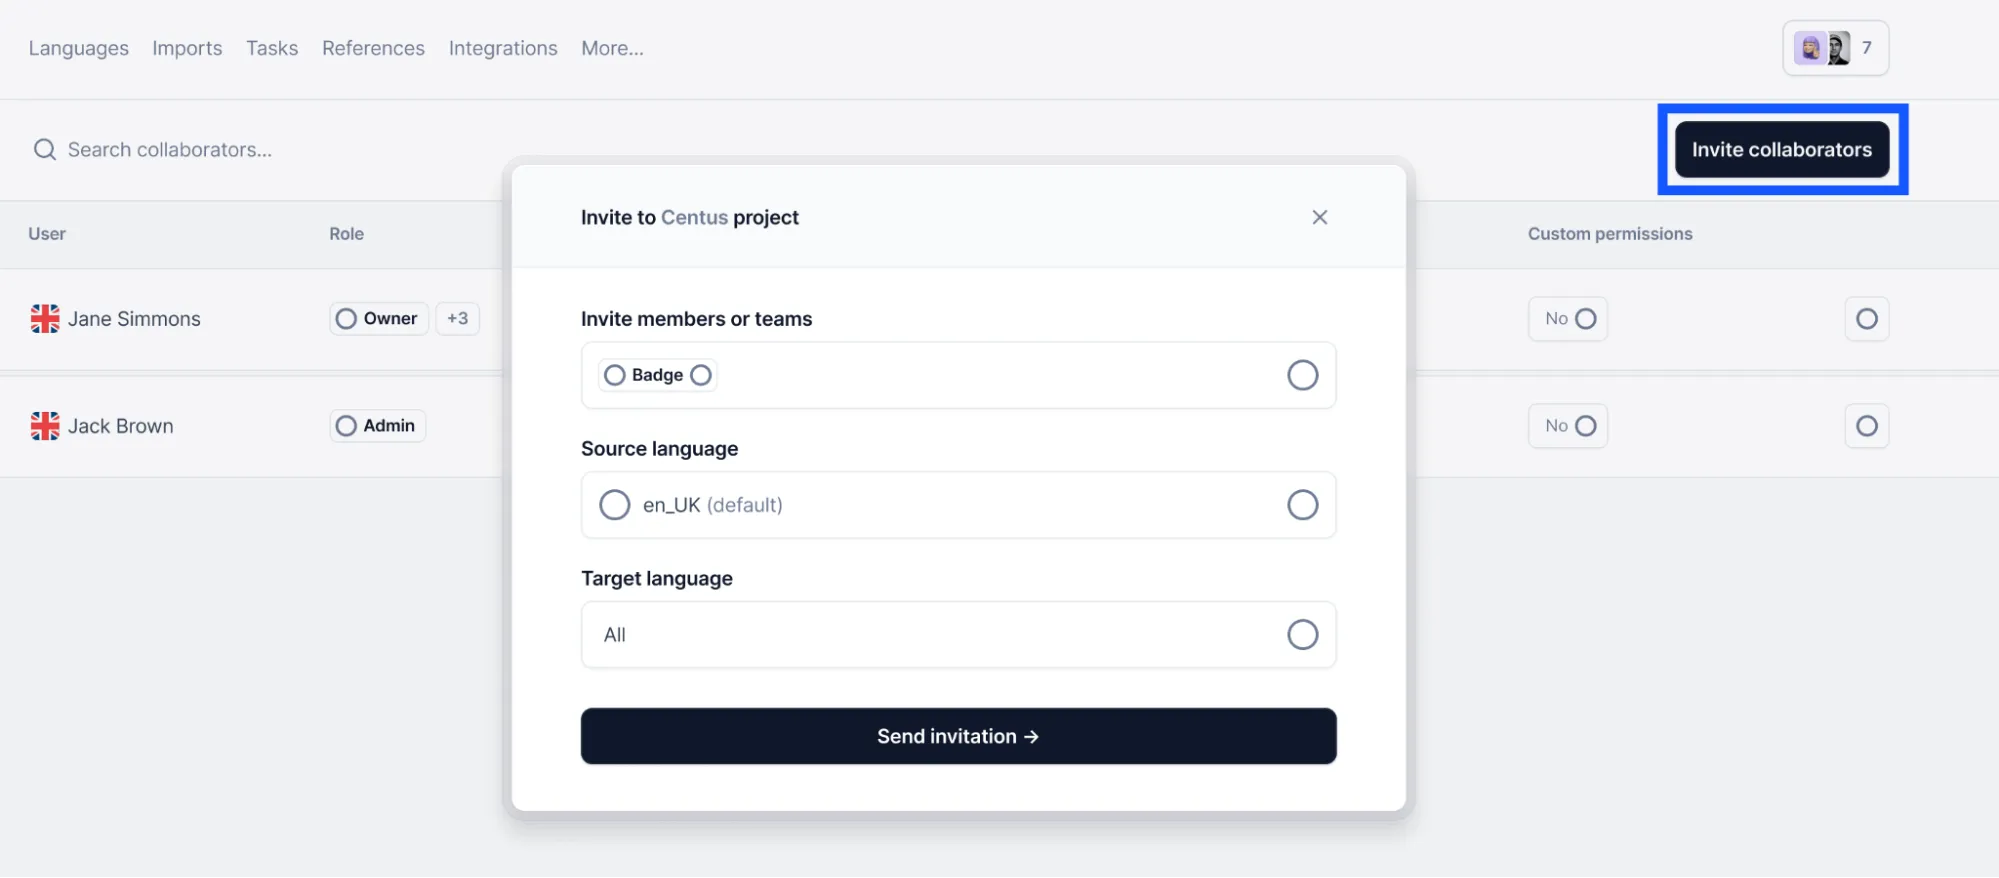
Now, let’s add translators and editors to your project.
Go to the Contributors section and click Invite collaborators.
📘 Relevant reading: How to hire translators
Once in, your language experts can use Google Translate, Microsoft Translator, or DeepL to generate automatic translations. Later, they can manually refine the translations saving your time and translation budget.
Encourage your translators, editors, and other team members to collaborate and share feedback. This helps prevent critical errors down the line.
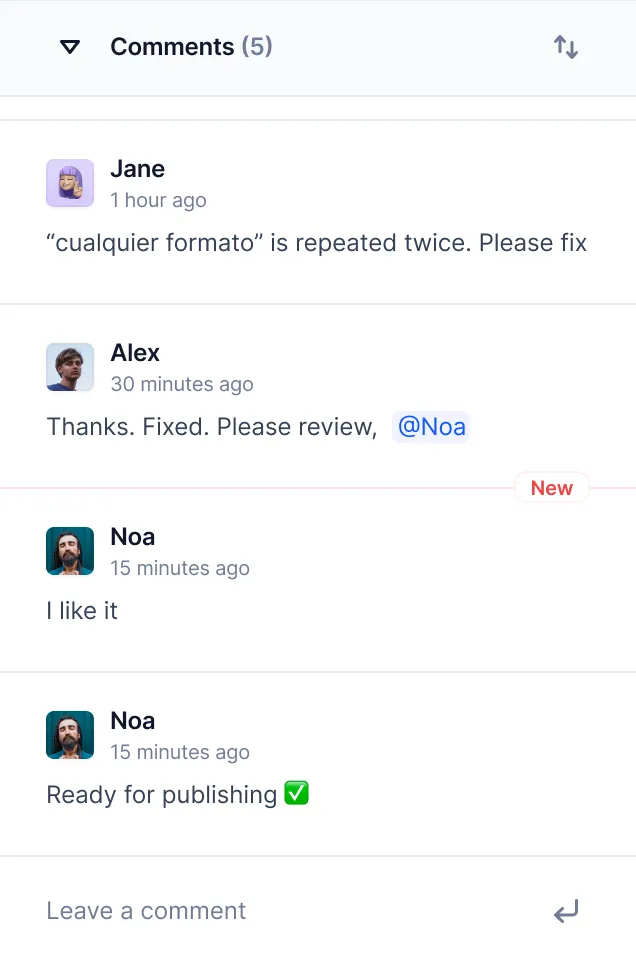
You can monitor your project progress in the Dashboard. For a granular view, review the translations in the Editor or use the Notification panel.

See how easy it is?
With Centus, you can organize localization of your NodeJS app into multiple languages simultaneously, which is crucial for sim-shipping.
Localization with Express.js
You won’t use vanilla Node.js to build an app.
Most developers use supporting runtimes like Express.js to simplify routing, handling POST requests, etc.
So let’s see how localization works here.
Step 1: Install express
Before we start working with Express, we need to install the Express package. For that, run the below command:
npm install express
After this is done, move to the next step.
Step 2: Update the app.js file to use Express.js routing
Now, let's modify our app.js file to use Express.
We’ll keep the same i18n localization setup from the previous example, but here, we’ll use Express to handle the server logic.
// app.js

const express = require('express');
const i18n = require('i18n');
const path = require('path');

// Create an Express application
const app = express();

// Configure i18n for localization
i18n.configure({
    locales: ['en', 'es'], // English and Spanish
    directory: path.join(__dirname, '/locales'),
    defaultLocale: 'en',
    objectNotation: true
});

// Initialize i18n middleware in the app
app.use(i18n.init);

// Route for the homepage
app.get('/', (req, res) => {
    const lang = req.query.lang || 'en';
    i18n.setLocale(lang);

    res.send(`
        <!DOCTYPE html>
        <html lang="${lang}">
        <head>
            <meta charset="UTF-8">
            <title>${i18n.__('title')}</title>
            <link rel="stylesheet" href="/styles.css">
        </head>
        <style>
        /* public/styles.css */
        body {
            font-family: Arial, sans-serif;
            margin: 0;
            padding: 0;
        }
        .navbar {
            background-color: #333;
            overflow: hidden;
        }
        .navbar a {
            float: left;
            display: block;
            color: #f2f2f2;
            text-align: center;
            padding: 14px 16px;
            text-decoration: none;
        }
        .navbar a:hover {
            background-color: #ddd;
            color: black;
        }
        .container {
            padding: 60px 20px;
            text-align: center;
        }
        h1 {
            font-size: 50px;
        }
        p.subtitle {
            font-size: 24px;
            color: #555;
        }
        .cta-button {
            background-color: #28a745;
            color: white;
            padding: 15px 30px;
            font-size: 18px;
            border: none;
            cursor: pointer;
            margin-top: 30px;
        }
        .cta-button:hover {
            background-color: #218838;
        }
        .language-switcher {
            margin-top: 40px;
        }
        .language-switcher a {
            margin: 0 10px;
            text-decoration: none;
            color: #007bff;
        }
        .language-switcher a:hover {
            text-decoration: underline;
        }
        </style>
        <body>
            <div class="navbar">
                <a href="#">${i18n.__('nav.home')}</a>
                <a href="#">${i18n.__('nav.about')}</a>
                <a href="#">${i18n.__('nav.contact')}</a>
            </div>
            <div class="container">
                <h1>${i18n.__('header')}</h1>
                <p class="subtitle">${i18n.__('subtitle')}</p>
                <button class="cta-button">${i18n.__('cta')}</button>
                <div class="language-switcher">
                    <p>${i18n.__('instruction')}</p>
                    <a href="/?lang=en">English</a> | <a href="/?lang=es">Español</a>
                </div>
            </div>
        </body>
        </html>
    `);
});

// Start the Express server
const port = 3000;
app.listen(port, () => {
    console.log(`Server running at http://localhost:${port}/`);
});
So, what did I change?
- Express setup: I replaced the http.createServer function with express(), which simplifies routing and request handling.
- Routing: The code now uses app.get() to define the route for our homepage, which is a more maintainable way of handling routing than Node’s http.createServer((request, response)
- i18n middleware: Instead of calling i18n.setLocale() manually on each request, we use i18n.init middleware to handle localization behind the scenes.
Step 3: Re-run the app
Now, you can re-run your app with Express:
node app.js
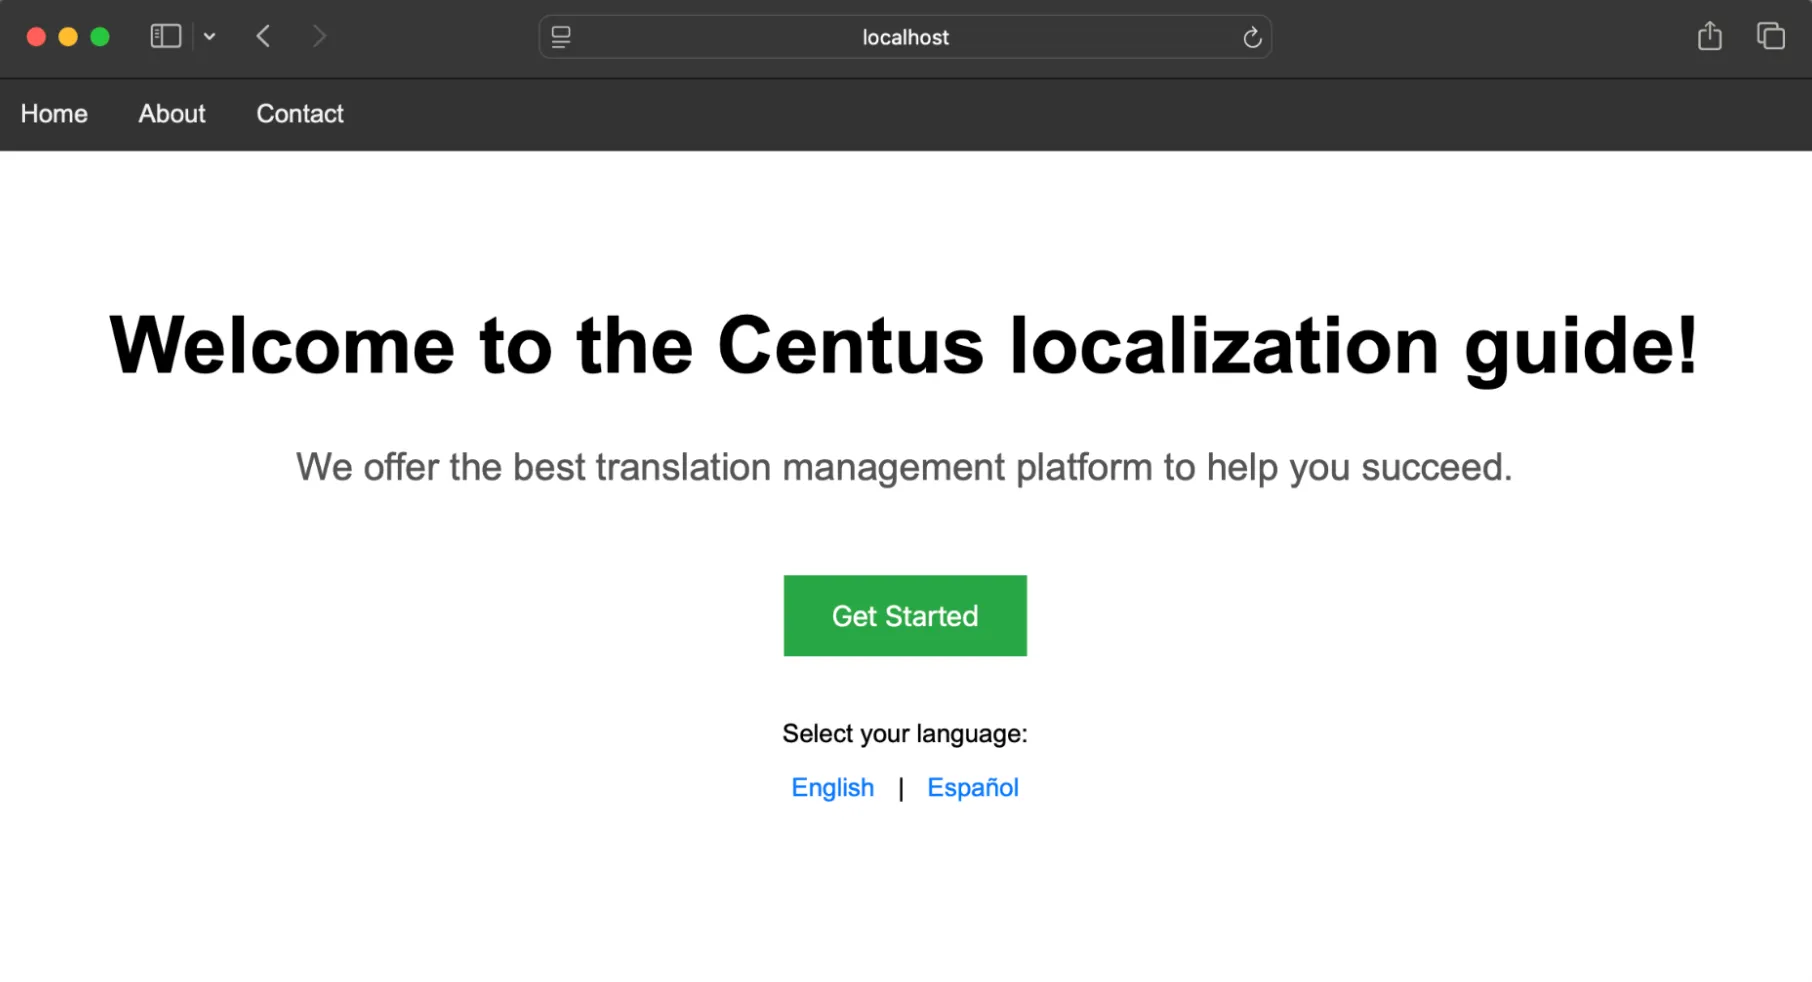
If all went well, you should see the exact same page as before on the localhost:3000 address.
Advanced localization with Node.js
As I mentioned earlier, localization is more than just translating text. In this section, let’s look at some of the nuances of localization for Node.js apps.
Date formatting
Different regions have different ways of displaying dates. In the U.S., the month comes first (MM/DD/YYYY), while in Europe, the day comes first (DD/MM/YYYY). We can use the date-fns library to format dates based on locale.
Luckily, most frameworks and programming languages offer libraries to handle this formatting.
Node.js (or Javascript in general) has the Intl.DateTimeFormat object that lets you create language-sensitive date formats. Since it’s built into the Javascript API, there’s no need to install additional libraries.
Modify the code as below:
... previous code remains the same...
// Route for the homepage
app.get('/', (req, res) => {
    const lang = req.query.lang || 'en';
    i18n.setLocale(lang);


// Add these new lines -- Get the current date and format it based on the locale
    const currentDate = new Date();
    const formattedDate = new Intl.DateTimeFormat(lang, { dateStyle: 'full' }).format(currentDate);
Now, add the below line just about the h1 tag in your HTML code:
<p><strong>${formattedDate}</strong></p>
And then, re-run your node app to see the date.
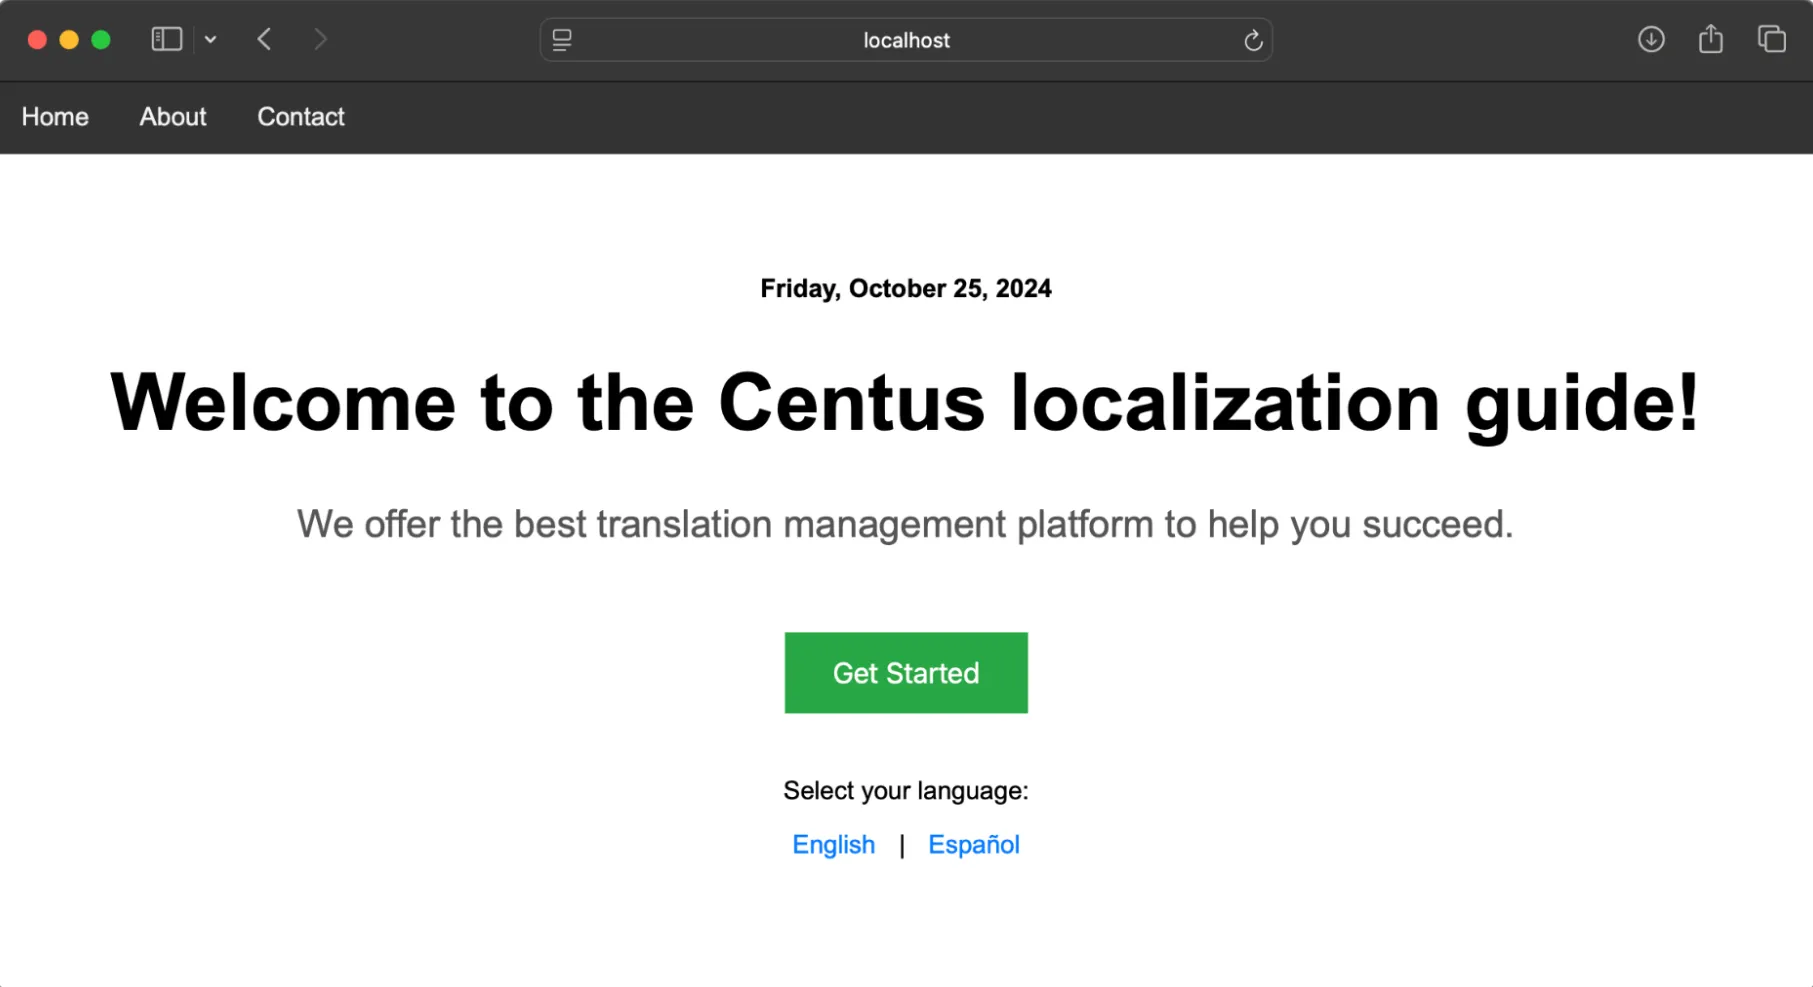
If you change the locale, the date format will get auto-translated and formatted without having to change anything in the JSON files.
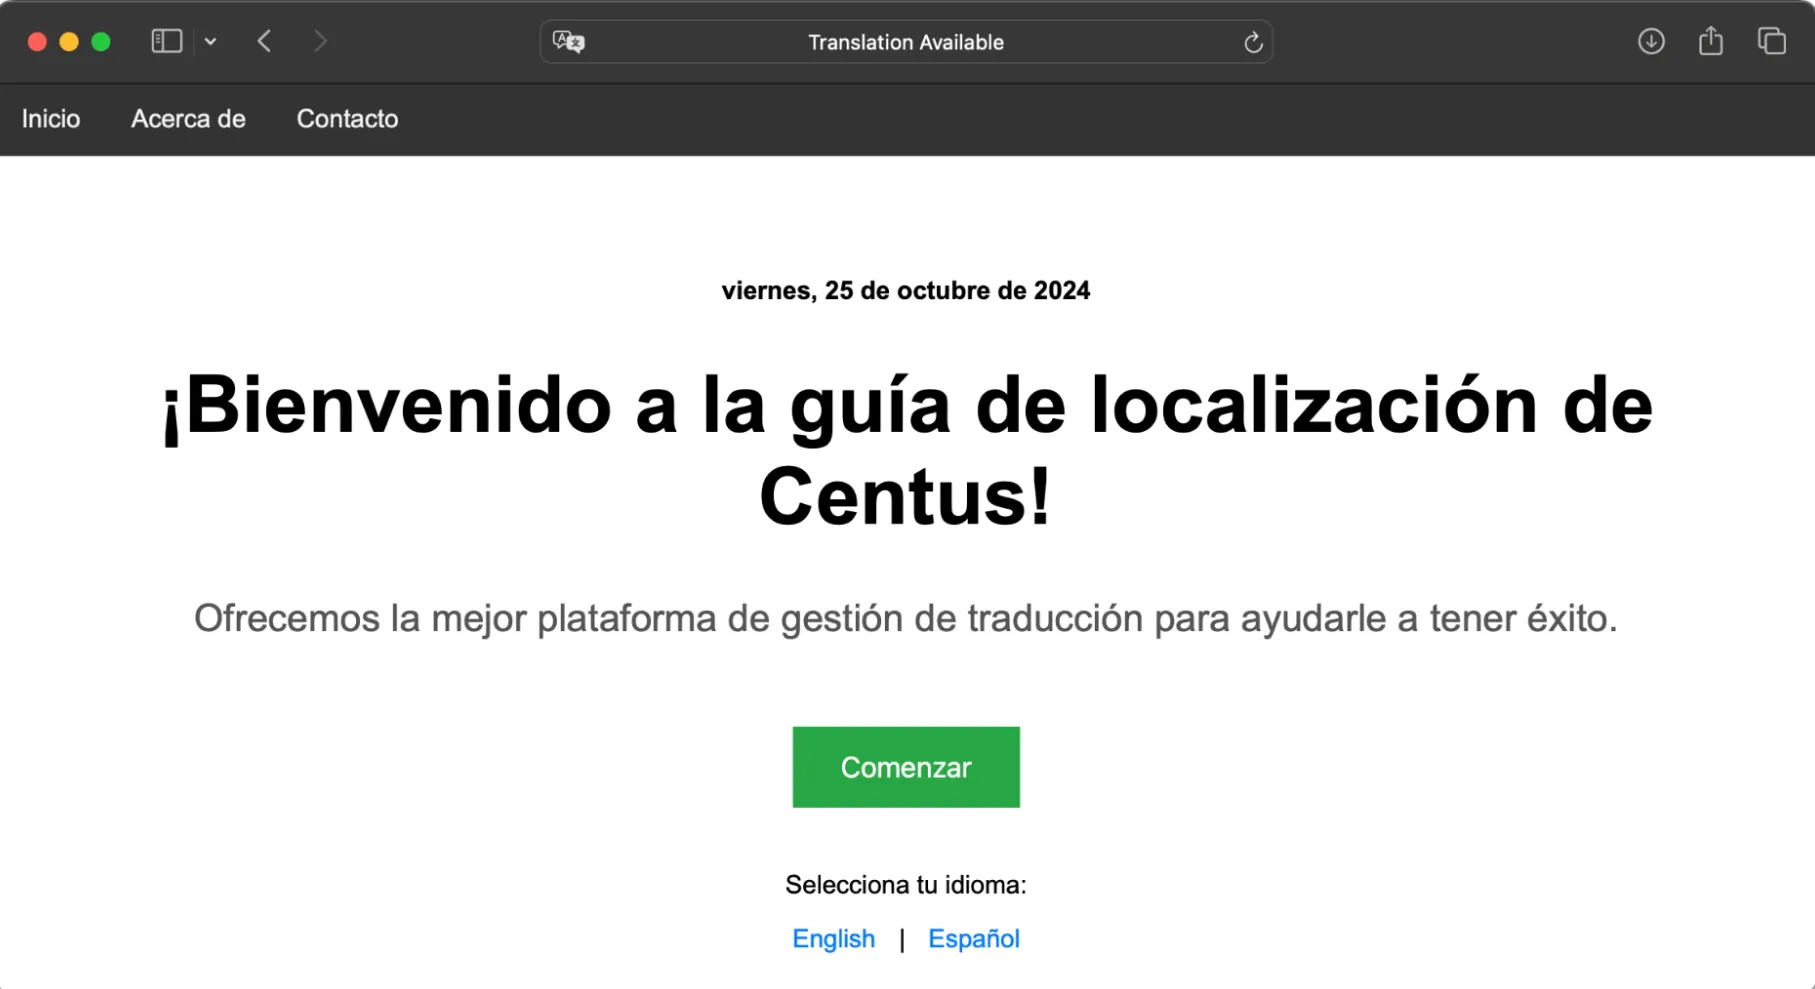
Saves a lot of time for us, doesn’t it?
Currency and number formatting
Similar to dates, different countries follow their own ways of handling and displaying currencies. For instance, in English, we a period (or a dot) to denote decimal places and commas to separate thousands.
In Spain, however, the order is reversed. A comma is used for decimal places and dots are used for separating thousands.
Do you need to hard-code all of these differences for each locale?
Luckily, no! Thanks to the developers maintaining these formatters, we simply need to pass the value and locale to the Intl.NumberFormat method and it’s good to go.
Just like we did for date formatting, add the following lines of code:
  // Get the current date and format it based on the locale
    const currentDate = new Date();
    const formattedDate = new Intl.DateTimeFormat(lang, { dateStyle: 'full' }).format(currentDate);

     // NEW CODE

    // Currency Formatting (example price)
    const price = 1234.56;
    const formattedPrice = new Intl.NumberFormat(lang, { style: 'currency', currency: lang === 'es' ? 'EUR' : 'USD' }).format(price);

    // Number Formatting (example large number)
    const largeNumber = 9876543210;
    const formattedNumber = new Intl.NumberFormat(lang).format(largeNumber);
I’ll also add these two pieces of HTML just below the date:
<p><strong>${i18n.__('price')}: ${formattedPrice}</strong></p>
<p><strong>${i18n.__('largeNumber')}: ${formattedNumber}</strong></p>
You’ll notice that I’ve added a price and largeNumber i18n variable here. Append the following lines to each of the locale JSON files that we created.
locales/en.json
"price": "Product Price",
"largeNumber": "Large Number"
locales/es.json
"price": "Precio del producto",
"largeNumber": "Número grande"
And then re-run your Node app. You’ll now see the large number and currency right below the date.
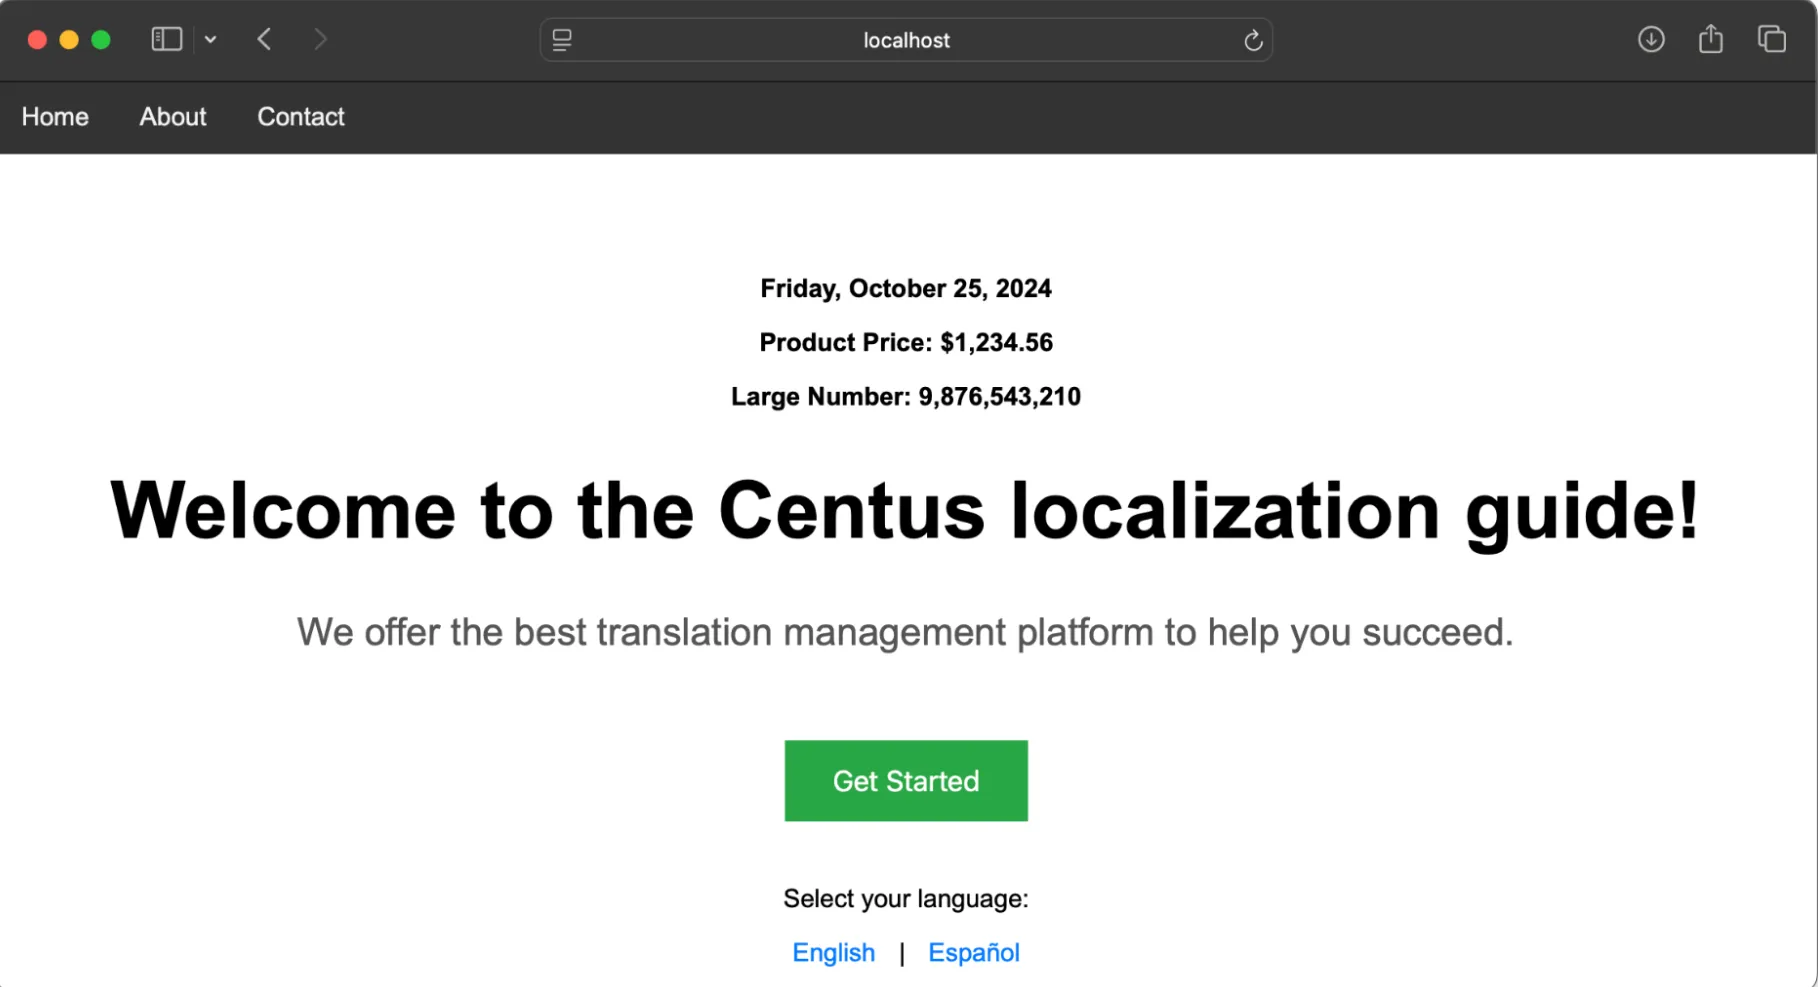
If you switch the locale, the large number and currency will automatically update the format to meet the new locale requirements.
Pluralization
Alright, we’re onto the tricky part of localization. Most modern languages use just two forms of plurals—one and many.
If it’s one user, we’ll say “one user,” and for any more than 1 user, we’ll say “{number} users.”
But some languages, like Arabic and Welsh, have six forms of plurals.
We do have the pluralize library to handle plurals across different languages. However, in this example, I’ll be showing you how you can do this with nested JSON.
Once you understand the mechanics, you can choose to use the pluralized library or continue with the nested JSON method.
Add these lines right below the "largeNumber" line in our locales JSON files.
locales/en.json
"items": { "one": "You have one item", "other": "You have %s items" }
locales/es.json
"items": { "one": "Tienes un artículo", "other": "Tienes %s artículos" }
That prepares our locale files to respond with the appropriate pluralized sentences.
Now, update the app.js with the following code:
const formattedNumber = new Intl.NumberFormat(lang).format(largeNumber);

// Add these lines below the formattedNumber variable line
const itemCount = 3; // Change this number to test pluralization
const pluralMessage = i18n.__n('items', itemCount);
I’m adding this right below our number formatter code we added in the previous example.
Finally, update the HTML with this line:
<p>${pluralMessage}</p>
And voila! You’ll now see the appropriate pluralized text depending on the selected locale. You can play around with the variable:

👉 Did you notice that our date, currency, and numbers have also switched to the appropriate format as per the locale?
Using the pluralize library for pluralization
If you’d rather make things simpler, you should consider using pluralize.
Here’s a simple example of how I’d implement it.
First, install the pluralize package.
npm install pluralize
Then, add these lines to the app.js instead of the ones we used while manually pulling pluralized sentences from our JSON.
// Plural Handling with `pluralize`
const itemCount = 5; // Example: you can modify this number
const pluralMessage = pluralize(i18n.__('item'), itemCount, true);
The pluralize() function takes three arguments:
- the word to be pluralized (in this case, i18n.__('item'))
- the count (itemCount)
- a boolean that decides whether to prepend the count.
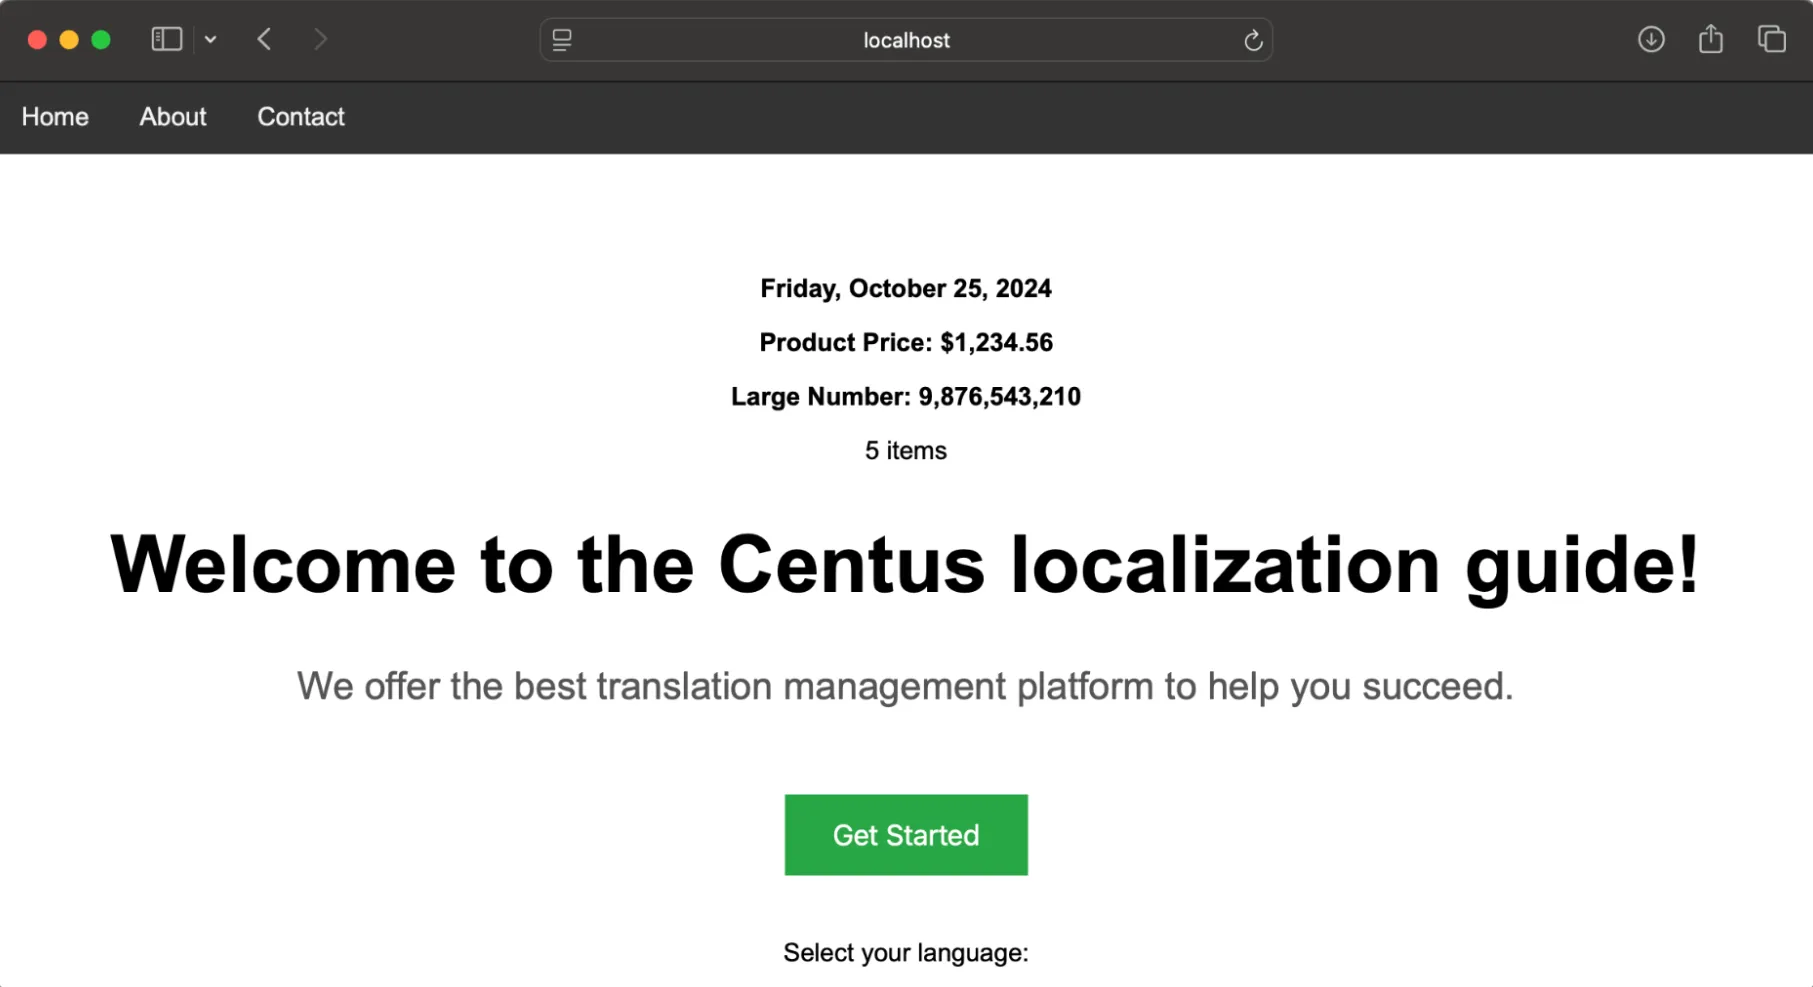
The output will be 5 items for English or 5 artículos for Spanish.
In the JSON file, just add the key-value pair for the key “item” as I’ve done here:
// locales/en.json
    "item": "item"
// locales/es.json
    "item": "artículo"
And that’s it.
Now, you can play around with the itemCount variable (or update it dynamically as required), and the pluralize package will find the appropriate plural for the word you’ve passed as the value for the “item” key.
Gendered words and sentences
This part is quite similar to how I’ve handled plurals using nested JSON. Add the below lines right after your last key-value pair in the JSON files.
// en.json
"welcome": {
   "male": "Welcome, Mr. %s",
   "female": "Welcome, Ms. %s"
}


// es.json
"welcome": {
  "male": "Bienvenido, Sr. %s",
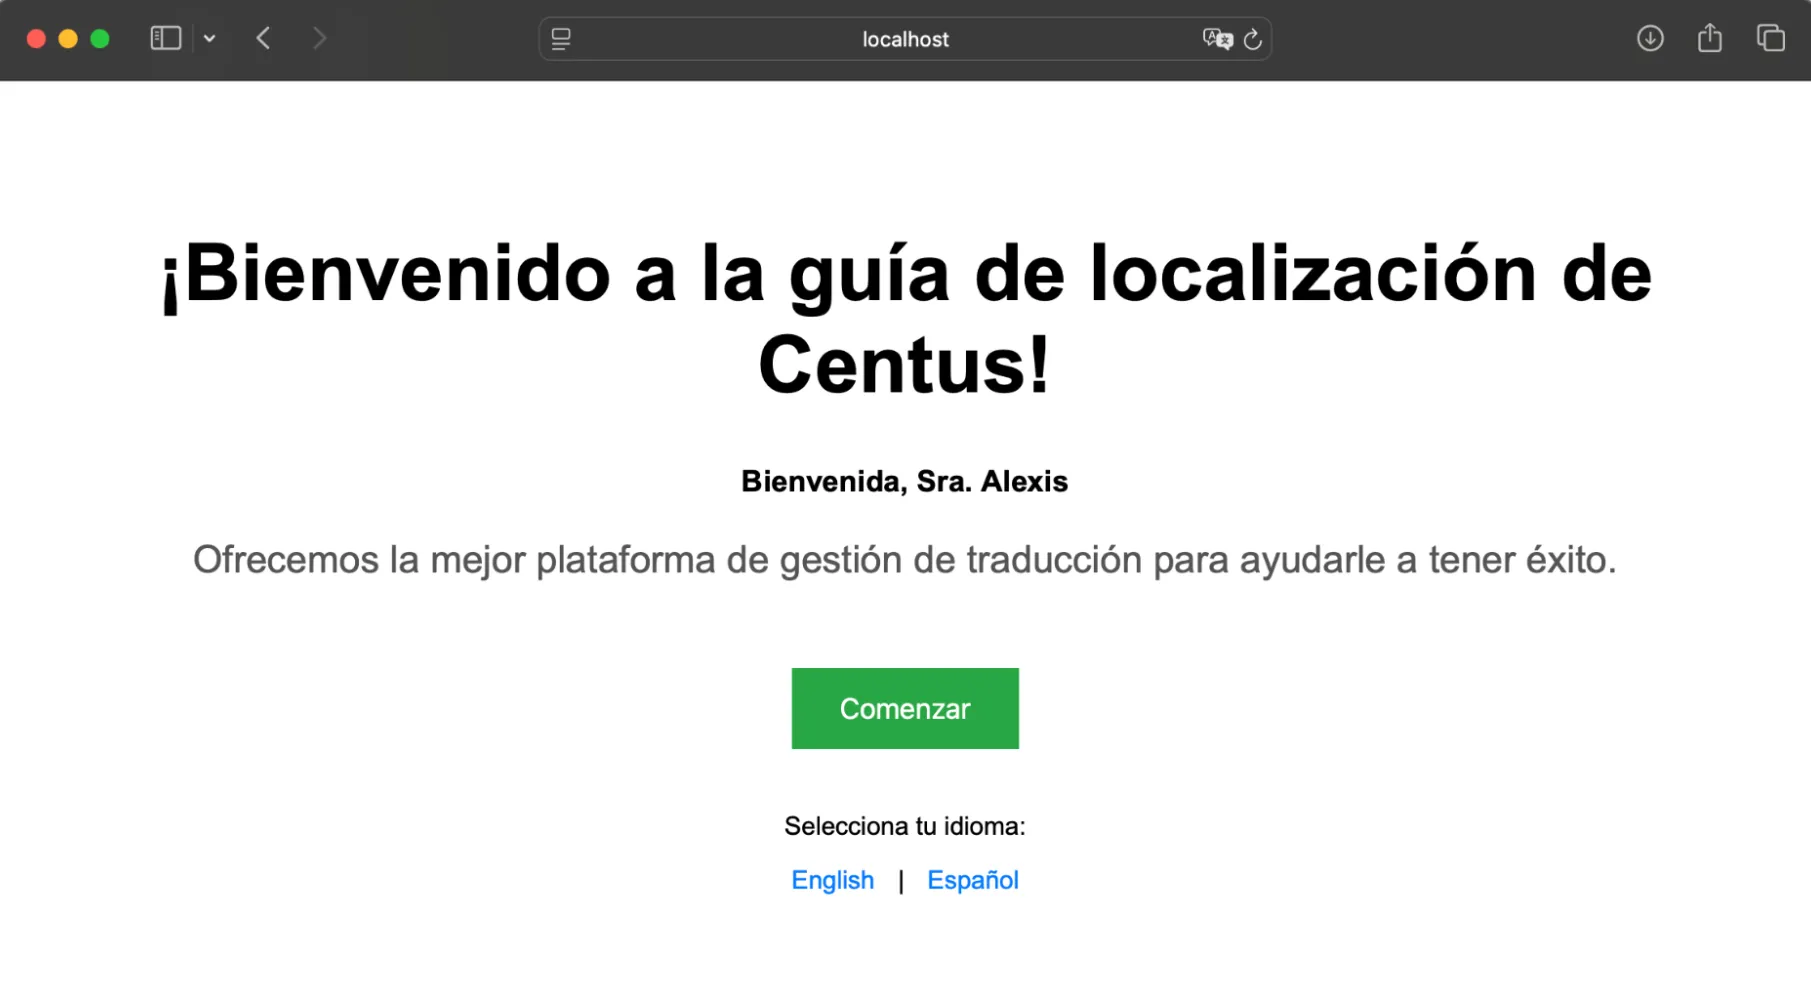
  "female": "Bienvenida, Sra. %s"
}
I’ve also cleaned up the HTML and removed the date, currency, largeNumber, and plural examples to give us a cleaner front-end.
Add these lines right above the res.send variable:
const name = "Alexis";
const gender = 'female'; // Change this to 'female' to test

const welcomeMessage = i18n.__(`welcome.${gender}`, name);
And to have the welcomeMessage displayed, I’ve added the variable as a heading 3 under our H1 tag.
<h3>${welcomeMessage}</h3>
If all goes well, you’ll see the page gets updated with the appropriate gendered sentence and title:
Wrapping up
Localization transforms an app into something familiar, something that speaks to users in their own language and breathes their culture.
When done right, it builds trust and increases user engagement.
Hopefully, my guide will make your localization journey a bit easier, helping you handle dates, currencies, pluralization, and gender-specific terms.
As for NodeJS translation, you already know how to handle it:
Get the week's best content!
By subscribing, you are agreeing to have your personal information managed in accordance with the terms of Centus Privacy Policy ->
Keep learning
30 min. read
Your Complete Guide to Django i18n
19 min. read
Laravel Localization: A Step-by-Step Guide
19 min. read
NextJS Internationalization: A Complete Walkthrough
18 min. read
JavaScript Localization Guide for Web Apps
25 min. read
Vue i18n and Localization: How to Localize a Vue App
29 min. read