I've written extensively about localization.
React, Vue, Next.js—you name it, I’ve covered it.
I also wrote a practical PHP localization guide recently. But I haven’t had the chance to try the most popular PHP framework, Laravel.
This comprehensive guide is my attempt to fill that gap.
I’ve thoroughly studied the Laravel framework, which is powerful and elegant in equal measure, making me wonder why I waited so long to try it.
I've documented the entire process, going from the basics of creating a Laravel app and localizing it to some of the advanced methods for localizing. Hopefully, it will shorten your learning curve.
But first, the basics:
Why does localization matter?
Because your users matter.
You localize your app to create the best possible experience for your international users. In turn, they engage more with your app and spread the word around helping you get more app downloads.
But is it worth the hassle?
Let me visualize my response with this bar chart from Statista 👇

The bar chart shows app downloads by country. See how dispersed the downloads are?
By focusing on a single locale, you condemn your app to remain in the shadows, seen only by a fraction of the market.
To sum up, Laravel localization can improve user experience and increase app downloads.
Sounds like something you might want?
Let’s get started!
How to localize a Laravel app
For starters, make sure the system you’re working on has the following prerequisites all set up.
Prerequisites
Here’s what you’ll need to have, ready on your device or server.
- Laravel 9.x or higher with all the dependencies installed
- Basic knowledge of Laravel and PHP
- An IDE of your choice
Preliminary step: Installing Laravel
Let me quickly take you through the commands to install Laravel if you don’t already have it.
You need to have PHP and Composer installed along with Laravel.
Depending on your operating system, run one of the following commands and follow the prompts to complete the installation:
MacOS
/bin/bash \-c "$(curl \-fsSL https://php.new/install/mac)"
Linux
/bin/bash \-c "$(curl \-fsSL https://php.new/install/linux)"
Windows Powershell
Set-ExecutionPolicy Bypass \-Scope Process \-Force; \[System.Net.ServicePointManager\]::SecurityProtocol \= \[System.Net.ServicePointManager\]::SecurityProtocol \-bor 3072; iex ((New-Object System.Net.WebClient).DownloadString('https://php.new/install/windows'))
Apart from this, you also need Node and NPM installed to be able to compile the front-end assets of your projects.
If you prefer a single package that combines all the requirements into one, go with Laravel Herd. It simplifies the process, and you can be sure you are all set to proceed.
Once you’re ready and can run Laravel apps, you can move to the first step.
Step 1: Creating a sample application
To demonstrate the localization process, I’ll create a simple Laravel application.
laravel new centus-laravel-localization
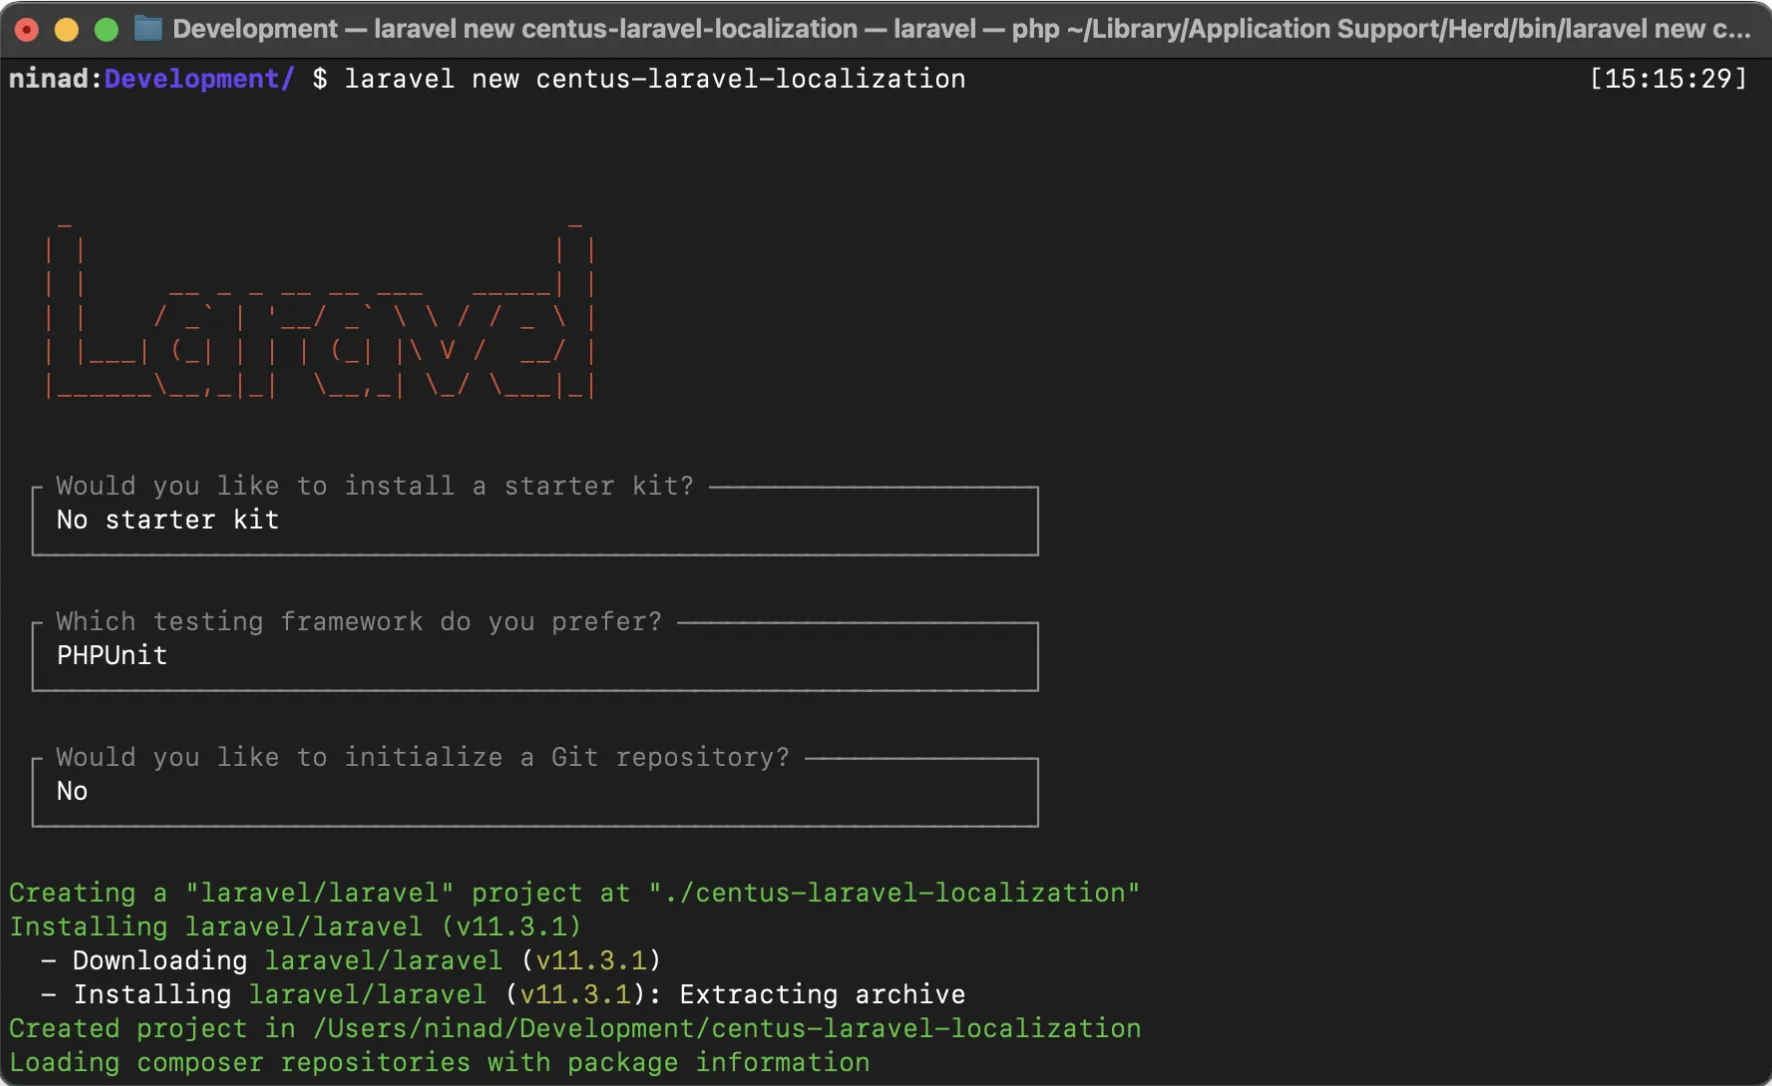
If everything goes smoothly, you should see the new Laravel project folder in your current directory.
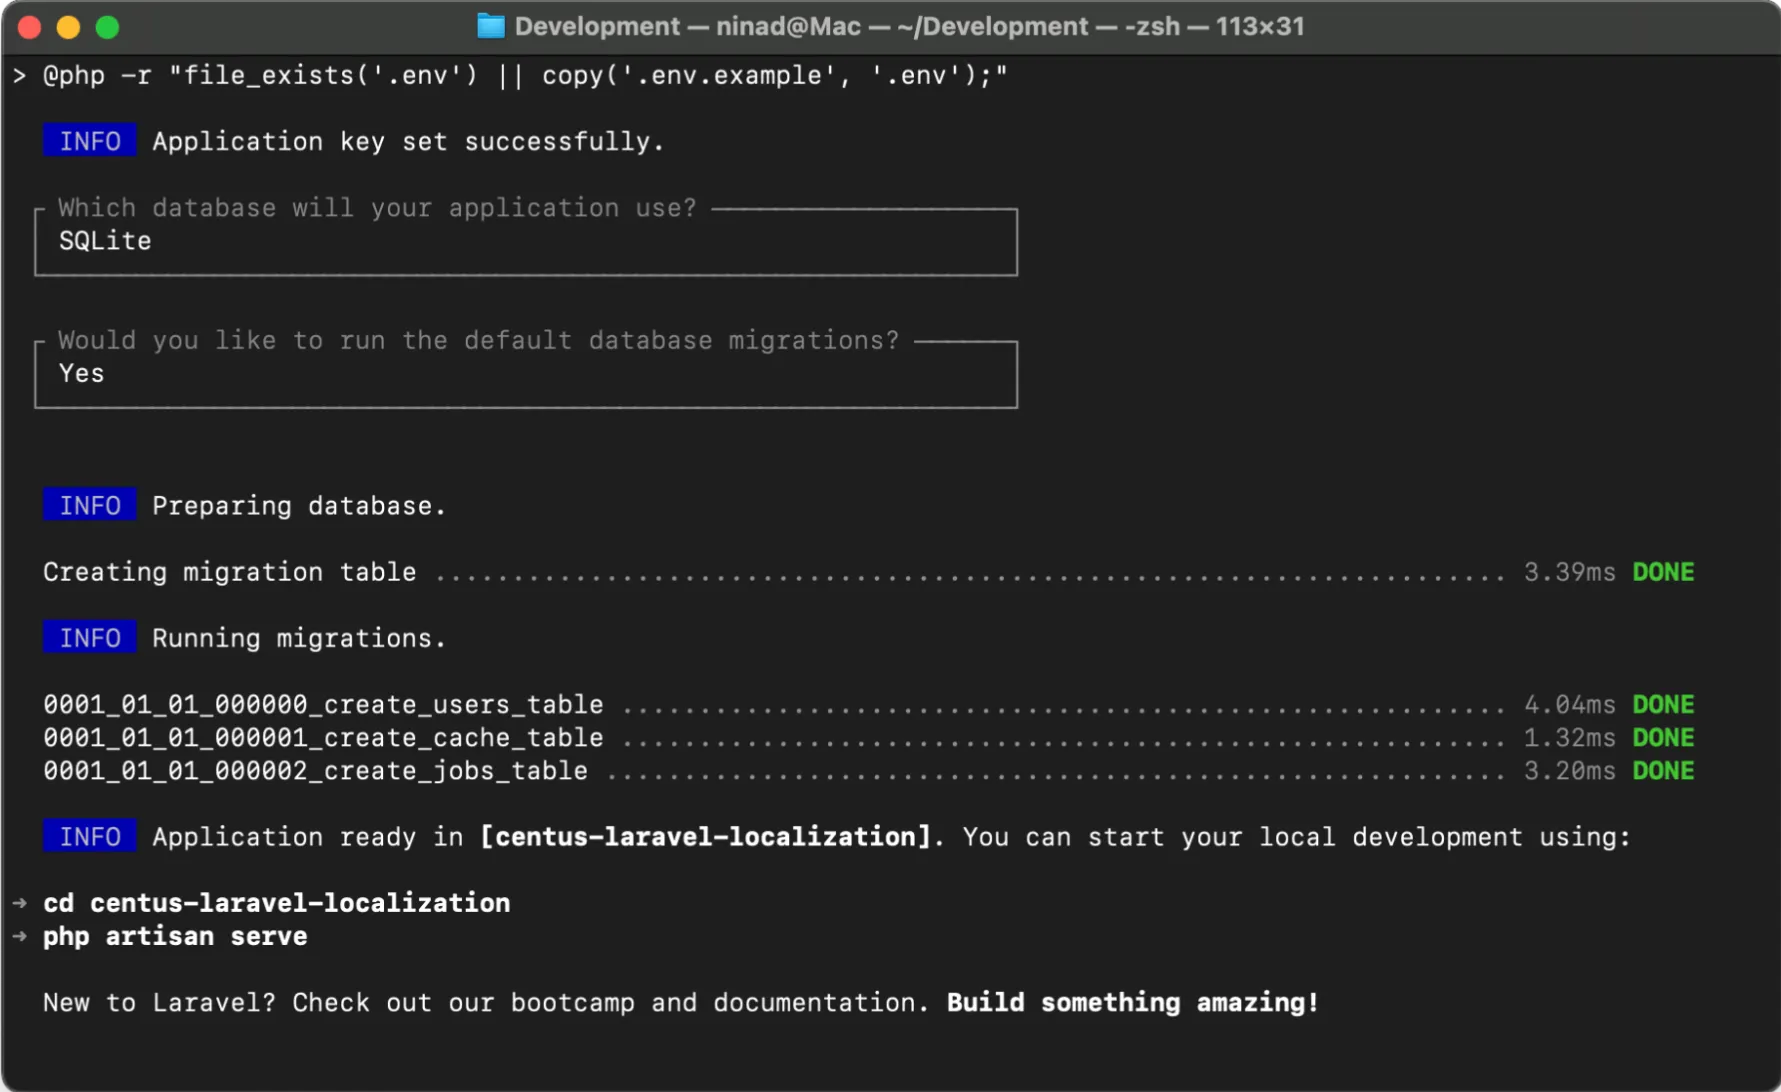
Now you can cd into the directory and serve the PHP application to see the default page.
Step 2: Configuring localization
Okay, we now have the area that has all the basic files that the Laravel app needs. We need to set up the settings for translating.
The settings for Laravel are stored in the config/app.php file, under the “locale configuration” section.
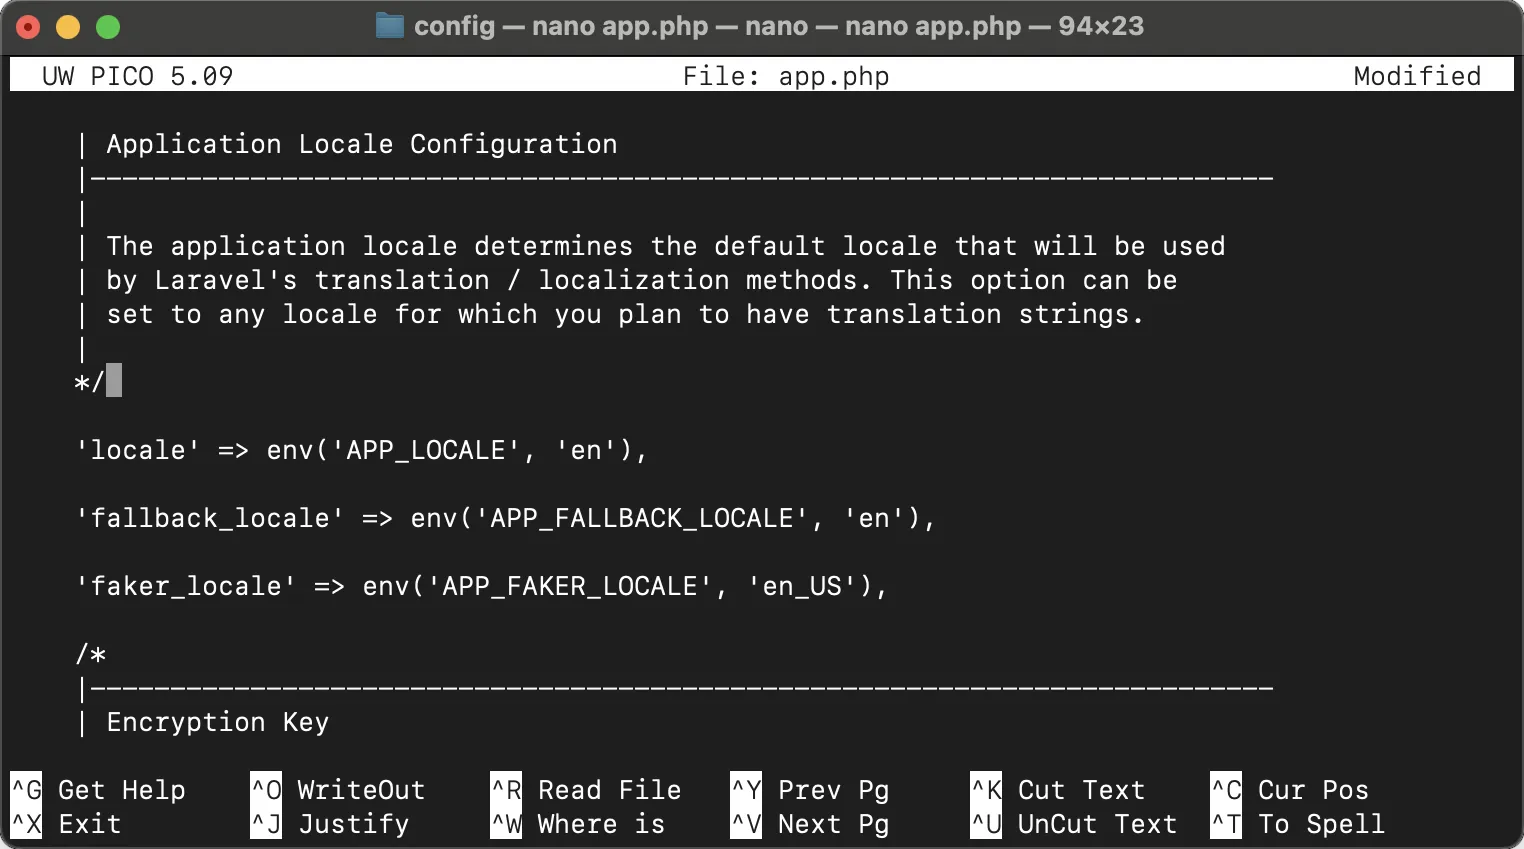
The default locale is set to en, meaning it’s in English. You can change it to a different locale, like Spanish (es), French (fr), etc.
If you want your app to be available in more than one language (I mean, isn't that why you're reading this article?) you need to decide which languages or locales those will be.
In the same config/app.php file, under the locale configuration section, make sure that you have the following lines of code:
'locale' => env('APP_LOCALE', 'en'),

'fallback_locale' => env('APP_FALLBACK_LOCALE', 'en'),

'faker_locale' => env('APP_FAKER_LOCALE', 'en_US'),

'available_locales' => [
    'English' => 'en',
    'Español' => 'es',
    'Français' => 'fr',
],
I'm working with three languages here: English, Spanish, and French.
You can add as many or as few languages to the array as you need.
Step 3: Creating the language files and resources
Laravel makes it easy to store and read translations using language files. I’ll kick things off by making a folder for each locale we’re going to work with.
You usually find these language files in the resources/lang directory of existing Laravel apps.
If you don’t have this directory yet, go ahead and create one at the root of your app.
Now, there are two ways to achieve the same result:
-
You can create individual folders for each locale and then add a messages.php file inside them
-
You can create {locale}.json files
I’ll be using the second approach here since JSON files are easier to work with when translating larger applications. You can use translation management systems to handle these JSON files and make localization easier.
Here’s my file structure inside the resources directory:
resources/lang/en.json
resources/lang/es.json
resources/lang/fr.json
Let’s add the required translation key-value pairs to JSON files.
resources/lang/en.json
{
    "Welcome to Centus localization demo": "Welcome to Centus localization demo",
    "Menu": "Menu",
    "Home": "Home",
    "About": "About",
    "Contact": "Contact",
    "Services": "Services",
    "Select Language": "Select Language",
    "Welcome, :name": "Welcome, :name"
}
resources/lang/es.json
{
    "Welcome to Centus localization demo": "Bienvenido a la demostración de localización de Centus",
    "Menu": "Menú",
    "Home": "Inicio",
    "About": "Acerca de",
    "Contact": "Contacto",
    "Services": "Servicios",
    "Select Language": "Seleccionar Idioma",
    "Welcome, :name": "Bienvenido, :name"
}
resources/lang/fr.json
{
    "Welcome to Centus localization demo": "Bienvenue à la démonstration de localisation de Centus",
    "Menu": "Menu",
    "Home": "Accueil",
    "About": "À propos",
    "Contact": "Contact",
    "Services": "Services",
    "Select Language": "Choisir la Langue",
    "Welcome, :name": "Bienvenue, :name"
}
The keys are the full-text snippets in the default language, and the values are the full translation for the values. However, if you have a standardized naming convention within your organization, you can always replace the keys with those names.
The keys here are simply variables that we’ll use in the front-end HTML code, and they will be used to pull the associated translation.
Step 4: Setting up the middleware
To make things simpler for the end user, I’m going to create a middleware that detects the user’s locale based on their browser settings.
Laravel provides an easy way to generate middleware using the Artisan command.
Run the following command in your terminal while in your app directory:
php artisan make:middleware LocaleMiddleware
You’ll see that our middleware has been created successfully in a file named LocaleMiddleware.php in the app/Http/Middleware directory.
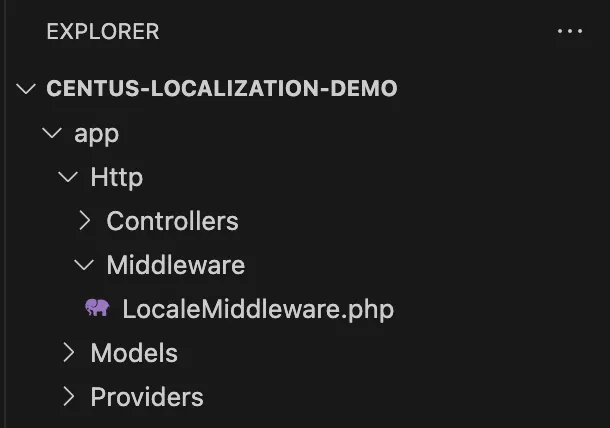
I’ll now replace the content inside the middleware file to work with our file structure and code.
Open the LocaleMiddleware.php file and replace it with the following code:
<?php
namespace App\Http\Middleware;

use Closure;
use Illuminate\Support\Facades\App;
use Illuminate\Support\Facades\Session;

class LocaleMiddleware
{
    public function handle($request, Closure $next)
    {
        if (Session::has('locale')) {
            App::setLocale(Session::get('locale'));
        }

        return $next($request);
    }
}
Here’s what this file does:
- It checks if there is a 'locale' key stored in the session by using Session::has('locale').
- If the locale is found in the session, the App::setLocale(Session::get('locale')) line sets the application's locale to that value.
- If not, it falls back to the default locale set for the fallback_locale variable
Step 5: Registering the middleware
Right now, this locale isn’t working across all the routes yet. We need to set our Kernel to use this middleware file.
Note: If you’re using anything below Laravel version 11, you’ll have a Kernel.php inside the app/Http directory. However, since Laravel 11, the kernel class has been eliminated and instead uses the bootstrap/app.php file for our middleware configuration.
So, I’ll update the withMiddleware method call to include our LocaleMiddleware class.
You can replace the code in the bootstrap/app.php file with the code below:
<?php

use App\Http\Middleware\LocaleMiddleware;
use Illuminate\Foundation\Application;
use Illuminate\Foundation\Configuration\Exceptions;
use Illuminate\Foundation\Configuration\Middleware;

return Application::configure(basePath: dirname(__DIR__))
    ->withRouting(
        web: __DIR__.'/../routes/web.php',
        commands: __DIR__.'/../routes/console.php',
        health: '/up',
    )
    ->withMiddleware(function (Middleware $middleware) {
        // Register LocaleMiddleware along with any other middleware
        $middleware->web(append: [
            LocaleMiddleware::class,
        ]);
    })
    ->withExceptions(function (Exceptions $exceptions) {
        // Custom exception handling if needed
    })
    ->create();
This configuration adds the LocaleMiddleware class to the web middleware group and applies it to all routes that use this group.
Step 6: Updating app routes to show the welcome view
While the default setup shows the welcome view just fine, we also have the language switcher that needs to pass the locale variable to the page.
To achieve this, we need to update the routing to handle locale switching and pass the locale variable to the session. This allows us to display the correct language on the welcome page.
Change the code in your routes/web.php file with the following:
<?php
use Illuminate\Support\Facades\App;
use Illuminate\Support\Facades\Route;
use Illuminate\Support\Facades\Session;

Route::get('/', function () {
    return view('welcome');
});
// Locale route for switching language
Route::get('locale/{locale}', function ($locale) {

    // Check if the passed locale is available in our configuration
    if (in_array($locale, array_values(config('app.available_locales')))) {

         // If valid, store the locale in the session
         Session::put('locale', $locale);
    }
    // Redirect back to the previous page
    return redirect()->back();
});
This reads the locale value passed to in the URL /locale/{locale} and validates to check if the value exists in our available locales.
If yes, it will be added to the session variable, and the language is switched.
If the locale passed to the URL doesn’t exist—for instance, if I pass localhost:8000/locale/uk in the URL, the route will see that we don’t have the UK locale and will redirect to the previous page without changing anything.
Step 7: Creating a custom homepage to test localization
If you have followed me till here, congrats! You’re at the final step of localizing your Laravel app. Our translation files are ready; they’re being read by the code, and the locales are passed to the welcome page.
I just have one more thing for you—to update the welcome page so we can bring all of the functionality to it.
Right now, it will still show the default Laravel welcome page.
So, let’s replace the code in the default resources/views/welcome.blade.php file with the following code. I’ve added some CSS to make it pretty but you can choose to skip that.
<!DOCTYPE html>
<html lang="{{ str_replace('_', '-', app()->getLocale()) }}">
<head>
    <meta charset="UTF-8">
    <meta name="viewport" content="width=device-width, initial-scale=1.0">
    <title>{{ __('Localization Demo') }}</title>
    <style>
        body {
            font-family: Arial, sans-serif;
            margin: 0;
            padding: 0;
            display: flex;
            justify-content: center;
            align-items: center;
            height: 100vh;
            background-color: #f4f4f4;
        }
        .container {
            text-align: center;
        }
        h1 {
            font-size: 2.5rem;
            color: #333;
        }
        nav {
            background-color: #333;
            padding: 1rem;
        }
        nav ul {
            list-style: none;
            padding: 0;
        }
        nav ul li {
            display: inline;
            margin: 0 15px;
        }
        nav ul li a {
            color: #fff;
            text-decoration: none;
            font-weight: bold;
        }
        nav ul li a:hover {
            text-decoration: underline;
        }
        .language-switcher {
            margin-top: 20px;
        }
        .language-switcher select {
            padding: 10px;
            font-size: 1rem;
        }
    </style>
</head>
<body>
    <div class="container">
        <nav>
            <ul>
                <li><a href="#">{{ __('Home') }}</a></li>
                <li><a href="#">{{ __('About') }}</a></li>
                <li><a href="#">{{ __('Services') }}</a></li>
                <li><a href="#">{{ __('Contact') }}</a></li>
            </ul>
        </nav>

        <h1>{{ __('Welcome to Centus localization demo') }}</h1>

        <div class="language-switcher">
            <form id="localeForm">
                <label for="language">{{ __('Select Language') }}:</label>
                <select name="locale" id="language" onchange="changeLanguage()">
                    @foreach(config('app.available_locales') as $name => $locale)
                        <option value="{{ $locale }}" {{ app()->getLocale() == $locale ? 'selected' : '' }}>
                            {{ $name }}
                        </option>
                    @endforeach
                </select>
            </form>
        </div>
    </div>

    <script>
        function changeLanguage() {
            var locale = document.getElementById('language').value;
            window.location.href = '/locale/' + locale;
        }
    </script>
</body>
</html>
Here’s what the page would look like by default:
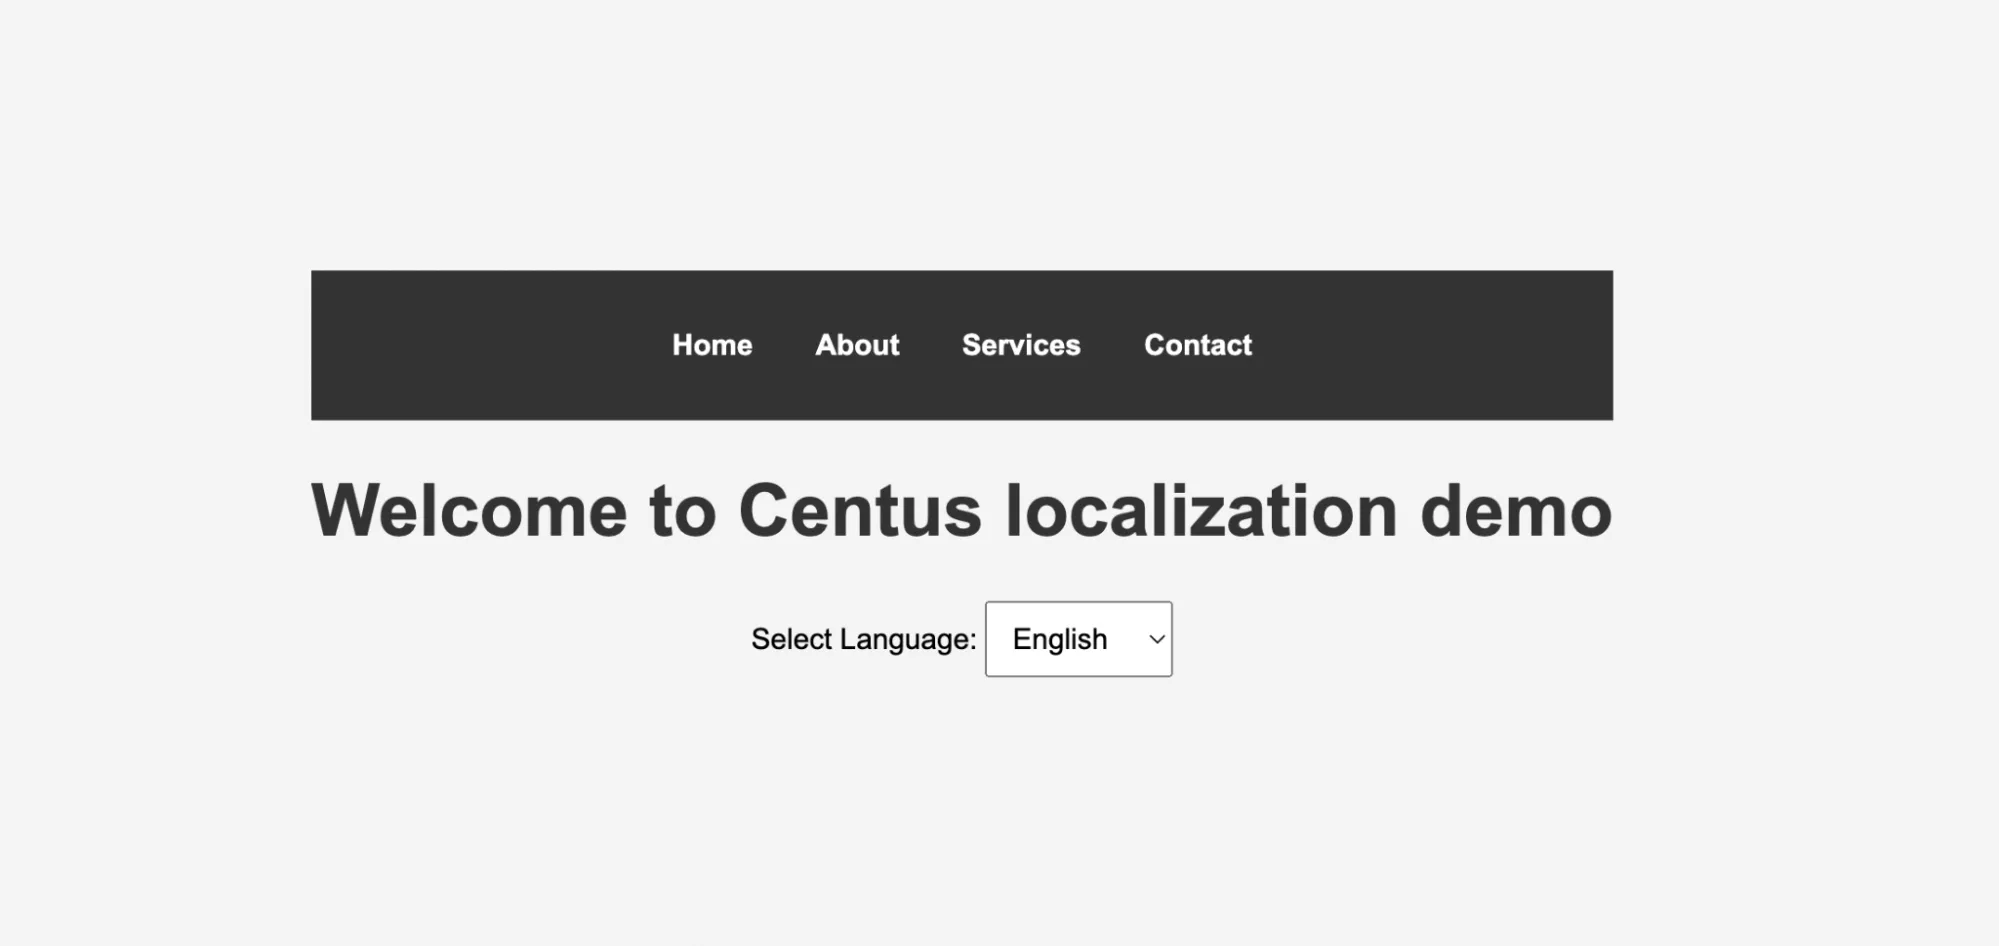
The above code does a lot of things.
- First, I’ve replaced all the hard-coded text with the keys from the language JSON files
- There’s a language switcher that dynamically pulls the locale names
- When the dropdown is changed, it switches to the locale-specific page, giving the user the content in their selected language
Now, if you switch the language to, say, Spanish, the page gets refreshed, and the new locale is used:

Advanced Laravel localization techniques
Awesome! You’re all set with the Laravel localization basics.
Now let’s move to some advanced localization methods that you would need to know to correctly localize your Laravel app.
Handling plurals
Different languages have varying pluralization rules. Our localized application needs to handle those forms well. For instance, if you want to display notifications, you need to use the right word for when there’s one notification, zero notifications, and multiple notifications.
Turns out, all this is quite simple, with the only effort being, finding the plural forms and adding the keys for them in our JSON files. Let me show you how I did it using the notification example.
Add the following line within your JSON file for each of the locales.
en.json
"You have :count notifications": "{0} You have no notifications|{1} You have 1 notification|[2,*] You have :count notifications"
es.json
"You have :count notifications": "{0} No tienes notificaciones|{1} Tienes 1 notificación|[2,*] Tienes :count notificaciones"
fr.json
"You have :count notifications": "{0} Vous n'avez aucune notification|{1} Vous avez 1 notification|[2,*] Vous avez :count notifications"
Now in your welcome.blade.php file, add the following lines of code:
{{ trans_choice('You have :count notifications', 0) }} <br>
{{ trans_choice('You have :count notifications', 1) }} <br>
{{ trans_choice('You have :count notifications', 5) }} <br>
I’ve added them right below the H1 tag and here’s what the output looks like for the English locale.
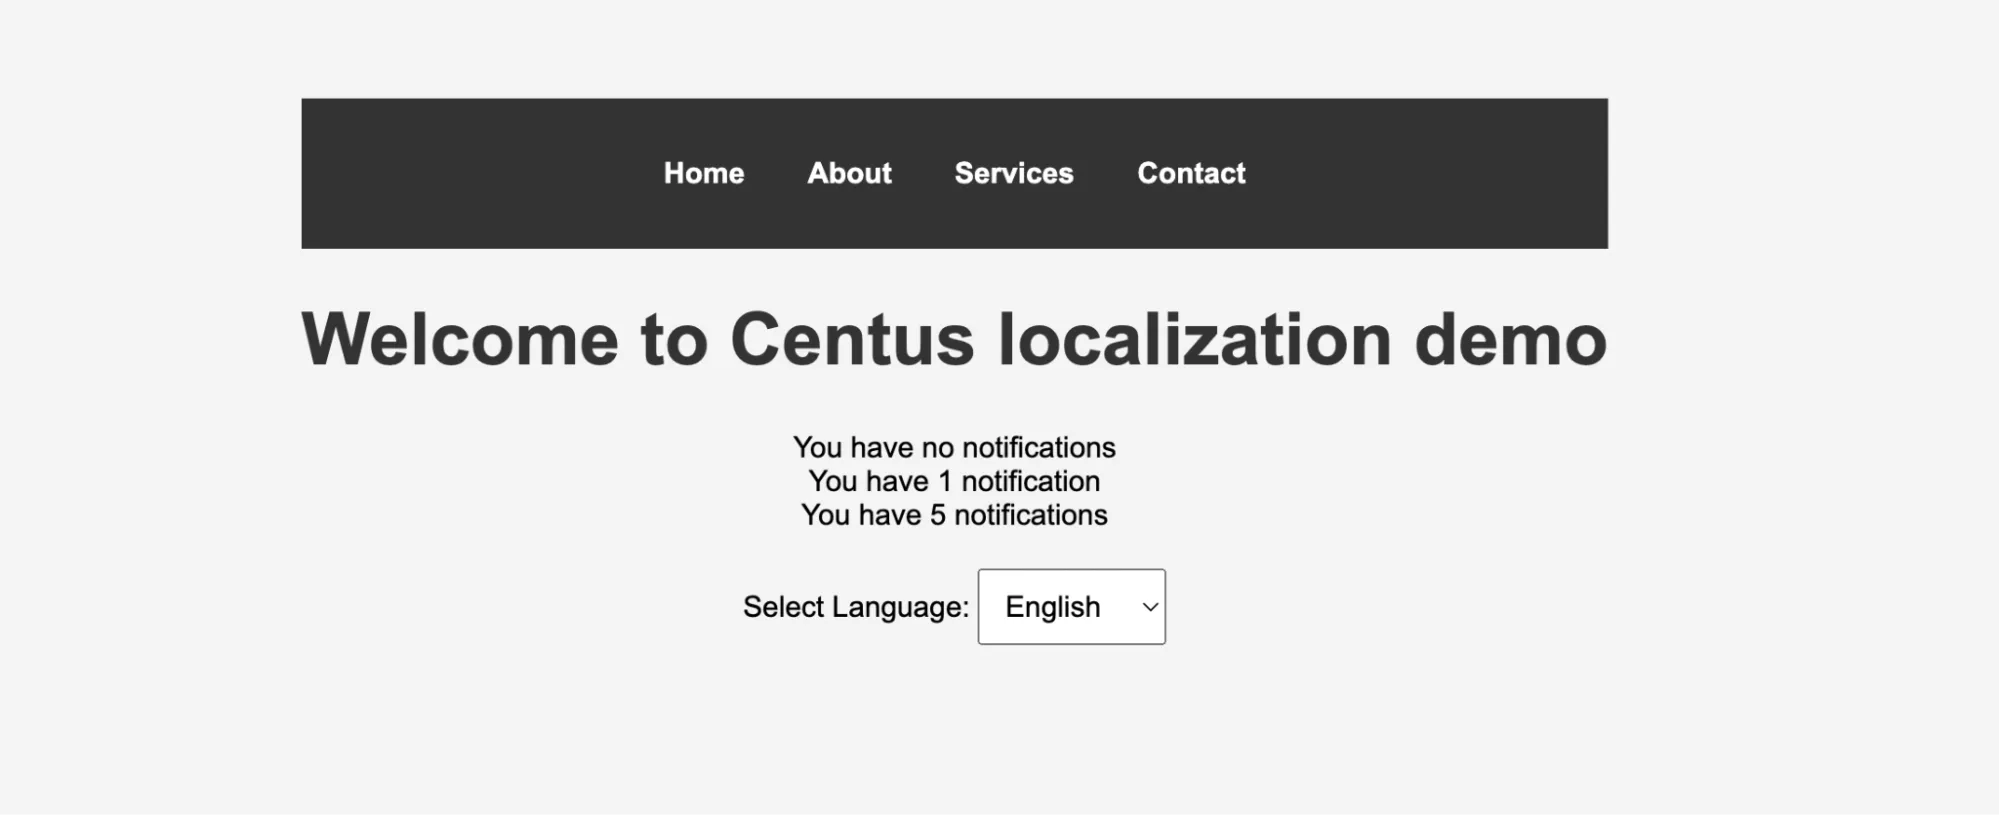
Notice how the proper words were used automatically while we simply passed the values to the trans_choice function.
Handling gendered words
Similar to plurals, we also need to handle gendered words. English is simple in this matter.
If you had to welcome someone, you’d say, “Welcome, {name}” irrespective of the gender.
But with Spanish, we have two separate words for male and female welcome. And it’s not just Spanish but many other languages that use gendered words that also affect other words in the sentences.
Let me show you a simplistic example of welcoming our users and how you can use Laravel localization to handle these genders.
Start by adding the following lines to each of your locale JSON files.
en.json
"Welcome to Centus, :username": "{male}Welcome to Centus, Mr. :username|{female}Welcome to Centus, Ms. :username"
es.json
"Welcome to Centus, :username": "{male}Bienvenido a Centus, Sr. :username|{female}Bienvenida a Centus, Sra. :username"
fr.json
"Welcome to Centus, :username": "{male}Bienvenue à Centus, M. :username|{female}Bienvenue à Centus, Mme. :username"
Now, we’ll use the same trans_choice function that we used for our pluralization. But here, instead of passing numbers for choices, we can pass our variables “male” and “female”.
Let’s see how that works.
@php
   $gender = "male";
   $username = 'John';
@endphp

<!-- Display the translated welcome message -->
{{ trans_choice('Welcome to Centus, :username', $gender, ['username' => $username]) }}
And just like that, you have gendered translations ready for use.
Please note that you don’t need to hardcode the gender value as I’ve done in the above example.
You can dynamically set it to “male” or “female” and other genders that you add to your translation files, and the UI will show the appropriate text.

Why did I not follow the regular method of nesting JSON keys for different genders and then accessing them with dot notation? Because unfortunately, we can’t. PHP suggests you use messages.php if you absolutely need nested values.
Number and currency formatting
A developer’s life would’ve been really easy if everyone across the globe followed the same number formats. But unfortunately, that’s not the case.
Luckily for us, the NumberFormatter class in Laravel handles these formatting differences without manually adding those to our JSON files.
Here’s the code snippet I’ve added under the H1 tag in the welcome.blade.php file
@php
    // Define the amount and currency dynamically
    $amount = 1000000;
    $currency = match (app()->getLocale()) {
        'en' => 'USD',
        'es' => 'EUR', // Example: Spanish uses Euros
        'fr' => 'EUR', // French uses Euros
        default => 'USD',
    };

    // Create the currency formatter for the current locale
    $currencyFormatter = new \NumberFormatter(app()->getLocale(), \NumberFormatter::CURRENCY);
    echo $currencyFormatter->formatCurrency($amount, $currency);
@endphp
Just like that, the NumberFormatter class gives us the currency and numbers that are correctly formatted when switching locales.
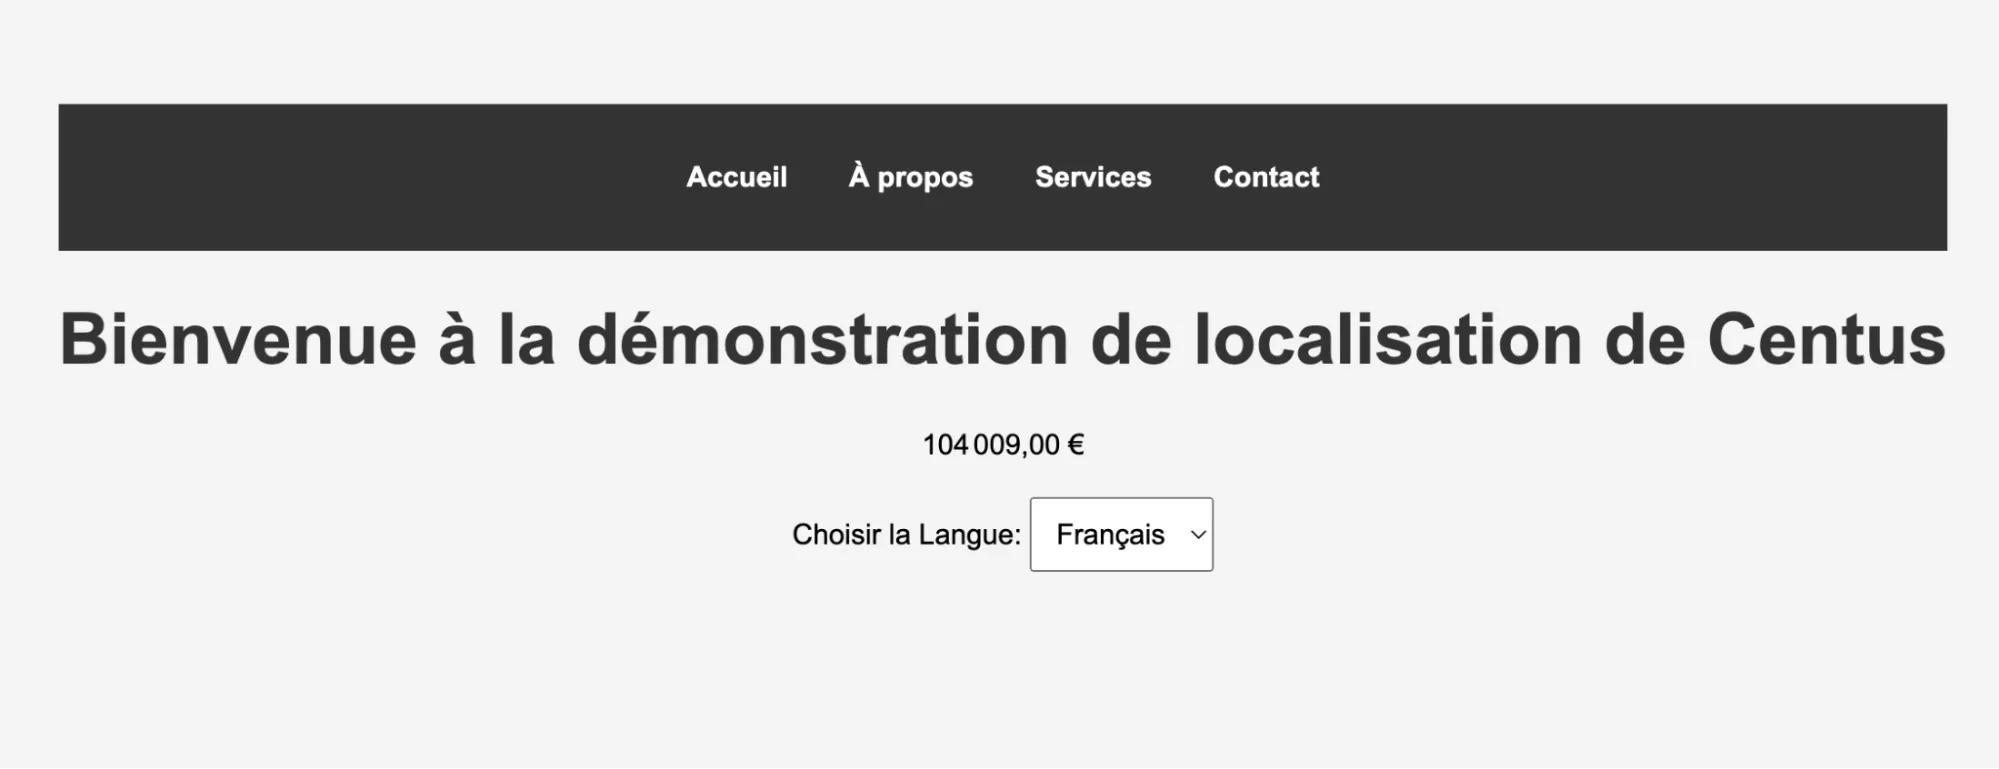
Do we have something for dates as well? Luckily, yes.
Translating months and days in dates
You don’t have to go about translating every month and day across different languages.
The Carbon class can handle that for you. First, I will change the AppServiceProvider.php file to use the Carbon class.
<?php

namespace App\Providers;
use Carbon\Carbon;

use Illuminate\Support\ServiceProvider;

class AppServiceProvider extends ServiceProvider
{
    /**
     * Register any application services.
     */
    public function register(): void
    {
        //
    }

    /**
     * Bootstrap any application services.
     */
    public function boot(): void
    {
        Carbon::setLocale(app()->getLocale());
    }
}
I’ve only added two lines in the default file, and everything else is as it is.
use Carbon\Carbon;
Carbon::setLocale(app()->getLocale());
Now I’ll update the welcome.blade.php file to use this carbon class and display the date in the correct locale.
Here’s the code I’ve added right below the heading:
<div class="current-date">
   <!-- Display localized date and time -->
   {{ now()->isoFormat('dddd, D MMMM YYYY, h:mm A') }}
</div>
Once it’s saved, your page should update to have the date under the heading now.

It automatically handles the translation for the day and month names here, saving us a lot of time.
Laravel translation with a TMS
You’ll notice that handling these translation files manually can get messy pretty quickly.
And it’s even more noticeable if there are multiple people working on the same project asynchronously.
That’s why translation management systems, like Centus, can completely transform your Laravel localization workflow.
Centus works best for continuous localization. This is a type of agile localization where translations are updated in real time, which is particularly convenient for frequent updates.
Using API, you can integrate your code repository with Centus to automatically push and pull translation strings, like:
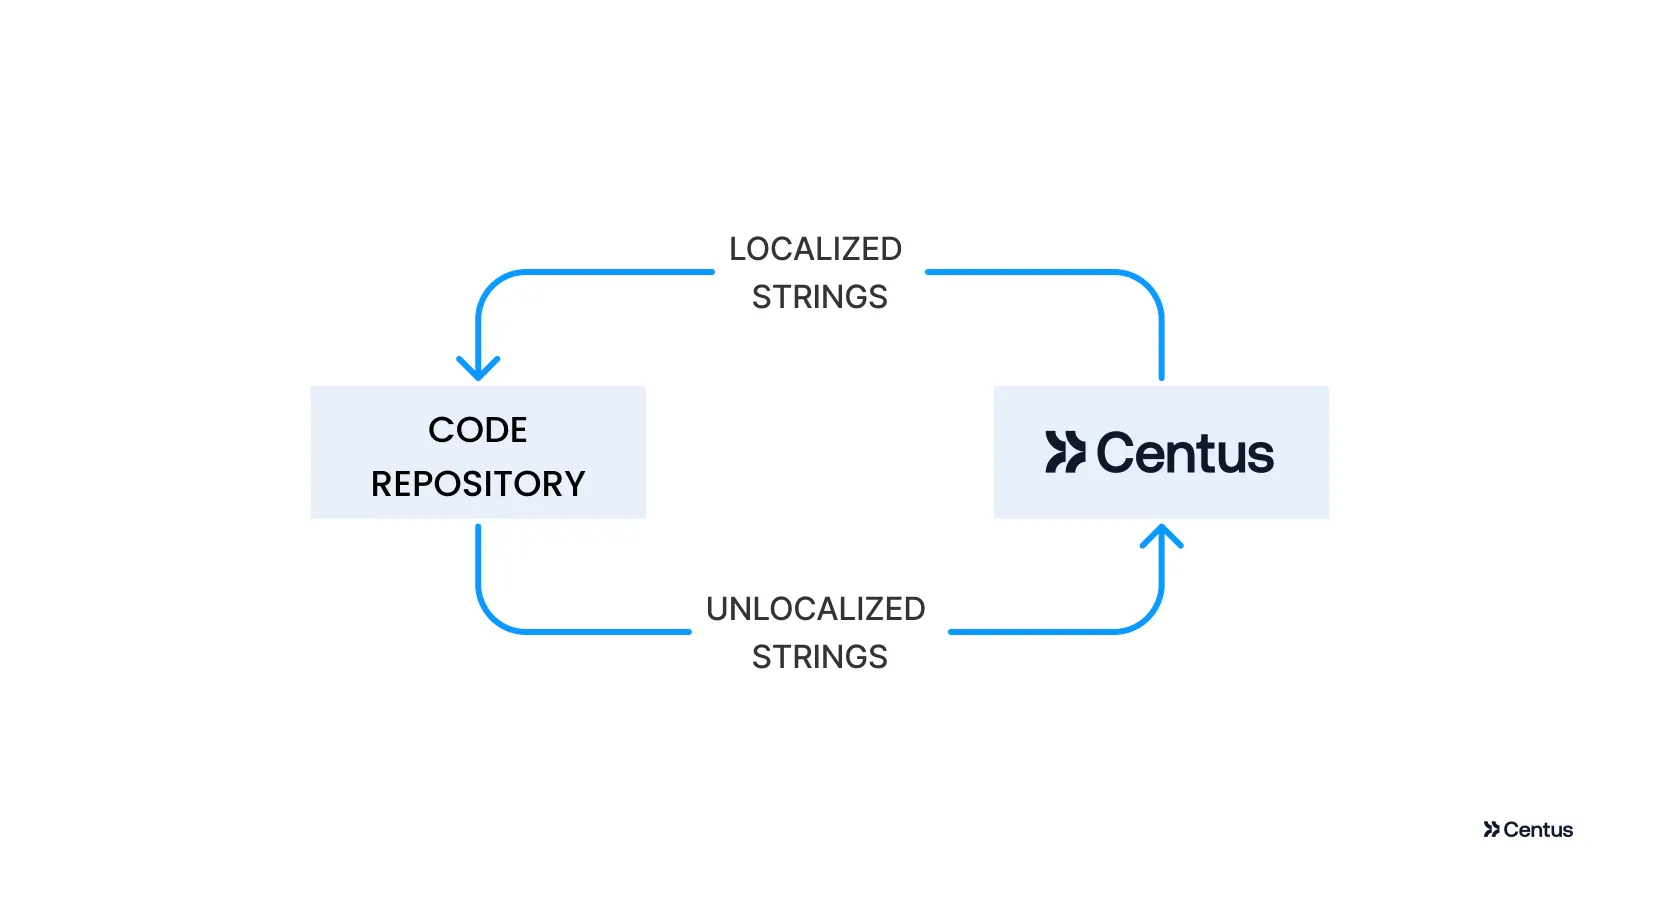
Whether you use Centus for continuous localization or more traditional localization models, it’s a great way to translate JSON files.
Here’s how it works:
Start by signing up to a TMS and creating a new project.
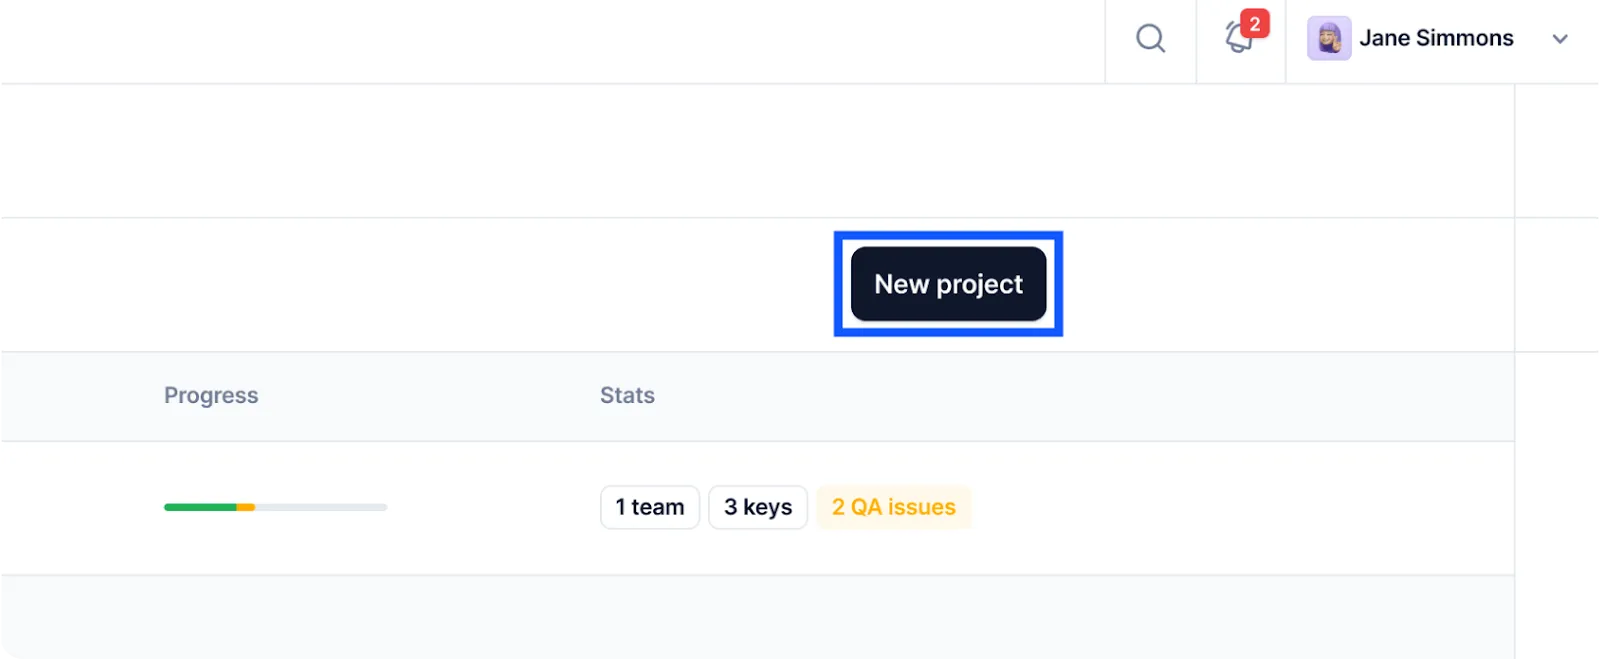
Next, navigate to the Imports section and add your JSON files.
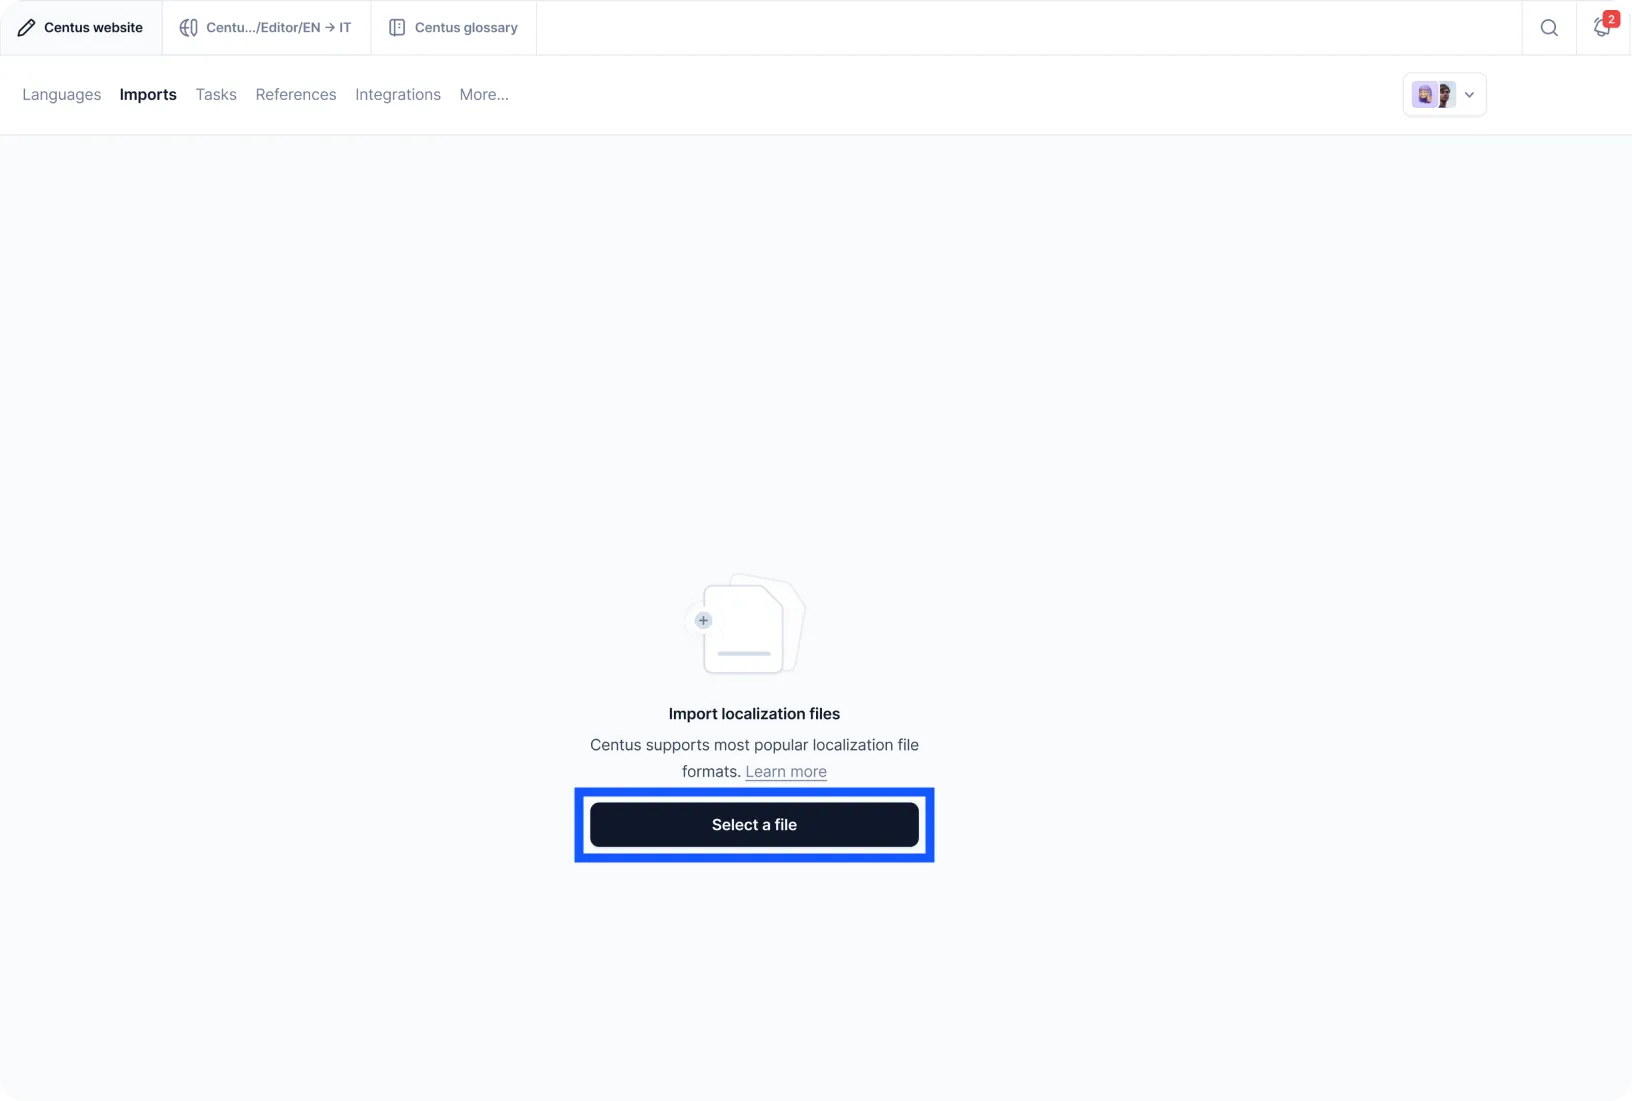
After you import the files to your project, they will look like this:
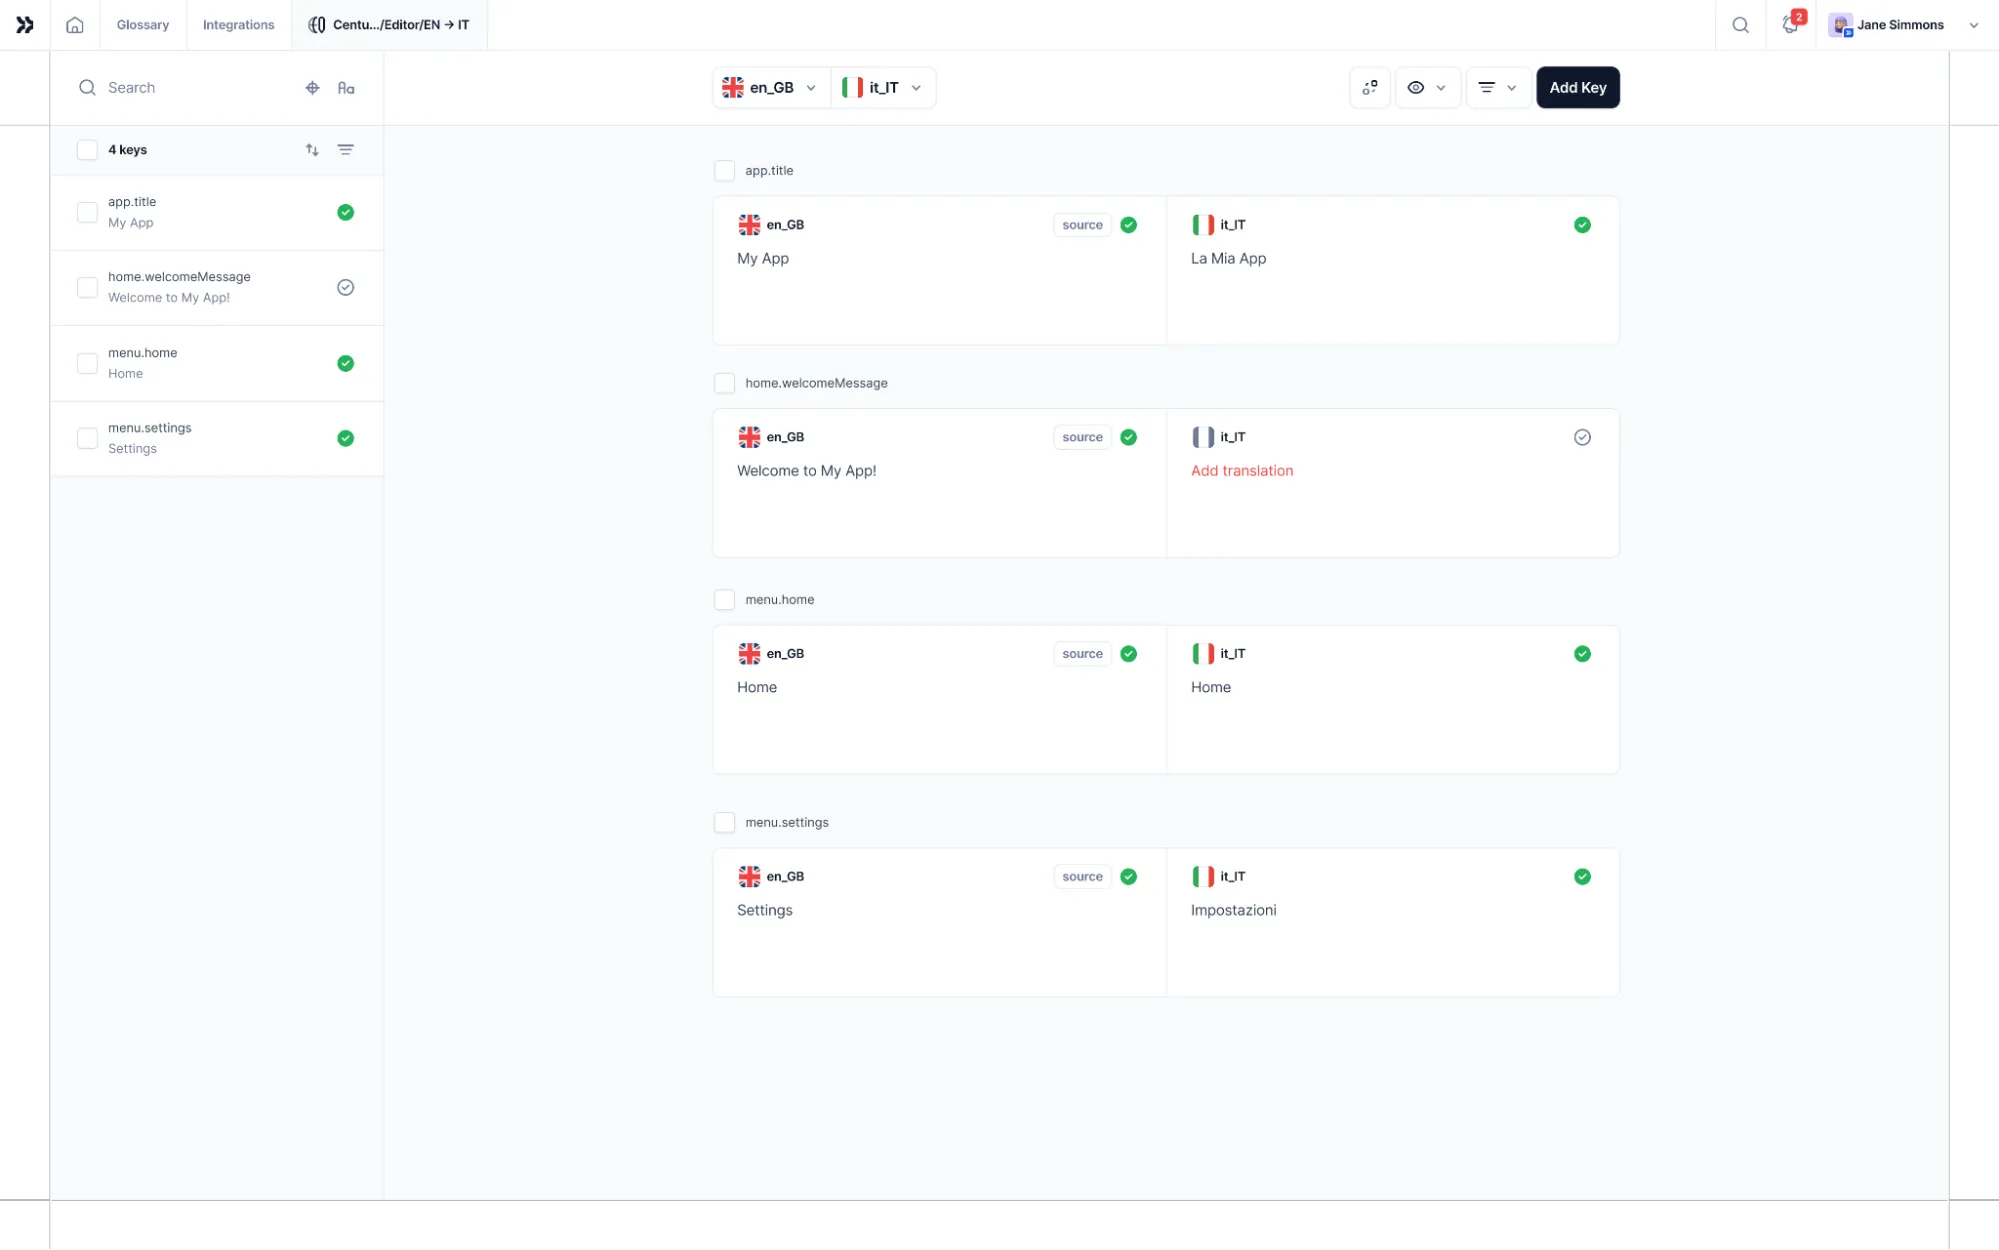
Centus automatically filters out all code syntax elements, presenting just strings to translators. Now they can focus solely on translation without wading through code, and you won’t have to worry about syntax errors.
Before moving on to other Laravel translation steps, let me share a tip.
See this character counter below?
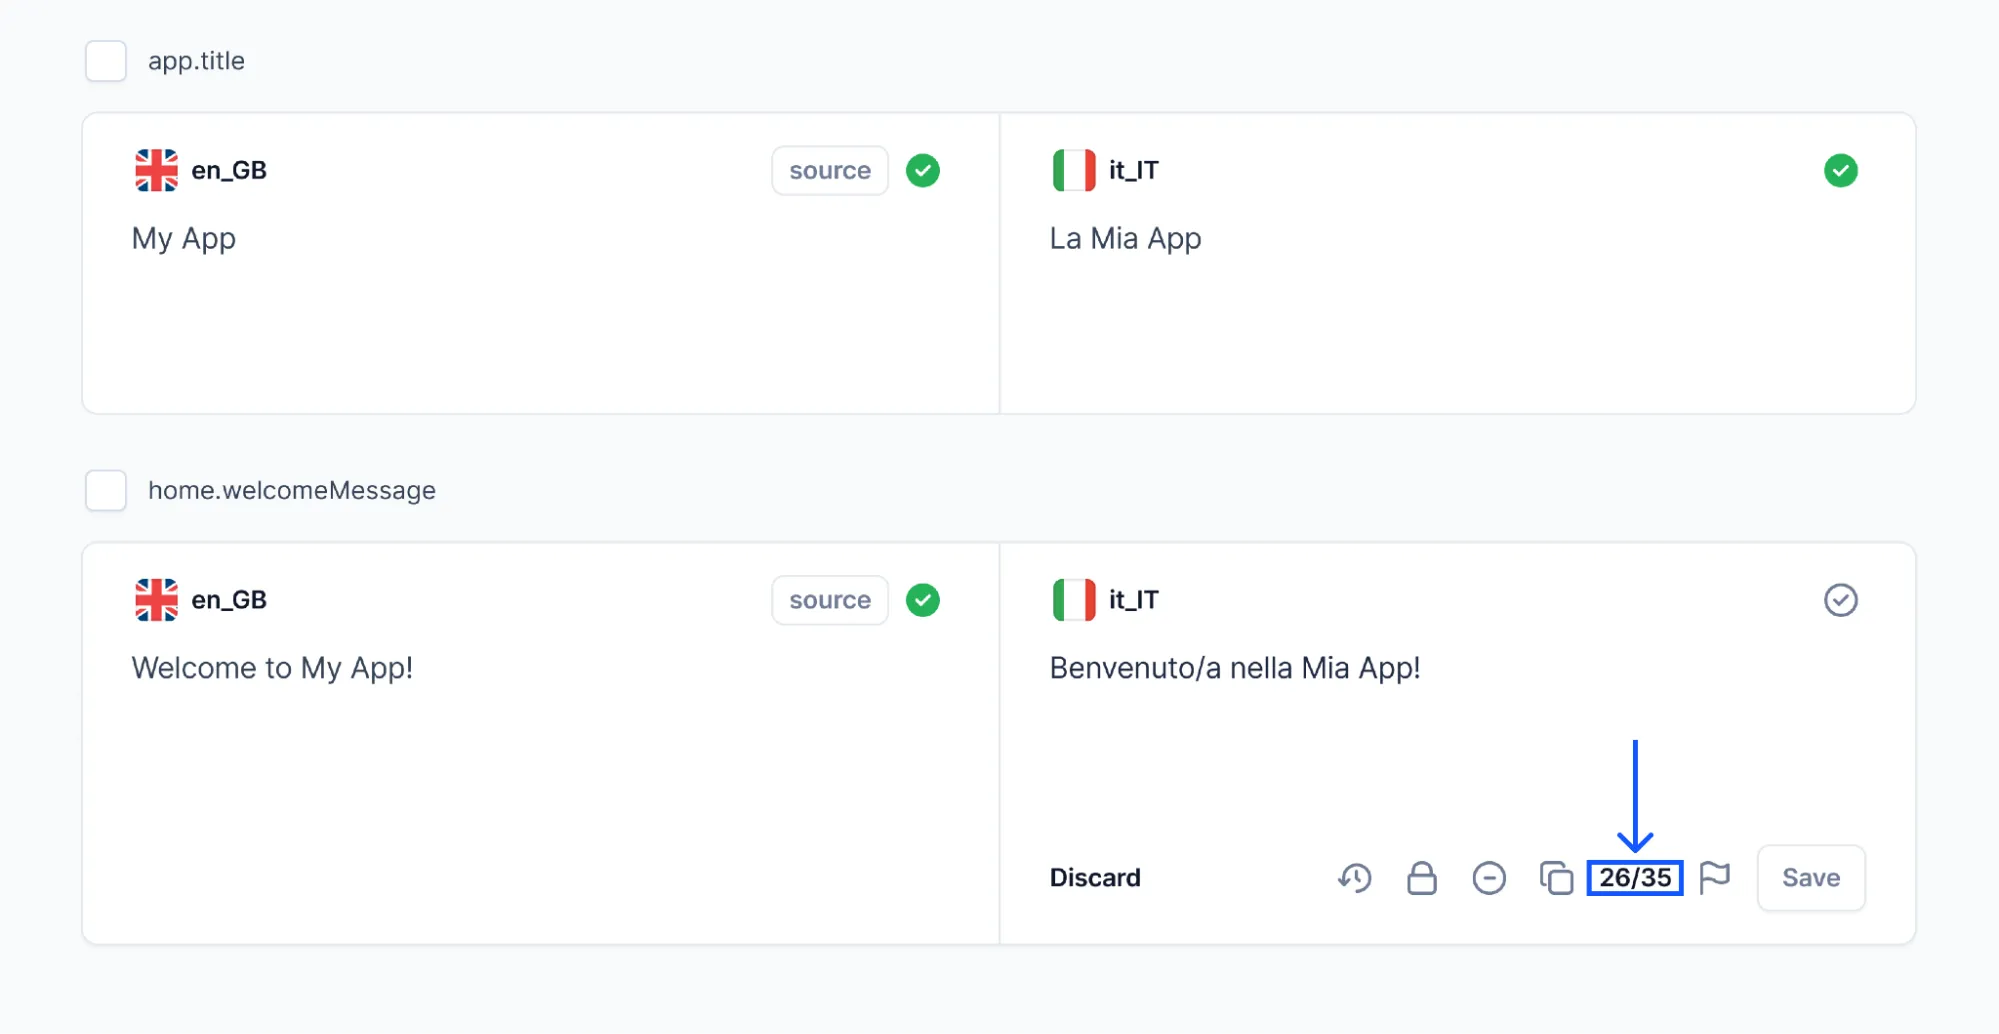
Use it to set the character limits for keys, especially those with translations for buttons or other small UI elements.
This way, translators can adjust their translations to ensure they fit perfectly. The result? Less back-and-forth between you, designers, and translators.
Speaking of designers and translators, to invite them to your project, go to the Contributors section and click Invite collaborators.
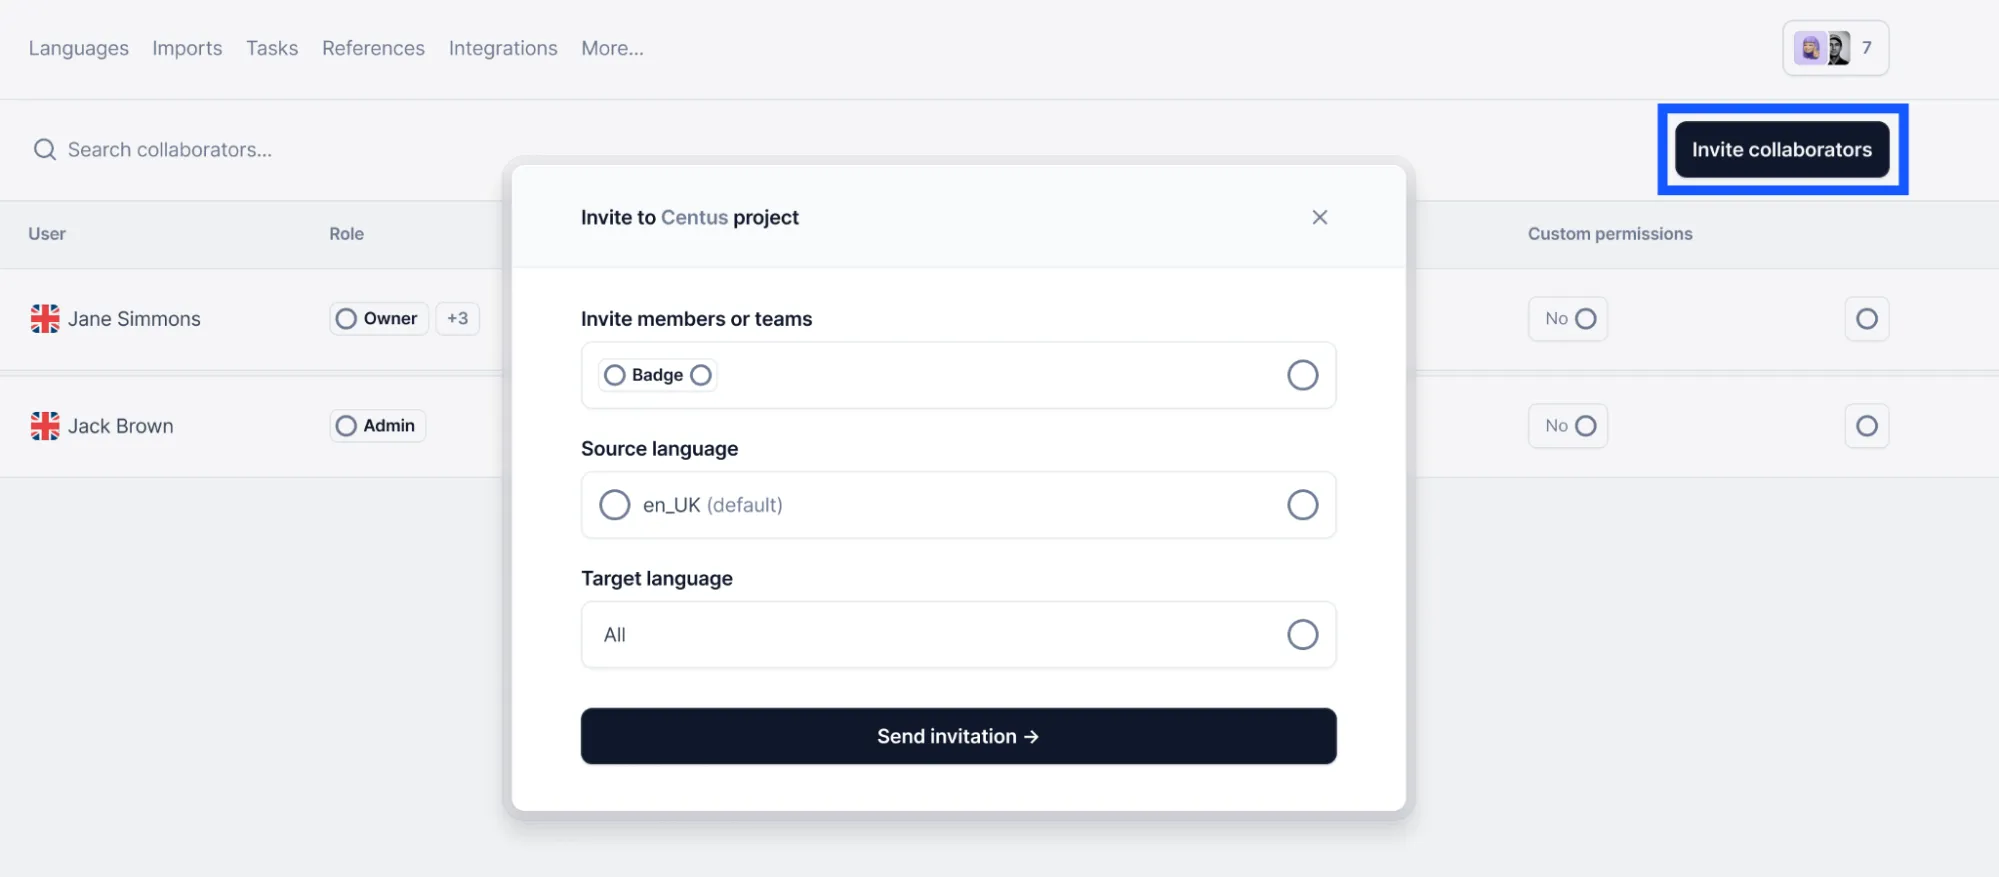
You can manage their permissions to ensure that everyone has access to the information they need.
Once in, your language experts will have access to automatic machine translations, glossaries, translation memories, QA checks and other tools necessary to create accurate translations.
Encourage your team to share feedback, especially at the editing and review stages. This helps prevent critical errors down the line.

You can monitor the progress of your Laravel localization project right in the dashboard.

You can also use the notification panel to stay on top of project milestones.
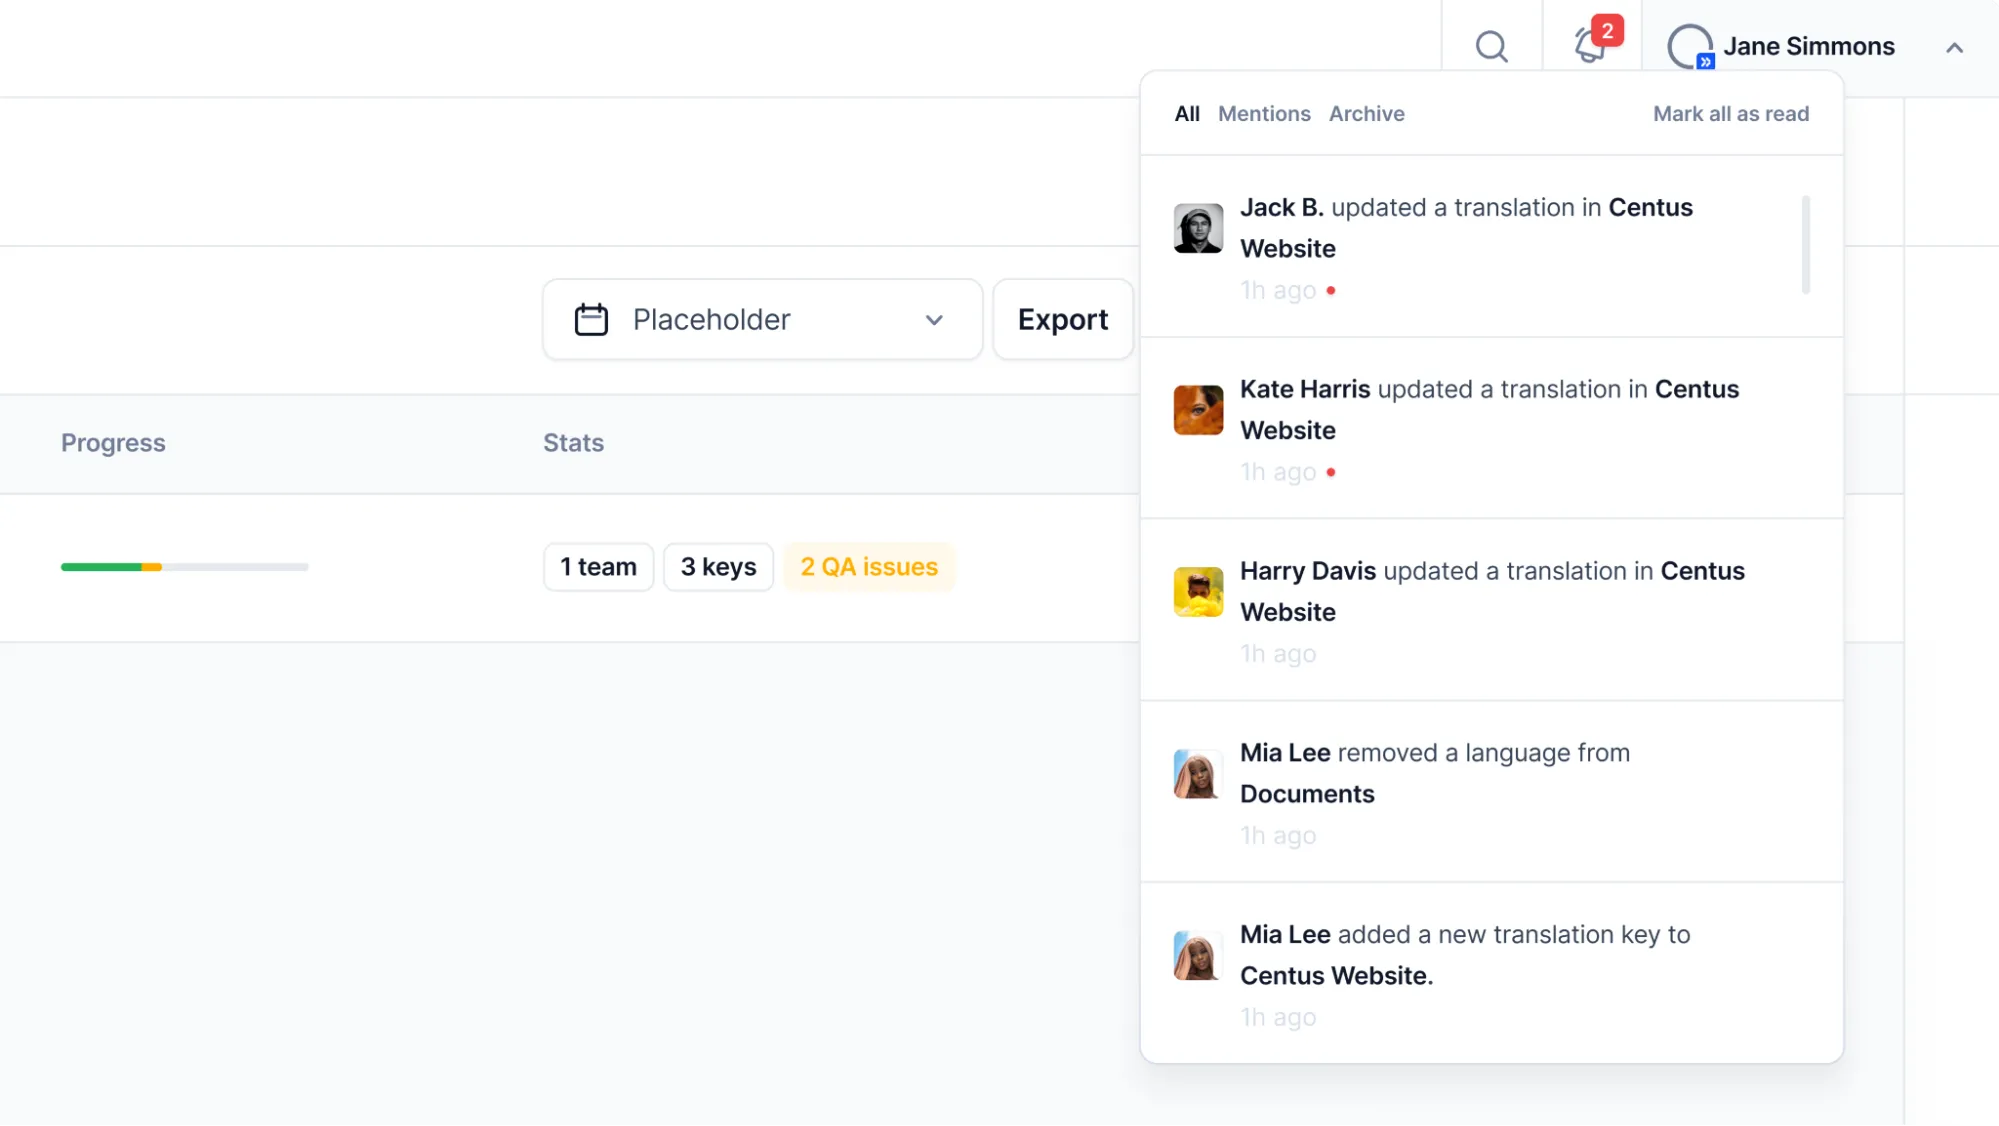
For a more granular view, you can go to the Editor to see translated, reviewed, and approved keys.
When the translations are ready, incorporate them into your Laravel app following my advice above.
As you can see, Centus offers a convenient way to organize localization. You can use it for Laravel or any other app and software localization projects.
Wrapping up
You’re all set now!
Hopefully, my documenting the steps for localizing Laravel apps has saved you the time you’d spend troubleshooting and experimenting.
Another way to save time? Use the localization platform Centus!
Bring translators, designers, and managers on the platform to localize your Laravel app with minimal input from you.
Get the week's best content!
By subscribing, you are agreeing to have your personal information managed in accordance with the terms of Centus Privacy Policy ->
Keep learning
25 min. read
Vue i18n and Localization: How to Localize a Vue App
19 min. read
NextJS Internationalization: A Complete Walkthrough
21 min. read
Software Localization Guide for Developers
30 min. read
Your Complete Guide to Django i18n

11 min. read
How to Perform Mobile App Localization: The Right Way
15 min. read