A multi-language website is key to capturing a wider audience. With 76% of consumers preferring e-commerce information in their language, sticking to just one language is a pricey ticket to obscurity. But worry not, we’ve got you covered.
Read on to learn how to create a multilingual website using WordPress and Wix. We’ll also share lesser-known yet effective strategies to make your multi-language website stand out.
How to make a website multilingual with WordPress
Creating a multilingual website in WordPress is pretty straightforward, thanks to plugins made by the WordPress community. WordPress doesn’t come with built-in multilingual features, so these plugins make it easy to set up and switch between different languages on your site.
Now, let's walk through the process of creating a multilingual WordPress site.
Step 1: Choose a WordPress plugin
The first step is to select a suitable plugin for translating your website. Popular options include WordPress Multilingual (WPML) TranslatePress, and Polylang. We’ll use one of the simplest—Polylang. You can download it here.
Note: The first language you add in the setup wizard becomes the default language of your website. You can change it later.
Step 2: Set up languages
Once the plugin is installed and activated, set up the languages:
- In the dashboard, go to Polylang > Languages
- Click Add new language
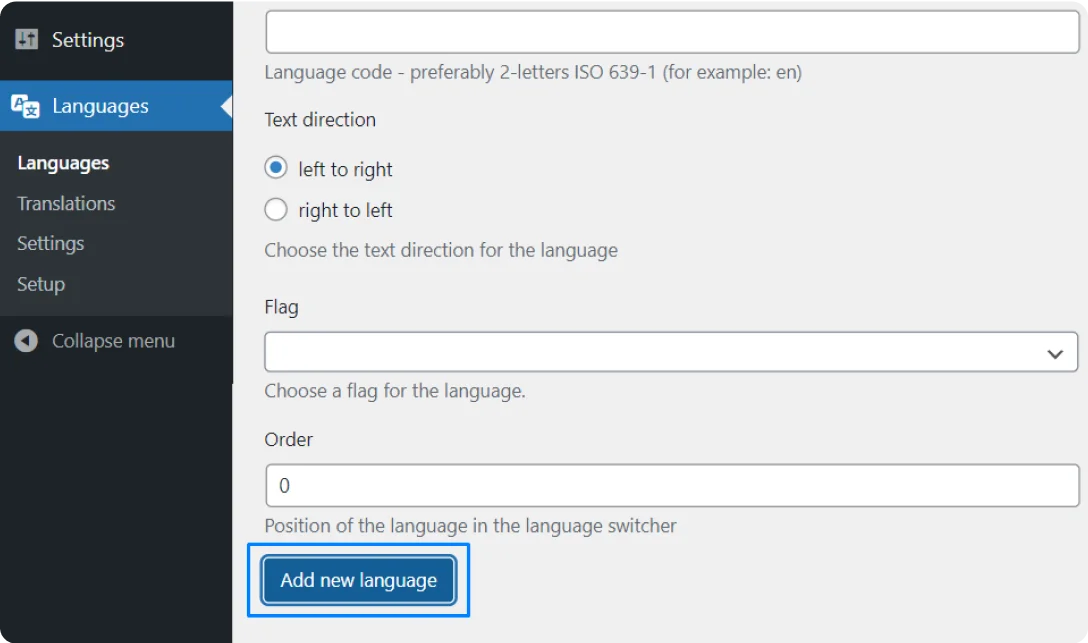
- Choose one or multiple languages and click Add
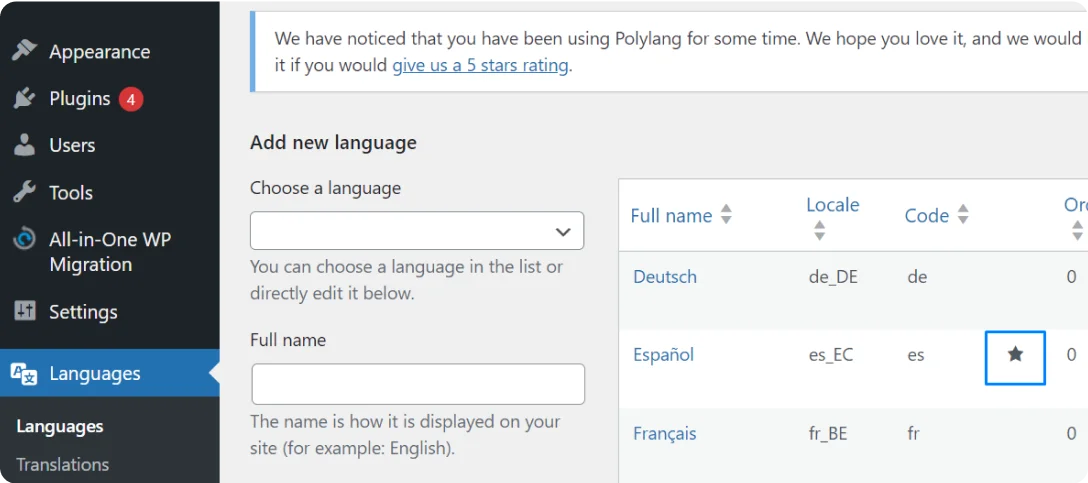
- To change the default language, navigate to the Languages section and click the star icon next to the preferred default language
Step 3: Translate your content
Use a professional translation management system (TMS) to automatically translate your content and assign it to human editors for review. Here’s how it’s done:
- Sign up to Centus
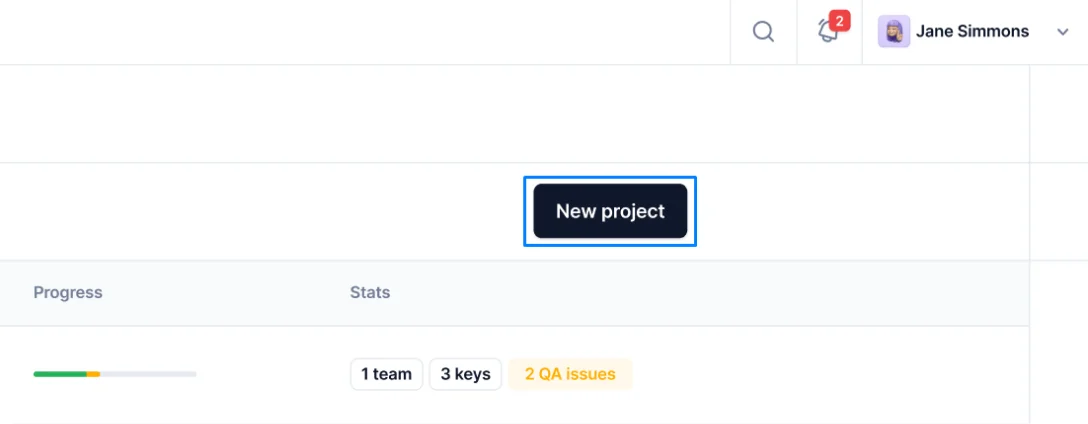
- Navigate to the Project dashboard and click New project
- Name the project and choose the source and target languages
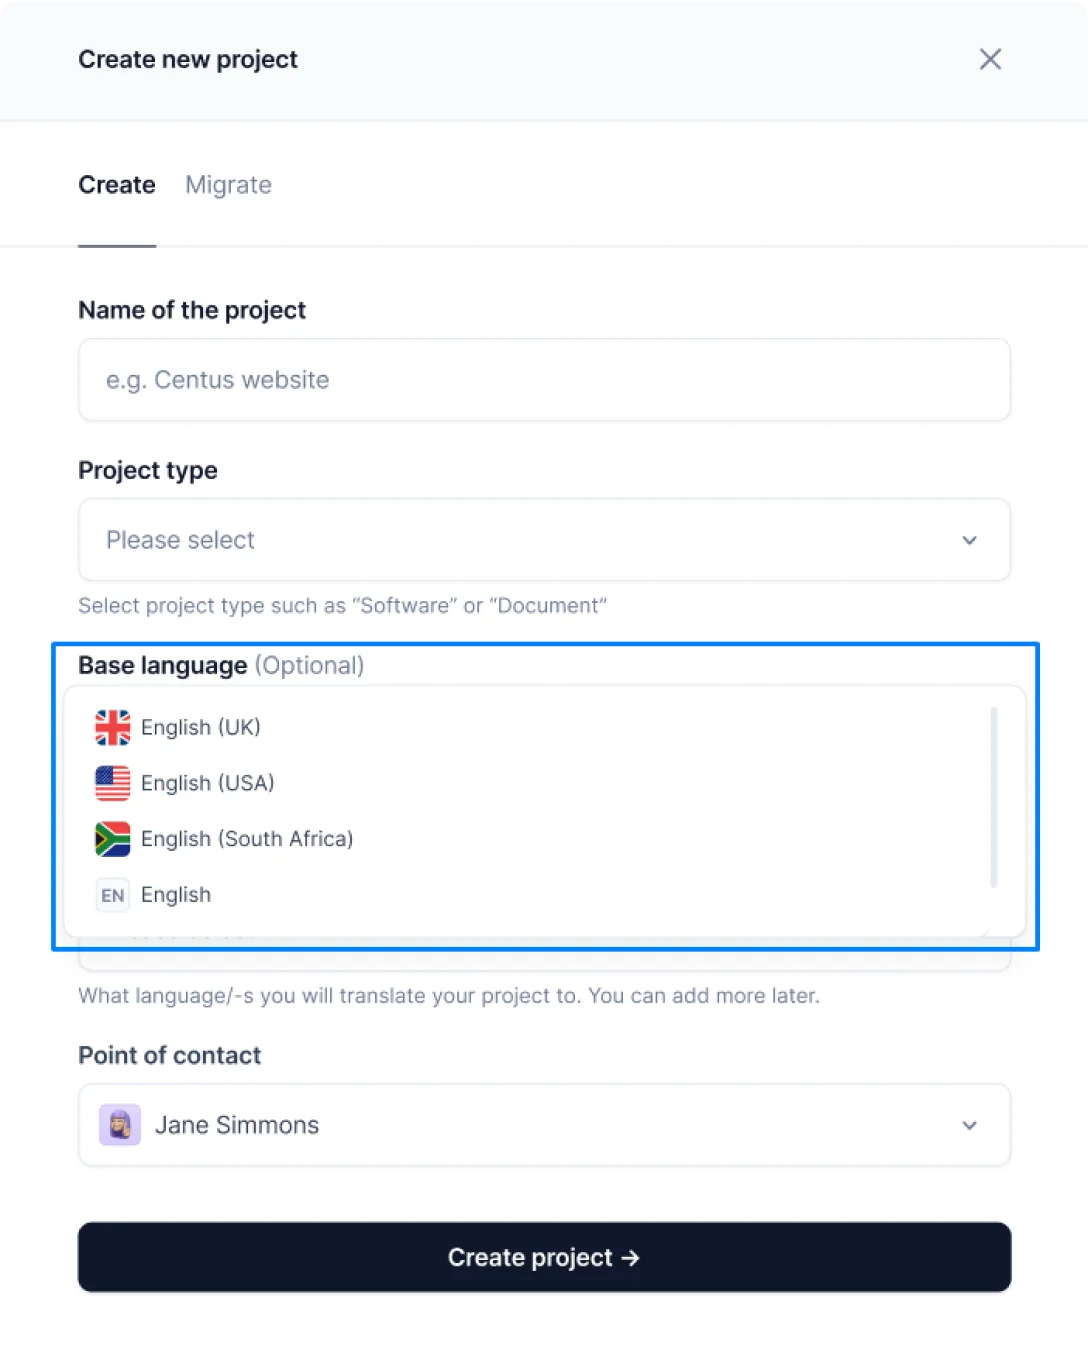
- Click Create project
- In the new project, navigate to the Imports section
- Click Select a file to add your DOCX, HTML, or CSV files for translation
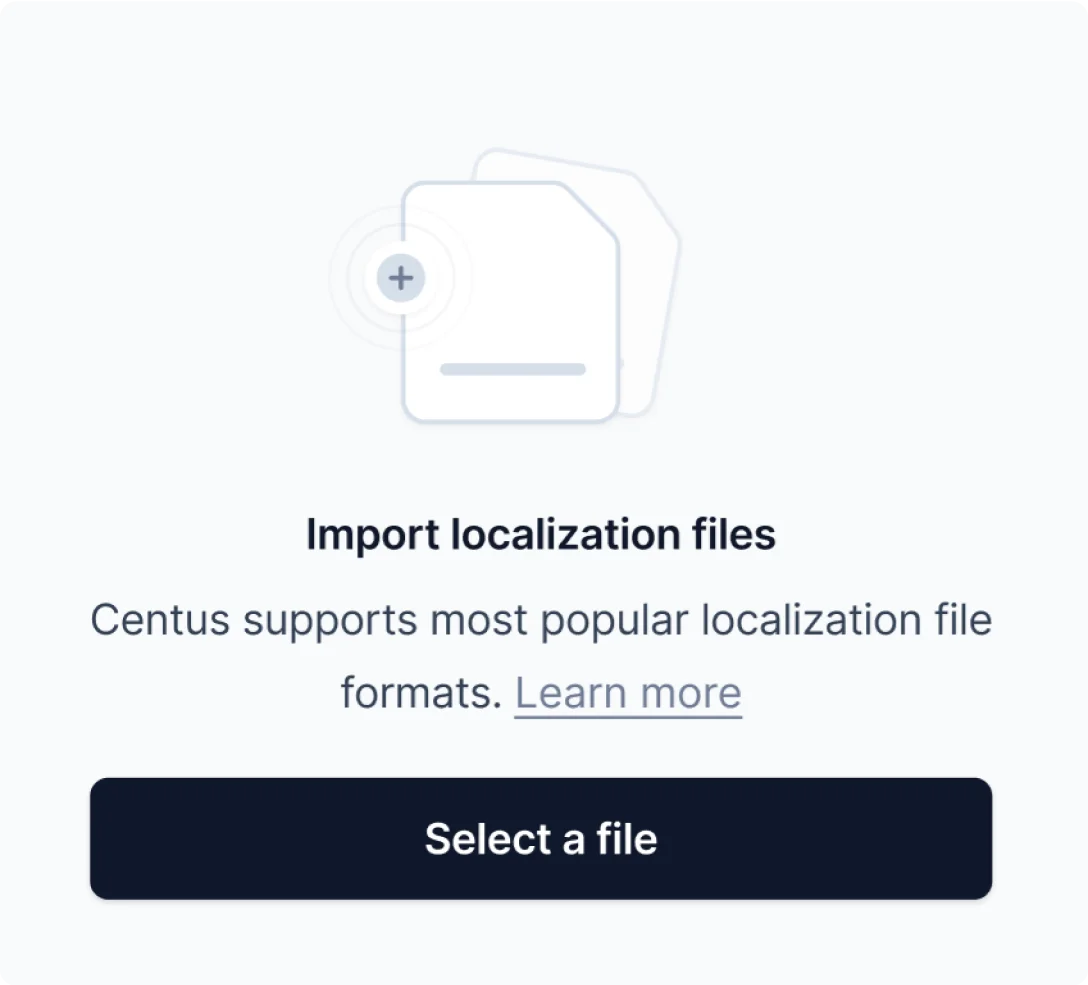
- Click Import
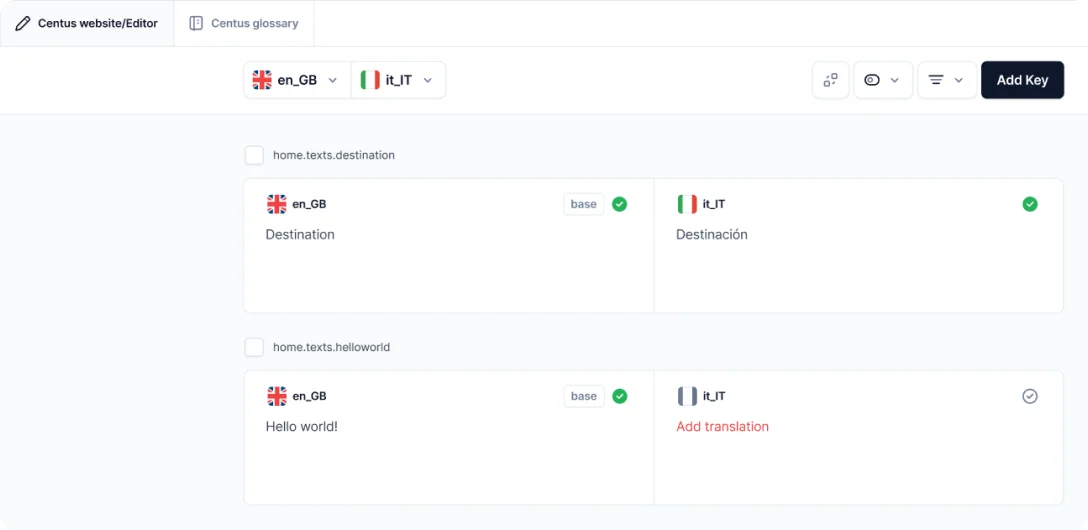
- In the Editor section, click empty values and choose among available translation options: Google Translate, DeepL translate, and Microsoft Translate. Alternatively, enter translations manually or pull them from the translation memory.
- In the Contributors section, click Add people to add a reviewer
- Enter the reviewer’s name, email, and other details
- Choose the Reviewer role from the dropdown menu
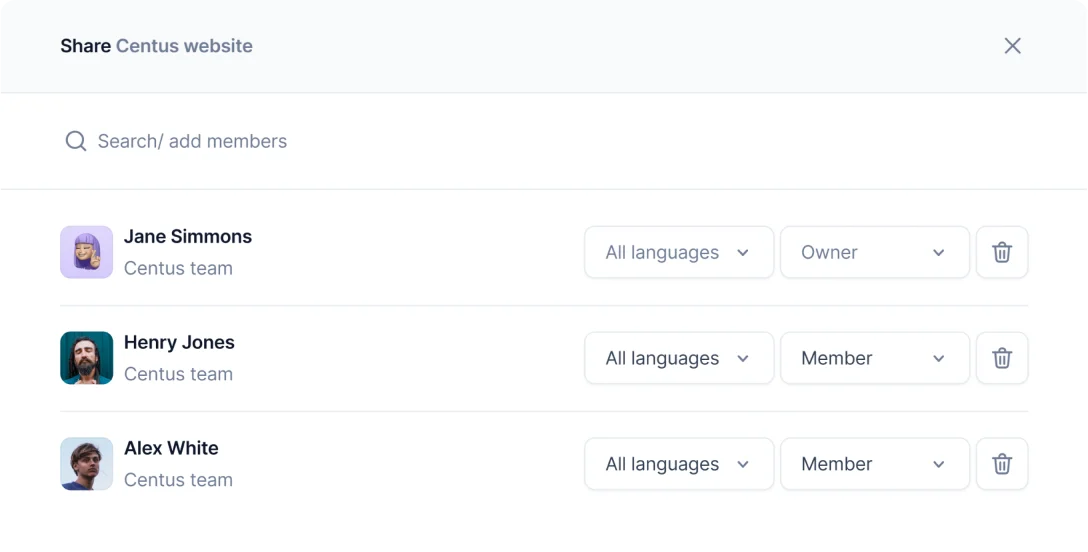
- Click Add project contributor
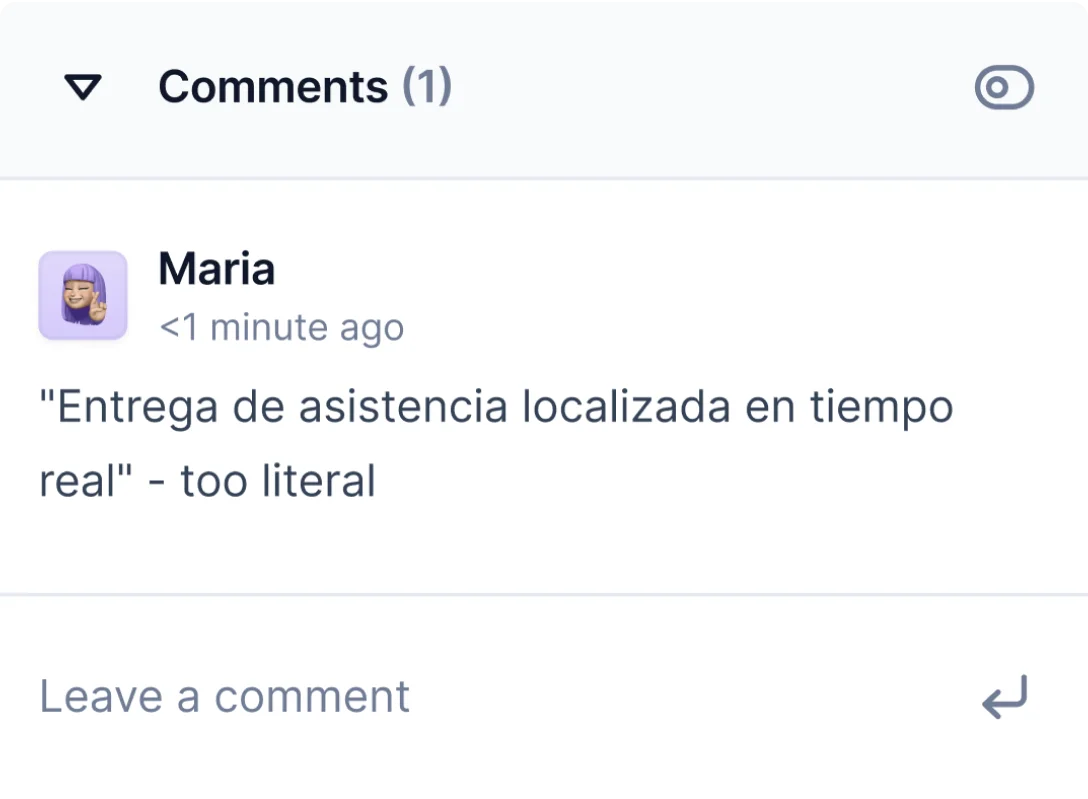
- Let the reviewer edit the translations and leave comments
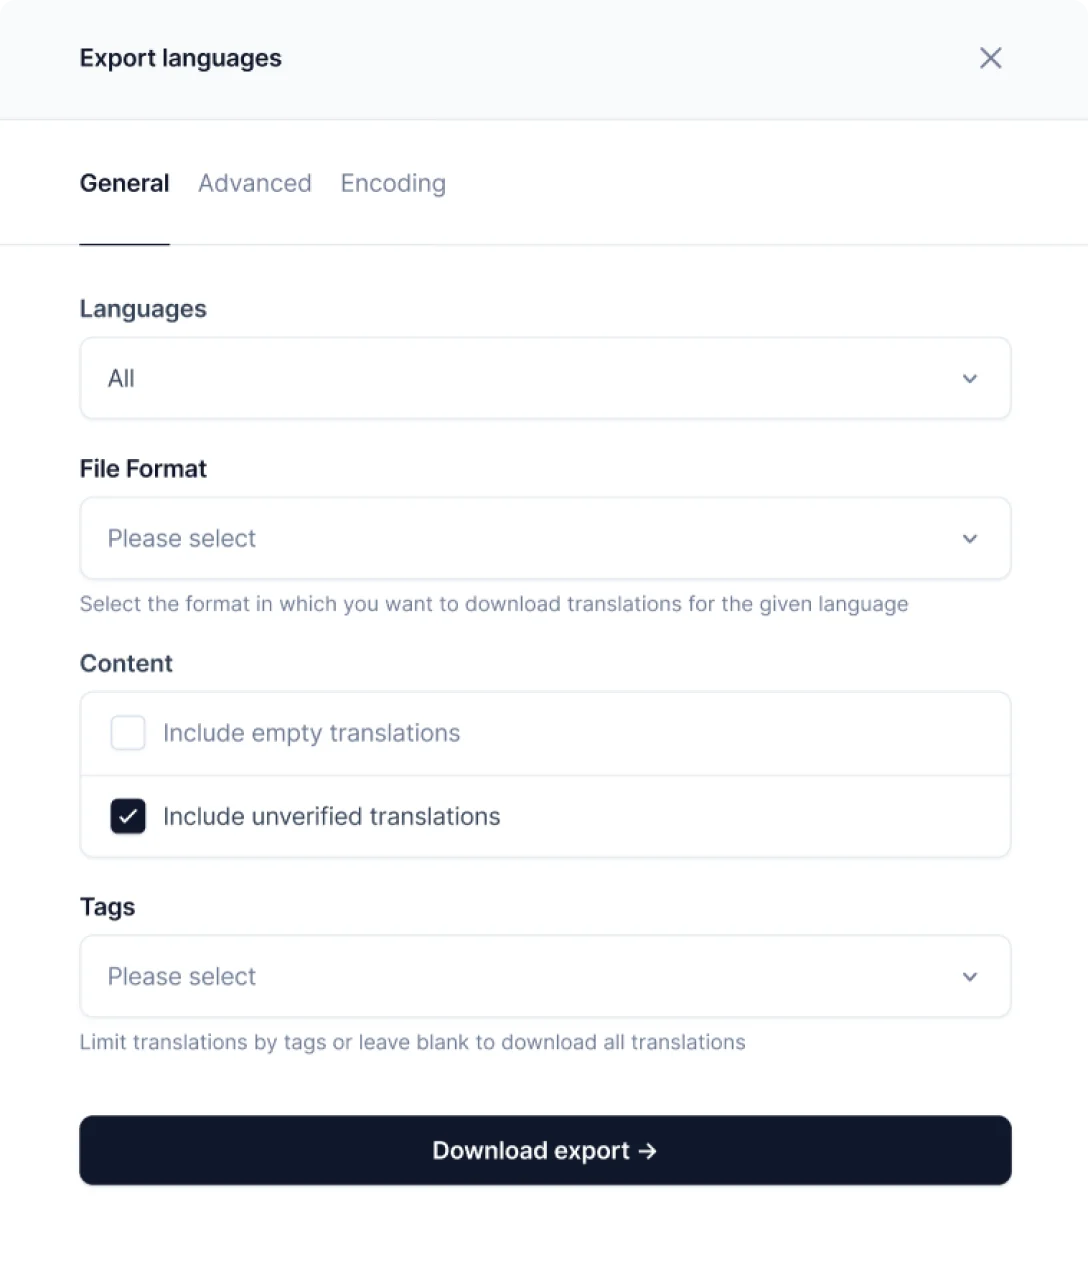
- In the Export section, choose the preferred file format
- Click Download export
Step 4: Add the translated content
- In the All Posts section, click the + symbol next to the post you want to translate
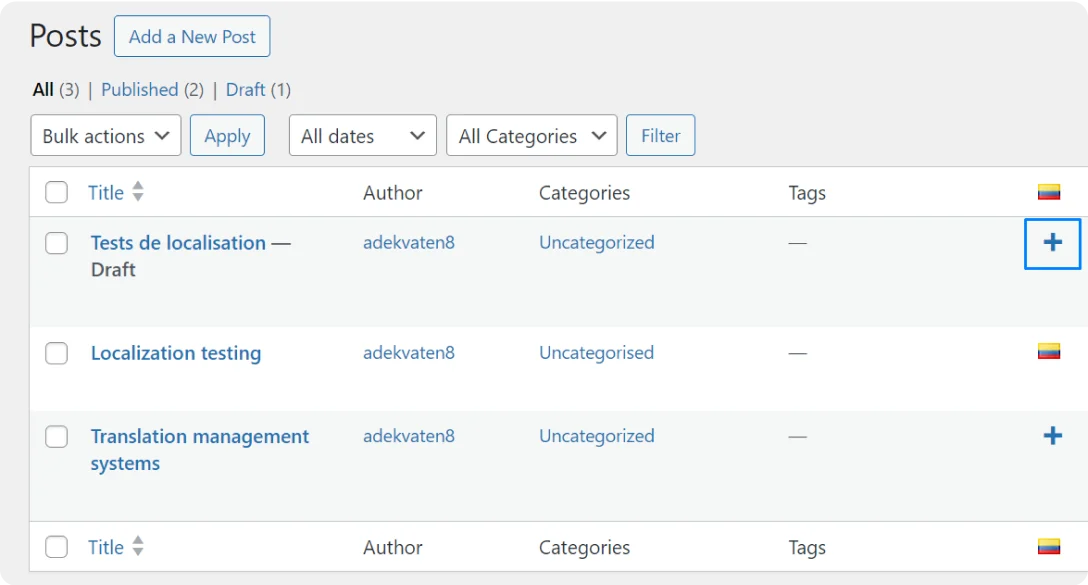
- In the editor that opens, add the translated content
- Click Publish
Step 5: Translate other elements
Polylang allows translating menus, widgets, and other elements. It goes like this:
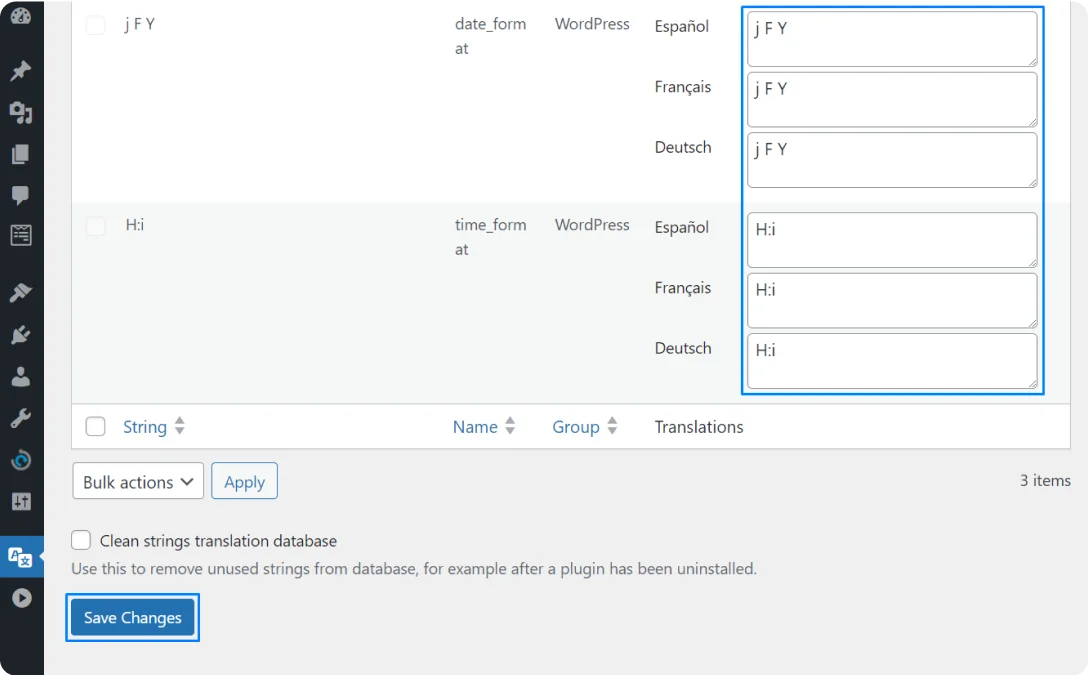
- In the Languages section, click Translations
- Add translations for descriptions, menus, and other elements
- Click Save Changes
Step 6: Add a language switcher
Now that you created translations for your pages, let your visitors choose a preferred language. Here’s how to add a language switcher to your website:
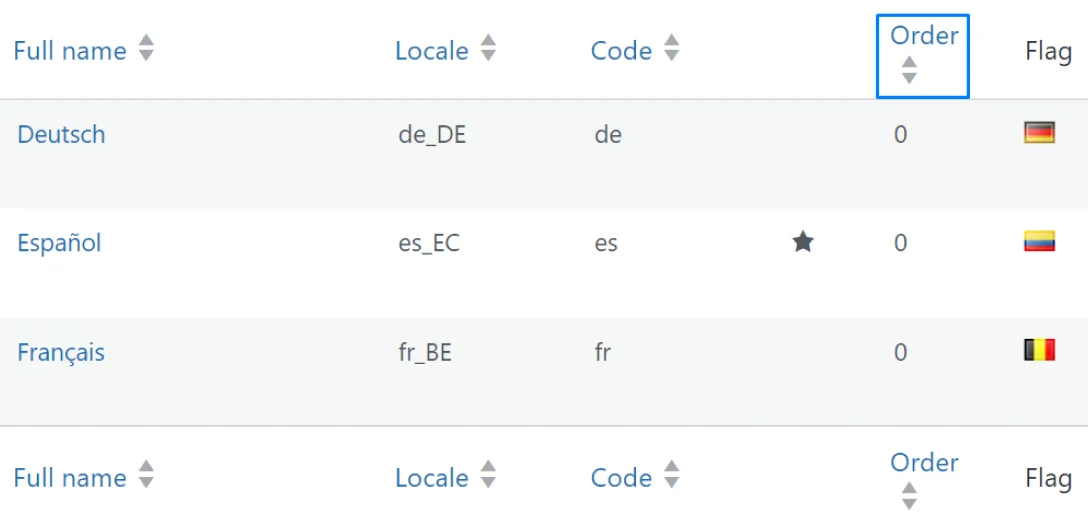
- In the Languages section, choose a flag for each language
- In the Order column, click arrows to set the order of languages in the switcher
 Congratulations! Your multilingual WordPress website is now ready to greet its visitors. If you have a Wix website, keep reading to learn how to localize it.
How to make a website multilingual with Wix
Creating a multilingual website on Wix is much simpler than creating one with WordPress. Wix does multilingual web design by duplicating versions of your site in your chosen languages, and providing one dashboard to manage them all. Future changes to your site are also automatically replicated in all language versions.
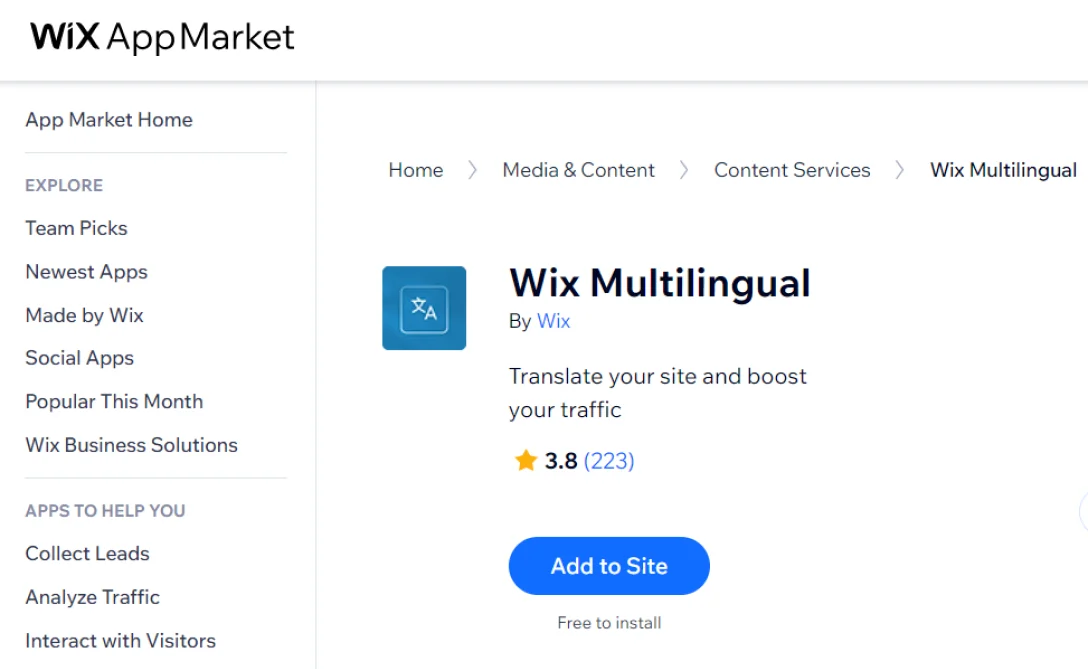
Step 1: Install Wix Multilingual
To create a multilingual version of your website, install the Wix Multilingual app from the Wix App Market:
- In the search bar, type Wix Multilingual and hit Enter
- Click Add to Site
Step 2: Add multilingual website versions
Now you can add multiple language versions of your website:
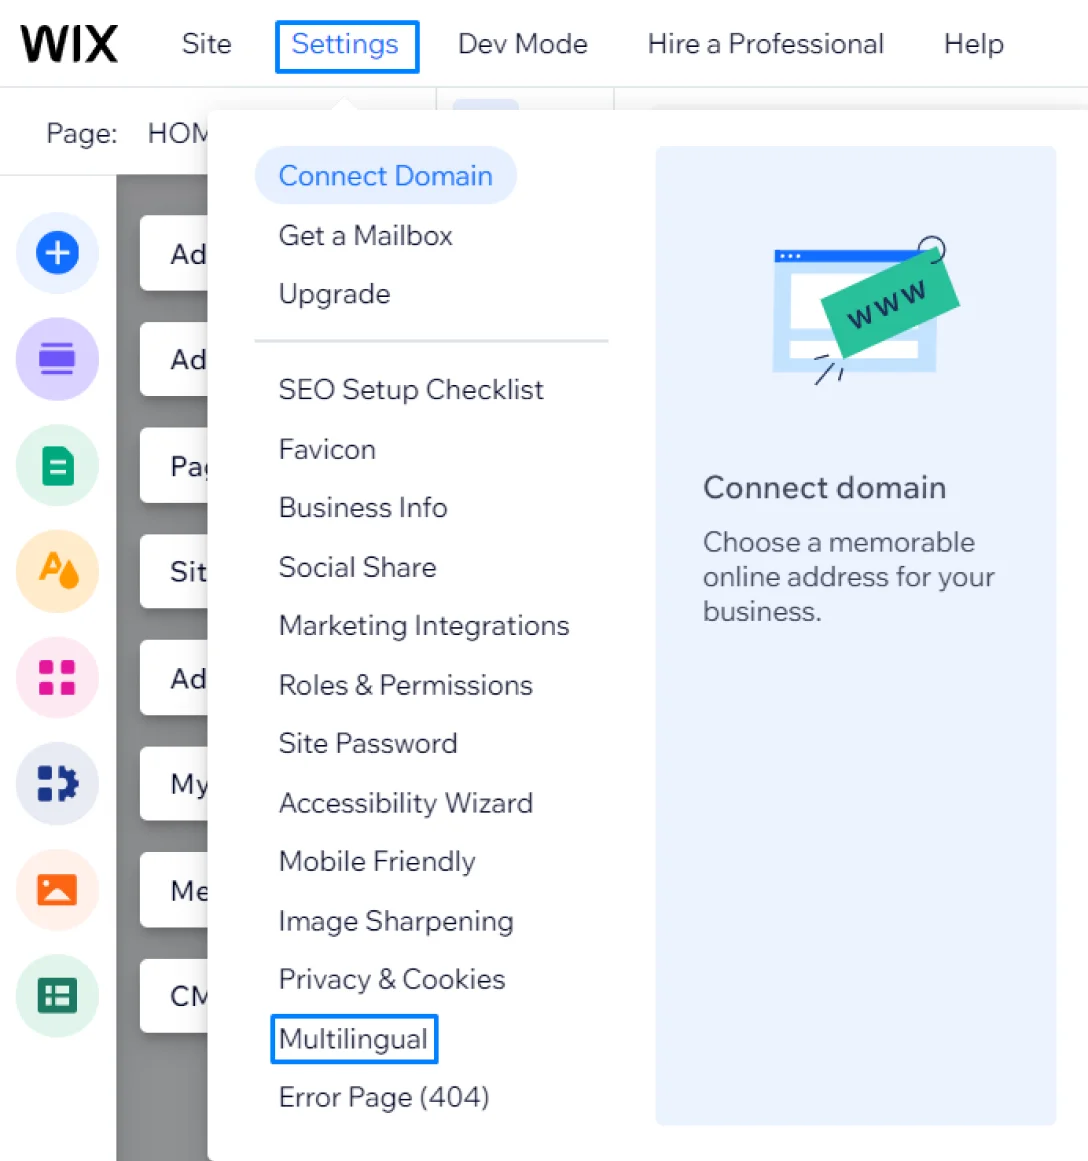
- In the Wix Editor menu, select Settings
- Click Multilingual, then click Confirm Default Language
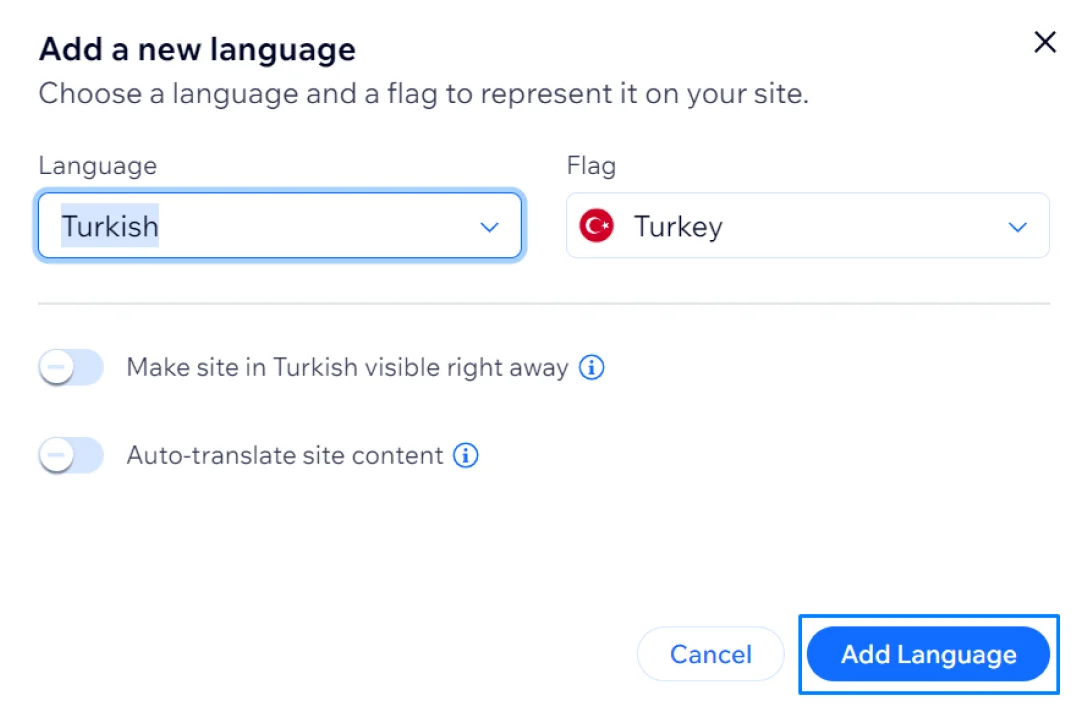
- Click Get Started
- Select a language and flag and click Add language
Note: Removing a language from your site will also permanently erase its translations and any modifications you've made in that language.
Step 3: Translate your content
Everything is set for translating your content. Follow these steps to create automatic translations:
- In the Wix Editor, click the language switcher
- Select the language you would like to translate
- Click Auto-translate site
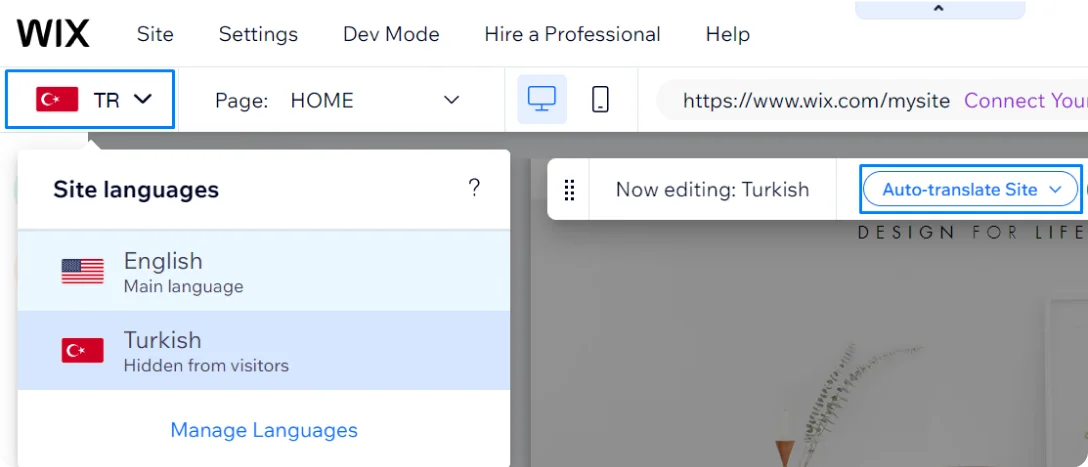
- Click on the automatically translated text to edit it, if necessary
Automatic translation gives you 3000 Google Translate word credits for free. You can purchase word credits if you wish to, or you can switch to manual translation.
Step 4: Publish translated content
After translating and editing your content, publish it following these steps:
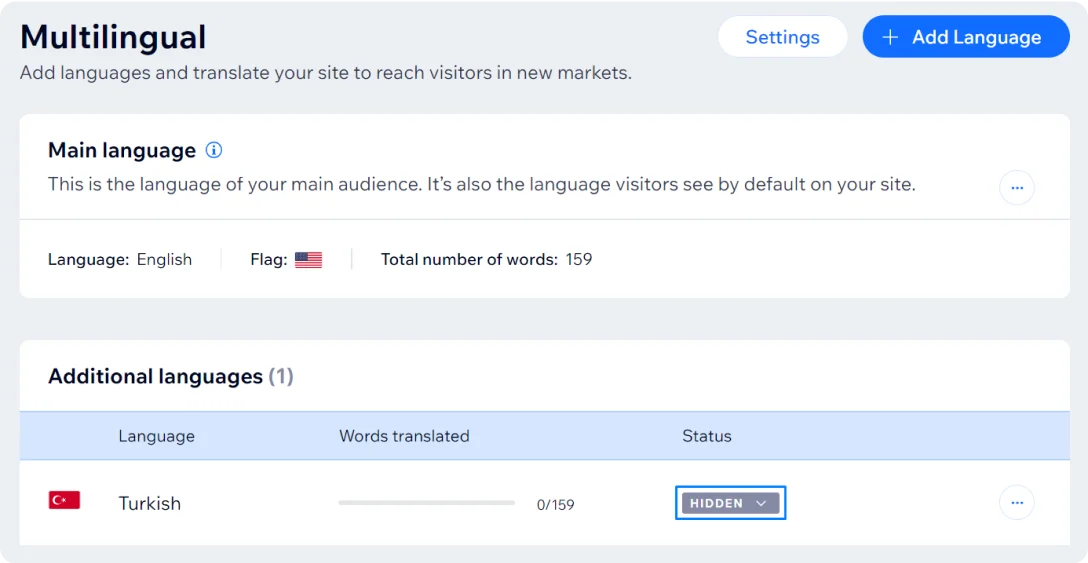
- In the Wix Editor menu, select Settings
- Click Multilingual
- In the Status column, click Hidden
- Select the Visible option
- In the Wix Editor, click Publish
How to make a multilingual store
To create a multilingual website for selling physical or digital products, you can use an online store builder. Using such platforms, you don’t need third-party plugins, as you would with WordPress or Wix. Online store builders come with built-in localization features.
Here’s how to make a multilingual online store:
- In the store settings, change the language
- This automatically updates the language of CTA buttons, forms, purchase emails, and checkout.
- Manually translate the store title, headers, and product descriptions.
Multilingual website best practices
Opening your website to multiple languages can bring you more traffic, but it also comes with challenges and pitfalls. Navigating this process requires smart planning and even smarter tools.
Let's explore five key strategies to ensure your multilingual website delivers a smooth experience and drives sales.
Polish your content
Machine translation helps you translate faster, but it should be a tool, not a crutch. Make sure to proofread automatically translated text. Better yet, invest in professional translation for all customer-facing content.
Make sure your brand voice, message, and design are consistent across all languages for a strong and familiar feel.
Don’t skimp on good tools
Translation management systems (TMS) are your best friends during website translation. These tools streamline the translation process, ensure your translations are correct, and save you valuable time and resources.
For example, Centus cuts the hassle of website localization by automating translation and quality assurance tasks. Centus also gives you advanced project management features and allows seamless integration with Figma and other design tools. Using it, you can ditch the manual tasks and instead focus on more creative aspects of multilingual website management.
Use a language switcher
Don’t force a language on your visitors. Always add a language switcher, and make it easy to find, letting your visitors switch languages effortlessly.
Invest in SEO
International SEO is key to boosting traffic to your multilingual website. Use hreflang tags to tell search engines which language version of your website should be shown to international visitors. Also, use engaging meta descriptions with local keywords to grab more clicks. Finally, don't forget to build local backlinks to help search engines recognize your website as trustworthy and relevant.
Keep on testing
Test your website thoroughly in all languages to ensure everything functions smoothly and translations are accurate. Get feedback from native speakers of each language to find areas for improvement and ensure your content resonates culturally.
These simple practices can help you create a multilingual website that connects with your intended audience in no time. So, whether you opt for a multi-language website on Wix, WordPress, or any other website builder, make sure to always keep these tips in mind. It’ll save you a ton of trouble down the road.
Need help managing your website translation process? Don’t hesitate to contact us anytime!
Get the week's best content!
By subscribing, you are agreeing to have your personal information managed in accordance with the terms of Centus Privacy Policy ->
Keep learning
11 min. read
How to Build a Killer Ecommerce Tech Stack
14 min. read
Website Localization: A Beginner’s Guide
11 min. read